Simple DIY Bench: Build Your Own Outdoor Seating Easily
Creating a simple DIY bench can be fun and rewarding. With just a few tools and materials, you can build a functional and stylish piece for your home or garden.
Building your own bench allows you to customize it to fit your space and style. You don’t need to be a woodworking expert to create a sturdy and attractive bench. This project is perfect for beginners and can be completed in just a few hours.
Whether you need extra seating for your porch, a cozy spot in your garden, or a practical addition to your hallway, a DIY bench can meet your needs. Plus, making it yourself adds a personal touch and a sense of accomplishment. Let’s dive into the basics of building a simple DIY bench!
Introduction To DIY Bench
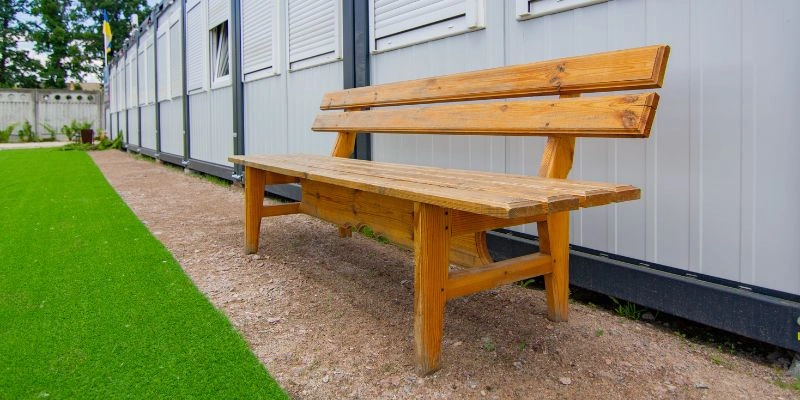
Building a simple DIY bench can transform your outdoor space. This easy project requires basic tools and materials. Perfect for beginners.
Building a DIY bench can be a rewarding project. It allows you to create a piece that fits perfectly in your space. You can customize it to your style. Plus, it can save you money compared to buying a pre-made bench.
DIY benches can be simple or complex. Beginners can start with basic designs. More experienced builders can try intricate ones. Building your own bench can also teach you new skills. It can be a fun weekend project.
Benefits Of Building Your Own
Creating your own bench offers many benefits. First, it gives you control over the design. You can choose the size, shape, and color. This ensures it matches your decor.
Second, building a bench can be cost-effective. You can use leftover materials. This reduces waste and saves money.
Third, it provides a sense of accomplishment. Completing a project with your own hands is satisfying. It can boost your confidence and skills.
Materials Needed
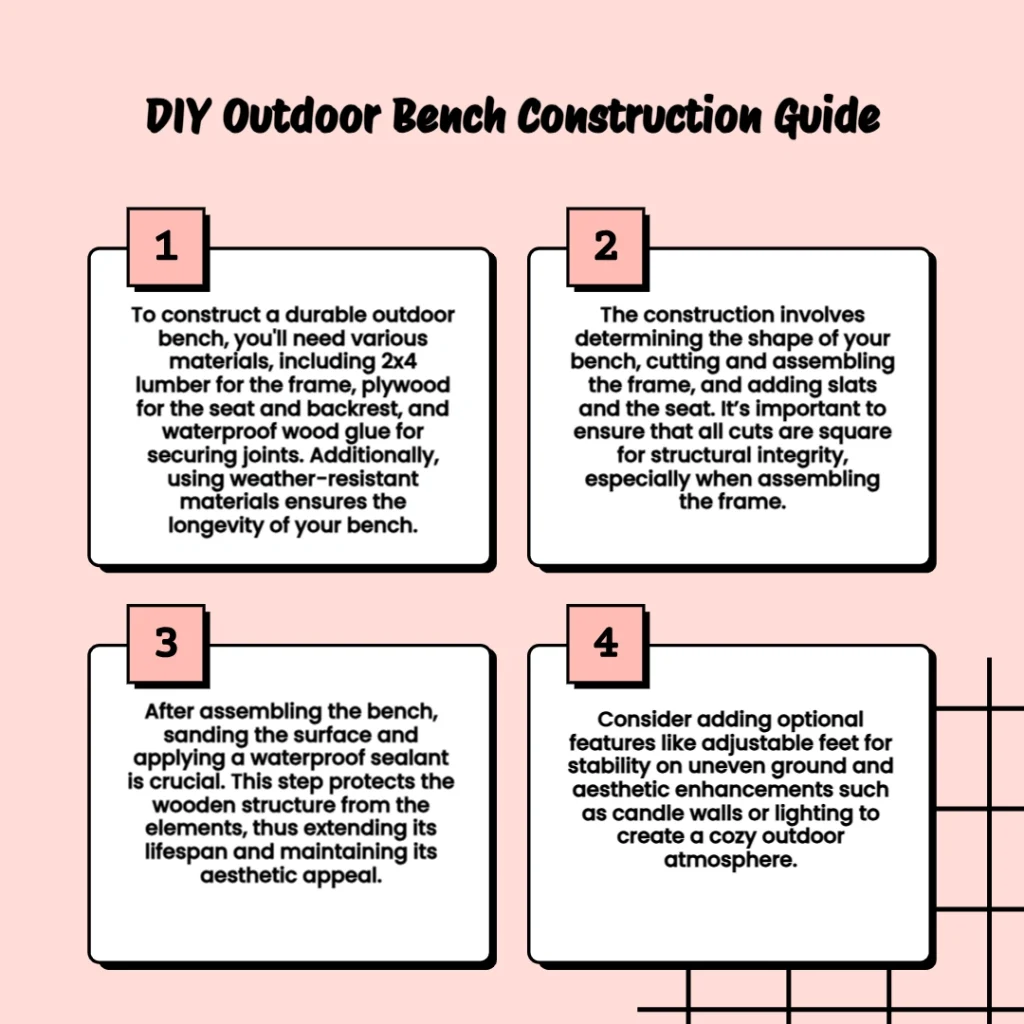
To build a simple DIY bench, you need a few materials. These include wood, screws, and a saw. Wood can be pine, cedar, or any type you prefer.
You also need a tape measure and a drill. Sandpaper is essential for smoothing rough edges. Paint or stain can be used to finish the bench.
Don’t forget safety gear. Gloves and goggles protect your hands and eyes. Having all materials ready makes the building process smoother.
Choosing The Right Wood
When it comes to creating a simple DIY bench, one of the most important decisions you’ll make is choosing the right wood. The type of wood you select can determine not just the look and feel of your bench, but also its durability and ease of construction. Let’s dive into the key factors to consider when picking the perfect wood for your project.
Types Of Wood
There are many types of wood to choose from, but for a DIY bench, you’ll want to focus on a few common options. Each type has unique characteristics and benefits.
- Pine: This is a softwood that is easy to work with and affordable. Pine is light in color and can be stained or painted to match your decor.
- Oak: Oak is a hardwood known for its strength and durability. It has a beautiful grain and is perfect for a classic, sturdy bench.
- Cedar: Cedar is naturally resistant to rot and insects, making it an excellent choice for outdoor benches. It has a pleasant smell and a distinctive reddish color.
- Maple: Maple is another hardwood that is very strong and has a fine, even texture. It’s often used for furniture that needs to withstand heavy use.
Pros And Cons
Each type of wood has its own set of advantages and disadvantages. Here’s a quick comparison to help you decide:
| Wood Type | Pros | Cons |
|---|---|---|
| Pine |
|
|
| Oak |
|
|
| Cedar |
|
|
| Maple |
|
|
Choosing the right wood for your DIY bench doesn’t have to be overwhelming. Consider where you will use the bench, your budget, and your skill level. With a little thought, you can pick the perfect wood and create a beautiful, functional piece that will last for years. Remember, the joy is in the journey, and sometimes, a little trial and error is part of the fun!
Gathering Tools
Starting a DIY bench project is exciting and rewarding. Before diving into the fun part of building, it’s crucial to gather all the necessary tools. Let’s break down what you need to get started, ensuring you have everything ready for a smooth and safe experience.
Essential Tools List
Having the right tools at hand can make a world of difference. Here’s a simple list of must-have tools for your DIY bench:
- Measuring Tape: Accurate measurements are key to a sturdy bench.
- Handsaw or Circular Saw: For cutting wood to the right size.
- Drill: A drill helps in making holes and driving screws.
- Screwdriver: Both flathead and Phillips are useful.
- Hammer: Essential for driving nails and tapping pieces into place.
- Clamps: These keep your wood steady while you work.
- Sandpaper or Sanding Block: To smooth out rough edges.
I remember the first time I built a bench, I forgot the clamps. Trust me, running back to the store in the middle of a project is no fun!
Safety Gear
Safety should always come first. Here’s what you need to protect yourself:
- Safety Glasses: Protect your eyes from flying debris.
- Gloves: They keep your hands safe from splinters and cuts.
- Ear Protection: Power tools can be loud. Earplugs or earmuffs help.
- Dust Mask: Sanding and cutting wood creates dust, which isn’t good to breathe in.
Once, I skipped the dust mask and ended up sneezing for hours. Lesson learned the hard way!
Gathering these tools and safety gear may seem like a lot, but they’re essential for a successful and safe DIY bench project. Remember, proper preparation can save you time and headaches down the road. Ready to start building? Let’s get those tools together and make something amazing!
Measuring And Cutting Wood
Creating a simple DIY bench requires careful measuring and cutting of wood. This step ensures your bench is sturdy and well-crafted. Accurate measurements and precise cutting techniques play a crucial role in this process. Let’s dive into these essential steps to build your perfect bench.
Accurate Measurements
To start, gather your measuring tools. A tape measure and a square are must-haves. Measure each piece of wood twice to ensure accuracy. Write down each measurement clearly. This helps avoid mistakes. Check for any knots or defects in the wood. These can affect your measurements.
Cutting Techniques
Choose the right saw for your cuts. A circular saw is great for straight cuts. For detailed work, use a jigsaw. Secure the wood firmly before cutting. This prevents slips and ensures clean cuts. Mark your cut lines with a pencil. Follow these lines carefully to maintain accuracy. Practice on scrap wood if you are new to using saws.
Remember, patience is key. Take your time to measure and cut. This will save you from errors and wasted materials. Now you’re ready to move on to assembling your DIY bench!
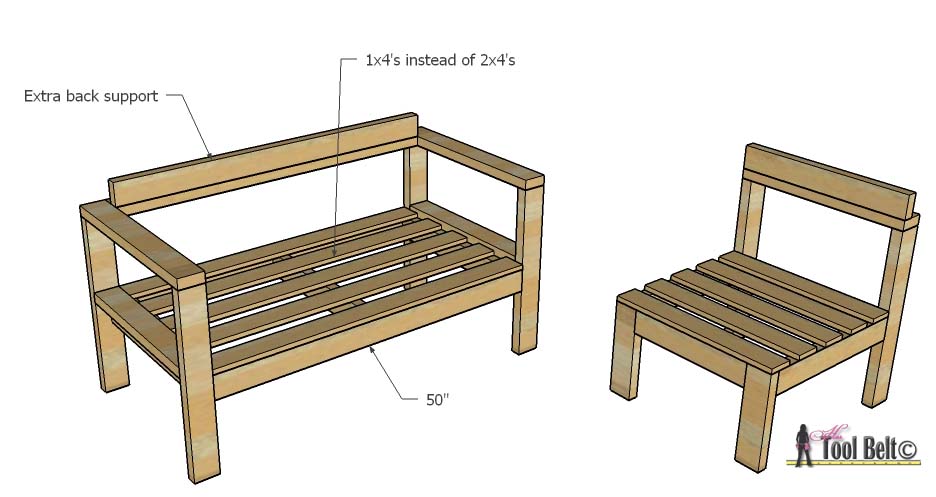
Assembling The Bench Frame
Creating a simple DIY bench is a rewarding project that adds both style and functionality to your space. The most crucial part of this process is assembling the bench frame. If you get this right, the rest of the project will fall into place much more easily. In this section, we’ll cover the basic steps to put together your bench frame, ensuring it’s both sturdy and visually appealing.
Joining Techniques
When it comes to joining the pieces of your bench frame, you have a few options. Each technique has its pros and cons, so it’s important to choose the one that best suits your skills and the materials you have on hand.
- Butt Joints: This is the simplest method, where two pieces of wood are joined at their ends. It’s easy to do but may not be the strongest option.
- Pocket Holes: These involve drilling angled holes into one piece of wood and screwing it to another. This method is both strong and relatively easy to master.
- Mortise and Tenon: This is a more advanced technique that involves creating a slot (mortise) and a corresponding tongue (tenon) to fit into it. It’s incredibly strong but requires precise cutting.
Remember, the key to a strong joint is accurate measuring and cutting. Take your time to ensure each piece fits perfectly before you start joining them together.
Ensuring Stability
Once you’ve chosen your joining technique, the next step is to ensure that your bench frame is stable. After all, no one wants a wobbly bench!
- Check for Squareness: Use a carpenter’s square to make sure that all your corners are at right angles. This will help prevent any wobbling.
- Use Clamps: Clamps are your best friends when it comes to holding pieces together while the glue dries. They keep everything in place and ensure a tight bond.
- Reinforce with Screws: Even if you’re using a strong joint like a mortise and tenon, adding screws can provide extra stability. Be sure to pre-drill holes to avoid splitting the wood.
Finally, give your frame a little shake once everything is assembled. If there’s any movement, now is the time to fix it. Tighten screws, add more glue, or even use additional clamps if needed. A stable frame is the foundation of a successful DIY bench project.
With these tips and techniques, you’re well on your way to creating a beautiful, sturdy bench that will last for years to come. So, roll up your sleeves, gather your tools, and let’s get building!
Attaching The Seat And Backrest
Attaching the seat and backrest to your DIY bench adds both comfort and stability. This process transforms your wooden frame into a functional piece of furniture. Follow these steps to ensure a secure and comfortable seating area.
Securing The Seat
Start by placing the seat board on top of the bench frame. Ensure it is centered and aligned with the frame edges. Use clamps to hold the seat board in place. Drill pilot holes through the seat board into the frame. This prevents the wood from splitting. Next, secure the seat board with screws. Make sure the screws are evenly spaced for a firm hold.
Fitting The Backrest
Align the backrest board with the back of the bench frame. Ensure it is straight and level. Use clamps to hold the backrest in place. Drill pilot holes through the backrest into the support beams. Attach the backrest with screws, ensuring they are evenly spaced. This will provide a sturdy and comfortable support for your back.
Once the backrest is secure, sit on the bench to test its comfort. Make any necessary adjustments to ensure stability and comfort.

Sanding And Finishing
Building a simple DIY bench can be a rewarding project that adds a functional and aesthetic touch to your space. But once the construction part is done, your job isn’t over. Sanding and finishing are crucial steps that will transform your bench from a rough piece of wood into a smooth, polished masterpiece. These steps might seem tedious, but with a few tips and tricks, you’ll have your bench looking professional in no time.
Sanding Tips
Sanding is all about patience and technique. Here are some tips to make the process easier and more effective:
- Start with Coarse Grit: Begin with a 60-80 grit sandpaper to remove any rough spots or imperfections. This will help smooth out the surface quickly.
- Work Your Way Up: Gradually move to finer grits (100-120, then 220) for a smoother finish. Remember, the higher the grit, the smoother the surface.
- Sand with the Grain: Always sand in the direction of the wood grain. This prevents scratches and gives a more professional finish.
- Use a Sanding Block: A sanding block ensures even pressure and helps you avoid over-sanding in one spot.
- Check Your Work: Run your hand over the surface to feel for any rough spots. Your hand is often more sensitive than your eyes.
Applying Finish
Now that your bench is smooth, it’s time to apply the finish. This step not only enhances the wood’s natural beauty but also protects it. Here’s how to do it:
- Choose the Right Finish: Depending on your preference, you can choose from options like stain, varnish, or paint. Stain enhances the wood grain, varnish provides a clear protective coat, and paint adds color.
- Apply Evenly: Use a brush or a cloth to apply the finish evenly. If you’re using stain, apply it in the direction of the grain and wipe off excess with a clean cloth.
- Let it Dry: Allow the finish to dry completely. This can take several hours or overnight, depending on the product used.
- Sand Lightly Between Coats: For a super smooth finish, lightly sand between coats with a fine grit sandpaper (320-400). This helps each layer adhere better.
- Repeat if Necessary: Apply additional coats if needed. Two to three coats are usually sufficient for a durable finish.
With these steps, your simple DIY bench will not only look great but also last longer. Happy sanding and finishing!
Adding Personal Touches
Adding personal touches to your DIY bench can make it truly unique. This is where you can let your creativity shine. By customizing the bench, you create a piece that reflects your style.
Custom Paint Or Stain
Choosing the right paint or stain can transform your bench. A bright color can make it stand out. A dark stain can give it a classic look. Think about the overall theme of your space. Is it modern? Rustic? Match the finish to your decor. Use outdoor paint for benches that will be outside. Indoor benches can use any type of paint. Always sand the wood before painting or staining. This helps the finish adhere better.
Decorative Elements
Decorative elements can add charm and character to your bench. Consider adding cushions for comfort. Pillows can also bring in color and pattern. Stencils are another great option. Paint designs on the bench to make it unique. You can also use decals for a quick update. Adding a name plate can make the bench special. Think about small details like handles or knobs. These can add a touch of elegance or whimsy. Personal touches make your bench one of a kind. They show your personality and style. Have fun with the process!
Maintaining Your Bench
Maintaining your bench ensures its longevity and keeps it looking great. With proper care, your DIY bench can serve you for many years. Here are some essential tips to maintain your bench efficiently.
Regular Maintenance Tips
Regularly clean your bench to remove dirt and debris. Use a soft brush and mild soap for cleaning. Check for loose screws or bolts. Tighten them as necessary to keep the bench sturdy. Inspect the wood for cracks or splits. Sand and seal any damaged areas promptly.
Protecting Against Weather
Weather can be harsh on outdoor furniture. Apply a weather-resistant sealant to protect your bench. Consider using a bench cover during extreme weather conditions. If possible, store your bench in a sheltered area during the winter months. This helps in prolonging its lifespan.
Frequently Asked Questions
What Materials Do I Need For A Diy Bench?
You will need wood, screws, a saw, a drill, and sandpaper. Optionally, you might want paint or stain for finishing.
How Long Does It Take To Build A Bench?
Building a simple DIY bench typically takes about 2-4 hours. The time may vary based on your skill level.
Can I Build A Bench Without Power Tools?
Yes, you can use hand tools like a handsaw and a screwdriver. However, power tools make the job easier.
What Type Of Wood Is Best For A Bench?
Cedar, pine, and oak are popular choices. They are durable and give a good finish.
Conclusion
Creating your own DIY bench is rewarding and fun. It’s simple, cost-effective, and adds a personal touch to your space. Just follow the steps, gather materials, and start building. You’ll save money and gain a beautiful, functional piece of furniture.
DIY projects like this bench boost creativity and skills. Ready to start your project? Grab your tools and enjoy the process. Your new bench awaits. Happy building!