Bleached Wood Floors: How the Trend Works & How to DIY It
To bleach hardwood floors, use caution as bleach can damage some types of wood. Sun-bleached floors can be fixed by sanding, staining, and sealing the entire room for an even finish.
Avoid using bleach directly on wood to prevent damage to the floor’s cellular structure and surrounding plants. The cost of bleaching wood floors varies depending on the size of the area and the type of wood used. Check out online resources for more information and tips on bleaching and restoring wood floors.
Consulting professionals for expert advice is recommended for best results in maintaining and restoring your wood floors.
Factors To Consider Before Bleaching
Wood Type Suitability
- Not all wood types are suitable for bleaching; red oak, ash, gum, and beech are better choices.
Potential Damage
- Bleach can shift the wood’s pH, damaging its cellular structure and corroding metal fasteners.
- Avoid using bleach on wood that may harm surrounding plants and cause long-term harm.
Cost Consideration
- Costs for bleaching hardwood floors can vary based on the size of the area and the professional service needed.
- Evaluate the cost of bleaching against the potential long-term effects on the wood.
How To Prepare For Bleaching
In preparation for bleaching your wood floors, it is crucial to follow certain steps to ensure a successful outcome. Below are the essential guidelines to help you get ready for the bleaching process.
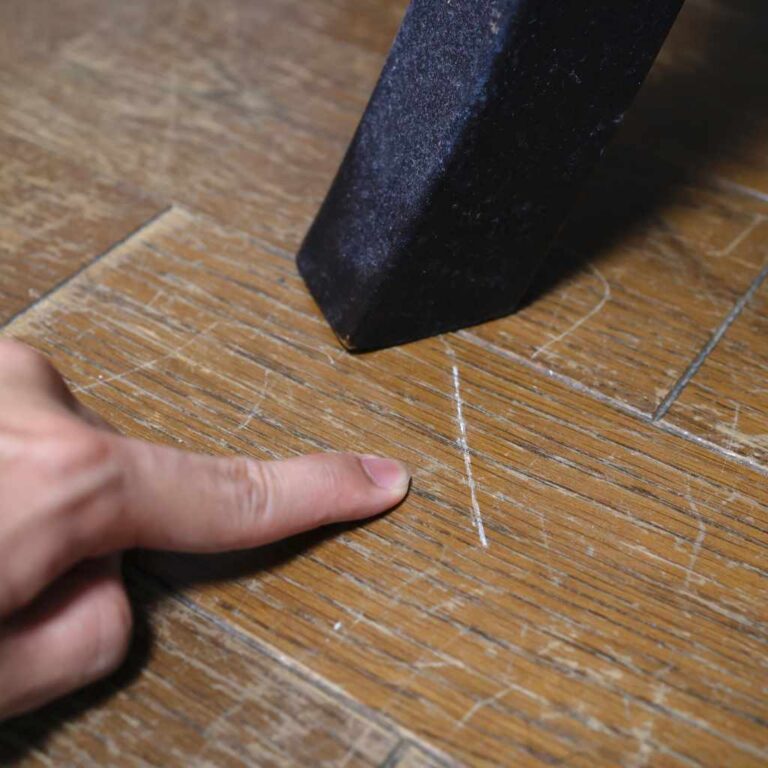
Floor Inspection
Before starting the bleaching process, conduct a thorough inspection of your wood floors to identify any existing damage, scratches, or imperfections that may need to be addressed before bleaching.
Gathering Materials
- Wood bleach solution
- Sandpaper
- Wood stain
- Sealant
- Protective gear (gloves, goggles)
Ensure you have all the necessary materials on hand before beginning the bleaching process to avoid interruptions and delays.
Bleaching Process Steps
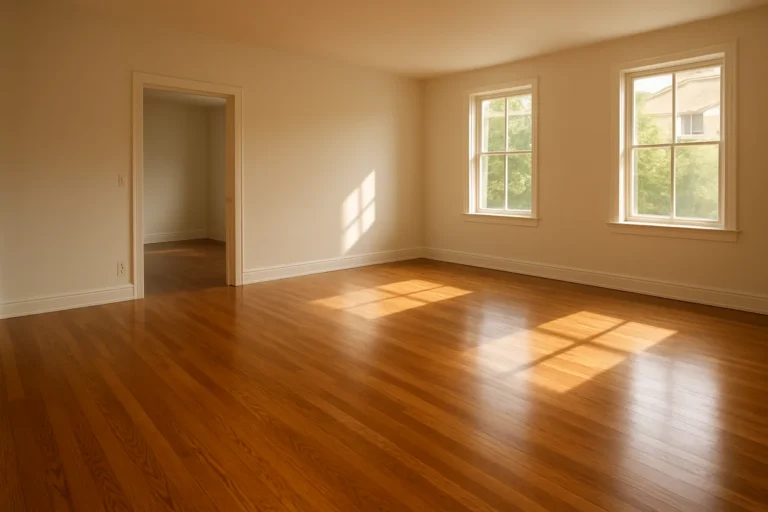
Bleached wood floors can create a stunning, light, and airy feel in any
space. The bleaching process involves several crucial steps to achieve the
desired result. Let’s walk through the essential stages of bleaching wood
floors to transform them into a beautiful, bleached masterpiece.
Floor Preparation
Before beginning the bleaching process, thorough floor preparation is
essential. Ensure the floor is free from any debris, dust, or existing
finishes. This can be achieved by sweeping, vacuuming, and cleaning the
floor surface. It’s crucial to start with a clean and smooth surface for
optimal bleaching results.
Applying Wood Bleach
Once the floor is adequately prepared, apply the wood bleach according
to the product instructions. It’s essential to wear protective gear such
as gloves and goggles during this process. Apply the bleach evenly
across the floor and allow it to sit for the recommended time to
achieve the desired level of bleaching. Follow the manufacturer’s
instructions carefully for the best outcomes.
Sanding And Buffing
After the bleaching process, sanding and buffing the floor are
vital steps to ensure a smooth and uniform finish. Carefully sand
the entire floor surface to remove any raised grain and to create a
level base for the subsequent treatments. Once the sanding is complete,
buff the floor to enhance its smoothness and prepare it for the final
finishing touches.
After-bleaching Care And Maintenance
After bleaching your wood floors, it’s essential to follow proper care and maintenance to ensure they stay beautiful and in good condition for years to come. This section will guide you through the necessary steps to take after bleaching your wood floors, including applying wood stain and sealing the floor.
Applying Wood Stain
One of the crucial steps in after-bleaching care is applying wood stain. Wood stain not only adds color to your bleached wood floors but also provides an extra layer of protection. Here’s how you can do it:
- Start by choosing the right wood stain color that complements your desired aesthetic.
- Clean the floor thoroughly and ensure it’s dry. Any dust or debris left on the surface can affect the staining process.
- Apply the wood stain to a small, inconspicuous area first to test the color and ensure it meets your expectations.
- If satisfied with the color, use a brush or cloth to apply the wood stain evenly on the entire floor surface. Work in small sections to ensure consistent results.
- Allow the wood stain to dry completely before moving on to the next step. This usually takes a few hours.
Sealing The Floor
After applying the wood stain, the next crucial step is sealing the floor to protect it from wear, moisture, and everyday spills. Here’s what you need to do:
- Choose a suitable sealant that matches the type of wood and the look you want to achieve.
- Ensure the floor is clean and free from dust or debris.
- Apply the sealant using a brush or roller, following the manufacturer’s instructions.
- Work in small sections, applying a thin and even layer of sealant.
- Allow the sealant to dry completely before walking on the floor or placing any furniture.
By following these steps and regularly cleaning your bleached wood floors with a gentle cleanser and a soft mop, you can maintain their beauty and longevity. Remember to avoid using harsh chemicals or abrasive materials that can damage the finish. With proper care, your bleached wood floors will continue to impress and enhance the aesthetics of your space.
Alternatives And Risks To Consider
When it comes to restoring and reviving your wood floors, bleaching may seem like a tempting option. However, before you reach for the bleach bottle, it’s important to consider the alternatives and potential risks associated with this method. In this section, we will explore the risks of bleaching wood floors, as well as other restoration options that you may want to consider.
Risks Of Bleaching
Bleaching your wood floors can come with a set of risks that you should be aware of before proceeding with this method. Although certain types of hardwood, such as red oak, ash, gum, and beech flooring, may be better suited to handle bleach solutions, it’s essential to exercise caution.
- Damage to Cellular Structure: The natural pH of wood is slightly acidic, while bleach is a basic solution. Consequently, using bleach on wood can alter the pH from its near-neutral state to a more basic one, potentially causing damage to the cellular structure of the wood.
- Destruction of Metal Fasteners: Bleach has corrosive properties that can harm metal fasteners, such as screws and nails, used in your wood floors. It’s crucial to consider the potential damage to these elements when contemplating bleaching your floors.
- Harm to Surrounding Plants: Bleach can also have adverse effects on any surrounding plants or vegetation. The chemical composition of bleach can cause damage to plant life, so it’s important to take this into account if you have greenery near your wood floors.
Given these risks, it’s crucial to weigh the potential consequences before deciding to bleach your wood floors. Fortunately, there are other restoration options available that can provide an alternative to bleaching.
Other Restoration Options
If you’re hesitant about bleaching your wood floors or want to explore alternative methods, there are several options worth considering:
- Sanding and Refinishing: Sanding and refinishing your wood floors can effectively remove stains, discoloration, and imperfections, without the need for bleach. This method involves sanding away the top layer of the wood to reveal a fresh, clean surface, followed by applying a new finish to restore its original beauty.
- Staining: Another alternative to bleaching is staining your wood floors. Stains come in a variety of colors, allowing you to change the color of your floors while still maintaining their natural beauty. Staining can help conceal minor blemishes and create a refreshed and rejuvenated appearance.
- Color Matching: In some cases, you may be able to achieve the desired effect by color matching new wood pieces with existing ones. This method involves carefully selecting and installing new wood that matches the color and grain pattern of your existing floors, seamlessly blending in any imperfections.
Before proceeding with any alternative restoration options, it’s essential to consult with a professional flooring expert. They can assess the condition of your wood floors, provide expert advice, and guide you in making the best decision for your specific situation.
Frequently Asked Questions On Bleached Wood Floors
Can Wood Floors Be Bleached?
Bleaching wood floors is not recommended, but some hardwoods like red oak, ash, gum, and beech can handle bleach. Bleach’s basic solution can damage wood’s natural pH and corrode metal fasteners. To fix sun-bleached wood, inspect, gather materials, sand, apply wood stain, and seal.
However, it’s best to avoid bleaching hardwood floors if possible.
How Do You Fix Bleached Wood Floors?
To fix bleached wood floors, inspect, gather materials, prepare, sand, apply wood stain, and seal the floor. Use caution as bleach can damage wood and cause pH imbalance.
Does Bleaching Wood Ruin It?
Bleaching wood can ruin it. Bleach’s basic pH damages wood’s cellular structure, corrodes metal fasteners, and harms plants.
How Much Does It Cost To Bleach Hardwood Floors?
Bleaching hardwood floors generally costs between $1,000 to $3,000. Factors such as the size and condition of the floor affect the overall cost.
Conclusion
Bleached wood floors can revitalize your space, adding a modern and airy feel. By embracing this trendy flooring option, you can achieve a light and airy aesthetic while being mindful of maintenance and durability. Whether you choose to bleach your existing wood floors or opt for new ones, the stunning results are sure to impress.