Edge-Lit LED Lighting for Wood Signs and Shelves (DIY Guide)
Edge-lit LEDs shine light into the edge of a clear acrylic panel so the panel itself glows, unlike backlighting, which sits behind it. Woodworkers use this for illuminated signs, shelves, and cabinet fronts. Skip flame-polishing the acrylic edge and the light scatters instead of channeling through. This guide covers the materials, LED strip specs, and the wiring mistake that dims one end of a longer sign.
What Is Edge-Lit LED Lighting?
Best Edge-Lit LED Kit Pick
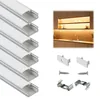
Muzata 6-Pack LED Strip Aluminum Channel with Milky Diffuser – $19.99
This is the U-shaped channel this guide’s install steps assume — it holds a 12mm LED strip flush against the acrylic edge and the milky cover keeps the diode spots from showing as hot points on the panel.
- Best for: a single wood sign or shelf up to about 20 feet of total channel
- Why we picked it: 2,500+ ratings at 4.4 stars and the milky diffuser matches the even-glow goal this guide covers
- Main drawback: silver finish only — paint or wrap it if you need black or wood-tone trim
Compare more edge-lit LED channel and kit options
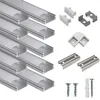 Option 1 hunhun 10-Pack LED Aluminum Channel – $27.19
|
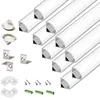 Option 2 THMOOTHER V-Shape Channel Diffuser – $26.38
|
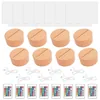 Option 3 DIY Acrylic LED Lamp Base Set (Wood Base) – $34.99
|
As an Amazon Associate we earn from qualifying purchases.
Edge-lit LED lighting places the LED strip along the outer edge of a clear or translucent panel — acrylic, glass, or a light-guide sheet — instead of behind it. Light enters the edge, travels through the material by internal reflection, and exits evenly across the face, so the panel itself becomes the light source. This is the same principle used in edge-lit LED TVs, but for a woodworking project the “panel” is usually a piece of cut acrylic set into a wood base, frame, or shelf edge.
How Edge-Lit LEDs Work
An LED strip sits inside a channel pressed against the polished edge of the panel. Light from each diode enters the acrylic and bounces between the front and back faces until it hits an engraved, etched, or frosted surface, which scatters it outward as visible glow. A rough or laser-cut edge scatters light immediately instead of letting it travel through the panel, which is why the edge has to be clear-polished, not just cut.
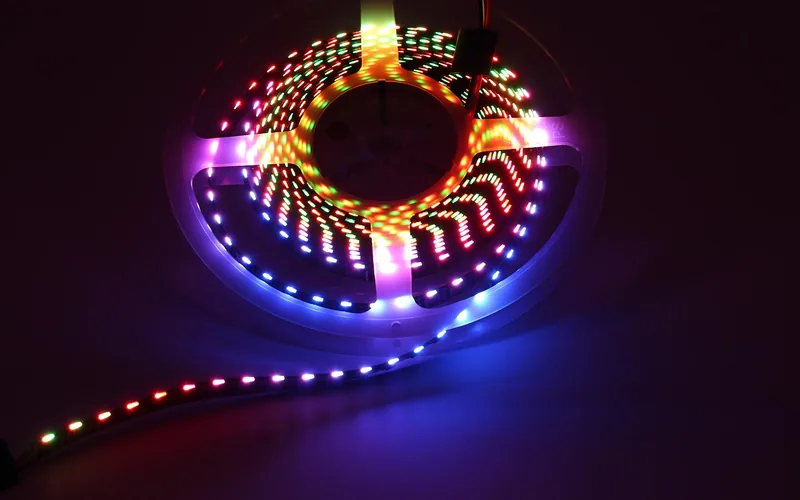
Edge-Lit LEDs in Wood Signs, Shelves, and Cabinets
In furniture and shop projects, edge-lit acrylic almost always pairs with a wood base or frame — the wood holds the LED channel and hides the wiring, while the acrylic panel does the glowing. Three uses come up most often for woodworkers: engraved or painted signs set into a routed wood base, floating shelves with a hidden LED strip along the rear edge, and glass-front cabinet doors edge-lit from an acrylic insert in the frame. See our guide on built-in wall shelf design for where a hidden LED edge looks best on a floating shelf.
Edge-lit signage is popular for bar and workshop signs because the light source disappears into the frame instead of sitting behind the sign as a bulky lightbox. If you are already framing out built-in shelving between studs, running LED wiring to an edge-lit accent shelf at the same time saves opening the wall twice.
Materials You Need for a DIY Edge-Lit Wood Sign or Shelf
A basic build needs five things: a clear cast-acrylic panel (not extruded — extruded acrylic engraves and transmits light unevenly), an aluminum LED channel sized to the panel thickness, a matching 12V or 24V LED strip, a small DC power supply, and a wood base thick enough to route a groove for the channel. Cast acrylic costs more than extruded, but it is the difference between a sign that glows evenly and one that shows dark laser-scorch marks.
📊 Edge-lit acrylic signs typically use 3mm–10mm cast acrylic — thinner sheets transmit light with less loss over a short run, while anything over 10mm needs brighter or double-sided LED input to glow evenly all the way across — Source: Wired4Signs USA, edge-lit acrylic sign guide.
How to Add Edge-Lit LED Lighting to a Wood Sign or Shelf
- Cut and flame-polish the acrylic edge: Cut the panel to size, then run a small torch lightly along the edge that will sit in the LED channel until it turns glass-clear — a rough or laser-cut edge scatters light instead of channeling it into the panel.
- Route the wood base or frame: Cut a groove sized to your aluminum channel into the wood base, shelf edge, or sign frame so the channel sits flush and the panel stands upright without wobble.
- Seat the LED strip in the channel: Press a 12V or 24V LED strip into the aluminum channel, peel-and-stick side down, then snap on the diffuser cover before inserting the acrylic panel.
- Wire to a matching power supply: Match the driver’s voltage to the strip exactly (12V strip on a 12V driver) and keep single runs under about 16 feet per feed point to avoid dimming at the far end.
- Mount, test, then seal: Screw the wood base into place, power on and check for even glow across the whole panel before sealing or finishing the wood, so any dark spot can still be traced back to a bad edge polish or a loose strip connection.

Edge-Lit vs. Backlit: Which Should You Use for a Wood Sign?
“Edge-lit vs. backlit” gets asked about TVs, but the same choice applies to a wood sign or shelf: light the panel from its edge, or light it from behind with LEDs mounted flat inside the wood recess. Edge-lit keeps the box thin and hides the light source; backlit is simpler to build and gives more even brightness on a large panel.
| Factor | Edge-Lit | Backlit |
|---|---|---|
| Box depth | As thin as the acrylic itself | Needs 1–2″ clearance behind the panel |
| Build difficulty | Edge must be flame-polished and channel-mounted | Strip mounts flat, no edge prep needed |
| Evenness on large panels | Can dim toward the center on wide signs | More even across a large sign or shelf face |
| Best for | Signs, shelf edges, cabinet fronts — slim look matters | Large panels, workbench task lighting |
Choosing the Right LED Strip and Acrylic Thickness
Warm white (2700–3000K) reads as a cozy, bar-sign glow; cool white (4000–5000K) reads closer to a retail display and shows engraved text more crisply. For acrylic, stay in the 3mm–10mm cast range covered above — go thinner for a small sign lit from one edge, thicker only if you are lighting from two opposite edges at once.
“An edge-lit panel only glows evenly if the edge going into the channel is cut and polished flame-clear — a rough or laser-cut edge scatters the light instead of channeling it through the acrylic.”
Common Mistakes to Avoid
- Using extruded instead of cast acrylic: extruded sheet is cheaper but engraves unevenly and shows cloudy laser marks under edge lighting.
- Mixing strip and driver voltage: a 24V strip on a 12V supply runs dim; a 12V strip on 24V can burn out the diodes.
- Skipping the edge polish to save time: a bandsaw or laser-cut edge left as-is scatters light right at the channel instead of feeding it into the panel.
- Running one strip too far: voltage drop dims the far end of any run longer than about 16 feet from a single feed point — feed power from both ends on longer signs or shelves.
Frequently Asked Questions on Edge-Lit LED Lighting
What does edge-lit LED mean?
Edge-lit LED means the LED strip sits along the outer edge of a clear panel instead of behind it. Light enters the edge and travels through the material by internal reflection, so the panel itself glows evenly across its face.
Can you make an edge-lit sign out of wood?
Yes, but the wood is the base or frame, not the glowing part. The acrylic or glass panel does the glowing; the wood holds the LED channel, hides the wiring, and gives the sign a stand or mount.
What thickness acrylic should I use for edge lighting?
Most DIY edge-lit signs use 3mm to 10mm cast acrylic. Thinner sheets transmit light with less loss over a short run; anything thicker than 10mm needs a brighter strip or light fed from two opposite edges to glow evenly.
How do I stop one end of my LED strip from looking dimmer?
That is voltage drop. Keep single-feed runs under about 16 feet, use 24V strips over 12V for longer runs since they drop less voltage per foot, or feed power into both ends of a long strip instead of just one.
Is edge-lit or backlit better for a wood sign?
Edge-lit keeps the sign thin and hides the light source, which suits small signs and shelf edges. Backlit is simpler to build and stays more evenly bright across a large panel, which suits bigger signage.
What LED strip voltage works best for a small sign?
A 12V strip is the standard choice for a single small sign or shelf under about 16 feet of total run, since it is the most common voltage aluminum channels and drivers are sized for.
Conclusion
Edge-lit LED lighting turns a plain acrylic panel into the light source itself, and pairing it with a wood base or frame is what makes it a woodworking project instead of just an electronics one. Get the edge polish, the channel fit, and the strip voltage right, and a simple wood-and-acrylic sign or shelf will glow as evenly as a manufactured one.
Sponsored / affiliate links. As an Amazon Associate I earn from qualifying purchases. I may earn additional commission from eligible campaigns.