How to Cut Grooves in Wood: Step-by-Step Guide
To cut grooves in wood, you can use tools such as a table saw with a dado blade or a handheld circular saw with a straight edge guide. Alternative methods include using a chisel and mallet for smaller grooves.
These tools allow you to achieve precise and clean grooves in your woodworking projects. Cutting grooves manually provides a hands-on approach that is both rewarding and effective. Whether you are a beginner or an experienced woodworker, mastering the skill of cutting grooves by hand will enhance your woodworking abilities and allow you to create custom pieces with unique designs and details.
Experiment with different tools and techniques to find the method that works best for your projects.
Essential Tools
Cutting grooves in wood requires the right tools to achieve precision and efficiency. Whether you’re a seasoned woodworker or a DIY enthusiast, having the essential tools for cutting grooves can make the process smoother and more successful. Below, we’ll explore the vital tools required for achieving clean and accurate grooves.
Router
A router is a versatile tool equipped with a spinning blade that enables you to create grooves of various depths and widths. It’s an indispensable tool in woodworking, offering precise control and consistent results. With the appropriate router bit, you can effortlessly craft grooves in wood, allowing for intricate designs and joinery.
Table Saw
Another indispensable tool for cutting grooves is the table saw. When equipped with a dado blade, the table saw can efficiently cut wide, straight grooves in wood. The dado blade allows for adjustable widths, making it ideal for creating grooves for joints, shelves, and other woodworking applications.
Chisel And Mallet
For smaller-scale grooves or fine-tuning, a chisel and mallet can be invaluable. This classic woodworking pairing provides control and precision for hand-carving grooves, particularly in scenarios where power tools may not be suitable or accessible. When used skillfully, a chisel and mallet can produce clean and tailored grooves in wood.
Methods For Cutting Grooves
Cutting grooves in wood can add both functionality and aesthetic appeal to your woodworking projects. Various methods are available to achieve precise and clean grooves in wood, each offering unique advantages based on the tools and techniques utilized.
To create grooves in wood with precision, utilizing a router is a popular choice among woodworkers. With the ability to adjust depth and width settings, routers offer versatility for grooving tasks. Simply secure the wood piece and guide the router along the desired path to achieve accurate grooves efficiently.
Utilizing A Table Saw
Another effective method for cutting grooves in wood is by utilizing a table saw. By equipping the table saw with a dado blade, you can achieve consistent and straight grooves. Adjust the blade height and fence position to control groove dimensions, ensuring precise outcomes for your woodworking projects.
For woodworkers seeking a hands-on approach, cutting grooves with a chisel can offer a traditional and personalized touch to your creations. Use a chisel and mallet to carefully carve out grooves, allowing for intricate detailing and customization in smaller-scale projects.
Using A Router
When it comes to cutting grooves in wood, using a router can be a highly effective method. A router is a versatile tool that allows you to create various types of cuts with precision. In this section, we will walk you through the process of cutting grooves in wood using a router. We’ll cover selecting the right router bit, setting the depth and width of the groove, and some tips to ensure a clean and accurate cut.
Selecting The Right Router Bit
The first step in cutting grooves with a router is selecting the right router bit. There are different types of router bits available, each designed for specific cuts. When it comes to grooving, you’ll want to use a straight bit or a spiral bit. These bits are ideal for creating straight and clean grooves in wood.
When selecting a router bit, consider the width of the groove you want to create. Choose a bit that matches the desired width, keeping in mind that you can always make multiple passes to achieve a wider groove if needed.
Additionally, ensure that the router bit has a sharp cutting edge. Dull bits can lead to poor results and may cause unnecessary tear-out on the wood surface. It’s always a good idea to inspect your router bits before use and replace them if necessary.
Setting The Depth And Width Of The Groove
Once you’ve selected the appropriate router bit, the next step is setting the depth and width of the groove. This will depend on the specific project requirements and the thickness of the wood.
Before making any cuts, it’s important to mark the desired groove location on the wood surface. This will serve as a guide as you navigate the router along the wood.
To set the depth of the groove, adjust the router’s cutting depth. Start by setting it to a shallow depth and make a test cut. Gradually increase the depth until you achieve the desired groove depth. Remember to make multiple passes if needed, especially for deeper grooves.
When it comes to the width of the groove, you can adjust this by making multiple passes with the router. Each pass will remove a small portion of the wood, allowing you to widen the groove to the desired width.
It’s worth mentioning that you should always start with conservative settings and make adjustments as you go. This will help prevent any accidental mistakes or overcutting, ensuring a precise and clean cut.
Conclusion
Using a router to cut grooves in wood can be a highly effective method, providing you with clean and precise results. By selecting the right router bit, setting the appropriate depth and width of the groove, and using accurate techniques, you can create professional-looking grooves for your woodworking projects.
Techniques With Table Saw
Cutting grooves in wood can be easily done using a table saw, a versatile tool that allows for precise and efficient cuts. By mastering the techniques with a table saw, you can create straight, parallel, and uniform grooves in your wood projects. In this section, we will explore two essential techniques: adjusting the blade for width and creating straight and parallel grooves. Let’s get started!
Adjusting The Blade For Width
Before you start cutting grooves, it is important to adjust the table saw blade to the desired width. This can be done by following these simple steps:
- Make sure the table saw is turned off and unplugged for safety.
- Loosen the arbor nut on the saw blade with a wrench.
- Rotate the blade to the desired width by using a combination of the adjustment knobs or handles located on the table saw.
- Tighten the arbor nut securely to hold the blade in place.
By adjusting the blade for width, you can ensure that your grooves are the perfect size for your project.
Creating Straight And Parallel Grooves
Now that the blade is properly adjusted, it’s time to create straight and parallel grooves. Follow these steps for precise and accurate results:
- Measure and mark the location of the groove on your wood piece using a ruler or measuring tape.
- Set the table saw fence to the desired distance from the blade, ensuring it is parallel to the blade.
- Place the wood piece against the fence, aligning the marked groove with the blade.
- Turn on the table saw and slowly push the wood piece through the blade, applying even pressure.
- Continue feeding the wood piece through the blade until the groove is complete.
Remember to always use push sticks or other safety accessories to keep your hands away from the blade and maintain a safe working environment.
With these techniques, you can confidently cut grooves in wood using a table saw. Practice your skills, take your time, and soon you’ll be creating professional-looking grooves in your woodworking projects. Happy cutting!
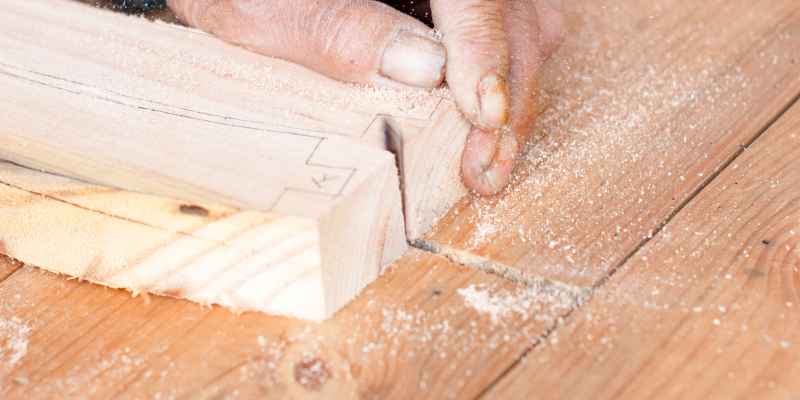
Hand-cutting With Chisel
Cutting grooves in wood by hand with a chisel is a traditional and skillful technique that allows for precise control over the depth and width of the groove. While it may require a bit more time and effort than using power tools, the end result is often a beautifully crafted groove that showcases the artisan’s handiwork.
Marking And Preparing The Wood
Before starting to cut the groove, ensure the wood is marked accurately to guide the chisel. Use a pencil and a square to mark the location and dimensions of the groove on the wood surface.
Using Chisel And Mallet For Precision
Position the chisel at the starting point of the marked groove and firmly tap it with a mallet to make an initial incision. Work the chisel along the marked line, making small, controlled cuts to gradually deepen the groove.
Safety Measures
Wearing Protective Gear
- Always wear safety goggles to protect your eyes from wood splinters.
- Use ear protection to prevent hearing damage from loud tools.
- Wear work gloves to safeguard your hands from sharp edges.
- Ensure proper ventilation in the work area to avoid inhaling wood dust.
Securing Wood Properly
- Use clamps to secure the wood firmly in place before cutting grooves.
- Check that the wood is stable and won’t shift during the cutting process.
- Work on a flat and level surface to prevent accidents.
- Do not rush the cutting process; maintain a steady pace for accuracy.
Frequently Asked Questions On How To Cut Grooves In Wood
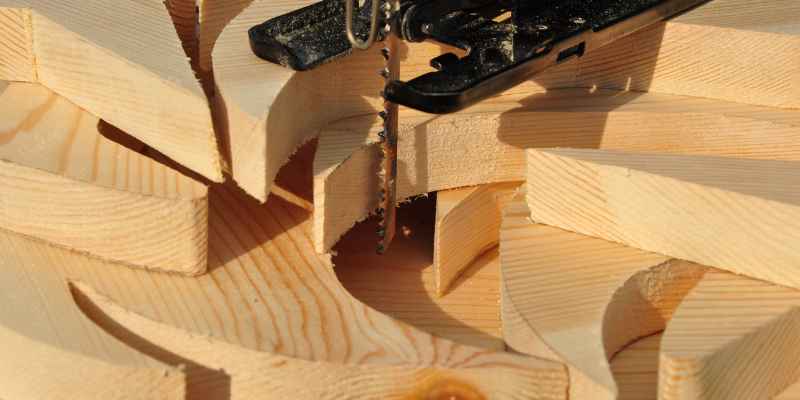
What Is The Best Tool To Cut Grooves In Wood?
The best tool to cut grooves in wood is a disc groove cutter or lamella cutter, which is perfect for milling grooves on straight or curved edges. Other alternatives include using a table saw with a dado blade, a handheld circular saw with a straight edge guide, or even a chisel and mallet for smaller grooves.
How Do You Cut Grooves In Wood By Hand?
To cut grooves in wood by hand, you can use alternative tools such as a table saw with a dado blade, a handheld circular saw with a straight edge guide, or even a chisel and mallet for smaller grooves. A flat-edged saw will leave a flat bottom, while angled blades leave a rounded edge.
How Do You Cut Grooves In Wood Without A Router?
To cut grooves in wood without a router, use a table saw with a dado blade, handheld circular saw with a guide, or a chisel and mallet for smaller grooves. Make sure to mark the groove on the wood before cutting.
Can I Use A Router To Cut A Groove In Wood?
Yes, you can use a router to cut a groove in wood. It’s a common method for creating grooves in various woodworking projects.
Conclusion
Cutting grooves in wood can be done by hand with alternative tools like a table saw, circular saw, or chisel. Experiment with different methods to find what works best for you and always prioritize safety while woodworking. Explore various techniques to enhance your skills and projects.