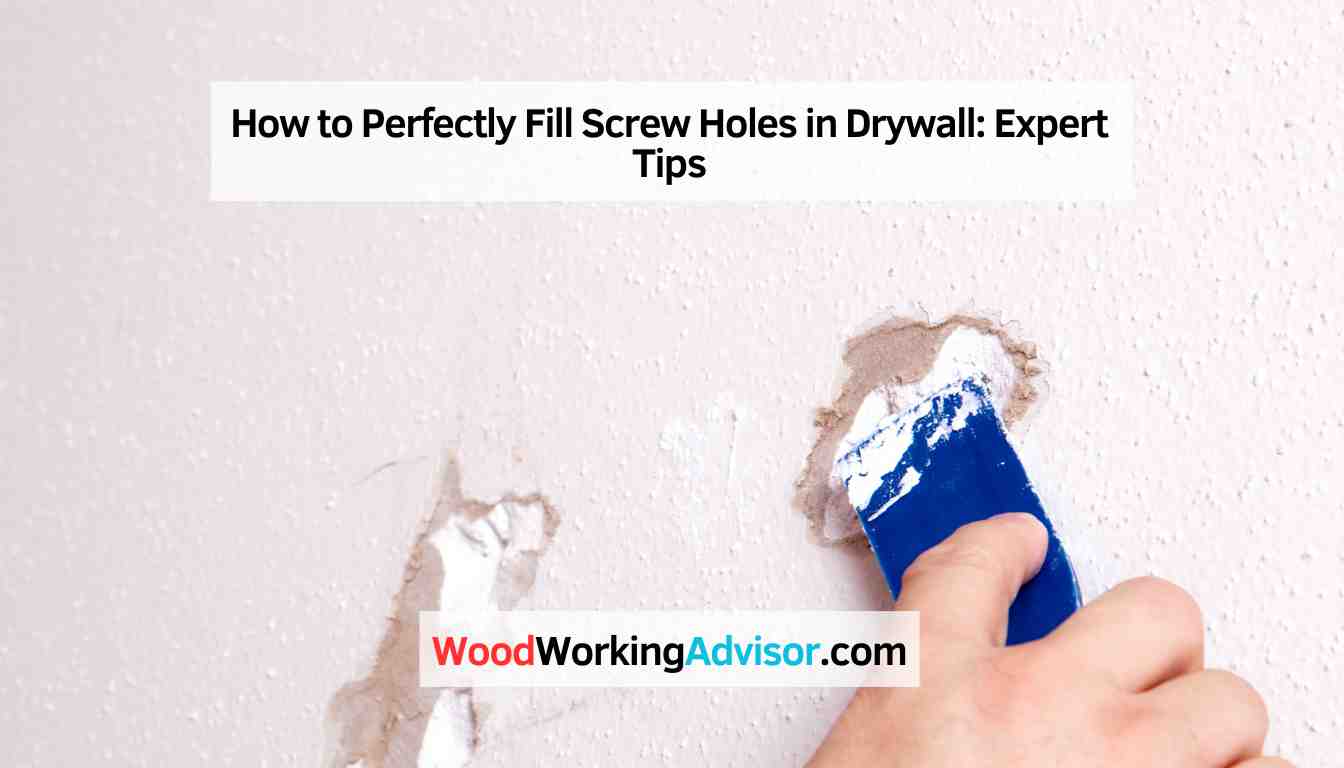
How to Perfectly Fill Screw Holes in Drywall: Expert Tips
To fill screw holes in drywall, use spackling compound and a putty knife for a smooth finish. Gently fill the hole, scrape off excess, and let it dry before painting.
Repairing screw holes in drywall is a common task for DIY enthusiasts and homeowners. Knowing the proper technique can ensure a seamless repair and a professional-looking result. Whether you’re preparing your walls for a fresh coat of paint or simply want to conceal imperfections, learning how to fill screw holes in drywall is a handy skill to have.
With a few simple tools and materials, you can easily tackle this project on your own. This guide will walk you through the step-by-step process of filling screw holes in drywall, giving you the confidence to make your walls look as good as new.
Choosing The Right Filler
In the process of filling screw holes in drywall, selecting the appropriate filler is crucial for a smooth and seamless repair job. Before proceeding, always evaluate the type of wall and choose the right filler accordingly.
Consider The Type Of Wall
- Identify if the wall material is drywall, plaster, or wood.
- Drywall requires a lightweight and easy-to-sand filler.
- For plaster walls, opt for a setting-type compound for better adhesion.
- Wood walls necessitate a strong adhesive filler that can withstand expansion and contraction.
Selecting The Appropriate Filler
- Choose spackling paste for small holes in drywall.
- Joint compound is ideal for larger holes and offers a smooth finish.
- For a quick fix, consider self-adhesive patch kits for hassle-free repairs.
Preparing The Screw Holes
To prepare the screw holes in drywall for filling, start by removing any debris or loose material around the holes. Next, use a putty knife to apply spackling compound, ensuring a smooth and even finish. Once dried, sand the area for a seamless repair.
Cleaning the Area:
- Wipe the area around the screw hole with a clean, dry cloth.
- Remove any dust or debris using a small brush or vacuum.
Ensuring Proper Drywall Surface:
- Check that the screw hole is flush with the drywall surface.
- If not, use a putty knife to gently press down the bulging area.
Filling The Holes
Filling the holes in drywall is an essential step to achieving a smooth and flawless finish. Whether you’re repairing damage or simply covering up old screw holes, properly filling the holes is crucial for a professional-looking result. In this guide, we’ll discuss the process of filling screw holes in drywall, focusing on applying the filler and smoothing the surface to ensure a seamless finish.
Applying The Filler
Once you’ve removed the screws, it’s time to apply the filler. Choose a high-quality spackling compound that is specifically designed for filling holes in drywall. Using a putty knife, scoop a small amount of filler and press it into the hole. Ensure the hole is completely filled without overfilling, as excess filler can be difficult to sand down later.
- Choose a high-quality spackling compound.
- Use a putty knife to press the filler into the hole.
- Avoid overfilling to simplify the sanding process.
Smoothing The Surface
After applying the filler, it’s important to smooth the surface to achieve a seamless finish. Use the putty knife to level off the filler, ensuring it is flush with the surrounding drywall. Once the filler has dried, lightly sand the area to blend it into the surrounding wall. Be careful not to apply too much pressure when sanding, as this can create an uneven surface.
- Level off the filler with a putty knife.
- Lightly sand the dried filler to blend with the wall.
- Avoid applying excessive pressure during sanding.
Sanding And Finishing
After filling the screw holes in drywall, the next crucial step is sanding and finishing. This process smooths out the patched area and ensures a seamless blend with the existing wall texture. By following these steps, you can achieve professional-looking results.
Using The Correct Sandpaper Grit
When it comes to sanding, using the correct sandpaper grit is essential. The grit refers to the coarseness of the sandpaper. For drywall repair, start with a finer grit such as 120 or 150. Using sandpaper with a lower grit may result in too much material being sanded away, while a higher grit may not be effective in smoothing the surface.
As you sand, make sure to apply even pressure and sand in a circular motion. This helps to prevent uneven sanding marks and creates a smooth finish. Be mindful of the surrounding wall area as well to avoid accidentally damaging the undamaged portions.
Blending With The Existing Wall Texture
Blending the patched area with the existing wall texture is crucial for achieving a seamless finish. To do this, use a drywall texture brush or a sponge to replicate the texture of the surrounding wall.
Hold the brush or sponge at a slight angle and gently dab or brush the patched area. Take your time to ensure that the texture matches the rest of the wall. If needed, practice on a scrap piece of drywall to get the hang of the technique before applying it to the patched area.
After applying the texture, let it dry thoroughly before moving on to the next step. This ensures that the texture adheres properly and doesn’t smudge or ruin your hard work.
Once the texture has dried, lightly sand the patched area again. This helps to further blend the texture with the surrounding wall, creating a harmonious look.
By using the correct sandpaper grit and taking the time to blend the patched area with the existing wall texture, you can effectively fill screw holes in drywall and achieve professional-looking results. Sanding and finishing are crucial steps in the process that shouldn’t be overlooked, as they ensure a seamless and visually appealing finish.
Final Touches And Paint
When it comes to filling screw holes in drywall, the final touches and paint are essential for achieving a seamless finish. These final steps are crucial for creating a polished look that seamlessly blends with the rest of the wall. By following these simple guidelines for priming and painting, you can achieve a professional result that will leave your drywall looking flawless.
Priming The Area
Before you begin painting, it’s important to prime the area where the screw holes have been filled. Priming prepares the surface and ensures that the paint adheres evenly to the drywall. Applying primer will also help to prevent any discoloration or unevenness in the final paint job.
Here’s how to prime the filled screw holes:
- Clean the area around the filled screw holes with a damp cloth to remove any dust or debris.
- Apply a thin coat of primer to the filled screw holes using a small brush or a roller.
- Allow the primer to dry completely according to the manufacturer’s instructions.
Painting For Seamless Integration
Once the primer has dried, it’s time to paint the area for seamless integration. Choosing the right paint color and finish is crucial for achieving a cohesive look that matches the rest of the wall. Follow these steps to ensure a flawless finish:
- Select a high-quality paint that matches the existing wall color and finish.
- Stir the paint thoroughly to ensure an even consistency.
- Using a small brush or a roller, carefully apply a thin coat of paint to the primed screw holes and surrounding area.
- Allow the first coat of paint to dry completely.
- If necessary, apply a second coat of paint to achieve full coverage and a seamless integration.
- Let the final coat of paint dry thoroughly before touching or applying any additional finishes.
By following these steps, you can confidently fill screw holes in drywall and achieve a flawlessly integrated and professionally finished result. Remember to take your time, be patient, and ensure each step is completed thoroughly for the best possible outcome.
Frequently Asked Questions For How To Fill Screw Holes In Drywall
How Do You Fill Screw Holes In Drywall?
To fill screw holes in drywall, start by removing any loose debris or screws. Then, apply a thin layer of spackling compound over the hole using a putty knife. Allow the compound to dry, then lightly sand it smooth. Finally, prime and paint the repaired area for a seamless finish.
Can I Use Toothpaste To Fill Screw Holes In Drywall?
Yes, toothpaste can be used as a temporary solution to fill small screw holes in drywall. Simply squeeze a small amount of toothpaste into the hole and smooth it out with a putty knife. However, toothpaste may not provide a durable and long-lasting repair like spackling compound or joint compound.
What Is The Best Filler For Screw Holes In Drywall?
The best filler for screw holes in drywall is spackling compound or joint compound. These fillers are specifically designed for repairing drywall and creating a smooth surface. They adhere well to the drywall and can be easily sanded for a seamless finish.
Make sure to choose a lightweight and quick-drying option for convenience.
Conclusion
After following these steps, you can easily fill screw holes in drywall with few supplies and minimal effort. Taking the time to properly patch and repair these holes will leave your walls looking smooth and seamless, and it’s a simple task that anyone can tackle.
With this knowledge, you can confidently maintain the pristine appearance of your walls and keep your living space looking its best.