How to Inlay Wood With a Router: Master the Art
To inlay wood with a router, utilize a guide bush and a guide bush alloy collar for precise cuts and inserts. This metal ring fits around the guide bush’s spigot, enabling you to cut recesses and inserts with a single template efficiently.
In woodworking, adding intricate inlays to wood pieces can elevate their beauty and uniqueness. Using a router for inlay work requires precision and attention to detail. By following specific techniques and utilizing the right tools like guide bushes and alloy collars, you can achieve professional-looking inlays.
This article explores the process of inlaying wood with a router, discussing the importance of guide bushes and how they facilitate accurate cuts. Let’s delve into the world of woodworking inlays with routers to create stunning designs on wooden surfaces.
Understanding Wood Inlay
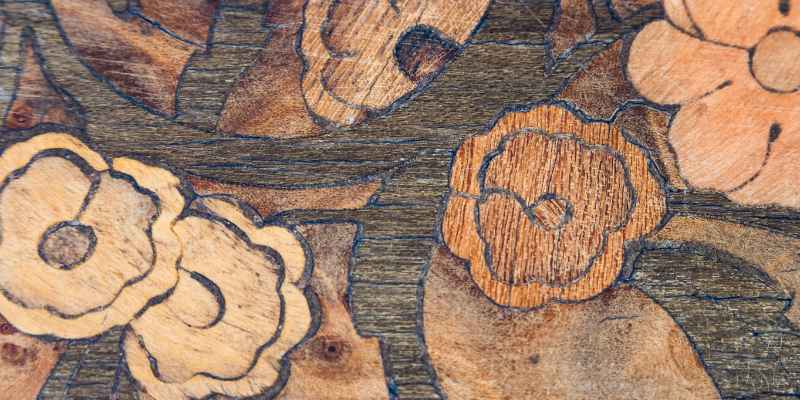
Wood inlay is a technique that involves cutting a recess on the face of a wood base, filling it with new material, and then finishing the surface to create a smooth and even final product. It is a popular woodworking technique that allows for the creation of intricate designs and patterns in wood. By using a router, you can easily cut precise and clean recesses, making it the ideal tool for wood inlay projects. In this article, we will delve into the details of wood inlay, including what it is, its benefits, and how to achieve the best results.
What Is Wood Inlay?
Wood inlay refers to the process of creating decorative designs or patterns by cutting a recess into a wood surface and filling it with contrasting materials such as wood, metal, or resin. This technique allows you to add visual interest and unique details to your woodworking projects. With the help of a router, you can achieve precise and clean cuts, resulting in a professional-looking inlay.
Benefits Of Wood Inlay
Wood inlay offers a variety of benefits that make it a popular technique among woodworkers:
- Enhanced Design: Wood inlay allows you to add intricate designs, patterns, and personalized details to your woodworking projects.
- Visual Contrast: By using contrasting materials for the inlay, such as different wood species or metals, you can create eye-catching visual contrast that makes your projects stand out.
- Artistic Expression: Wood inlay gives you the freedom to express your creativity and artistic vision through your woodworking projects.
- Added Value: Incorporating wood inlay into your projects can increase their perceived value and appeal, making them more attractive to potential buyers or recipients.
By understanding the concept of wood inlay and the benefits it offers, you can confidently embark on your own wood inlay projects using a router. In the following sections, we will explore the step-by-step process of creating stunning wood inlays with a router.
Tools And Materials Needed
Inlaying wood with a router requires specific tools and materials to achieve precise and intricate designs. Let’s explore the essential items you need:
Router
A router is the primary tool for creating inlays in wood. It allows you to carve out precise designs and patterns effortlessly.
Router Bits
Router bits are the cutting tools attached to the router. Different router bits are used for various inlay designs and depths.
Templates
Templates are guide patterns that help create consistent inlay shapes. They ensure accuracy and repeatability in your designs.
Guide Bushings
Guide bushings are essential for following templates accurately. They help guide the router along the desired path for perfect inlay results.
When inlaying wood with a router, having the right tools and materials is crucial for achieving professional-looking results.
Preparing The Wood Surface
Before you start inlaying wood with a router, it’s crucial to prepare the wood surface properly. Sand the surface smoothly and ensure it’s free of any imperfections or debris. Inlaying requires a clean and even canvas for a successful outcome.
Selecting The Base Wood
Choose high-quality hardwood for inlaying to ensure a sturdy and attractive finished product. Maple, oak, and walnut are popular choices due to their durability and grain patterns.
Sanding And Cleaning The Surface
Start by sanding the wood surface with progressively finer grits (e.g., 120, 220, and 320) to achieve a smooth and even base. Remove all dust with a soft cloth or brush, and then use a tack cloth to ensure a clean surface for the inlay process.
Creating The Inlay Design
Before you can inlay wood with a router, it’s essential to create a design that will be incorporated into the base material. Designing the inlay can be a creative and satisfying process, and there are a few methods to consider for this crucial step.
Choosing The Design
When creating an inlay design, it’s important to decide on a pattern or shape that will complement the wood and enhance the overall aesthetic. Consider the size, complexity, and visual impact of the design to ensure it suits the project.
Drawing Or Using Templates
Once you’ve chosen the design, you can either draw it directly onto the wood or use pre-made templates for accuracy and precision. Templates can help achieve consistent and symmetrical results, especially for intricate designs.
In WordPress, this HTML content will be displayed as a section of a blog post with headings and content organized in a structured and SEO-friendly manner.
Cutting The Inlay
Inlaying wood with a router involves precision and attention to detail, especially when it comes to cutting the inlay. This stage is crucial in achieving a seamless and professional finish.
Setting Up The Router
Before cutting the inlay, ensure the router is securely mounted on a stable surface. Adjust the depth of the router bit as needed to match the thickness of the inlay material.
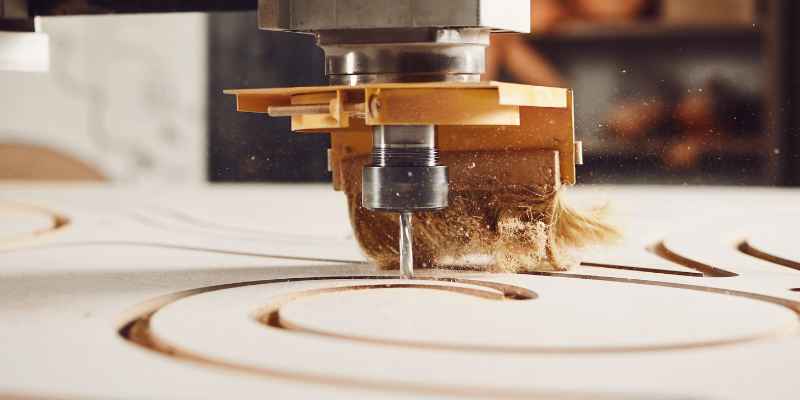
Cutting The Recess
To create a recess for the inlay, carefully guide the router along the outline of the design. Move the router steadily to avoid jagged edges and ensure a clean cut.
Cutting The Insert
For the insert piece, use a smaller router bit to cut the shape that will fit snugly into the recess. Take your time to achieve precise cuts for a perfect fit.
Fitting And Finishing The Inlay
Once you have successfully cut out the inlay for your woodworking project, it’s time to fit and finish the inlay to achieve a seamless and polished look. This crucial step will ensure that the inlay sits flush with the surrounding wood, creating a professional and visually appealing result. Here’s how you can complete the fitting and finishing process:
Dry Fitting The Inlay
Before permanently attaching the inlay, it is essential to dry fit it first. This step allows you to check if the inlay fits correctly within the recessed area and make any necessary adjustments. To dry fit the inlay, place it within the recess and test its fit by lightly tapping it. Ensure that it sits evenly and snugly without any gaps or overhangs. If you find any areas where the fit is not perfect, use a chisel or sandpaper to make slight adjustments until the inlay fits seamlessly.
Gluing The Inlay
Once you are satisfied with the dry fit, it’s time to glue the inlay into place. Apply a small amount of wood glue onto the recessed area and spread it evenly using a small brush or a toothpick. Carefully place the inlay onto the glue, ensuring that it aligns perfectly with the surrounding wood. Apply gentle pressure to press the inlay down, and use a damp cloth to wipe away any excess glue that may have squeezed out. Let the glue dry completely according to the manufacturer’s instructions before proceeding to the next step.
Sanding And Finishing
The final step in the fitting and finishing process is to sand and finish the inlay. Start by gently sanding the surface of the inlay and the surrounding wood using fine-grit sandpaper. This will help to smooth out any rough edges or uneven surfaces, ensuring a seamless transition between the inlay and the wood. Be careful not to sand too aggressively, as this can damage the inlay or the wood. Once the desired smoothness is achieved, wipe away any sanding dust using a clean cloth.
After sanding, apply the desired finish to the entire wood surface, including the inlay. This could be a clear varnish, wood stain, or any other finish of your choice. Follow the instructions provided by the manufacturer for the application method and drying time. Once the finish is dry, use a clean cloth to buff the surface gently to achieve a smooth and shiny finish.
By following these steps for fitting and finishing the inlay, you can take your woodworking project to the next level. The precision and attention to detail required for this process will result in a stunning and professional-looking inlay that will impress anyone who sees it.
Advanced Techniques And Tips
When it comes to inlaying wood with a router, there are advanced techniques and tips that can take your woodworking skills to the next level. These techniques allow you to create intricate and detailed inlays that will make your projects stand out. In this section, we will explore two important aspects of advanced inlay techniques: creating detailed inlays and troubleshooting common issues.
Creating Detailed Inlays
To create detailed inlays, it is essential to have the right tools and materials. Here are some tips to help you achieve precise and intricate inlays:
- Choose the right router bit: When it comes to creating detailed inlays, using a specialized router bit is crucial. Look for a bit that is designed specifically for inlay work and ensures clean and precise cuts.
- Use templates: Templates are a valuable tool when it comes to creating consistent and intricate inlays. Invest in high-quality templates that suit your desired design. These templates will guide your router and help you achieve accurate results.
- Practice proper technique: Proper technique is vital for achieving clean and sharp inlays. Take your time to practice routing techniques such as plunge cuts, stop cuts, and freehand routing to enhance your skills.
- Secure the workpiece: To avoid any unwanted movement during the routing process, make sure to secure the workpiece properly. This can be done using clamps or a router table, depending on the size and complexity of your project.
Troubleshooting Common Issues
While inlaying wood with a router, you may encounter some common issues that can affect the quality of your inlays. Here are a few troubleshooting tips to help you overcome these problems:
- Avoid tear-out: Tear-out can occur when the router bit exits the wood, leaving a rough and splintered edge. To prevent tear-out, ensure you are using a sharp router bit and consider routing in the opposite direction to minimize tear-out.
- Dealing with chip-out: Chip-out refers to the accidental chipping or breaking of the wood fibers while routing. To minimize chip-out, try using a backing board to support the wood fibers and reduce the likelihood of chipping.
- Correcting depth inconsistencies: Inconsistent depth can result in uneven inlays. To rectify this issue, double-check the depth settings on your router and ensure they are consistent throughout the routing process.
- Proper sanding and finishing: After completing the inlay, sanding and finishing are essential to achieve a smooth and polished look. Take your time to sand the inlay area carefully, removing any rough edges or imperfections. Apply a suitable finishing product to enhance the beauty and durability of your inlays.
By following these advanced techniques and troubleshooting tips, you can take your wood inlaying skills to new heights. Practice patience, precision, and attention to detail, and you will be rewarded with stunning and professional-looking inlays that will impress both yourself and others.
Frequently Asked Questions On How To Inlay Wood With A Router
What Type Of Router Bit For Inlay?
For inlaying wood, use a router bit specifically designed for inlay work for precise and clean cuts on the surface.
Can You Use A Router To Write In Wood?
Yes, you can use a router to write in wood. Routers are easy to use for creating artistic wooden surfaces. You can draw lines and pictures on the wood surface, either based on your own design or using templates. The router is guided freehand to create the desired writing or design.
How Is Wood Inlay Done?
Wood inlay is done by cutting a recess on the surface of a wooden base, filling it with new material, and then smoothing the surface. This can be done freehand or using templates with a router. Routers are easy to use for creating artistic wooden surfaces, allowing you to draw lines and pictures on the wood.
The easiest way to create inlays with a router is by using a guide bush with a guide bush alloy collar.
What Is A Router Inlay Kit?
A router inlay kit is used with a router to create precise designs or shapes on wood surfaces.
Conclusion
Transform your woodworking game by mastering the art of inlaying wood with a router. Elevate your craftsmanship and create intricate designs effortlessly. Unleash your creativity with router inlays for stunning woodwork projects. Dive into the world of precision and beauty with this versatile woodworking technique.
Elevate your woodworking projects with intricate router inlays.