How to Install Wood Look Tile Flooring: Step-by-Step Guide
To install wood look tile flooring, remove old flooring and glue, prep and repair the subfloor, install the tile substrate, plan the layout, install the floor tile and grout the tile joints. It is important to follow these steps properly to ensure a successful installation.
Additionally, running the wood look tile across the room first and using a tile leveling system can aid in the installation process. When considering the type of tile to use, options such as porcelain, ceramic, and faux wood are available, with tile patterns and grout choices to complement any style.
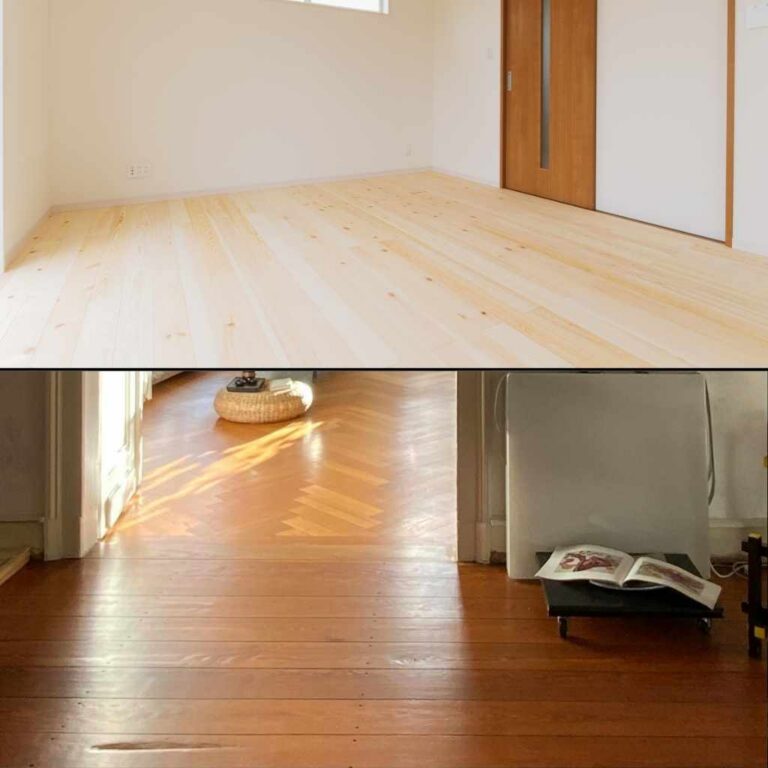
Properly laying wood look tile flooring can transform a space and add a touch of elegance to any room.
Preparation
Installing wood look tile flooring requires proper preparation to ensure a successful installation. This includes removing old flooring, repairing the subfloor, and planning the tile layout. Follow these steps and use the right tools to achieve a professional-looking wood tile floor.
Preparation is key to successfully installing wood look tile flooring. This involves removing old flooring and glue, prepping and repairing the subfloor, installing the tile substrate, and planning the tile layout. Let’s take a closer look at each of these steps.
Removing Old Flooring & Glue
Before installing your new wood look tile flooring, you must first remove the old flooring and glue. This can be a tedious process, but it’s crucial for the new tiles to adhere properly to the subfloor. Use a scraper or chisel to remove any remaining adhesive or debris, ensuring that the subfloor is clean and smooth.
Prepping/repairing The Subfloor
Next, you need to prep and repair the subfloor. This step may vary depending on your subfloor type, but generally involves filling any cracks or holes with a leveling compound. If your subfloor is wooden, ensure that it’s sturdy and level before installing the tile.
Installing The Tile Substrate
The tile substrate is an essential part of your new flooring. It serves as a stable and level base for your wood look tiles, preventing any movement or cracking. Use a cement backer board or tile substrate membrane to ensure a sturdy base.
Planning Tile Layout
Before laying the tiles, it’s important to plan your tile layout. This includes determining the best starting point for your tiles and using spacers to maintain even and consistent gaps between tiles. Measure and mark your layout to ensure accurate and precise placement of your wood look tiles.
By following these preparation steps, you can ensure that your new wood look tile flooring will look great and last for years to come. Take your time with each step and prioritize precision and accuracy for a professional-looking finish.
Installation
Installing wood look tile flooring requires proper subfloor preparation, tile substrate installation, and careful planning for the tile layout. It is important to follow the steps carefully, and use a tile leveling system to ensure the perfect flatness of each row.
The installation process can be time-consuming but will provide a durable and attractive wood-like floor.
Now that you have measured your space, calculated the amount of tile you need, and prepared the room, it’s time to start the installation process. The installation process can seem overwhelming at first, but with a little patience and the right tools, you can achieve a beautiful wood look tile floor that will last for years to come. Let’s break down the installation process into sections for easy understanding.
Laying Wood Look Tile:
Start by laying two rows of tile across the room from one end to the other. This will give you a good starting point to build off of. Use a tile leveling system to make sure each row is perfectly flat. For this process, you can use spacers to maintain a consistent gap between the tiles.
Measuring for Cuts:
Before making any cuts, carefully measure the space where you will need to place the cut tile. Always measure twice to ensure accuracy. Once you have your measurements, use a tile cutter or wet saw to make precise cuts. You can use a straight edge or L-shaped tool to mark your cutting line.
Starting the Tile Installation:
Begin installing the tile in a corner of the room and work your way outwards. Use the appropriate adhesive for your tile and subfloor. Follow the manufacturer’s instructions for applying the adhesive.
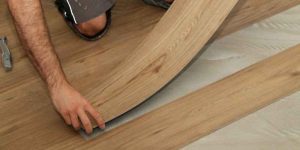
Making L-Cuts with a Wet Saw or Grinder:
When you reach a wall or obstacle, you may need to make an L-cut to fit the tile properly. Use a wet saw or grinder to make precise L-cuts. Be sure to wear protective gear and follow safety instructions when using power tools.
Applying the Tile:
Carefully place the tile in the adhesive and press down firmly to ensure the tile is properly seated. Use spacers to maintain uniform gaps between each tile. Continue laying the tile until you reach the opposite end of the room.
Using a Tile Leveling System:
A tile leveling system can help ensure a perfectly flat and level floor. Use a tile leveling system between each row of tile to ensure the tiles are level and the spacing is uniform. These systems help prevent tile lippage, which is when one tile is higher or lower than its neighboring tile.
In conclusion, proper installation is essential for a beautiful and long-lasting wood look tile floor. Follow these steps carefully and use the right tools and materials. With a little bit of patience and attention to detail, you can achieve a stunning wood look tile floor that will add value and style to your space.
Grouting
During the installation of wood look tile flooring, it is crucial to grout the tile joints correctly for a professional finish. After laying the tile substrate, planning the tile layout, and installing the floor tile, spread the thin-set adhesive and apply the grout.
Finally, clean off the haze on the tiles for an immaculate look.
Grouting is a crucial part of installing wood look tile flooring. It is the process of filling the gaps between the tiles with grout, creating a smooth, continuous surface. In this section, we will discuss techniques for grouting, tools needed for grouting, cleaning off haze, getting perfect grout lines, and tips for cleaning.
Techniques For Grouting
Grouting can be a messy and time-consuming process, but with these techniques, you’ll achieve a clean finish. Start by mixing the grout to a smooth consistency, then apply it to the tiles using a rubber float. Move the float diagonally across the tiles to ensure the gaps are completely filled. Once the grout is applied, use a grout sponge to wipe away excess grout, making sure the grout lines are level and smooth.
Tools Needed For Grouting
To get the job done right, you’ll need the appropriate tools. The basics include a rubber float, grout sponge, and a bucket for mixing the grout. For larger areas, you may want to consider using a grout bag, which allows for precise application. You may also need a grout saw to remove any excess grout or haze that may appear after the initial cleaning.
Cleaning Off Haze
Cleaning off haze is an essential part of the grouting process. Once the grout has dried, you’ll need to wipe the tiles clean to remove any leftover grout residue. Use a damp sponge or cloth to remove the haze while ensuring not to disturb the grout lines. If the haze is tough to remove, try using a haze remover specifically designed for tile.
Getting Perfect Grout Lines
Grout lines can make or break the look of your wood look tile flooring. Achieving perfect grout lines is possible, but it takes patience and attention to detail. Use a tile spacing tool or tile leveling system to ensure consistent grout lines throughout the installation. If possible, select a grout color that closely matches the tile for a seamless look.
Tips For Cleaning
Cleaning your wood look tile flooring is essential to maintain its beauty and longevity. Avoid using harsh chemicals that can damage the tiles or grout. Use a soft-bristle brush and a pH-neutral cleaner to remove dirt and stains. Be sure to rinse thoroughly with clean water to ensure that no residue is left behind.
Sealing The Grout
After the grout has dried, consider sealing it to prevent staining and discoloration. Grout sealer can be applied using a brush or spray bottle and should be reapplied every few years. Always follow the manufacturer’s instructions for best results.
In conclusion, grouting is a vital part of installing wood look tile flooring. With the right tools and techniques, you can achieve a beautiful, durable, and functional wood look tile floor.
Finishing
To install wood look tile flooring, you should first remove the old flooring and prepare the subfloor. Install the tile substrate and plan the tile layout before installing the floor tile. Finally, grout the tile joints for a professional finish.
Make sure to use a tile leveling system and follow the manufacturer’s instructions for the best results.
Finishing is the most important step when it comes to installing wood look tile flooring. This includes removing the leveling system, installing transitions, and tips for maintaining the flooring. To begin, removing the leveling system involves carefully pulling out the wedges and clips used to secure the tiles in place. This should be done once the thin-set has fully cured.
Next, installing transitions is crucial for creating a seamless look between rooms with different flooring types. This can be accomplished by using a variety of transition options such as T-molding, reducer strips, or quarter rounds. It is important to choose a transition piece that matches the color of the wood look tile for a cohesive appearance.
Finally, tips for maintaining wood look tile flooring include sweeping or vacuuming the floor regularly to remove dirt and debris. It is also important to avoid using harsh chemicals or abrasive cleaners that can damage the surface. Instead, use a pH-neutral cleaner specifically designed for tile flooring. By following these simple tips, you can ensure that your wood look tile flooring remains beautiful and durable for years to come.
Faqs
Learn how to install wood look tile flooring with these easy steps. Start by removing old flooring and preparing the subfloor, then install the tile substrate and plan the layout. Lay the tile, apply grout, and clean off any haze for a beautiful and durable wood look floor.
Use a tile leveling system for perfectly flat rows and consider using tile backer board for an even base when laying tiles on wooden floors.
Do you use spacers for wood look tile?
Yes, you should always use spacers when installing wood look tile. The size of the spacers will depend on the size of the tiles. It is important to use spacers to ensure that the tiles are evenly spaced and to allow room for grout. Without spacers, the tiles may be uneven and the grout lines may not be straight.
What is the proper installation for plank tiles?
The proper installation for plank tiles is to start by preparing the subfloor. The subfloor should be clean, dry, and level. If the subfloor is not level, it should be leveled using self-leveling compound. The tiles should then be laid out in a staggered pattern, with the edges of the tiles touching each other. A tile leveling system should be used to ensure that each row is perfectly flat. The tiles should then be installed using thinset mortar and a trowel. After the tiles are installed, they should be allowed to set for at least 24 hours before grouting.
What do you put under floor tiles on wooden floor?
When installing floor tiles on a wooden floor, it is important to use an underlayment to provide a stable base for the tiles. One option is to use a cement backer board. The backer board should be installed over the wooden floor using screws. Another option is to use an uncoupling membrane, which is placed over the wooden floor and provides a buffer between the tiles and the subfloor. The membrane also helps to prevent cracks in the tiles from appearing due to the movement of the wooden floor.
Tips From A Pro
Learn how to install wood look tile flooring like a pro with these helpful tips and tricks. From preparing the subfloor to laying the tiles and applying grout, this guide covers all the important steps to ensure a successful installation.
Watch instructional videos for guidance and make sure to use a tile leveling system for perfectly flat results.
Tips From a Pro: Advice and Tips from Professional Installers and Common Mistakes to Avoid When Installing Wood Look Tile Flooring
Are you ready to install wood look tile flooring in your home but don’t know where to start? Look no further because we have gathered advice and tips from professional installers to help you get the job done right. We’ve also listed common mistakes to avoid to ensure your tile flooring looks great and lasts for years to come.
Advice and tips from professional installers:
1. Prepare the subfloor properly: Before laying tile, it’s important to prepare the subfloor properly. Make sure the surface is level, clean, and free of any debris. If the subfloor is uneven, use a leveling compound to smooth out the surface.
2. Use tile spacers: When laying wood-look tile flooring, use tile spacers to ensure that the spacing between tiles is consistent. This will make sure your flooring looks more professional.
3. Plan the layout: Plan your tile layout before you start installing. This can save you time and money by minimizing waste and preventing mistakes. Consider using a tile leveling system to ensure that each row is perfectly flat.
4. Cut tiles carefully: Cutting tiles can be tricky, especially when cutting long planks. Use a wet saw or tile cutter to make accurate cuts. Make sure you do not cut too deep or too short and make sure all cuts are straight.
5. Properly mix the thin-set: Use a suitable flooring trowel and mix the thin-set with the right amount of water to reach the correct consistency. If the thin-set is too thick, it will not bond properly. If it’s too watery, it will not hold the tiles in place.
Common mistakes to avoid:
1. Not preparing the subfloor: Neglecting to properly prepare the subfloor can cause issues later on in the installation process, such as uneven tile or loosening tiles.
2. Starting in the wrong spot: Starting in the wrong spot can lead to an uneven installation. Be sure to start in the center of the room and work outward.
3. Poorly mixed thin-set: Improperly mixed thin-set can cause tiles to shift or not bond correctly.
4. Lack of tile spacers: Not using tile spacers can cause uneven spacing between tiles, which can lead to an uneven or unprofessional-looking installation.
5. Inadequate cleaning and maintenance: Proper cleaning and maintenance can extend the life of your wood look tile flooring. Be sure to sweep and mop regularly and avoid harsh chemicals that can damage the tile.
In conclusion, installing wood look tile flooring may seem like a daunting task, but with the right advice and techniques, you can achieve a professional-looking finish. Following these tips from professional installers and avoiding common mistakes will help you get the job done right.
Frequently Asked Questions For How To Install Wood Look Tile Flooring
How Should Wood Look Tile Be Laid?
When installing wood look tile, start by running the tile across the room in two rows and use a tile leveling system to ensure each row is flat. Remove old flooring, prep and repair the subfloor, install tile substrate, plan tile layout, then install and grout the tile joints.
Use spacers and a tile backer board for an even base. You can also watch DIY tutorials for additional tips and tricks.
Do You Use Spacers For Wood Look Tile?
Yes, spacers must be used for wood look tile installation. It’s important to use tile spacers to ensure the tiles are evenly spaced, which will help with achieving the desired grout lines and prevent mistakes in tile placement.
What Is The Proper Installation For Plank Tiles?
To properly install plank tiles, you must remove old flooring and glue, prepare and repair the subfloor, install the tile substrate, plan the tile layout, install the floor tiles, and grout the tile joints. It’s recommended to use a tile leveling system to ensure that each row is perfectly flat.
Additionally, consider running the wood look tile across the room first for accuracy. Use a tile backer board or waterproof backer board as an even base if laying tiles on a wooden floor.
What Do You Put Under Floor Tiles On Wooden Floor?
To ensure an even base when laying floor tiles on wooden floors, the best option is to use tile backer board. This is specially designed to provide a thinner and even base compared to plywood. Moreover, waterproof backer boards are available for use in wet rooms and bathrooms.
Conclusion
To sum up, installing wood look tile flooring requires careful planning and execution. This type of flooring offers the beauty of wood without the maintenance and durability issues. With the right tools, materials, and techniques, any homeowner can successfully install wood look tile themselves.
Remember to prepare the subfloor properly, plan the layout, and use a tile leveling system to ensure a flat surface. Whether you prefer a herringbone pattern or a traditional plank layout, wood look tile can transform any room into a stunning and inviting space.