How To Remove Shellac: Simple and Effective Methods
To remove shellac, buff the surface with a fine-grit sandpaper or use a shellac remover solution. Shellac is a popular finish used on wood surfaces, but it can become damaged or worn over time.
If you’re looking to refresh your woodwork or furniture, removing the old shellac is an essential step. There are a few different methods you can use, such as sanding the surface with a fine-grit sandpaper to remove the shellac layer.
Alternatively, you can apply a shellac remover solution and carefully scrape off the softened shellac. Both methods require some effort and caution, but can effectively remove shellac and prepare the surface for a new finish. We will guide you through the process of removing shellac and restoring your wood to its original beauty.
What Is Shellac?
Before diving into the process of removing shellac, it is important to understand what shellac actually is. Shellac is a natural resin that is derived from the secretions of the lac insect found in the forests of India and Thailand. This resin is carefully harvested and processed to create a versatile and durable wood finish.
Definition Of Shellac
Shellac is a natural resin obtained from the secretions of the lac insect, which is found in the forests of India and Thailand. It is processed into a versatile wood finish that is commonly used in various applications.
Common Uses Of Shellac
Shellac has been used for centuries as a wood finish due to its excellent properties. It provides a glossy and protective coating that enhances the natural beauty of wood while offering resistance against scratches, moisture, and heat. Here are some of the common uses of shellac that you might come across:
- Furniture: Shellac is often used as a finish for wooden furniture, providing a durable and lustrous surface.
- Cabinetry: Cabinetmakers love shellac for its ability to showcase the natural grain of the wood while protecting it from everyday wear and tear.
- Woodworking: Whether it’s a delicate woodcraft or a sturdy workbench, shellac can be applied to any woodworking project to achieve a smooth and long-lasting finish.
- Musical Instruments: Many musical instrument makers prefer shellac because it enhances the sound quality and beauty of instruments such as guitars, violins, and pianos.
- Art and Crafts: Shellac is also widely used by artists and craftsmen for sealing and protecting various surfaces, including paintings, sculptures, and even jewelry.
With its wide range of applications and impressive qualities, shellac has become a popular choice among woodworkers, artists, and craftsmen. However, there may come a time when you need to remove shellac from a surface, whether it is for refinishing purposes or to correct a mistake. In the next section, we’ll explore the step-by-step process of removing shellac effectively.
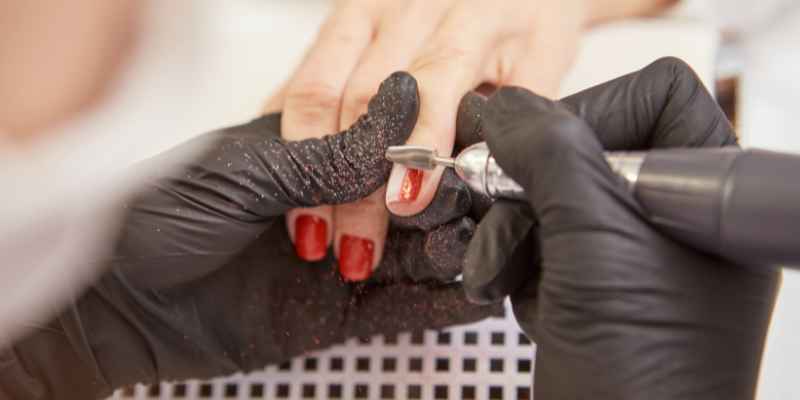
Why Remove Shellac?
There are several reasons why you might want to remove shellac from your nails. Whether you’re looking to change your nail color, or dealing with shellac damage or wear, it’s important to know the proper methods for removal. Let’s explore these reasons in more detail:
If you’re someone who loves experimenting with nail colors and designs, the desire to change your nail color frequently is completely understandable. Shellac, while long-lasting and durable, can make it challenging to switch up your manicure as easily as you’d like. By removing the shellac, you open up the opportunity to embrace new, exciting nail colors and designs.
Over time, shellac can become damaged or worn, leading to a less-than-perfect manicure. Whether it’s pesky chips, cracks, or simple wear from everyday activities, removing the shellac allows you to start fresh and maintain healthy-looking nails. It’s essential to remove damaged shellac properly to prevent further harm to your nails.
Method 1: Using Acetone
To remove shellac, you can use the acetone method. This effective technique involves using acetone to dissolve the shellac, allowing for easy removal.
Gather Supplies
Before you begin removing shellac from your nails using acetone, make sure you have all the necessary supplies ready. Here’s a list of what you’ll need:
- A soft nail file or buffing block
- Acetone-based nail polish remover
- Cotton balls or pads
- Tin foil or nail caps
- Cuticle oil or moisturizer
Prepare Nails
To ensure an effective removal process, prepare your nails beforehand:
- Start by filing the top layer of the shellac gently. Be careful not to file too aggressively, as this can damage your nails.
- Once you’ve filed off the shiny layer, use a buffing block to roughen up the surface of your nails. This helps the acetone penetrate the shellac more easily.
- Apply cuticle oil or moisturizer on the skin surrounding your nails. This creates a protective barrier that prevents the acetone from drying out your cuticles.
Soaking Nails In Acetone
Now it’s time to start the removal process using acetone:
- Soak a cotton ball or pad in acetone-based nail polish remover.
- Place the soaked cotton ball or pad directly onto your nail, ensuring it covers the entire nail surface.
- Secure the cotton ball or pad in place by wrapping your nail with tin foil or using a nail cap.
- Repeat this process for all your nails.
- Let your nails soak in the acetone for about 10-15 minutes. This allows the shellac to loosen and become easier to remove.
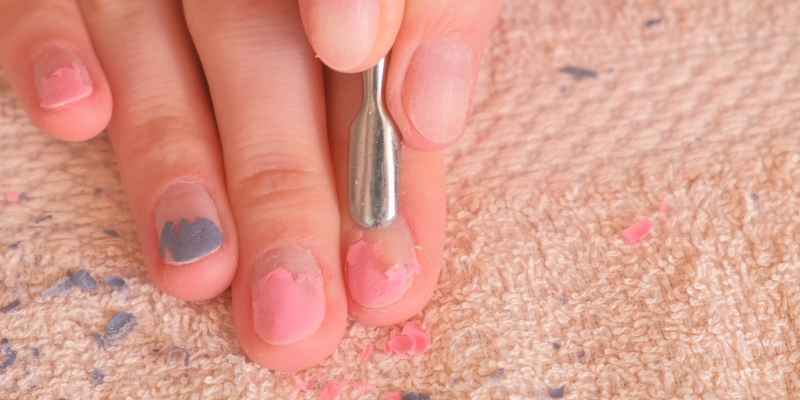
Removing Shellac
Now that the shellac has had time to loosen, it’s time to remove it:
- Gently remove the tin foil or nail caps from your nails.
- Take one nail at a time and use a gentle rubbing motion with the cotton ball or pad to wipe away the softened shellac. Continue until all traces of shellac are gone.
- If there are stubborn areas where the shellac hasn’t completely come off, you can use an orangewood stick or a cuticle pusher to carefully scrape off any remaining shellac.
- After removing the shellac, rinse your hands with water to remove any residue.
- Apply cuticle oil or moisturizer to nourish and hydrate your nails and cuticles.
Remember, this method of removing shellac using acetone may cause some dryness or irritation, so it’s important to follow up with proper nail care and hydration. Now that you know how to use acetone to remove shellac, your nails will be ready for a fresh and clean slate.
Method 2: Using Peel-off Remover
In this method, we will be using a peel-off remover to remove the shellac from your nails. Peel-off removers are a great option as they are gentle on your nails and do not require any scraping or filing. Follow these simple steps to effectively remove shellac using a peel-off remover.
Choose A Peel-off Remover
When selecting a peel-off remover, it’s important to choose a high-quality product that is specifically designed for shellac removal. Look for removers that are acetone-based as they work effectively in dissolving the shellac without causing damage to your nails.
Apply The Remover
Before applying the peel-off remover, make sure your nails are clean and dry. Take a cotton pad and saturate it with the peel-off remover. Place the soaked cotton pad on your nail and wrap it securely with a small piece of foil. Repeat this step for each nail and leave the peel-off remover to work its magic for about 10-15 minutes. This allows the remover to penetrate the shellac and break it down.
Peel Off The Shellac
After the recommended time has passed, remove the foil wrap from your nails one at a time. Gently pull off the cotton pad and the shellac should easily peel off along with it. If you encounter any resistance, avoid forcing it and repeat the process for a few more minutes. Once the shellac is completely removed, use a gentle buffer to smooth out any remaining residue on your nails.
Nail Care After Removal
After removing the shellac, it’s important to give your nails some extra care to promote their health and strength. Apply a nourishing cuticle oil to moisturize and soften your cuticles. This will prevent them from becoming dry and prone to damage. It’s also recommended to apply a strengthening nail treatment to restore any strength that may have been lost during the shellac removal process.
Following these steps will help you effectively remove shellac using a peel-off remover without causing any harm to your nails. Enjoy clean, healthy nails ready for your next manicure!
Conclusion
With these simple and effective methods, you can bid adieu to shellac and restore the natural beauty of your nails. By following the step-by-step instructions, you can remove shellac easily and effortlessly. Remember to be patient and take your time during the process to avoid damaging your nails.
Give your nails the care they deserve, and enjoy the freedom of flaunting your natural, healthy nails once again.