Do You Need to Seal Wood After Staining? Here’s When and How
Not sure which finish to use? Our guide to wood finishes compares all the options.
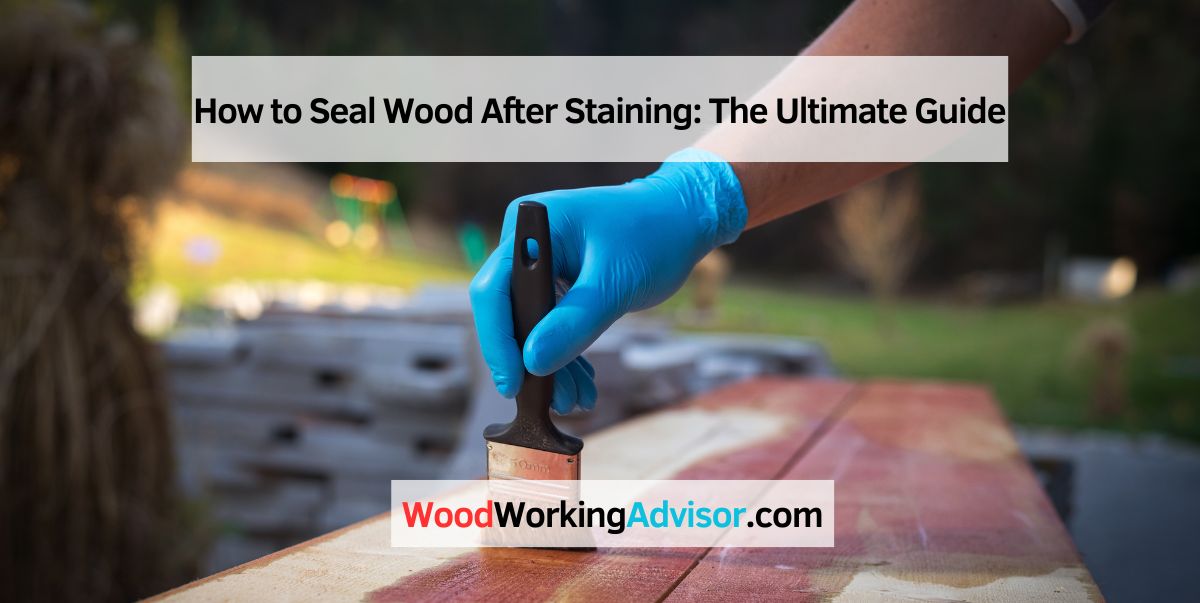
To seal the wood after staining, apply a clear sealant to protect and enhance the appearance of the wood. Sealing wood after staining is necessary to preserve the color and durability of the finished project.
There are several options to choose from, including polyurethane, lacquer, or a penetrating oil finish, each with its own benefits and application methods. By sealing the wood, you will prevent moisture damage, increase its longevity, and keep it looking beautiful for years to come.
We will discuss the steps to properly seal wood after staining, as well as provide tips for selecting the right sealant for your project.
What To Do After Staining Wood
Once your stain is fully dry, the next step — often called the afterstain process — is applying a protective topcoat sealer. Stain adds color but offers zero surface protection. Without a sealer, the stained wood is vulnerable to moisture, scratches, fingerprint oils, and UV fading within weeks.
Here is the correct sequence after staining:
- Wait for the stain to dry fully — oil-based stains need 24–48 hours; water-based stains dry in 2–6 hours.
- Lightly sand with 220-grit — removes raised grain and dust nibs; wipe clean before sealing.
- Apply the first coat of sealer — thin coats dry faster and bond better than one thick coat.
- Sand between coats with 320-grit — creates adhesion between layers.
- Apply 2–3 total coats — three coats is the standard for durable, long-lasting protection.
The right sealer depends on where the wood will live. Polyurethane over stain is the most common choice for interior furniture and floors. For projects near water, choose a waterproof exterior formula.
Choosing The Right Sealer
When it comes to sealing wood after staining, choosing the right sealer is crucial. A sealer not only protects the wood from moisture but also enhances its appearance and prolongs its lifespan. There are two main types of sealers to consider: oil-based sealers and water-based sealers. Each type has its own advantages and considerations, so it’s important to understand their differences and choose the one that best fits your needs.
Oil-based Sealers
Oil-based sealers are a popular choice for many woodworkers due to their durability and rich finish. These sealers penetrate deeply into the wood, providing excellent protection against moisture, stains, and wear. They also enhance the wood’s natural beauty by highlighting its grain and color.
- Advantages of Oil-based Sealers:
- Provides long-lasting protection
- Enhances the natural beauty of the wood
- Offers excellent water resistance
- Suitable for both indoor and outdoor use
However, it’s worth noting that oil-based sealers can take longer to dry and may emit strong odors during the application process. Additionally, they often require multiple coats and may darken the wood’s color over time.
Water-based Sealers
Water-based sealers are an eco-friendly alternative to oil-based sealers. They contain fewer volatile organic compounds (VOCs), making them a safer choice for both the environment and the person applying them. These sealers are also known for their quick drying time and easy clean-up with soap and water.
- Advantages of Water-based Sealers:
- Fast drying time
- Environmentally friendly
- Low odor during and after application
- Less color change over time
One point to consider with water-based sealers is that they may not provide the same level of durability and water resistance as oil-based sealers. They may also require more coats to achieve the desired level of protection.
When choosing between oil-based and water-based sealers, it’s important to assess the specific requirements of your project. Consider factors such as the type of wood, the intended use of the wood, and your personal preferences for the finish. By making an informed decision, you can ensure that the sealer you choose protects and enhances your stained wood for years to come.

| Sealer Type | Best For | Dry Time | Coats Needed | Finish Look | VOCs |
|---|---|---|---|---|---|
| Oil-based Polyurethane | High-traffic floors, tabletops, outdoor | 8–24 hrs between coats | 2–3 | Warm amber tone, rich gloss | High |
| Water-based Polyurethane | Furniture, cabinets, indoor wood | 2–4 hrs between coats | 3–4 | Clear, minimal color shift | Low |
| Wipe-on Poly | Small projects, turnings, detailed pieces | 2–4 hrs | 4–6 thin coats | Natural, satin sheen | Moderate |
| Lacquer | Cabinets, furniture — spray application | 30–60 min | 3–4 | Crystal clear, fast build | Very High |
| Shellac | Seal knots, under other finishes | 45 min | 2–3 | Warm amber; not waterproof | Low (alcohol-based) |
| Danish Oil / Tung Oil | Penetrating finish, natural look | 4–6 hrs | 2–3 | Matte, enhances grain | Low–Moderate |
| Outdoor Spar Urethane | Decks, exterior furniture, doors | 4–6 hrs | 3–4 | UV-resistant, flexible | Moderate–High |
Wood Stain and Sealer in One — Combo Products
If you want to save a step, wood stain and sealer combo products combine color and topcoat protection in one formula. These are ideal for smaller projects where applying separate stain and sealer coats feels excessive.
Top combo products:
- Minwax PolyShades — combines Minwax stain colors with polyurethane in one coat. Best for indoor furniture and trim.
- Rust-Oleum Varathane Stain & Poly — water-based formula; low odor, fast-dry, available in spray or brush-on.
- Behr Water-Based Stain & Poly-In-One — good for floors and high-traffic surfaces with a durable finish.
Trade-off: Combo products sacrifice some color depth vs. a dedicated stain, and the topcoat layer is thinner than a standalone sealer. For professional-quality results or large projects, separate stain + sealer is still recommended.
Minwax PolyShades — Stain & Polyurethane in One
- Stains and seals in a single coat — saves time on small projects
- Available in gloss, semi-gloss, and satin finishes
- Works over existing polyurethane finishes to refresh stain color
| Check current price on Amazon |
As an Amazon Associate we earn from qualifying purchases.
Preparing The Wood Surface
Before applying a sealant to your stained wood, it’s crucial to properly prepare the surface. This step ensures that the sealant adheres well, providing maximum protection and longevity to your woodwork. Preparing the wood surface involves sanding and cleaning the wood, ensuring a smooth and dirt-free foundation for the sealant.
Sanding The Surface
Start by sanding the stained wood surface to remove any rough spots, splinters, or imperfections. Choose a sandpaper with a medium grit, such as 120 or 150, and sand in the direction of the wood grain. This technique helps to even out the surface while minimizing the risk of causing scratches or damage.
Make sure to sand all areas evenly, paying extra attention to the edges and crevices where the stain may have accumulated unevenly. For larger projects, consider using a hand-held or orbital sander for faster and more consistent results.
Cleaning The Surface
After sanding, thoroughly clean the wood surface to remove any dust, debris, or residue. A clean surface ensures proper adhesion of the sealant and prevents any particles from becoming trapped beneath the protective coating.
Start by using a vacuum cleaner or brush to remove larger particles and dust. Next, wipe the surface with a damp cloth to remove finer particles and residual dust. Allow the wood to dry completely before proceeding to the next step.
If there are any stubborn stains or contaminants, you can use a mild detergent or cleaner specifically formulated for wood surfaces. Follow the instructions provided and avoid using harsh chemicals that may damage the wood or interfere with the sealant application.
Applying The Sealer
When it comes to applying the sealer to your stained wood, there are a few methods you can use to ensure it is done correctly. Proper application of the sealer will help protect the wood and maintain the beauty of the stain. Let’s explore the two main techniques for applying the sealer: Using a Brush and Using a Cloth or Applicator Pad.
Using A Brush
Using a brush is a traditional and reliable method for applying sealer to stained wood. Follow these steps for best results:
- Carefully dip the brush into the sealer, ensuring it is fully coated but not dripping.
- Starting from one end, brush the sealer onto the wood in long, even strokes, moving with the grain of the wood for a smooth and consistent finish.
- Work in small sections to ensure thorough coverage and to prevent the sealer from drying too quickly.
- Allow the first coat to dry completely before applying additional coats, following the same method to build up the desired level of protection.
Using A Cloth Or Applicator Pad
Applying sealer with a cloth or applicator pad can provide more control and precision, especially on larger surfaces. Here’s how to do it:
Minwax Fast-Drying Polyurethane
- Oil-based formula seals and protects stained wood with a durable, clear finish
- Available in gloss, semi-gloss, and satin sheens to match any project
- Fast-drying — recoat in 4 hours; sand-resistant finish in 24 hours
| Check current price on Amazon |
As an Amazon Associate we earn from qualifying purchases.
- Pour a small amount of sealer onto the cloth or applicator pad, ensuring it is evenly distributed.
- Gently wipe the sealer onto the wood, working with the grain to ensure uniform coverage.
- Continue applying the sealer in light, even coats until the entire surface is sealed, allowing each coat to dry fully before adding additional layers.
Drying And Curing
After staining your wood surface, it is crucial to follow the proper drying and curing process. This ensures that the stain is set properly and protects the wood in the long run. In this section, we will discuss the estimated drying time and the curing process for your stained wood.
Drying Time
The drying time of stained wood depends on various factors such as the type of stain used, humidity levels, and temperature. On average, water-based stains generally dry faster compared to oil-based stains. It is essential to allow sufficient time for the stain to dry completely before proceeding with the sealing process.
The drying time can vary anywhere from a few hours to a few days. It is recommended to refer to the manufacturer’s guidelines to determine the specific drying time for the stain you have used. These guidelines will provide you with valuable information about the optimal drying conditions and other important details.
While waiting for the stain to dry, ensure that the wood surface is placed in a well-ventilated area. Adequate air circulation will facilitate the drying process and minimize the chances of any unwanted interactions with the stain.
Curing Process
After the stain has dried, it’s time to focus on the curing process. Curing refers to the period during which the stain fully hardens and reaches its maximum durability. During this time, the wood becomes more resistant to moisture, stains, and everyday wear and tear.
The curing process for stained wood usually takes longer than the drying time. On average, it can take anywhere from a few days to a couple of weeks for the stain to fully cure. It is important to note that the curing time can also be affected by environmental conditions such as temperature and humidity.
During the curing process, it is best to avoid placing any objects or heavy furniture on the stained wood surface. This will prevent any imprints or damage to the stain before it has fully cured. Additionally, avoid exposing the wood to excess moisture or harsh chemicals during this period.
Once the staining process is complete, and the stain has had enough time to dry and cure, you can proceed with sealing the wood. Sealing not only enhances the appearance of the wood but also provides an extra layer of protection against moisture, water damage, and other external factors.
Now that you understand the importance of drying and curing, let’s move on to the next step: sealing the stained wood surface.
Maintaining The Sealed Wood
To maintain sealed wood after staining, apply a thin coat of polyurethane using a brush or cloth. Ensure even coverage, then let the wood dry thoroughly. Sand lightly between coats, and repeat the sealing process 2-3 times for long-lasting protection and a beautiful finish.
Regular Cleaning
Once you have sealed your wood, it’s important to maintain its cleanliness to ensure its longevity. Regular cleaning of the sealed wood will prevent the buildup of dirt, dust, and stains that can damage the protective seal. For routine cleaning, use a soft cloth or mop dampened with a mild wood cleaner or a mixture of water and dish soap. Gently wipe the surface in the direction of the wood grain, being careful not to scrub too aggressively.
To tackle stubborn stains or sticky residue, opt for a cleaner designed specifically for sealed wood. These cleaners are formulated to remove tough stains without stripping away the protective seal. Apply a small amount of cleaner to a clean cloth and gently rub the affected area until the stain is lifted. Afterward, wipe the surface with a damp cloth to remove any residue, and then dry with a clean, absorbent towel.
Reapplication Of Sealer
Over time, the protective seal on the wood may start to wear off due to regular use and exposure to the elements. To ensure that your wood stays protected, it is important to reapply the sealer periodically. The frequency of reapplication will depend on the type of sealer used and the level of wear and tear the wood is subjected to. As a general rule of thumb, you should consider resealing your wood every 1 to 3 years.
Before reapplying the sealer, it is crucial to prepare the wood surface properly. Start by cleaning the wood as mentioned earlier to remove any dirt or residue. If there are any rough spots or imperfections, gently sand them down with fine-grit sandpaper. Once the surface is smooth and clean, apply a thin, even layer of sealer using a brush or roller. Allow the sealer to dry completely before applying additional coats as needed.
Remember, maintaining the sealed wood not only enhances its appearance but also prolongs its lifespan. By following these simple yet essential steps of regular cleaning and reapplication of sealer, you can ensure that your wood remains protected and beautiful for years to come.

Frequently Asked Questions For How To Seal Wood After Staining
Do I Need To Seal the Wood After Staining?
Yes, it is recommended to seal wood after staining. Sealing helps protect the wood from moisture, UV damage, and other potential harm. It also enhances the appearance and durability of the stained wood.
Do I Need To Clear Coat Stained Wood?
Yes, it is recommended to clear-coat stained wood. Clear coating adds a protective layer that enhances durability and prevents damage from moisture, scratches, and UV rays. It also gives a glossy or matte finish, depending on your preference.
How Do You Seal Stained Wood For Outdoors?
To seal stained wood for outdoors, use a high-quality outdoor wood sealer. Ensure the wood is clean and dry before applying. Use a brush or sprayer to evenly coat the wood surface with the sealer. Allow it to dry completely before using the wood outdoors.
Do You Need To Oil Wood After Staining?
Yes, it’s necessary to oil wood after staining. Oiling helps to nourish the wood, enhance its natural beauty, and protect it from moisture and other damage. It also helps to seal the stain and make it last longer.
Conclusion
Sealing wood after staining is crucial for preserving its beauty and durability. By following the proper techniques, you can ensure a long-lasting finish that protects against moisture and daily wear. Remember to choose the right sealant for your specific project and apply it carefully for the best results.
With the right approach, your stained wood can maintain its exquisite appearance for years to come.
Yes — always apply a clear coat over stained wood. Stain provides color but offers no surface protection whatsoever. Without a clear topcoat, the stained surface will absorb moisture, scratch easily, and fade from UV exposure within months.
When clear coating is required:
- Furniture, tables, and countertops (abrasion and spill protection)
- Floors (high traffic, moisture)
- Outdoor wood exposed to rain and UV
- Any project that will be touched regularly
When you might skip it: Rough outdoor structures (fence posts, garden beds) where appearance matters less than cost, or when using a stain + polyurethane combo product that already seals as it colors.
How many coats? Apply a minimum of 2 coats; 3 coats is standard for durable, long-lasting protection on furniture and floors. Sand lightly between coats with 320-grit for best adhesion.
How Do You Seal Stained Wood For Outdoors?
To seal stained wood for outdoors, use a high-quality outdoor wood sealer. Ensure the wood is clean and dry before applying. Use a brush or sprayer to evenly coat the wood surface with the sealer. Allow it to dry completely before using the wood outdoors.
Do You Need To Oil Wood After Staining?
Yes, it’s necessary to oil wood after staining. Oiling helps to nourish the wood, enhance its natural beauty, and protect it from moisture and other damage. It also helps to seal the stain and make it last longer.
Conclusion
Sealing wood after staining is crucial for preserving its beauty and durability. By following the proper techniques, you can ensure a long-lasting finish that protects against moisture and daily wear. Remember to choose the right sealant for your specific project and apply it carefully for the best results.
With the right approach, your stained wood can maintain its exquisite appearance for years to come.