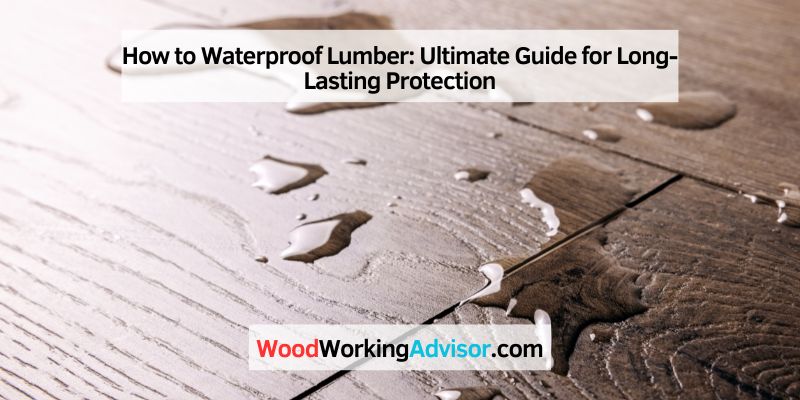
How to Waterproof Lumber: Ultimate Guide for Long-Lasting Protection
To waterproof lumber, apply a waterproofing sealant or paint to protect it from moisture and damage. Waterproofing lumber is essential to prevent water damage, rot, and decay.
By applying a waterproofing sealant or paint, you can protect the wood from moisture and ensure its longevity. Whether you are planning to use lumber for outdoor projects, such as decks or fences, or indoor applications like bathrooms and kitchens, waterproofing is crucial.
It creates a protective barrier that prevents water penetration, thereby guarding against swelling, warping, and other related issues. We will discuss various methods and products to effectively waterproof lumber, ensuring its durability and resistance to weather elements. Regular maintenance and reapplication of the waterproofing sealant will help maintain the wood’s protective barrier for years to come.
Choosing The Right Type Of Waterproofing
To waterproof lumber, it’s essential to choose the right type of waterproofing. One effective method is using sealants specifically designed for wood, such as polyurethane or marine-grade varnishes. These sealants provide a protective barrier against moisture, preventing rot and decay.
Properly waterproofing lumber is essential to protect it from moisture and extend its lifespan. When it comes to choosing the right type of waterproofing, there are two main options available: oil-based sealers and water-based sealers.
Oil-based Sealers
Oil-based sealers are a popular choice for waterproofing lumber due to their versatility and durability. These sealers are typically made from a combination of oils, such as linseed or tung oil, and solvents that penetrate deep into the wood to create a protective barrier.
One of the key advantages of oil-based sealers is their ability to enrich the natural beauty of the wood, enhancing its color and grain. These sealers also provide excellent protection against water damage and UV radiation. They are suitable for both indoor and outdoor applications, making them ideal for decks, fences, and furniture.
Applying oil-based sealers is a straightforward process. It usually involves using a brush, roller, or sprayer to evenly coat the surface of the lumber. For best results, ensure that the wood is clean, dry, and free from any previous coatings. Multiple coats may be necessary for enhanced protection.
Water-based Sealers
Water-based sealers are an eco-friendly alternative to oil-based sealers. These sealers are made from a combination of water and synthetic resins, making them low in VOC (volatile organic compounds) and safer to use.
One of the notable benefits of water-based sealers is their fast drying time. They typically dry within a few hours, allowing for quick completion of projects. These sealers provide excellent resistance to moisture and mold growth, making them suitable for both interior and exterior applications.
Water-based sealers also offer easy cleanup, as they can be rinsed with water and soap. They are available in various finishes, including clear, semi-transparent, and solid colors, providing options for different aesthetic preferences.
To apply water-based sealers, ensure that the wood is clean and dry. Use a brush, roller, or sprayer to apply an even coat, following the manufacturer’s instructions. Depending on the level of protection desired, multiple coats may be required.
In conclusion, choosing the right type of waterproofing for your lumber is crucial in enhancing its durability and protecting it from moisture damage. Whether you opt for oil-based sealers or water-based sealers, both provide effective waterproofing solutions. Consider your project requirements and personal preferences to make an informed decision that suits your needs.
Preparing The Lumber Surface
Prepare the lumber surface before waterproofing by following these steps: clean the wood, sand it down, fill any cracks or holes, and apply a primer. Finally, seal the lumber with a waterproof coating for long-lasting protection against moisture.
Cleaning The Surface
Before waterproofing lumber, it is essential to clean the surface thoroughly. This step removes any dirt, debris, or previous finishes that may hinder proper adherence of the waterproofing agent. Cleaning the lumber ensures that you have a clean and smooth surface to work with, enabling the waterproofing treatment to penetrate adequately.
Here’s how you can clean the surface effectively:
- Begin by removing any loose dirt, dust, or debris from the lumber using a stiff brush or broom. This step is important as it prevents the buildup of particles that may affect the waterproofing process.
- If there are any visible stains or mildew growth on the lumber, use a mixture of mild soap or detergent and water to gently scrub the affected areas. Rinse thoroughly with clean water and allow the lumber to dry completely.
- In some cases, you may encounter stubborn stains that are difficult to remove with soap and water alone. For such situations, consider using a specialized wood cleaner or a mixture of bleach and water. Follow the instructions provided by the manufacturer and take necessary precautions while handling and using these chemicals.
Sanding And Smoothening
After cleaning the lumber, sanding and smoothening the surface is the next crucial step. Sanding helps remove any rough spots, uneven surfaces, or splinters, resulting in a smooth and even base for the waterproofing treatment.
Here’s how you can sand and smoothen the surface effectively:
- Begin by selecting the appropriate sandpaper grit for your specific project. In general, a medium or fine-grit sandpaper, such as 80 or 120, works well for preparing the surface of lumber.
- Using a sanding block or an electric sander, gently sand the entire surface of the lumber in the direction of the grain. This technique helps maintain the natural appearance and integrity of the wood.
- Pay attention to any rough areas, corners, or edges that may require additional sanding. By smoothing out these imperfections, you ensure an even application of the waterproofing agent.
- Once you have completed sanding, remove any sawdust or debris from the surface using a clean cloth or vacuum. Make sure the surface is free from any particles before proceeding to the next step.
By following these steps to clean, sand, and smoothen the lumber surface, you set the foundation for an effective and long-lasting waterproofing treatment. Taking the time to properly prepare the surface ensures that the waterproofing agent can penetrate the wood effectively and provide the protection your lumber deserves.
Application Of Waterproofing
Applying a waterproofing solution to lumber is crucial to protect it from moisture, rot, and decay. The application of waterproofing can be done in various ways to ensure thorough coverage and protection. From using a brush or roller to spraying the waterproofing solution, each method has its advantages and can be suitable for different applications.
Using A Brush Or Roller
Brushes or rollers are commonly used to apply waterproofing solutions to lumber. The brushing or rolling method allows for precise application and ensures that the solution penetrates into the wood fibers. It is essential to apply an even coat, covering the entire surface of the lumber, paying particular attention to end grain and joints. This method is practical for smaller projects or areas that require detailed application.
Spraying The Waterproofing Solution
Spraying the waterproofing solution is another effective method for coating lumber. It offers quicker application and can cover large surface areas more efficiently. When using a sprayer, it is important to adjust the nozzle for proper coverage and to avoid overspray. It is advisable to apply multiple thin coats, ensuring the solution saturates the wood evenly. This method is suitable for larger projects and can provide consistent coverage across various wood surfaces.
Drying And Curing Process
The drying and curing process is an essential step when waterproofing lumber. This process involves allowing sufficient drying time and ensuring proper ventilation to achieve the best results. By following these steps carefully, you can effectively waterproof your lumber and protect it from moisture damage. In this article, we will discuss each of these steps in detail.
Allowing Sufficient Drying Time
To ensure the lumber is properly waterproofed, it is crucial to allow sufficient drying time. This step is vital as it helps eliminate any excess moisture trapped within the wood. When the lumber contains high levels of moisture, it may hinder the effectiveness of the waterproofing process.
It is recommended to determine the initial moisture content of the lumber before applying any waterproofing solution. The ideal moisture content for most lumber is around 15%. If the moisture content exceeds this level, it is necessary to dry the lumber before proceeding further.
- Start by stacking the lumber evenly, with small gaps between each piece to facilitate airflow.
- Ensure that the lumber is protected from direct sunlight and extreme weather conditions, as this can lead to uneven drying.
- Allow the lumber to dry naturally over time. The duration may vary depending on the type and thickness of the wood, as well as the ambient humidity level.
- Regularly monitor the moisture content of the lumber using a moisture meter. When the desired moisture level is reached, you can move on to the next step of the waterproofing process.
Ensuring Proper Ventilation
Proper ventilation is crucial during the drying and curing process, as it helps to remove excess moisture and promote even drying. Without adequate airflow, the lumber may develop mold or mildew, compromising its structural integrity.
You can ensure proper ventilation by following these guidelines:
- Position the lumber stacks in a well-ventilated area, away from any obstructions.
- Avoid storing the lumber in a confined space or stacking it too close together, as this can hinder proper airflow.
- Consider using fans or natural air currents to improve circulation around the lumber stacks.
- Regularly inspect the lumber for any signs of mold or moisture accumulation. If such issues arise, adjust the ventilation accordingly and address the problem promptly.
By ensuring proper ventilation and allowing sufficient drying time, you can effectively prepare your lumber for the waterproofing process. These steps are essential for achieving long-lasting results and protecting your lumber from moisture damage.
Maintenance And Longevity
To ensure the maintenance and longevity of lumber, it’s essential to properly waterproof it. This can be achieved through various methods such as applying sealants or using waterproof coatings, helping to protect the wood from moisture damage and extending its lifespan.
Regular Inspections
Regular inspections are crucial for maintaining and prolonging the lifespan of your waterproofed lumber. By conducting routine inspections, you can identify any potential issues early on and address them promptly. Inspecting your lumber periodically allows you to catch any signs of deterioration, such as cracking, splintering, or discoloration, which can lead to water damage if left untreated. Additionally, regular inspections give you the opportunity to assess the effectiveness of your waterproofing efforts and determine whether reapplication is necessary.
Reapplication Of Waterproofing
Reapplying waterproofing regularly is an essential part of maintaining the longevity of your lumber. Over time, the protective layer of waterproofing can wear off due to exposure to the elements. To ensure ongoing protection, it’s important to periodically reapply a new coat of waterproofing to your lumber. The frequency of reapplication will vary depending on factors such as the type of waterproofing product used and the level of exposure to moisture. However, as a general guideline, it is recommended to reapply waterproofing every 1-3 years. This will help to ensure that your lumber remains well-protected and resistant to water damage.
Frequently Asked Questions On How To Waterproof Lumber
What Is The Best Way To Waterproof Wood?
The best way to waterproof wood is by using a waterproof sealant or wood preservative. Applying a waterproof paint or varnish can also help protect the wood from moisture. Regular maintenance and reapplication may be necessary to ensure long-lasting waterproofing.
Can You Seal Wood For Outdoor Use?
Yes, you can seal wood for outdoor use. Sealing wood helps protect it from moisture, UV rays, and other elements. Use a waterproof sealant or exterior-grade paint to create a protective barrier that extends the lifespan of the wood. Regular maintenance may be needed to keep the seal intact.
How Do You Seal Raw Wood For Outdoor Use?
To seal raw wood for outdoor use, follow these steps:
1. Start by sanding the wood to create a smooth surface.
2. Apply a wood sealer or primer to protect against moisture.
3. Let it dry completely before applying an outdoor wood stain or paint.
4. Apply multiple coats, following the instructions on the product.
5. Allow ample drying time between coats for the best results.
How Do You Waterproof Framing Lumber?
To waterproof framing lumber, use a waterproofing sealant or paint and apply it to the surfaces. Ensure all areas are covered for maximum protection against moisture. Repeat this process regularly to maintain the waterproofing.
Conclusion
To sum up, waterproofing lumber is a crucial step to protect it from moisture damage. By following the right methods and using quality products, you can ensure the longevity of your lumber projects. Whether for outdoor furniture or construction, a little extra effort in waterproofing can make a big difference in the durability and lifespan of your lumber.