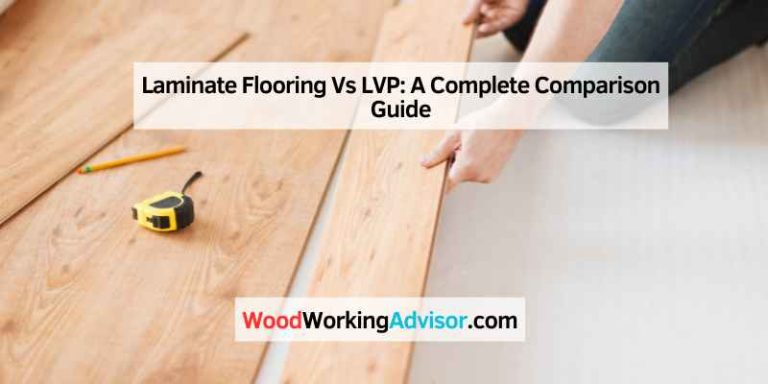
Installation of LVP Flooring: A Step-by-Step Guide
To install LVP flooring, ensure subfloor is clean and level. Lay planks according to manufacturer instructions.
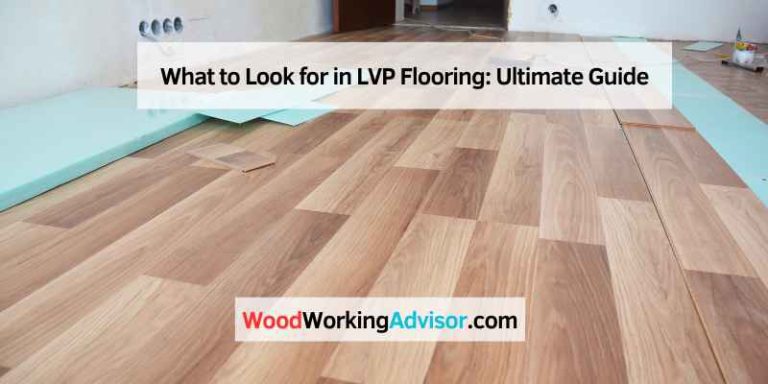
Luxury Vinyl Plank (LVP) flooring is durable and attractive, but a successful install depends on properly preparing the subfloor and following the manufacturer’s plank-fitting sequence.
Credit: buildmyplace.com
Preparation
When installing LVP flooring, it is important to properly prepare the area. This includes ensuring the subfloor is clean and level, and determining if underlayment is necessary based on the type of surface it will be installed on.
Gathering Necessary Tools
Before you begin installing your LVP flooring, gather the following tools:
- Vinyl Flooring Cutter
- Tape Measure
- Pencil
- Utility Knife
- Spacers
- Hammer
- Tapping Block
- Crosscut Power Saw
- Level
- Underlayment
- Primer
- Roller
Understanding Underlayment
If you’re not laying the LVP over cushion-backed vinyl or below-grade tile, you’ll need underlayment. Ensure to use it when covering hardwood, uncushioned vinyl, and concrete floors.
Do you need underlayment? Learn more at Floor City.
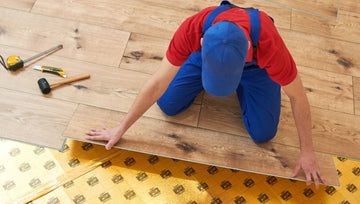
Installation Process
- Prepare the subfloor by ensuring it is clean and level.
- Begin in a corner and work your way across the room.
- Measure the length needed and cut the planks accordingly.
- Ensure accurate measurements to avoid wastage.
- Fit the final rows snugly for a seamless finish.
- Use spacers to maintain a consistent gap around the edges.
Special Considerations
When installing LVP flooring, there are certain special considerations that should be taken into account to ensure a successful installation. These considerations include installing transition mouldings and handling uneven subfloors.
Installing Transition Mouldings
Transition mouldings are essential for a seamless and professional-looking LVP flooring installation. These mouldings are used to bridge the gap between different types of flooring or to cover the expansion gap around the perimeter of a room. When installing transition mouldings, it is important to measure and cut them accurately to fit the specific transition areas. Additionally, proper installation techniques, such as using the appropriate transition moulding for different flooring heights and securing them firmly in place, are crucial to achieving a polished and durable finish.
Handling Uneven Subfloors
Uneven subfloors can pose challenges during the installation of LVP flooring. It is important to address any unevenness in the subfloor to prevent issues such as shifting, gaps, or squeaking in the installed LVP planks. One effective way to handle uneven subfloors is to use a self-leveling underlayment to create a smooth and level surface for the LVP installation. Additionally, checking and repairing any dips, bumps, or imperfections in the subfloor before beginning the installation process can help ensure a stable and visually appealing outcome for the LVP flooring.

Credit: www.thewcsupply.com
Maintenance And Aftercare
After installing LVP flooring, proper maintenance and aftercare are essential for longevity. Regularly cleaning and wiping the flooring with a damp cloth will keep it free from dirt and stains. It’s also important to avoid using harsh chemicals or abrasive tools, as they can damage the surface.
Cleaning Instructions
Keeping your LVP flooring clean is essential to maintain its appearance and prolong its lifespan. Here are some cleaning instructions to follow:
- Regularly sweep or vacuum the floor to remove dirt, dust, and debris. Be sure to use a soft-bristle broom or vacuum attachment to avoid scratching the surface.
- Damp mop the floor using a pH-neutral cleaner specifically formulated for LVP flooring. Avoid using harsh chemicals, abrasive cleaners, or excessive amounts of water, as they can damage the floor’s protective top layer.
- Wipe up any spills or stains immediately using a cloth or mop. Blot the area gently, and if necessary, use a mild cleaner to remove the stain. Avoid scrubbing vigorously to prevent damage to the floor.
- Place doormats at entryways to trap dirt and moisture from shoes. This will help prevent dirt from being tracked onto the LVP flooring and reduce the need for frequent cleaning.
- Avoid dragging heavy furniture or objects across the floor, as this can cause scratches or dents. Use furniture pads or felt protectors under the legs of chairs, tables, and other furniture to minimize the risk of damage.
Dealing With Common Issues
While LVP flooring is durable and resistant to many types of wear and tear, it is important to address common issues promptly to maintain its quality. Here are some tips for dealing with common issues:
- Scratches: For minor scratches, use a color-matched LVP filler or a touch-up pen to conceal the damage. For deeper scratches, consult a flooring professional for guidance on repairing or replacing the affected planks.
- Stains: For stubborn stains, try using a non-abrasive cleaner specifically designed for LVP flooring and follow the manufacturer’s instructions. Avoid using harsh chemicals or abrasive scrubbing tools, as they can damage the floor’s surface.
- Indentations: To minimize the appearance of indentations from heavy furniture or objects, place furniture pads or felt protectors under the legs. If indentations persist, use a hairdryer on a low heat setting to gently heat the affected area and carefully lift the fibers using a clean cloth or the edge of a spoon.
- Water damage: LVP flooring is water-resistant, but excessive moisture can still cause damage over time. Immediately wipe up any spills or standing water to prevent moisture from seeping into the floor. If water damage occurs, consult a flooring professional for assistance.
- UV fading: While LVP flooring is resistant to fading, prolonged exposure to direct sunlight can still cause some fading over time. Use curtains, blinds, or UV-blocking window films to protect your LVP flooring from excessive sunlight.
By following these cleaning instructions and addressing common issues promptly, you can ensure that your LVP flooring remains in excellent condition for years to come.
Best Tool for LVP Flooring Installation

Roberts LVP Flooring Cutter (Up to 7.5 in. wide)
Guillotine-style cutter makes straight and 45-degree cuts in luxury vinyl plank without a saw — no dust, no noise, and no safety risks from saw blades. Much faster than a utility knife for repetitive cuts.
- Best for: Making straight crosscuts on LVP planks during floor installation
- Why we picked it: Dust-free, silent cutting — ideal for indoor work without ventilation
- Main drawback: Cannot make curved or notched cuts — still need a jigsaw for those
More LVP installation tools
|
Option 1 Tapping Block + Pull Bar Set
|
Option 2 LVP Flooring Expansion Spacers
|
Option 3 LVP Underlayment with Moisture Barrier
|
As an Amazon Associate we earn from qualifying purchases.
Frequently Asked Questions For Installation Of Lvp Flooring
Does Lvp Require Underlayment?
Yes, use underlayment when installing LVP over hardwood, concrete, or uncushioned vinyl floors. No underlayment needed over cushion-backed vinyl or tile floors.
How Should Lvp Be Installed?
Install LVP by measuring, cutting, and staggering planks. Avoid common mistakes like improper corners or vents. Use underlayment for most applications, barring some exceptions. Level the subfloor for glue-down installation to prevent peeling. Floating LVP is more forgiving of slight imperfections.
Do You Install Lvp Directly On Subfloor?
Yes, LVP can be installed directly on subfloors such as concrete or ceramic tile if clean and level. Underlayment may be required for existing hardwood or vinyl floors to protect against moisture damage and sound transmission. LVP can be glued down or installed as a floating floor.
Is Lvp Glued Down Or Floating?
LVP can be either glued down or floating. Glue-down LVP requires a leveled subfloor to avoid peeling or cracking, while floating LVP can mask slight subfloor imperfections.
Conclusion
The installation of LVP flooring can transform any space with its durability and aesthetic appeal. By following the proper installation process, including preparing the subfloor and carefully laying the planks, homeowners can achieve a professional-looking result. With the versatility of LVP, it can be installed over various existing surfaces, making it a practical flooring option for many households.