Easy Steps for Installing Vinyl Flooring Planks: A Complete Guide
To install vinyl flooring planks, ensure the subfloor is clean and level. Begin in a corner, interlocking the planks along the length of the room for a secure fit.
Vinyl flooring planks are a popular choice for homeowners due to their durability, easy maintenance, and wide range of styles. Installing these planks is a straightforward process that can be completed as a DIY project with the right tools and materials.
By following the manufacturer’s instructions and taking the time to properly prepare the subfloor, you can achieve a professional-looking finish that will enhance the aesthetic appeal of your space.
Choosing The Right Vinyl Flooring Planks
When it comes to choosing the right vinyl flooring planks, there are key factors to consider. Let’s delve into how to pick the perfect vinyl flooring for your space.
Consider Your Space
Consider the size and layout of your space before selecting vinyl flooring planks. Ensure you measure accurately to avoid any shortages or wastage.
Examine Different Styles And Patterns
Examine various styles and patterns available in vinyl flooring planks. Choose a design that complements your existing decor or fits your desired aesthetic.
Gathering Tools And Materials
In order to properly install vinyl flooring planks, it is crucial to gather the necessary tools and materials beforehand.
Essential Tools
- Measuring tape
- Utility knife
- Tapping block
- Spacers
- Level
Required Materials
- Vinyl flooring planks
- Underlayment
- Adhesive
- Transition strips
Preparing The Subfloor
Before installing vinyl flooring planks, it is crucial to properly prepare the subfloor to ensure a smooth and long-lasting installation. This involves cleaning and smoothing the subfloor, as well as checking for moisture and levelness.
Cleaning And Smoothing The Subfloor
To begin, remove any existing flooring and clean the subfloor thoroughly. Use a broom and vacuum to eliminate debris and dust. Address any existing unevenness or imperfections by filling in gaps or cracks with a suitable floor leveling compound. Sand down any high spots and smooth out any rough areas to create a flat surface for the vinyl planks.
Checking For Moisture And Levelness
Before proceeding, it is important to assess the subfloor for moisture and levelness. Conduct a moisture test using a moisture meter to ensure the subfloor’s moisture content is within the acceptable range for vinyl installation. Additionally, utilize a straight edge or level to check for any uneven areas or dips in the subfloor that may need to be addressed.
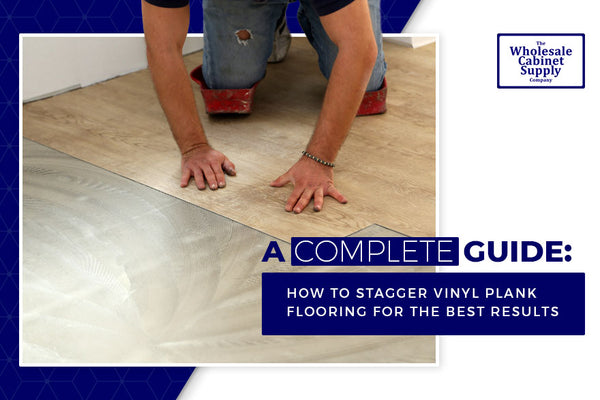
Credit: www.thewcsupply.com
Installing The Vinyl Flooring Planks
When it comes to renovating your home, installing vinyl flooring planks can be an excellent choice. Not only are they durable and cost-effective, but they also offer a wide range of styles to suit any aesthetic. But how do you go about installing the vinyl flooring planks? In this guide, we’ll walk you through the process step by step, ensuring an easy and successful installation.
Starting With The First Row
The first step in installing vinyl flooring planks is to start with the first row. This is crucial as it sets the foundation for the rest of the installation. Begin by measuring the length of your room and determining the center point. Mark this center point on the starting wall using a pencil.
Next, lay out the vinyl flooring planks alongside the marked starting wall, ensuring they are perfectly aligned. This will help you visualize the layout and make any necessary adjustments before actually starting the installation. Once you are satisfied with the arrangement, you can proceed to secure and cut the planks.
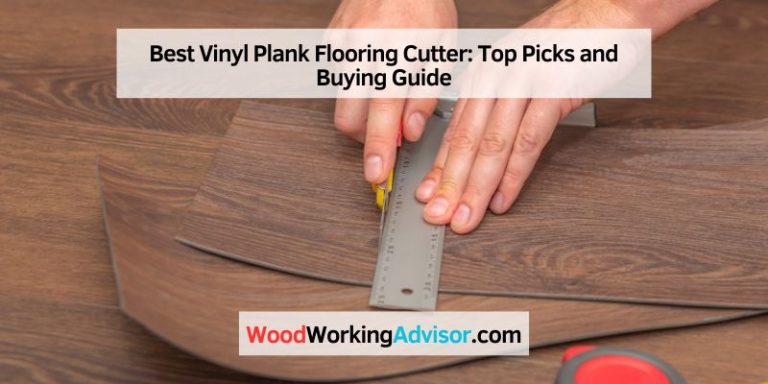
Securing And Cutting The Planks
Securing the vinyl flooring planks is the next step in the installation process. The planks typically come with interlocking edges, allowing for easy installation. Start by placing the first plank against the starting wall, aligning it with the center point. Gently press the plank down, ensuring it is securely locked into place with the adjacent plank.
Continue installing the planks row by row, making sure each plank is tightly secured with the previous one. Remember to leave a small gap, approximately 1/4 inch, between the planks and the walls to allow for expansion. This gap can later be covered by baseboards or molding.
As you reach the end of a row, you may need to cut the remaining plank to fit. To do this, measure the gap between the last installed plank and the wall and transfer the measurement onto the plank. Use a sharp utility knife to carefully cut the plank along the marked line, ensuring a precise fit.
Repeat the process of securing and cutting the planks until you reach the opposite wall, completing the installation. Take your time and double-check each step to ensure a seamless and professional finish.
In conclusion, installing vinyl flooring planks can be a DIY-friendly project that adds both beauty and functionality to your home. Start with the first row, secure and cut the planks with precision, and watch as your floor transforms before your eyes. With a bit of patience and attention to detail, you’ll be enjoying your new vinyl flooring in no time.
Finishing Touches And Maintenance
To complete the installation of vinyl flooring planks, it’s essential to focus on the finishing touches and ongoing maintenance. This includes ensuring all planks are securely in place and applying any necessary sealants or protective coatings. Regular cleaning and maintaining a proper humidity level will help preserve the appearance and longevity of the flooring.
After successfully installing vinyl flooring planks, it’s essential to focus on the finishing touches and maintenance to ensure the longevity and attractiveness of your floors. This section will provide you with the necessary information on adding transition strips and tips for maintenance and care.
Adding Transition Strips
Transition strips are crucial for a smooth and seamless appearance when transitioning from one type of flooring to another. Here are a few key steps to follow when adding transition strips to your vinyl flooring:
- Measure the length of the area where the transition strip is required.
- Trim the transition strip to the appropriate length, ensuring a precise fit.
- Apply adhesive or screws to secure the transition strip in place.
- Check that the strip is level and aligns with the vinyl flooring.
Adding transition strips not only enhances the visual appeal of your flooring but also helps prevent tripping hazards and protects the edges of your vinyl planks.
Tips For Maintenance And Care
Proper maintenance and care will prolong the life and pristine condition of your vinyl flooring. Follow these tips to ensure your vinyl planks stay in exceptional shape:
- Sweep or vacuum your vinyl flooring regularly to remove dirt and debris.
- Wipe up spills immediately to prevent stains and damage to the protective layer.
- Use a mild cleaning solution specifically designed for vinyl flooring, following the manufacturer’s instructions.
- Place mats or rugs at entryways to minimize the tracking of dirt and grit.
- Avoid using abrasive cleaners or tools that may scratch or damage the vinyl surface.
- Prevent direct sunlight exposure by using blinds or curtains to avoid discoloration or fading.
By incorporating these maintenance and care practices into your routine, you can preserve the beauty and durability of your vinyl flooring for years to come.
Remember, proper finishing touches like transition strips and regular maintenance are essential for maintaining the longevity and aesthetic appeal of your vinyl plank flooring. By following these guidelines, you can enjoy your beautiful floors with peace of mind.
Credit: www.homedepot.com
Frequently Asked Questions For Vinyl Flooring Planks How To Install
How Do You Install Vinyl Flooring Planks?
To install vinyl flooring planks, start by preparing the subfloor, removing any existing flooring and smoothing out any imperfections. Then, lay down the underlayment and cut the vinyl planks to size. Finally, click the planks together and secure them in place, following the manufacturer’s instructions for your specific product.
Can Vinyl Flooring Planks Be Installed Over Existing Flooring?
Yes, vinyl flooring planks can generally be installed over existing flooring, as long as the surface is smooth, clean, and level. However, it’s important to check the manufacturer’s guidelines to ensure compatibility with your specific product, as some types of existing flooring may need to be removed before installation.
Do Vinyl Flooring Planks Require Underlayment?
While not always necessary, using an underlayment beneath vinyl flooring planks can offer several benefits. Underlayment can help level out minor subfloor imperfections, reduce noise, provide insulation, and add extra cushioning underfoot. However, be sure to check the manufacturer’s guidelines to see if underlayment is recommended for your specific product.
Conclusion
In sum, installing vinyl flooring planks may seem daunting at first, but it is a manageable DIY project with the right guidance. By following these steps, you can transform your space with a durable and stylish flooring option. Make sure to measure accurately and take your time for a professional-looking finish.