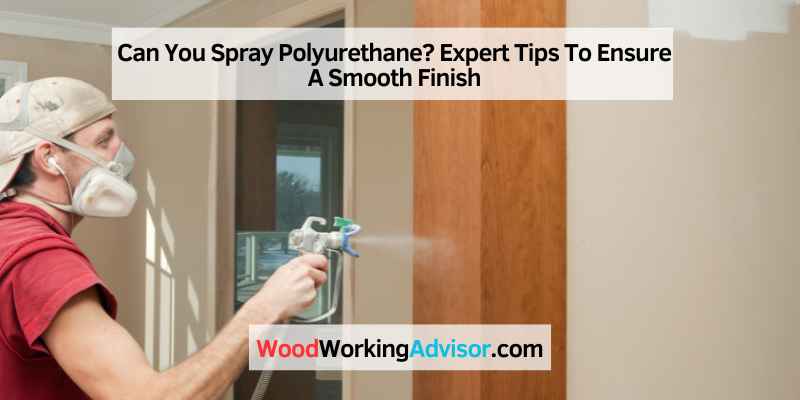
Can You Spray Polyurethane? Quick & Easy Techniques
Yes, you can spray polyurethane. Spraying offers a smooth, even finish and is suitable for large surfaces.
Polyurethane is a popular finish for wood projects, providing durability and a glossy appearance. Spraying polyurethane can be a more efficient method than brushing, especially for large or intricate surfaces. The process requires proper preparation and technique to achieve a professional result.
Ensure your workspace is well-ventilated to avoid inhaling fumes. Use a quality spray gun and maintain a consistent distance from the surface. Light, even coats are key to avoiding drips and achieving a smooth finish. Spraying can save time and effort while delivering a superior look to your woodworking projects.
Introduction To Spray Polyurethane
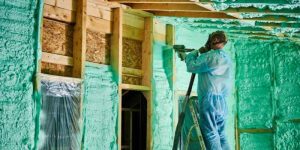
Spray polyurethane is a versatile and durable finish. It is used to protect wood, metal, and other materials. This method involves using a spray gun to apply the polyurethane. This creates a smooth and even coat. It is popular for both DIY projects and professional work.
Benefits Of Using Polyurethane
Polyurethane offers many benefits. It provides a strong and hard finish. It is resistant to water and chemicals. Here are some key benefits:
- Durability: Polyurethane is tough and long-lasting.
- Protection: It guards against scratches and wear.
- Versatility: Suitable for various surfaces like wood and metal.
- Ease of Application: Simple to apply with a brush or spray.
- Quick Drying: Dries faster than other finishes.
Comparing Spray Vs. Brush Application
Choosing between spray and brush application can be tricky. Both methods have pros and cons. Here’s a comparison:
| Aspect | Spray Application | Brush Application |
|---|---|---|
| Finish Quality | Smooth and even | May show brush marks |
| Application Speed | Faster | Slower |
| Control | Requires skill | Easier to control |
| Cleanup | More involved | Simple |
Spraying is faster and gives a smooth finish. Brushing is easier but may leave marks. Choose based on your skill level and project needs.
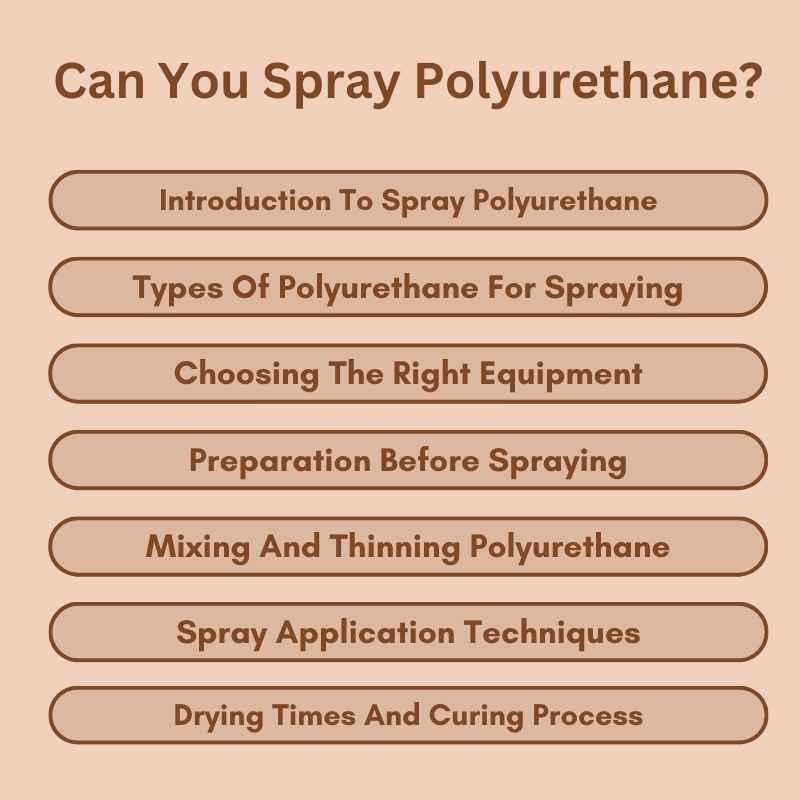
Types Of Polyurethane For Spraying
Spraying polyurethane can give your projects a smooth, professional finish. Understanding the types of polyurethane available is key. This section covers the two main types: Oil-Based and Water-Based Polyurethane.
Oil-based Polyurethane
Oil-based polyurethane is known for its durability. It provides a rich, warm finish. This type is suitable for high-traffic areas. It takes longer to dry compared to water-based options. The drying time can be around 24 hours. Oil-based polyurethane tends to yellow over time. This can add a vintage look to your project. It is also more resistant to heat and chemicals.
Water-based Polyurethane
Water-based polyurethane is easy to clean up. It dries quicker than oil-based types. Usually, it dries within 2 to 4 hours. This type is less likely to yellow over time. It provides a clear, natural look. Water-based polyurethane is ideal for light-colored woods. It emits fewer odors and is more environmentally friendly. It is also less resistant to heat and chemicals compared to oil-based options.
Choosing The Right Equipment
Spraying polyurethane can provide a smooth and professional finish. Choosing the right equipment is crucial. The right tools ensure an even coat and fewer mistakes.
Selecting A Spray Gun
A spray gun is essential for applying polyurethane. You have two main choices: HVLP (High Volume Low Pressure) and LVLP (Low Volume Low Pressure).
- HVLP Spray Guns: These guns use high volume and low pressure. They are great for detailed work. They reduce overspray and waste.
- LVLP Spray Guns: These guns use low volume and low pressure. They work well with small compressors. They are good for beginners.
Understanding Compressors And Turbines
A compressor or turbine powers your spray gun. Each has its advantages.
| Type | Features |
|---|---|
| Compressors |
|
| Turbines |
|
Choose a compressor if you need versatility. Choose a turbine for ease of use.
Preparation Before Spraying
Before spraying polyurethane, proper preparation is essential. This ensures a smooth and even finish. Below are key steps for preparation before spraying.
Surface Preparation
Proper surface preparation is crucial for a smooth finish. Follow these steps:
- Clean the surface: Remove dust, dirt, and grease.
- Sand the surface: Use fine-grit sandpaper for a smooth base.
- Remove old finishes: Strip any old paint or varnish.
- Fill gaps and cracks: Use wood filler for a uniform surface.
- Wipe down: Use a damp cloth to remove sanding dust.
Safety Measures And Workspace Setup
Safety is very important. Set up your workspace correctly:
- Wear protective gear: Use gloves, goggles, and a mask.
- Ventilate the area: Open windows or use fans.
- Cover nearby objects: Use drop cloths to protect from overspray.
- Check the sprayer: Ensure it is clean and functional.
- Test spray: Practice on a scrap piece to adjust settings.
| Item | Purpose |
|---|---|
| Gloves | Protect hands from chemicals |
| Goggles | Protect eyes from splashes |
| Mask | Prevent inhalation of fumes |
| Drop cloths | Protect surrounding areas |
Follow these steps for a safe and effective spraying process.
Mixing And Thinning Polyurethane
Mixing and thinning polyurethane is crucial for a smooth finish. Proper mixing ensures consistency. Thinning helps with application and drying. This guide covers both processes.
The Mixing Process
First, open the polyurethane can and stir gently. Use a wooden stick for this step. Stirring blends the contents evenly. Avoid shaking the can. Shaking creates bubbles. Bubbles ruin the finish. Stir for about five minutes.
After stirring, check for lumps. If you see lumps, strain the polyurethane. Use a paint strainer or cheesecloth. This removes any impurities. Clean polyurethane ensures a smooth coat.
Thinning Ratios And Techniques
Thinning polyurethane makes it easier to apply. Use mineral spirits for oil-based polyurethane. Use water for water-based polyurethane. The standard thinning ratio is 3:1. This means three parts polyurethane to one part thinner.
| Type of Polyurethane | Thinner | Ratio |
|---|---|---|
| Oil-Based | Mineral Spirits | 3:1 |
| Water-Based | Water | 3:1 |
For thin coats, use a spray gun. A spray gun gives an even finish. Adjust the spray gun settings. Set to a low pressure. This ensures a fine mist. Hold the spray gun 12 inches from the surface. Spray in a steady, sweeping motion.
For brush application, dip the brush lightly. Apply in thin, even strokes. Thin coats dry faster. They also reduce drips and runs.
Spray Application Techniques
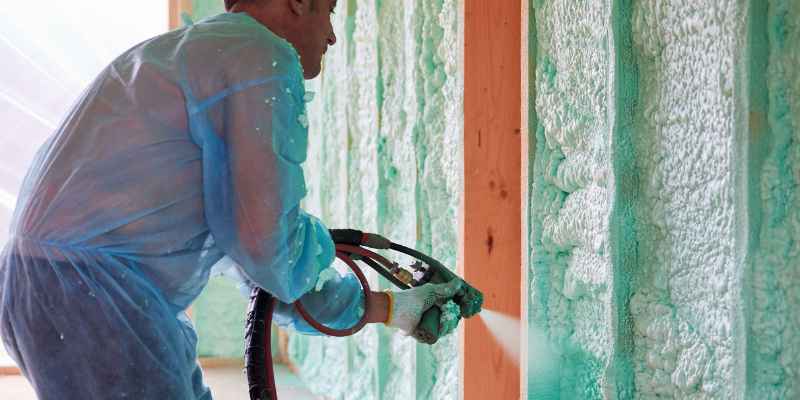
Spraying polyurethane can give a smooth, professional finish. It’s essential to master the spray application techniques. This will ensure an even coat and avoid common issues.
Technique Fundamentals
Start by shaking the can well. Shake for at least two minutes. This ensures the polyurethane mixes properly. Hold the can about 12 inches from the surface. This distance prevents drips and runs.
Spray in a steady, sweeping motion. Overlap each pass by 50%. This ensures even coverage. Avoid stopping in one spot. This can cause puddles and uneven thickness.
Apply multiple thin coats. Thick coats can run and sag. Allow each coat to dry fully. Check the can for drying times. Usually, it takes a few hours.
Avoiding Common Mistakes
Common mistakes can ruin your finish. Avoid spraying too close. This causes runs and drips. Maintain the 12-inch distance.
Don’t rush the process. Allow proper drying time between coats. Rushing can lead to a tacky surface. Follow the instructions on the can.
Avoid spraying in humid or windy conditions. Humidity can cause a cloudy finish. Wind can blow dust onto the wet surface.
Keep the spray can moving. Stopping can cause an uneven coat. Practice your spraying motion on a scrap piece first.
Clean the spray nozzle between uses. A clogged nozzle can cause uneven spraying. Wipe it with a cloth after each use.
| Common Mistake | Solution |
|---|---|
| Spraying too close | Maintain a 12-inch distance |
| Rushing the process | Allow proper drying time |
| Spraying in humidity | Choose a dry day |
| Stopping the spray | Keep a steady motion |
| Clogged nozzle | Clean after each use |
Drying Times And Curing Process
Understanding the drying and curing process of polyurethane can be tricky. It is crucial to know how long it takes for the finish to dry and cure. This will ensure you achieve the best results. In this section, we will explore the different drying phases and factors that affect curing time.
Understanding Drying Phases
Polyurethane drying happens in two main phases: initial drying and curing.
- Initial Drying: This is the time it takes for the surface to feel dry. It usually takes around 2-4 hours.
- Curing: This phase is when the polyurethane fully hardens. It can take up to 30 days.
During the initial drying, avoid touching the surface. The finish can still be damaged at this stage.
Once the curing phase begins, the polyurethane will harden and become durable. It is essential to wait for full curing before heavy use.
Factors Affecting Curing Time
Several factors can affect the curing time of polyurethane. Understanding these will help you manage your project timeline better.
| Factor | Effect on Curing Time |
|---|---|
| Temperature | High temperatures speed up drying and curing. |
| Humidity | High humidity slows down drying and curing. |
| Ventilation | Good airflow helps in faster drying. |
| Coat Thickness | Thicker coats take longer to cure. |
Ensure the environment is optimal for drying and curing. This will result in a smooth and durable finish.
In summary, understanding the drying phases and factors affecting curing time is essential. This knowledge will help you achieve the best results with your polyurethane projects.
Finishing Touches And Maintenance
Applying polyurethane gives a beautiful finish to wood projects. Proper finishing and care ensure longevity. This section covers essential steps for a lasting finish.
Sanding Between Coats
Sanding between coats is crucial. It smooths the surface and ensures better adhesion. Use 220-grit sandpaper for the best results. Sand lightly and evenly.
- Wait until the coat is dry.
- Sand gently in the direction of the wood grain.
- Remove all dust before applying the next coat.
Long-term Care For Polyurethane Finishes
Maintaining your polyurethane finish keeps it looking fresh. Regular cleaning and proper care extend its life. Here are some tips for long-term care:
- Dust surfaces with a soft, dry cloth.
- Clean spills immediately to avoid damage.
- Avoid harsh chemicals; use mild soap and water.
- Protect from direct sunlight to prevent fading.
By following these steps, your polyurethane finish will remain beautiful and durable.
Troubleshooting Common Issues
Spraying polyurethane can sometimes lead to issues. Knowing how to fix these problems can save your project. This guide will help you address common issues with spraying polyurethane.
Addressing Sags And Runs
Sags and runs happen when too much polyurethane is applied. This can cause it to drip and form uneven areas.
- Preventing Sags: Apply thin coats. Let each coat dry before applying another.
- Fixing Sags: Sand the sagged area lightly. Reapply a thin coat of polyurethane.
Keep the spray gun moving to avoid applying too much in one spot. Adjust the spray pattern for better control.
Fixing Bubbles And Blushing
Bubbles and blushing can ruin the finish. Bubbles form when air gets trapped. Blushing happens due to moisture.
- Preventing Bubbles: Stir the polyurethane gently. Do not shake the can.
- Fixing Bubbles: Sand the bubbles out. Apply a new, thin coat.
To prevent blushing, work in a dry area. Ensure the surface is clean and dry before spraying.
- Fixing Blushing: Sand the affected area. Reapply the polyurethane in a dry environment.
Using these tips can help you achieve a smooth finish. Proper technique and environment are key.
Advanced Tips For Professionals
For those with experience, spraying polyurethane is an art. Professional tips can help achieve a flawless finish. Learn advanced techniques to speed up your workflow.
Techniques For A Flawless Finish
Achieving a flawless finish requires patience and skill. Follow these steps for best results:
- Prep the Surface: Sand the surface smoothly. Remove dust with a tack cloth.
- Thin the Polyurethane: Use mineral spirits to thin it. This helps in even spraying.
- Use a Quality Sprayer: A good sprayer ensures even application. Adjust settings as needed.
- Apply Thin Coats: Apply multiple thin coats. Avoid thick layers to prevent drips.
- Sand Between Coats: Lightly sand between coats. Use fine-grit sandpaper for smoothness.
Speeding Up The Application Process
Professional tasks often need speed without compromising quality. Here’s how to be efficient:
- Choose Fast-Drying Polyurethane: Use polyurethane that dries quickly. This reduces waiting time.
- Use a Spray Booth: A spray booth minimizes dust and speeds up drying.
- Warm the Polyurethane: Warm it before spraying. This makes it flow better and dry faster.
- Use Fans: Set up fans to increase airflow. This helps in quicker drying.
- Plan Your Work Area: Organize your workspace. Have all tools ready to avoid delays.
With these professional tips, you can achieve a perfect finish quickly. Master these techniques and improve your workflow efficiently.
Frequently Asked Questions
Can You Spray Polyurethane On Wood?
Yes, you can spray polyurethane on wood. It provides a smooth finish and protects the surface. Ensure proper ventilation and follow manufacturer instructions.
What Type Of Sprayer To Use For Polyurethane?
Use an HVLP (High Volume Low Pressure) sprayer. It provides better control and reduces overspray, ensuring a smooth finish.
How Many Coats Of Polyurethane Should You Spray?
Typically, apply 2-3 coats of polyurethane. Sand lightly between coats for a smoother finish and better adhesion.
Do You Need To Thin Polyurethane For Spraying?
Yes, you often need to thin polyurethane for spraying. Use mineral spirits or a compatible thinner, following manufacturer recommendations.
Conclusion
Spraying polyurethane is a practical option for many projects. It provides a smooth, durable finish with minimal effort. Ensure proper ventilation and use the right tools for best results. Always follow safety guidelines to protect yourself. Embrace the benefits of spraying polyurethane for your next woodworking or DIY project.