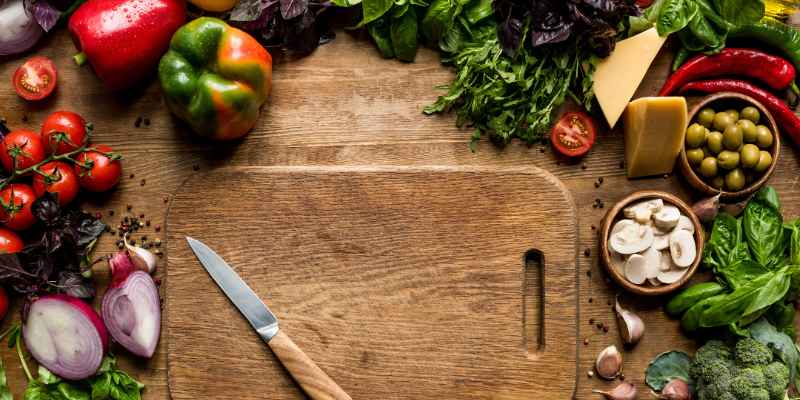
DIY Cutting Boards Designs: 10 Creative Ideas for Your Kitchen
Learn how to make your own cutting board designs with minimal tools and any type of wood. Follow step-by-step tutorials from DIY Huntress, FixThisBuildThat, The Navage Patch, Six Eight Woodworks and Caleb’s Fine Woodworking on YouTube to create beautiful and functional cutting boards.
Alternatively, learn about the safe and healthy way to choose the right wood for a cutting board with tips from Tom’s Woodworking and Carpentry and Healthier Homes. Avoid using woods with toxic properties or treated with chemicals not safe for food contact.
This DIY woodworking project is a great way to create unique and personalized gifts for family and friends.
Choosing The Right Wood
Choosing the right wood is crucial when designing DIY cutting boards. It’s important to choose food-safe woods that are not treated with synthetic oils or sealers, and to avoid woods with toxic properties or those treated with chemicals not suitable for food contact.
Variety of wood selection can add uniqueness to the design.
important when choosing the right wood for your DIY cutting board? Not only does the wood need to be safe for food preparation, but it also needs to be durable and aesthetically pleasing. In this blog post, we will explore the best woods for cutting boards and the woods to avoid to help you create a stunning and functional cutting board.
Best Wood For Cutting Boards
When choosing the perfect wood for your DIY cutting board, there are a few excellent options to consider. These woods are not only durable but also have a beautiful appearance that will make your cutting board stand out.
- Maple: This classic wood is a popular choice for cutting boards due to its hardness and durability. Maple is resistant to scratches and dents, making it an excellent choice for frequent use in the kitchen. It is also light in color, which provides a stunning contrast to darker woods or can be used solo for a traditional look.
- Walnut: If you’re looking for a statement piece, walnut is the wood for you. Its dark, rich color and unique pattern lend themselves to a beautiful cutting board. Walnut is also a durable wood that can withstand chopping and slicing without showing signs of wear and tear.
- Cherry: Another popular choice for cutting boards is cherry wood, with its beautiful reddish color and unique grain pattern. Not only is it visually appealing, but it is also a durable wood that resists bacteria growth, making it a safe choice for food preparation.
Woods To Avoid
While many woods are beautiful and could make great cutting boards, some should be avoided due to their toxicity or softness. Here are a few woods to avoid for your DIY cutting board project:
- Teak: While teak is a popular wood for outdoor furniture due to its resistance to weather, it should not be used for cutting boards. Teak can release natural oils that are toxic and harmful when ingested.
- Bamboo: Bamboo is an eco-friendly choice for many products, but it is not ideal for cutting boards. The natural glue used to hold bamboo strips together can be harmful if ingested and could potentially damage your knife edges due to its excessive hardness.
- Pine: Pine is a softwood that is prone to scratches and cuts, making it unsuitable for frequent chopping and slicing. It is also a porous wood that can harbor bacteria, making it a poor choice for food preparation.
In conclusion, choosing the right wood for your DIY cutting board project is crucial to creating a functional and beautiful piece. Maple, walnut, and cherry are just a few of the best woods for cutting boards due to their durability and stunning appearance. Remember to avoid woods that are toxic or too soft, such as teak, bamboo, and pine. With the right wood and some basic woodworking skills, you can create a one-of-a-kind cutting board that will add beauty and functionality to your kitchen for years to come.
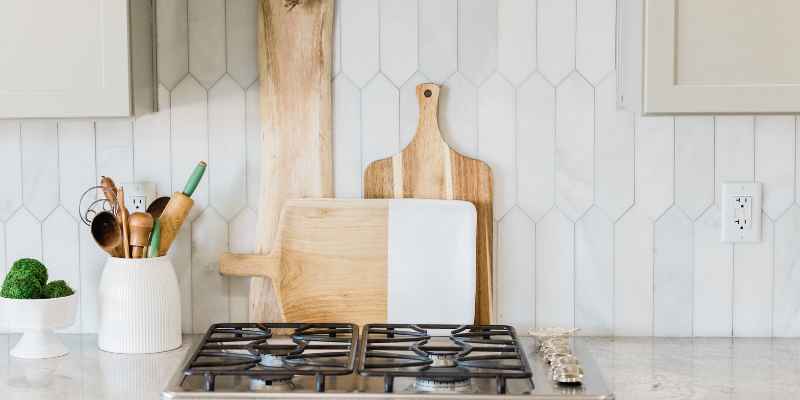
DIY Cutting Board Designs
Learn how to create a beautiful DIY cutting board with minimal tools. Choose from various designs such as the Chevron pattern or make your own unique style using different types of wood like maple or walnut. End-grain and edge-grain cuts, surfacing strips, superior glue-ups, finishing tips, and more can all be found in online tutorials.
Cutting boards are essential tools in any kitchen. They not only provide a safe workspace for chopping, slicing and dicing, but also add an aesthetic appeal to your kitchen. While the market offers a vast range of cutting board designs, making one yourself can be a fun and creative experience. Here are some DIY cutting board designs you can explore.
Chevron Cutting Board
A chevron cutting board is a geometric patterned board that gives your kitchen an eye-catching look. You can make a chevron board by gluing together multiple strips of wood in a V-shape. Start by cutting your strips at a 45-degree angle and then glue them together to form a pattern. Once the glue dries, sand the board until it’s smooth and then apply a food-safe finish.
End-Grain Cutting Board
An end-grain cutting board is a durable and attractive option that shows off the grain and natural beauty of wood. With this design, the end grain of the wood faces up, creating a textured surface perfect for slicing and dicing. To make this board, cut your wood into strips and glue them together on their ends, then sand and finish the board.
Etched Cutting Board
An etched cutting board adds personality and flair to your kitchen. With this design, you can etch any pattern or design onto the board’s surface. You can use a wood-burning tool, a Cricut machine, or even a laser engraver to etch your board. Just make sure to use food-safe materials and finishes.
Butcher Block Cutting Board
A butcher block cutting board is a sturdy and long-lasting option that’s perfect for heavy-duty chopping and cutting. To make this board, you’ll need to glue together multiple strips of wood in a checkerboard pattern. You’ll then need to sand and finish the surface until it’s smooth and ready to use.
Charcuterie Board
A charcuterie board is a perfect option for hosting parties and serving hors d’oeuvres. This board typically features a mix of meats, cheeses, fruits, and nuts arranged in an attractive way. To make this board, you can use any of the designs above or create your own unique pattern. Just make sure to choose food-safe materials and finishes.
In Conclusion
DIY cutting board designs offer a fun and creative way to personalize your kitchen. Whether you want to create an eye-catching pattern or a durable surface for chopping, these designs provide endless possibilities. So get creative and start crafting your own cutting board today!
Woodworking Techniques For Cutting Boards
Learn various woodworking techniques for creating beautiful and functional DIY cutting board designs. From selecting the right wood to cutting and sanding, this tutorial covers everything you need to know to create your own unique cutting board.
When it comes to making a DIY cutting board, the woodworking techniques you use can make all the difference between an average board and a stunning one. In this article, we will discuss some essential woodworking techniques for cutting boards that will help you achieve a high-quality result. We will explore milling wood, edge grain cuts, face grain boards, glue-up tips, and flattening boards. So, let’s get started.
Milling Wood
Before you can start making your cutting board, you need to mill the wood properly. Milling refers to preparing the wood surface by flattening and squaring it. It is essential to mill the wood correctly so that the cutting board does not warp or twist over time. One easy way to mill wood is to use a jointer and a planer. The jointer is used to flatten one side of the wood, while the planer is used to create a parallel surface on the opposite side.
Edge Grain Cuts
Edge grain cuts are a common woodworking technique for making a cutting board. This type of cut involves gluing boards together so that their edges form the surface of the board. Edge grain cutting boards are durable and less prone to damage than face grain and end grain boards. You can use different patterns and combinations of wood species to create unique designs.
Face Grain Boards
Face grain boards are another type of cutting board that you can make using woodworking techniques. These boards are made by gluing boards together so that their wide surfaces form the surface of the board. Face grain boards are easier to make than end grain and edge grain boards and require less sanding. However, they are less durable and more prone to scratches and knife marks.
Glue Up Tips
When gluing the boards together, it is crucial to use the right clamping technique and let the glue dry properly. One way to ensure a proper clamp is to use cauls, which are flat, straight pieces of wood that help to distribute pressure evenly. It is also important to use good-quality wood glue and to apply a generous amount.
Flattening Boards
Flattening the board is the final step in making a cutting board using woodworking techniques. If the board is not flat, it will not sit level on the countertop and may not be suitable for cutting. One way to flatten the board is to use a hand plane or a belt sander. It is essential to take your time and take small amounts of wood off until the board is flat.
In conclusion, making a cutting board using woodworking techniques may seem challenging, but it is a fun and rewarding task. By following the tips and techniques outlined above, you can create a unique, high-quality cutting board that you can be proud of.
Finishing Touches
Looking to add the finishing touches to your DIY cutting board design? Consider adding juice grooves or handles for added functionality. Choose from a variety of wood options such as maple or walnut to create a unique and personalized cutting board that is both functional and aesthetically pleasing.
Juice Grooves:
If you are looking to add an additional level of functionality to your DIY cutting board, consider adding juice grooves to catch the excess liquids. Juice grooves can be easily carved using a router, or you can use a V-groove bit to achieve a similar effect. When adding juice grooves to your cutting board, make sure that they are deep enough to keep the liquids from flowing over the edges but not so deep that they affect the cutting surface.
Handle Placement:
If you plan on using your DIY cutting board for heavy-duty tasks such as chopping large vegetables or meats, consider adding handles to make it easier to lift and maneuver. When placing handles, make sure to position them in a way that balances the weight of the board. You can also opt for a unique handle design that adds to its aesthetic appeal.
Sanding Tips:
Achieving a smooth and polished surface is crucial to the overall appearance of your DIY cutting board. When sanding, start with a coarse grit sandpaper (80-100) and work your way up to finer grits (220-400) to achieve a smooth and even finish. Sand in the direction of the grain, and do not use a circular motion as it can cause scratch marks on the surface.
Wood Finishes:
When selecting a wood finish for your DIY cutting board, make sure to choose one that is food-safe, durable, and easy to apply. Mineral oil and beeswax are popular options for their natural and non-toxic properties. You can also opt for a food-grade varnish or a polyurethane coating for added protection. When applying the finish, make sure to follow the manufacturer’s instructions carefully.
Wood Waxing:
Wood wax is an excellent option for DIY cutting boards as it adds a protective layer while enhancing the natural beauty of the wood. When applying wood wax, make sure to clean the surface thoroughly to remove any dirt, debris, or leftover food particles. Use a soft cloth to apply a thin layer of wax, and let it sit for a few minutes before buffing it with a clean cloth. Repeat the process as necessary until you achieve the desired level of shine.
With these tips and techniques, adding finishing touches to your DIY cutting board has never been easier. From juice grooves and handle placement to sanding tips and wood finishes, you can create a beautiful and functional cutting board that’s perfect for your kitchen.
DIY Cutting Board Gift Ideas
Create a unique and thoughtful gift with these DIY cutting board designs. From simple end-grain boards to beautiful etched patterns, there is a cutting board for every skill level and occasion. Check out tutorials on YouTube and learn how to make your own cutting board with minimal tools and materials.
harmful to humans, such as lead or arsenic. With that being said, DIY cutting board gift ideas can be a fun and creative way to show your loved ones that you care. Here are three ideas for creating unique cutting boards that will be cherished for years to come.
Simple Woodworking Project
For beginners, a simple woodworking project may be the perfect starting point for creating a DIY cutting board gift. One option is to use a piece of hardwood and cut it into a rectangular shape. Sand the edges and add a food-safe oil or wax to protect the wood. For a decorative touch, wood burning tools can be used to create a custom design or pattern on the surface of the cutting board.
Wooden Boxes In Boxes
Another creative DIY cutting board gift idea is to make a set of wooden boxes in boxes. Using varying sizes of hardwood, boxes with lids can be created and placed inside one another. The largest box can serve as a cutting board, which can be removed for use and replaced inside the box for storage. Adding a wood burner design or pattern to the outside of the boxes can create a beautiful and personalized gift.
Wood Burned Designs
If you are looking for a more intricate design for your DIY cutting board gift, using a wood burner may be the way to go. This tool allows you to create detailed designs such as typography, patterns, and other decorations on the surface of the cutting board. From a personalized design to a decorative pattern, the possibilities are endless, and the result is a unique gift that will be cherished for years to come.
In conclusion, DIY cutting board gifts can be simple, creative and unique. A beginner can start with an easy project, while more advanced woodworkers can create intricate designs using a wood burner. By following these ideas, you can create a memorable and practical gift that will be treasured by your loved ones.
Cutting Board Use And Care
Looking for DIY cutting board designs? Check out online tutorials and videos for inspiration and instructions. Remember to choose food-safe wood and avoid chemicals or toxic materials to keep your cutting board in top shape. Follow proper care and maintenance for a long-lasting and safe cutting board.
Cutting boards are an essential part of any kitchen, but with heavy usage, they can also be a source of bacterial growth. Proper care and maintenance of cutting boards ensure their longevity and cleanliness. Whether you have a wooden, plastic, or bamboo cutting board, the following tips will help you keep them in top condition.
How to Flatten End-Grain Safely
End-grain cutting boards are sturdy, durable, and perfect for chopping vegetables and meats. But over time, the board can warp and develop an uneven surface. One way to fix this is by flattening the board using a drum sander. However, this method can be dangerous and should be done with caution.
To safely flatten an end-grain cutting board, follow the steps outlined in this video by Caleb’s Fine Woodworking. Start by sanding the top surface until it’s completely flat, and then flip the board over and repeat the process on the bottom surface. Be sure to wear protective gear, including eye and ear protection, and use steady, controlled movements during the sanding process.
Keeping Boards Clean and Sanitized
One of the most important steps in cutting board care is keeping them clean and sanitized. After each use, rinse the board with warm, soapy water, and dry it thoroughly with a paper towel or clean cloth. Avoid soaking wooden cutting boards as they can absorb water and warp. If you’re dealing with tough stains or odors, you can use a paste of baking soda and water to scrub the board clean.
To sanitize your cutting board, use a mixture of vinegar and water or hydrogen peroxide and water. These natural products are great for killing bacteria and leaving your board smelling fresh and clean. Spray the solution onto your cutting board and let it sit for a few minutes before wiping it off with a damp cloth.
The Healthiest Cutting Board to Use
When it comes to choosing the healthiest cutting board to use, wooden boards are the best. Wood has natural antimicrobial properties that are known to kill germs and bacteria. Furthermore, wood is a non-porous material, which means that bacteria cannot penetrate it as easily as other materials like plastic or bamboo.
In conclusion, cutting board use and care are crucial for maintaining a clean and bacteria-free kitchen environment. With the right steps, you can ensure the longevity of your cutting board and keep your family safe from foodborne illnesses. Remember to follow the instructions for flattening your end-grain board safely, keep it clean and sanitized, and choose wood over other materials for the healthiest cutting board choice.
Unique Cutting Board Designs
Bring creativity to your kitchen by making your own unique cutting board designs with DIY projects. From end-grain cutting boards to cheese boards, the possibilities are endless with a variety of different wood types and patterns to choose from.
When searching for the perfect cutting board, one can get overwhelmed by the countless options available on the market. Cutting boards come in various shapes, sizes, and materials, but nothing beats the artistry and uniqueness of DIY cutting boards. If you’re looking for a cutting board that speaks to your personality, then considering unique cutting board designs is the way to go. In this article, we delve into some of the most intricate and artistic wood cutting board patterns and templates that you can DIY at home to stand out in your kitchen.
Intricate And Artistic Designs
If you’re a lover of intricacy and attention to detail, then this type of cutting board design is meant for you. These designs require exceptional skills, creativity, and patience to complete. Some examples of intricate designs include geometric shapes, interlocking puzzles, and intricate inlays. To achieve some of these designs, you’ll need to use different types of woods with varying textures and colors. By using a combination of woods, you can achieve a beautiful and more striking cutting board.
Wood Cutting Board Patterns And Templates
If you’re not sure where to start with your cutting board, using templates or patterns is an excellent way to begin. Patterns and templates make it easier to plan and execute your cutting board design. There are numerous templates available, and you can choose them depending on your skill level. From simple designs like stripes and checkerboard patterns to complex ones like stars, hexagons, and sunbursts, there’s no shortage of ideas and patterns you can choose from. Using a template or pattern ensures your finished product is symmetrical and well balanced.
In conclusion, when you decide to create a DIY cutting board, there are no limits to your creativity and design options. Whether you choose to use templates or design your board from scratch, make sure to consider the type of wood you’re using, and the texture and color of the wood to make your cutting board stand out in your kitchen. With the right tools and a creative mindset, you can create a cutting board that’s both functional and aesthetic to your liking.
Selling Cutting Boards
Looking to sell DIY cutting boards? You can try creating unique designs with a variety of wood types including maple and walnut. Whether it’s end-grain or edge-grain, creating a functional and stylish cutting board can be a satisfying DIY project.
Profitability Of Selling Cutting Boards
Selling cutting boards can be a profitable business venture. The cost of production is relatively low since all you need is wood, a saw, and some sandpaper. You can sell cutting boards for a much higher price than what it cost to produce them, resulting in a healthy profit margin. Additionally, you can save on marketing costs by utilizing social media platforms, such as Instagram, to showcase your designs, showcase your crafting process, and interact with potential customers. With high demand and low overhead costs, selling cutting boards can be a lucrative business for DIY enthusiasts.
Market Demand For Cutting Boards
The market demand for cutting boards is consistently high. Every household owns a cutting board, and it’s likely they will need to replace them after years of use. The obsession with minimalism has also driven individuals to switch to high-quality, versatile products such as cutting boards that can multitask as a food platter or decoration. With more people looking for unique and personalized products, you can tap into the market by making custom cutting boards with intricate designs and engravings. Additionally, cutting boards make ideal gifts, wedding favors, and corporate giveaways, ensuring a steady stream of customers.
In conclusion, while the market demand for cutting boards is high, the key to a profitable business is to differentiate yourself from competitors. Focus on creating innovative designs, emphasizing high-quality craftsmanship, and providing top-notch customer service to get your brand noticed. By doing so, you can establish yourself as a go-to source for cutting boards, attract loyal customers, and enjoy long-term success in your venture.
Frequently Asked Questions For Diy Cutting Boards Designs
What Wood Is Best For A Cutting Board?
The best wood for a cutting board is hardwoods such as maple, walnut or cherry. Avoid softwoods like pine or cedar because they have open grains that can harbor bacteria. Choose a wood that is food-safe and not treated with synthetic oils or sealers or toxic chemicals.
End-grain cutting boards are also preferred due to their durability.
Is There Money In Making Cutting Boards?
Yes, there is money in making cutting boards. It can be a profitable business as it’s a necessary and popular kitchen tool. But the amount of money you make depends on factors like the quality of the cutting board, the materials used, pricing, marketing, and distribution.
How Do You Flatten The End-grain On A Cutting Board?
To flatten the end-grain on a cutting board, you can safely use a drum sander or a router sled. Both tools will effectively level the surface. Afterward, sand the board by hand until it is completely smooth.
What Should Cutting Boards Not Be Made Of?
Cutting boards should not be made of woods with toxic properties or ones that have been treated with chemicals not suitable for food contact. It’s essential to choose one that’s food-safe and not treated with synthetic oils or sealers.
Conclusion
Designing and creating your own DIY cutting board can bring a sense of pride and satisfaction to your woodworking projects. With the right tools and materials, you can make a cutting board that is both functional and aesthetically pleasing. Whether you choose an end-grain or edge-grain board, there are numerous designs and patterns that you can experiment with.
So, roll up your sleeves, grab your tools, and start creating your own personalized cutting board.