How to Color Wood Glue (Without Weakening the Bond)
PVA wood glue takes liquid dye, powdered pigment, or acrylic paint — but more than about 5% of the glue’s weight weakens the bond. Overdo it on a load-bearing joint like a mortise-and-tenon and the joint can slip under stress. This guide covers safe dye ratios for PVA and epoxy, which colorants actually hold color after clamping, and how to color a glue line for an invisible seam or a bold decorative inlay.
Why Color Wood Glue in the First Place?
Best Wood Glue Colorant Pick
TransTint Dyes, Dark Walnut, 2 oz – $34.02
A fully-dissolved liquid dye — the colorant this guide recommends for staying safely under the 5% dye-to-glue ratio while matching a walnut or dark-wood glue line.
- Best for: Matching glue color to walnut, dark oak, or dark stain
- Why we picked it: Pre-dissolved, so it mixes evenly at the low ratios this guide recommends
- Main drawback: Pricier per ounce than food coloring or paint
Compare more wood glue colorant options
 Option 1 TransTint Dyes, Black, 2oz – $33.26
|
 Option 2 TransTint Dyes, Red Mahogany, 2 oz – $34.19
|
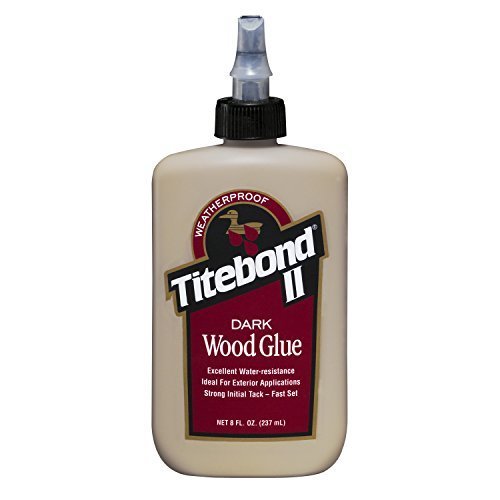
 Option 3 Titebond 3703 Dark Wood Glue, 8 oz – $6.99
|
As an Amazon Associate we earn from qualifying purchases.
Standard PVA wood glue dries translucent amber or white, which shows as a pale line in any glue joint — especially visible in end-grain gaps, dovetails, and any seam that will be finished clear rather than painted. Tinting the glue to match the wood (or the stain you plan to use) hides that line instead of fighting it with sanding and filler after the fact.
The reverse is also a real technique: woodworkers deliberately color glue darker than the wood — usually black or dark walnut — to turn a structural seam into a visible design line on cutting boards, segmented turnings, and epoxy river tables. Both goals use the same colorants; only the target shade changes.
How Much Dye Can You Add to Wood Glue Without Weakening It?
Keep any liquid dye, powdered pigment, or paint to roughly 5% of the glue’s total weight or less. PVA glue bonds by forming a continuous polymer film as the water in it evaporates; solids from a colorant sit inside that film and, past a certain concentration, break up the continuous bond path instead of just tinting it. At 5% or under, most colorants blend in without a measurable strength loss in normal shop use. Push past roughly 10–15% and clamped test joints start failing at a visibly lower load, particularly with powdered pigments, which add more dry solid per drop of color than a liquid dye does.
Epoxy tolerates pigment better than PVA because the resin and hardener cure through a chemical reaction, not water evaporation — but the epoxy manufacturer’s own maximum pigment load (usually printed on the product page or data sheet) still overrides any general rule of thumb here.
📊 Titebond’s own application guidance caps colorant addition at 5% of the adhesive’s weight for exactly this reason — go over that and you’re trading bond strength for color. — Source: Titebond Application Tips
Practical shortcut: a standard 4 oz glue bottle holds about 118 grams of glue, so 5% is roughly 6 grams — call it a scant teaspoon of liquid dye, or about 15–20 drops from a dropper bottle like TransTint. Mix a small test batch first, clamp a scrap joint, and let it cure fully (not just dry to the touch) before trusting the ratio on a real project.
Best Colorants for Wood Glue: TransTint Dye vs. Food Coloring vs. Acrylic Paint
Not every colorant behaves the same way once the glue cures. The table below is based on how each one actually performs in a PVA glue line after clamping and drying, not just how it looks wet.
| Colorant | Colorfastness After Curing | Best For |
|---|---|---|
| TransTint liquid dye | Holds true; fully dissolved, no settling | Matching a specific wood tone or shellac/stain color |
| Food coloring (gel or liquid) | Fades noticeably within months, especially in sunlight | A quick test batch or a project that won’t see UV exposure |
| Acrylic craft paint | Stable, but opaque — hides wood grain instead of tinting through it | Bold decorative glue lines where an opaque color is the goal |
| Universal tinting colorant | Stable; same colorant paint stores use to tint paint | Matching an existing painted or stained finish exactly |
For most projects, a liquid dye purpose-made for wood is the safer default — it’s pre-dissolved (so it mixes evenly with no grit), it’s formulated to stay at a low percentage of whatever it’s mixed into, and unlike food coloring it won’t visibly fade over the life of the piece.
Types of Wood Glue You Can Color
PVA Glue (Standard Wood Glue)
Standard yellow or white PVA glue is the easiest to color because it’s water-based — a water-soluble dye or a few drops of acrylic paint blends in with light stirring. Stick to the 5% rule above and test on scrap before committing to a visible joint.
Epoxy Resin
Epoxy needs a colorant made for resin, not a wood dye — epoxy-specific tints and pigments are formulated to disperse in the resin/hardener mix without interfering with the cure. This matters most for epoxy used as a wood filler or river-table pour, where a full cure is doing structural work, not just holding two flat faces together.
How to Mix and Apply Colored Wood Glue
Gather a container of wood glue, your chosen dye or pigment, a small mixing cup, a stir stick, and gloves before starting — pigments and dyes stain skin, and some carry a Prop 65 warning on the label.
- Test the ratio first: mix a small batch at roughly 5% colorant by weight (about 15–20 dye drops per 4 oz of glue) in a separate cup, never straight in the bottle.
- Stir until fully uniform: streaks of unmixed dye will show as darker lines once the glue dries and shrinks slightly.
- Dry-test on scrap: apply a bead to an offcut of the same wood species and let it cure fully — wet color reads darker and more saturated than cured color.
- Apply normally: colored glue clamps, spreads, and squeezes out exactly like uncolored glue — the dye doesn’t change working time or clamp time.
- Wipe squeeze-out immediately: colored glue that skins over on the wood surface is harder to sand off cleanly than clear glue, since any residue left behind is now visible rather than invisible.
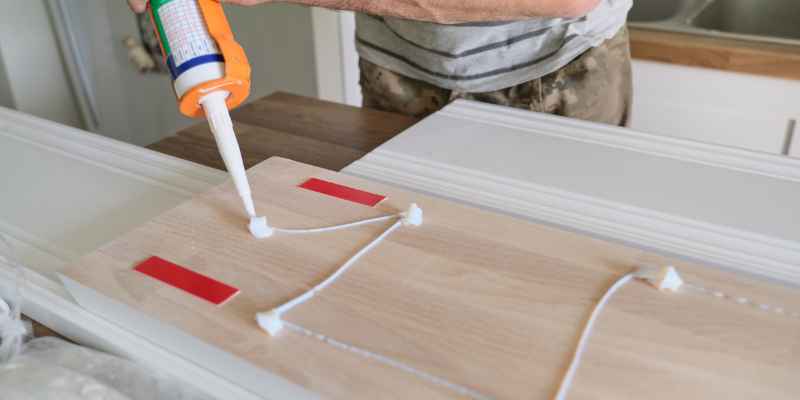
“The mistake I see most often on a first attempt is mixing the dye straight into the glue bottle and shaking it — you get a color gradient as you use the bottle down, because it never fully evens out. Mix a small test batch in a separate cup instead, every time.”
Coloring Glue for an Invisible Seam vs. a Decorative Glue-Line Inlay
These are opposite goals using the same colorants, so it’s worth deciding which one you’re actually after before mixing anything.
Matching the Wood for an Invisible Seam
Tint the glue as close as possible to the wood’s natural tone (or its stain color, if you’re staining after glue-up). TransTint dyes in wood-tone shades — walnut, mahogany, golden oak — are built for exactly this. Test on the actual offcut and under the finish you plan to apply, since a clear topcoat shifts color slightly and a stain will too.
Contrasting the Wood for a Decorative Inlay
Black-dyed glue lines are a deliberate design element in segmented turning, cutting boards, and box-making — a thin black line at a miter or lamination reads as an intentional inlay rather than a glue joint. This only works cleanly with tight, consistent joints, since a wide or uneven glue line in black is far more visible than the same gap would be in clear glue.
Drying, Curing, and Fixing Common Coloring Mistakes
Colored PVA glue follows the same dry-to-clamp-removal and full-cure timeline as clear glue — typically dry to the touch in 20–30 minutes, safe to unclamp in 30–60 minutes, and fully cured (maximum bond strength) after 24 hours. Colorant doesn’t meaningfully change these times at the 5%-or-under ratio this guide recommends.
Color Fading After Sanding or Finishing
If the color looks lighter after sanding, you’re seeing dye-saturated glue mixed with wood dust rather than a true fade — wipe the area with a damp cloth and check again before assuming the color failed. A genuine fade after finishing usually means food coloring or another non-lightfast colorant was used; switch to a wood-specific dye for the next attempt.
Uneven or Blotchy Color
Blotching almost always traces back to incomplete mixing (see the numbered steps above) rather than a bad colorant. If a joint already shows streaking, let it fully cure, then address it as a finishing problem — sand and re-color with matching stain rather than trying to re-dye cured glue, which won’t reabsorb pigment evenly.
Frequently Asked Questions
Can I add food coloring to wood glue?
Yes, food coloring mixes into PVA glue and works fine for a quick test batch. It isn’t lightfast, though — expect visible fading within months on anything exposed to sunlight, so switch to a wood dye like TransTint for a finished piece meant to last.
Does coloring wood glue weaken the bond?
Only if you add too much. Keep dye, pigment, or paint to roughly 5% of the glue’s weight or less and there’s no measurable strength loss in normal use. Past about 10–15%, clamped test joints start failing at a lower load, especially with powdered pigments.
Can I use acrylic paint to color wood glue?
Yes — acrylic paint mixes into PVA glue and holds its color well once cured. Unlike a dye, it’s opaque, so it hides the wood grain underneath rather than tinting through it, which makes it better suited to bold decorative lines than to an invisible, grain-matching seam.
What color should glue be for dark wood like walnut or mahogany?
A liquid wood dye in a matching wood-tone shade — dark walnut for walnut, red mahogany or brown mahogany for mahogany and cherry — gets closest, since these dyes are formulated to mimic the actual wood tone rather than an arbitrary brown. Always test on an offcut of the same species and under your planned finish before committing.
Is it necessary to color wood glue?
No — it’s purely cosmetic. Uncolored glue holds just as strong; coloring only matters if the glue line will be visible in the finished piece and you want it to either disappear into the wood or stand out as a deliberate design line.
How do I mix color into wood glue?
Mix a small test batch in a separate cup first — about 15–20 dye drops per 4 oz of glue, or roughly 5% by weight for pigment or paint — and stir until fully uniform before applying to a real joint. Mixing straight in the bottle risks an uneven gradient as you use it down.
Conclusion
Coloring wood glue is a simple mix-and-test process as long as you respect the one number that actually matters: keep colorant to about 5% of the glue’s weight so the bond stays as strong as an uncolored joint. A liquid dye like TransTint gives the most predictable, lightfast result whether you’re hiding a glue line in walnut or turning it into a bold black inlay.
For background on the glue itself before you start tinting it, see our wood glue buying guide, our notes on how long a glue line actually takes to dry, and how long to leave a joint clamped before it’s safe to handle.
If a colored joint doesn’t come out the way you wanted, separating glued wood pieces is possible without damaging the wood, and our guide to the strongest wood glue for furniture joints covers which formulas to reach for on load-bearing work.
Sponsored / affiliate links. As an Amazon Associate I earn from qualifying purchases. I may earn additional commission from eligible campaigns.