
How to Cut a 60-Degree Angle on a Table Saw (Miter & Bevel)
A 60-degree angle on a table saw is either a miter cut (an angled crosscut, blade upright) or a bevel cut (blade tilted through the board’s edge) — and most table saws only tilt to 45 degrees, so a true 60-degree bevel needs a workaround, not just turning the tilt knob further. This guide covers the exact setup for both cuts, the 30-degree complementary-angle trick for bevels beyond your saw’s tilt limit, and the mistakes that ruin the joint.
Miter Cut Or Bevel Cut: Which 60-Degree Angle Do You Need?
Before setting anything up, confirm which cut the project actually calls for — the setup, and what your table saw is capable of, is different for each.
- Miter cut — the blade stays vertical (90° to the table); the miter gauge or crosscut sled is set to the angle instead. This is what you want for an angled end cut, like a hexagon segment or a 60° corner joint. Every table saw’s miter gauge swings to 60° without issue.
- Bevel cut — the blade itself tilts, cutting an angled edge through the board’s thickness. Most contractor and cabinet-style 10-inch table saws cap bevel tilt at 45°–48°. A 60° bevel is past that limit on nearly every consumer table saw — see the workaround below before assuming your saw is broken.
If you came here for a 60-degree corner joint (hexagons, planters, picture frames with non-90° corners), that’s almost always a miter cut. If you need an angled edge for a joint bevel, read the bevel section below first.
How To Cut A 60-Degree Miter Angle On A Table Saw
This is the more common of the two cuts and the safer one to start with.
- Set the blade to 90°: Confirm the blade is square to the table using a square tool — it should not be tilted for this cut.
- Set the miter gauge to 60°: Most miter gauges are marked in 5° or 15° increments; find or mark 60° and lock it. Verify with a digital angle gauge or protractor rather than trusting the gauge’s stamped scale, which drifts with wear.
- Set blade height: Raise the blade about 1/4 inch above the material’s thickness — enough to clear the cut without exposing more blade than needed.
- Support the workpiece: Hold the material firmly against the miter gauge fence. For anything longer than about 2 feet, clamp an auxiliary fence or use a sled — an unsupported board can rotate mid-cut.
- Feed slowly and steadily: Push the miter gauge and material through the blade in one continuous motion. Stopping mid-cut on an angled pass is what causes the classic burn mark and step in the cut face.
- Check the result: Verify the finished angle with a protractor before cutting a second matching piece — this catches gauge drift before it ruins a pair of miters.
How To Cut A 60-Degree Bevel — And Why Most Blades Can’t Tilt That Far
A true 60° bevel tilts the blade 60° off vertical. The problem: bevel-tilting table saws are built and rated for a 0°–45° range (a few benchtop models stretch to 47°–48°) — none tilt to 60°. Forcing the tilt mechanism past its stop risks stripping the trunnion gear or bending the tilt arm.
📊 Standard 10-inch contractor and cabinet table saws are mechanically limited to a 0°–45° blade tilt range (a handful of benchtop models reach 47°–48°) — Source: table saw manufacturer spec sheets (Bosch, DeWalt, SawStop, Ridgid).
The workaround is the complementary-angle trick: subtract the bevel you need from 90°. For a 60° bevel, that’s 90 − 60 = 30°. Set the blade to 30° instead, then flip the workpiece up on its edge and run it through vertically, guided by a shop-made jig or a tall auxiliary fence clamped to the rip fence. The cut face still ends up at a true 60° angle to the board’s face — you’re just approaching it from the other side of the angle.
- Tilt the blade to 30°: Use a digital angle gauge on the blade itself — never trust the saw’s built-in bevel scale for anything beyond a rough setting.
- Build or attach a tall jig: Clamp a tall, straight board vertically to the rip fence so the workpiece can stand on edge and stay supported through the full height of the cut.
- Stand the workpiece on edge: Position it flat against the jig, with the face that will become the bevel toward the blade.
- Feed with a push block: Keep both hands clear of the blade path; a tall, narrow workpiece on edge is more prone to tipping than a flat cut, so go slower than usual.
- Verify with a protractor: Confirm the resulting bevel is 60° to the face before committing to a full run of parts.
“The tilt scale stamped on a table saw’s trunnion is a rough guide, not a measurement — on a saw that’s a few years old, it can be off by 1–2 degrees, which is enough to leave a visible gap on a six-piece miter joint. A digital angle gauge set directly on the blade removes that guesswork.”

Tools For Measuring And Verifying The Angle
The saw’s own miter and bevel scales are starting points, not final measurements. Verify every setup with one of these before making the actual cut:
- Digital angle gauge: Magnetic base, reads to a tenth of a degree — the most reliable option for bevel tilt, since it sits directly on the blade.
- Protractor or combination square with protractor head: Good for checking the miter gauge angle and the final cut on the workpiece itself.
- Drafting triangle (30-60-90): A quick, cheap way to spot-check a 60° angle without any measuring at all.

Best Angle Gauge Pick
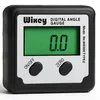
Wixey WR300 Digital Angle Gauge
Magnetic base reads blade tilt directly to 0.1° — the standard shop tool for verifying a 60° miter or the 30° complementary bevel setting before cutting.
- Best for: verifying bevel tilt directly on the blade
- Why we picked it: 0.1° resolution catches the gauge drift that ruins multi-piece miter joints
- Main drawback: pricier than a basic protractor
Compare more angle gauge options
 Option 1 POWERTEC 71828 Digital Angle Finder
|
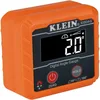 Option 2 Klein Tools 935DAG Digital Angle Gauge
|
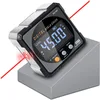 Option 3 4-Side Magnetic Digital Angle Finder
|
As an Amazon Associate we earn from qualifying purchases.
Common Mistakes When Cutting 60-Degree Angles
- Trusting the stamped bevel scale for the final setting — it’s a rough guide; verify with a digital angle gauge before cutting.
- Trying to tilt the blade past its rated maximum — if the tilt handle won’t turn further, that’s the saw’s mechanical limit, not a stuck bolt. Use the complementary-angle trick instead of forcing it.
- Cutting a whole batch before verifying the first piece — a 1–2 degree gauge error compounds fast on a multi-piece miter joint (a hexagon or octagon).
- Feeding too fast on an angled cut — angled cuts have less blade-to-material contact stability than a square crosscut; a slower, steadier feed avoids the burn marks and stepped edges that come from stalling mid-cut.
- Skipping the push stick on a beveled edge-cut — a workpiece on edge is narrower and less stable; hands stay farther from the blade than usual.
Safety Precautions
- Wear safety glasses and hearing protection every time — angled cuts don’t change this baseline.
- Use a push stick or push block for the final few inches of every cut, especially on a narrow beveled edge-cut where hands sit closer to the blade path.
- Never reach over or across a spinning blade to clear an offcut — wait for the blade to stop.
- Keep the blade guard installed whenever the cut allows it; remove it only for cuts (like some bevel setups) where the guard genuinely can’t clear the jig, and replace it immediately after.


Frequently Asked Questions
Can A Table Saw Blade Tilt To 60 Degrees?
No — standard 10-inch contractor and cabinet table saws are mechanically limited to a 0°–45° bevel tilt range, with a few benchtop models reaching 47°–48°. For a true 60° bevel, set the blade to the complementary 30° angle and cut the workpiece standing on edge using a jig, rather than forcing the tilt mechanism past its stop.
What Tool Is Used To Cut A 60-Degree Angle?
A table saw with a miter gauge or crosscut sled set to 60° handles a 60° miter (angled crosscut) directly. A miter saw with its head swung to 60° works the same way for crosscuts. For a 60° bevel (angled edge), a table saw with the blade tilted to the 30° complementary angle and a support jig is the standard shop method.
How Do You Cut Long 60-Degree Angle Cuts On A Table Saw?
Support the full length of the workpiece so it can’t rotate or tip mid-cut — an auxiliary fence clamped along the miter gauge, or a dedicated crosscut sled with a fence, works better than the miter gauge alone once material runs longer than about 2 feet. Feed at a steady pace and keep a hand or roller stand supporting the far end as it clears the blade.
Is A 60-Degree Corner Joint A Miter Cut Or A Bevel Cut?
It’s a miter cut in almost every real project — hexagon segments, angled picture frames, and planter sides all use a 60° miter gauge or sled setting with the blade upright. A bevel cut only comes into play if the joint also needs an angled edge (not just an angled end), which is far less common outside furniture-grade joinery.
Conclusion
Most 60-degree angle projects need a miter cut — set the miter gauge or crosscut sled to 60° and the blade stays upright the whole time. A true 60-degree bevel is the exception: since it’s past the tilt range of nearly every table saw, the 30-degree complementary-angle trick with a support jig is the real-world method, not a bevel-scale setting most saws don’t even offer. Verify every angle with a digital gauge before committing material, and the rest of the cut is routine table saw work.