How to Cut Plexiglass on a Table Saw Safely
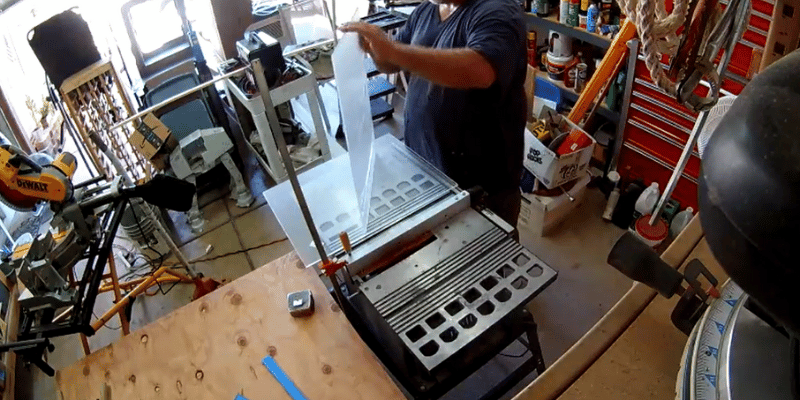
To cut plexiglass on a table saw, use a carbide-tipped blade and set the fence to the desired width. Secure the plexiglass with clamps and push it slowly through the blade, taking caution to prevent chipping or cracking.
Begin by measuring and marking the cutting line on the plexiglass before proceeding with the cutting process. Placing a sacrificial piece of wood on top of the plexiglass can also help minimize damage. Ensure that you wear appropriate safety gear, such as goggles and gloves, throughout the cutting process.
Following these steps will allow you to accurately and safely cut plexiglass on a table saw.
Understanding Plexiglass And Its Uses
Plexiglass, also known as acrylic glass or acrylic sheet, is a versatile material with a wide range of applications. It is a strong and transparent plastic that is a popular alternative to glass due to its durability, lightweight nature, and ability to be easily shaped and cut. In this section, we will explore what Plexiglass is, its common applications, and why you should consider using it for your next project.
What Is Plexiglass?
Plexiglass is a brand name for acrylic glass, which is a synthetic polymer made from polymethyl methacrylate (PMMA). It was first developed in the 1930s as a shatter-resistant and transparent substitute for glass. Today, Plexiglass is widely used in various industries for its optical clarity, resistance to UV light, and excellent weatherability. It is available in different thicknesses, colors, and finishes to suit different needs.
Common Applications Of Plexiglass
Plexiglass finds numerous applications in both residential and commercial settings. Its versatility makes it an ideal choice for a wide range of projects. Some common applications of Plexiglass include:
- Windows and skylights: Plexiglass is frequently used to replace glass windows in homes, businesses, and vehicles due to its weather resistance and impact strength.
- Signage and displays: It is a popular choice for creating signs, illuminated displays, and exhibition materials due to its clarity and ability to be easily customized through laser cutting or engraving.
- Furniture and home decor: Plexiglass can be used to create sleek and modern furniture pieces, such as tables, chairs, and shelving. It is also commonly used for picture frames and decorative accents.
- Protective barriers: Due to its impact resistance, Plexiglass is often used as a protective barrier in settings like retail stores, banks, and hospitals.
Why Choose Plexiglass For Your Project?
There are several reasons why Plexiglass is a popular choice for DIY enthusiasts and professionals alike:
- Durability: Plexiglass is highly durable and resistant to shattering, making it a safer option compared to glass.
- Flexibility: It can be easily cut, drilled, or shaped to suit specific design requirements.
- Lightweight: Plexiglass is about half the weight of glass, making it easier to handle and install.
- Optical clarity: Plexiglass offers exceptional transparency and optical clarity, allowing for clear visibility and minimal distortion.
- Weather resistance: It is resistant to yellowing, degradation, and damage caused by exposure to sunlight and extreme weather conditions.
Preparing For Safe And Effective Cutting
Before diving into the process of cutting plexiglass on a table saw, it is crucial to take the necessary steps to ensure the safety of both yourself and the material. Preparing properly and following important safety precautions will not only protect you from potential accidents but also enhance the quality of the final cut. In this section, we will discuss the essential tools and equipment you need to gather, the safety precautions you must follow, and how to properly secure the plexiglass for cutting.
Gathering The Necessary Tools And Equipment
In order to cut plexiglass on a table saw, you will require a specific set of tools and equipment. Ensuring you have these items ready before you begin will save you time and ensure a smooth cutting process.
Here’s a list of the tools and equipment you need:
| Safety glasses or goggles | Protective gloves | Face mask |
| Table saw with carbide-tipped blade | Ruler or measuring tape | Clamps or a vise |
| Masking tape | Sharp marker or pencil | Clean, lint-free cloth |
Important Safety Precautions To Follow
When working with plexiglass or any machinery, safety must always be the top priority. By following these safety precautions, you can greatly reduce the risk of accidents or injuries:
- Wear safety glasses or goggles and protective gloves throughout the entire process to safeguard your eyes and hands from potential hazards.
- Wear a face mask to prevent inhalation of any dust particles or fumes generated during the cutting process.
- Ensure the table saw is properly set up and in good working condition before starting. Check that the blade is sharp and securely tightened.
- Keep your workspace clean and organized. Clear away any debris or materials that can obstruct your movement or interfere with the cutting process.
- Always use proper techniques and maintain a firm grip on the plexiglass to prevent slipping or mishandling.
- Do not apply excessive force or rush the cutting process. Let the saw and the blade do the work by carefully guiding the plexiglass through the cut.
- Be mindful of your body positioning and maintain a safe distance from the saw blade to avoid any potential accidents.
How To Secure Plexiglass For Cutting
Properly securing the plexiglass before cutting it on a table saw is crucial to ensure a precise and safe cut. Follow these steps to securely position the plexiglass:
- Measure and mark the desired dimensions for your cut on the plexiglass using a sharp marker or pencil.
- Apply strips of masking tape along the cutting line. This tape helps prevent any potential chipping or splintering during the cutting process.
- Place the marked and taped plexiglass onto the table saw, aligning the cutting line with the saw blade.
- Use clamps or a vise to secure the plexiglass firmly in place. This will prevent any movement or vibrations during the cutting process.
- Ensure there is enough clearance between the blade and any other objects on the table, such as fences or guides.
By adhering to these guidelines, you can confidently prepare for safe and effective cutting of plexiglass on a table saw. Remember to prioritize safety, gather the necessary tools, follow the precautionary measures, and securely position the plexiglass before commencing the cutting process.
Setting Up The Table Saw For Plexiglass Cutting
To set up your table saw for cutting plexiglass, ensure you have a fine-toothed blade installed and adjust the blade height so it protrudes slightly above the plexiglass. Use a zero-clearance insert and provide support to prevent the material from splintering during the cut.
Adjusting Blade Height And Angle
Before cutting plexiglass on a table saw, it’s crucial to ensure that the blade height and angle are properly adjusted. These adjustments will not only help you achieve clean and precise cuts but also prevent any potential damage to the material.
Start by adjusting the blade height. For plexiglass, it’s recommended to set the blade height to around 1/8 inch above the thickness of the material. This will allow for smoother cuts and reduce the risk of chipping.
Next, check the blade angle. It’s important to have the blade set at 90 degrees to the table. This perpendicular alignment will help in obtaining accurate cuts, ensuring that the edges of the plexiglass are even and consistent.
Selecting The Appropriate Saw Blade
Choosing the right saw blade for cutting plexiglass can greatly influence the quality of your cuts. Opting for a blade specifically designed for cutting plastic or acrylic will yield the best results.
Look for a blade with a high tooth count, preferably at least 80 teeth. This increased tooth count reduces the chance of chipping and splintering, resulting in cleaner and smoother cuts. Additionally, a blade with carbide-tipped teeth will provide longevity and durability.
Ensuring Accuracy With The Fence And Miter Gauge
When cutting plexiglass on a table saw, using the fence and miter gauge correctly is essential to maintain accuracy and precision.
Start by aligning the fence parallel to the blade. Ensure that the distance between the fence and the blade is slightly wider than the width of the plexiglass sheet. This will prevent binding and allow for a smooth cutting process.
For angled cuts, the miter gauge comes into play. Set the miter gauge to the desired angle and lock it in place. Make sure the plexiglass is securely positioned against the miter gauge before making the cut.
By following these steps and setting up your table saw properly for plexiglass cutting, you’ll be well on your way to achieving precise, clean, and smooth cuts without any damage to the material.
Top Techniques For Cutting Plexiglass On A Table Saw
Cutting plexiglass on a table saw requires proper techniques for a clean finish. Ensure safety by using a sharp blade, adjusting the blade height, and cutting at a slower speed. Use a fence or sled for more precise cuts and reduce the risk of shattering or melting the plexiglass.
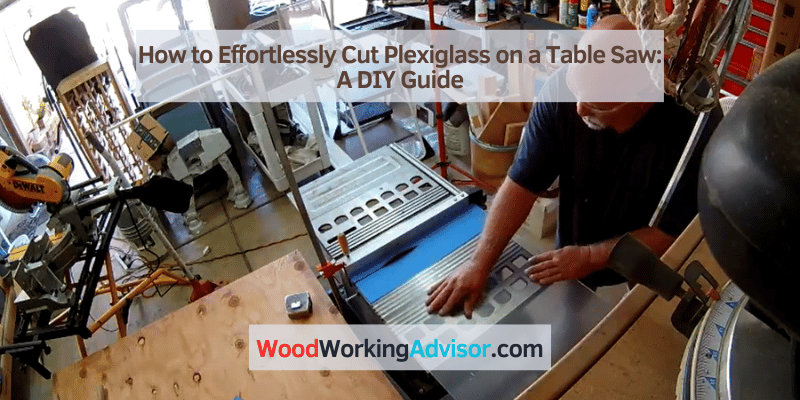
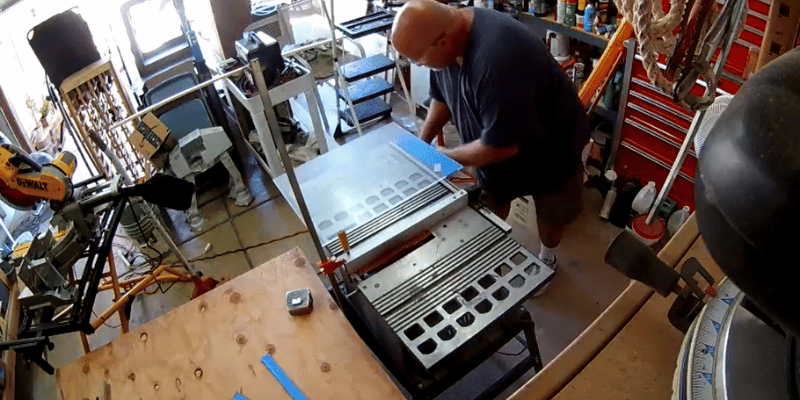
Straight Line Cutting Method
When it comes to cutting plexiglass on a table saw, using the straight line cutting method is one of the most common techniques. This method allows you to achieve a clean and precise cut, minimizing chipping and melting. Follow these step-by-step instructions for a smooth and accurate straight line cut:
- Ensure your table saw is equipped with a carbide-tipped blade specifically designed for cutting plexiglass.
- Measure and mark the desired cutting line on the plexiglass using a fine-tip marker or scoring knife.
- Set the table saw fence at the appropriate distance from the blade to fit the width of your plexiglass sheet.
- Put on safety goggles and gloves to protect yourself from any potential hazards.
- Position the plexiglass sheet against the fence, allowing a small gap between the sheet and the blade.
- Switch on the table saw and guide the plexiglass sheet carefully along the fence, maintaining a steady pace.
- Apply gentle pressure to prevent the plexiglass from chipping or melting, and continue pushing the sheet until the cut is complete.
- Switch off the table saw and carefully remove the cut plexiglass.
Tips For Reducing Chipping And Melting
To achieve a clean cut and minimize the risk of chipping or melting the plexiglass, keep the following tips in mind:
- Use a slow feed rate to prevent the blade from generating excessive heat as it cuts through the plexiglass.
- Apply a specialized lubricant, such as cutting wax or a dedicated plexiglass cutting fluid, to reduce friction and heat buildup.
- Cover the cutting line with masking tape to protect the plexiglass surface from potential chipping during the cutting process.
- Consider using a smaller tooth count blade for finer cuts or a higher tooth count blade for faster cuts with minimal chipping.
Curved Cutting Technique
If you’re looking to cut curves in plexiglass, utilizing the curved cutting technique will give you the desired results. Plexiglass is a versatile material that accommodates various shapes, but managing the blade curvature is crucial for a smooth and accurate cut.
Follow these techniques for smooth and accurate curves:
- Choose a narrow width blade with a high tooth count to ensure precision and reduce the risk of chipping.
- Draw the desired curve on the plexiglass using a template or a compass, ensuring the line is clearly visible.
- Attach the appropriate curve-cutting guide to your table saw fence, adjusting it to match the desired cutting curve.
- Place the plexiglass against the guide and slowly feed it through the blade, keeping a firm grip on the sheet.
- Ensure the plexiglass moves smoothly along the curve-cutting guide without any sudden jerks or shifts.
- Continue pushing the plexiglass until the cut is complete, maintaining a steady pace throughout the process.
Mitre Cutting For Angled Edges
To achieve angled edges on plexiglass, mitre cutting is the go-to technique. This method allows you to cut precise angles without compromising the integrity of the material.
Follow these steps for a clean and precise mitre cut:
- Measure and mark the desired angle on the plexiglass, taking accurate measurements for a perfect fit.
- Set the table saw blade to the correct angle by adjusting the tilting mechanism or using a specialized mitre gauge.
- Secure the plexiglass against the table saw’s fence, ensuring it remains stable throughout the cutting process.
- Guide the plexiglass through the blade, applying steady pressure and maintaining control over the sheet at all times.
- Once the cut is complete, check the angle to ensure it matches your intended measurement.
- Smooth out any rough edges using sandpaper or a deburring tool.
By employing these top techniques for cutting plexiglass on a table saw, you can achieve professional-looking results with minimal chipping, melting, or inaccuracies. Remember to prioritize safety by wearing appropriate protective gear and following manufacturer recommendations for your equipment and tools.
Finishing Touches And Safety Measures
When it comes to cutting plexiglass on a table saw, it’s important to give attention to the finishing touches and prioritize safety measures. This will not only ensure a clean and professional-looking cut but also protect you from any potential dangers. In this section, we will discuss how to remove rough edges and burrs, as well as how to properly sand and polish plexiglass for a flawless finish. Additionally, we will cover crucial safety measures to keep in mind when handling the cut pieces.
Removing Rough Edges And Burrs
After cutting plexiglass on a table saw, it’s common to have rough edges and burrs along the cut line. These imperfections can not only be unsightly but also pose a risk of injury if left unattended. Fortunately, there are a few simple steps you can follow to remove these rough edges and create a smooth finish:
- Start by securing the cut piece of plexiglass on a sturdy workbench or table.
- Using a fine-grit sandpaper, gently file the rough edges in a back and forth motion. Be sure to sand evenly and apply light pressure to prevent any cracks or further damage to the plexiglass.
- Once the rough edges have been smoothed out, switch to a higher grit sandpaper to create a polished finish. Continue sanding until the edges are smooth and no longer rough to the touch.
- Finally, wipe away any debris or dust from the surface using a clean cloth or compressed air.
Sanding And Polishing Plexiglass
Sanding and polishing plexiglass not only removes rough edges but also helps create a professional-looking finish that is free from scratches and blemishes. Here’s how you can achieve a flawless result in a few simple steps:
- Start by securing the cut piece of plexiglass on a flat and stable surface.
- Using a low grit sandpaper, such as 400 or 600, gently sand the surface of the plexiglass in circular motions. This will help remove any noticeable scratches or imperfections.
- Once the surface is smooth, switch to a higher grit sandpaper, such as 800 or 1000, and repeat the sanding process.
- After achieving the desired smoothness, you can further polish the plexiglass by using a plastic polish or a polishing compound specifically designed for acrylic materials.
- Apply the polish to a clean cloth and gently rub it onto the plexiglass surface in circular motions. Continue until you achieve a glossy finish.
- Finally, wipe away any residue using a clean, lint-free cloth.
Safety Measures When Handling The Cut Pieces
Handling cut pieces of plexiglass requires caution to prevent any injuries or damage. Here are some important safety measures to follow:
- Wear protective gloves to avoid cuts or scratches from sharp edges.
- Use a pair of safety goggles to protect your eyes from any flying debris.
- Always handle the cut pieces with care, ensuring you have a firm grip to prevent accidental drops or slips.
- When transporting or storing the cut plexiglass, ensure you utilize proper packaging and padding to prevent breakage.
- Keep the work area clean and free from any hazards that could potentially cause accidents.
Frequently Asked Questions On How To Cut Plexiglass On A Table Saw
Can You Cut Plexiglass With A Table Saw?
Yes, you can cut plexiglass with a table saw. However, you need to take certain precautions such as using a fine-toothed blade and reducing the cutting speed to prevent chipping or melting of the material.
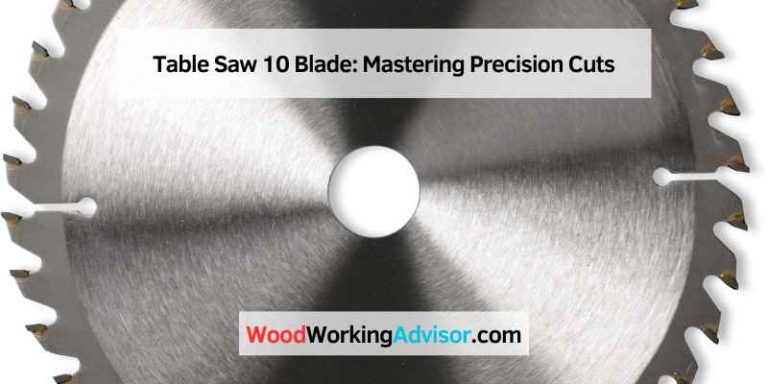
What Type Of Blade Is Best For Cutting Plexiglass On A Table Saw?
To cut plexiglass on a table saw, it is best to use a blade with fine teeth and a high tooth count. A crosscut blade or a paneling blade with 80 to 100 teeth is ideal. This helps to achieve clean and smooth cuts without any chipping or melting.
What Safety Measures Should I Take When Cutting Plexiglass On A Table Saw?
When cutting plexiglass on a table saw, always wear safety goggles, gloves, and a dust mask to protect yourself from flying debris and particles. Additionally, secure the material firmly using clamps or a jig to prevent it from moving during the cutting process.
Conclusion
To conclude, cutting plexiglass on a table saw can be a straightforward process when done correctly. By following the steps outlined in this guide, you can achieve clean and precise cuts while ensuring your safety. Remember to use the appropriate tools and take your time to measure and secure the plexiglass before proceeding.
With practice, you’ll become more adept at this skill and be able to create beautiful projects using plexiglass. Now, it’s time to put your newfound knowledge into action and start cutting with confidence!