How to Cut Plexiglass With a Circular Saw (Right Blade)
To cut Plexiglass with a circular saw, attach a fine-toothed blade, set the saw to a low speed, and use light pressure to guide the saw through the Plexiglass. Start by making a small notch, then continue cutting along the desired line.
Cutting Plexiglass can be a tricky task, but with the right tools and techniques, it can be done easily and accurately. Whether you are a DIY enthusiast or a professional builder, knowing how to cut Plexiglass with a circular saw can save you time and effort.
Plexiglass, also known as acrylic, is a versatile material used in various applications, including windows, signs, and displays. Its durability and transparency make it a popular choice, but it can be prone to chipping or cracking if not cut properly. In this guide, we will cover the necessary steps to cut Plexiglass with a circular saw, ensuring a clean and precise cut every time. So, let’s dive in and learn the proper way to cut Plexiglass with a circular saw!
Choosing The Right Tools And Materials
When it comes to cutting plexiglass with a circular saw, having the right tools and materials is crucial. Not only will this ensure a clean and precise cut, but it will also make the process much easier and safer. In this section, we will discuss the essential tools for cutting plexiglass, how to select the right circular saw for the job, and the necessary materials you’ll need before diving into the project.
Essential Tools For Cutting Plexiglass
Before you start cutting plexiglass, it’s important to gather all the essential tools you’ll need. Here’s a list of items that will come in handy:
- Circular saw: A circular saw is the primary tool you’ll use to make the cuts. It’s important to choose a saw with a fine-toothed blade that is suitable for cutting plexiglass. The blade should have at least 80 teeth to ensure clean and accurate cuts.
- Safety gear: Safety should always be a priority when working with power tools. Make sure you have the following safety gear before you start cutting plexiglass:
- Safety goggles or a face shield to protect your eyes
- Ear protection to minimize noise
- Gloves to protect your hands
- Measuring tape: Accurate measurements are essential for cutting plexiglass to the desired size. Having a measuring tape will help you mark the cutting line with precision.
- C-clamps: Plexiglass can be prone to vibration during the cutting process. Using C-clamps to secure the material to your work surface will minimize vibrations and help you achieve cleaner cuts.
- Square or straightedge: A square or straightedge will be used as a guide to ensure straight cuts. It will help you maintain proper alignment as you guide the circular saw along the cutting line.
- Masking tape: Applying masking tape along the cutting line will not only help protect the surface of the plexiglass from scratches but also reduce the chances of chipping or splintering when the saw blade meets the material.
Selecting The Right Circular Saw For The Job
When it comes to cutting plexiglass, not all circular saws are created equal. Here are some factors to consider when selecting the right circular saw for the job:
- Blade type: As mentioned earlier, a fine-toothed blade with a high tooth count is ideal for cutting plexiglass. Look for blades specifically designed for cutting plastics or non-ferrous materials to ensure optimum performance.
- Saw speed: Choose a circular saw with variable speed control, as you’ll want to reduce the blade speed to prevent excessive heat buildup, which can result in melting or cracking of the plexiglass.
- Dust collection: Cutting plexiglass can produce a substantial amount of dust. Opt for a circular saw with a built-in dust collection system or consider using a dust extractor to keep your work area clean and free from airborne particles.
- Stability and ergonomics: Look for a circular saw that feels comfortable and well-balanced in your hand. A stable and ergonomic saw will provide better control and reduce the risk of accidents.
Gathering The Necessary Materials
Before you start cutting plexiglass, make sure you have all the necessary materials at hand. Here’s what you’ll need:
- Plexiglass sheet: Of course, you’ll need a piece of plexiglass to cut. Measure and purchase a sheet with the desired dimensions for your project.
- Painter’s tape: Painter’s tape will come in handy for marking the cutting line on the plexiglass. It provides a clear and easily visible guide for the circular saw.
- Work table or sawhorses: To provide a stable and secure work surface, use a sturdy work table or sawhorses to support the plexiglass sheet.
- Marker or pencil: Using a marker or pencil, you can transfer the measurements onto the plexiglass and accurately mark the cutting line.
- Optional lubricant: Depending on the thickness of the plexiglass and the saw blade you’re using, applying a lubricant such as cutting oil or wax can help reduce friction and heat buildup during the cutting process.
Now that we have covered the essential tools and materials, you are ready to move on to the next step of the process – preparing the plexiglass for cutting.
Safety Precautions For Working With Plexiglass
When it comes to cutting plexiglass with a circular saw, safety should always be your top priority. Plexiglass is a versatile material that offers many benefits, but it can also pose some potential hazards if not handled properly. In this section, we will discuss the important safety precautions you should take to protect yourself and ensure a safe working environment.
Understanding The Potential Hazards
Before you start cutting plexiglass with a circular saw, it’s crucial to be aware of the potential hazards associated with this task. Plexiglass, also known as acrylic, is a brittle material that can easily crack or chip. When cutting it with a circular saw, there is a risk of the material splintering, which can cause injury. Additionally, cutting plexiglass creates fine dust particles that can irritate your skin, eyes, and respiratory system if proper precautions are not taken.
Protecting Yourself With Safety Gear
To minimize the risks associated with cutting plexiglass, it’s essential to use the right safety gear. Here are some key items you should have:
- Safety glasses: Shield your eyes from potential debris and protect them from flying shards of plexiglass.
- Face mask: Prevent the inhalation of dust particles by wearing a face mask that provides adequate filtration.
- Gloves: Protect your hands from sharp edges and potential injury by wearing cut-resistant gloves.
- Hearing protection: Reduce the noise generated by the circular saw by wearing earplugs or earmuffs.
By wearing the appropriate safety gear, you can greatly reduce the risk of injury while working with plexiglass.
Creating A Safe Work Environment
In addition to personal protective equipment, creating a safe work environment is crucial when cutting plexiglass. Follow these guidelines to ensure a safe setup:
- Work area: Choose a well-ventilated area with sufficient lighting to enhance visibility and reduce the risks associated with working with power tools.
- Stable work surface: Place the plexiglass on a sturdy worktable or surface that provides stability and prevents vibrations that could lead to accidents.
- Secure the material: Use clamps or adhesive tape to secure the plexiglass firmly in place, minimizing movement and reducing the risk of the material binding or shifting during cutting.
- Cut line visibility: Mark the cut line on the plexiglass clearly to provide better visibility, ensuring accurate cutting and reducing the chances of errors or accidents.
By following these safety precautions and creating a safe work environment, you can confidently cut plexiglass with a circular saw while minimizing the risks associated with this task.
Preparing The Plexiglass For Cutting
Discover the key steps to prepare Plexiglass for cutting with a circular saw. Learn how to ensure a smooth and accurate cutting process for your projects with this detailed guide.
Preparing the Plexiglass for Cutting
When it comes to cutting plexiglass with a circular saw, proper preparation is key to achieving clean and accurate cuts. By following a few simple steps, you can ensure that your plexiglass is ready for cutting, maximizing the chances of success. In this section, we will discuss the important aspects of preparing the plexiglass, including measuring and marking the cut line accurately, securing the plexiglass for stability, and properly cleaning the surface for cutting.
Measuring and Marking the Cut Line Accurately
Before you begin cutting, it is crucial to measure and mark the cut line accurately on the plexiglass. This will help guide your saw and ensure that you achieve the desired dimensions. To do this, follow these steps:
1. Start by determining the exact measurement of the cut you want to make. Use a measuring tape or ruler to ensure accuracy.
2. Once you have the measurement, mark it on the plexiglass with a fine-tipped marker or a scribe. Make sure the line is clearly visible and easy to follow.
3. To achieve even more precision, consider using a straightedge or a ruler as a guide. Place it along the marked line and secure it in place using clamps or tape. This will help you maintain a straight and steady cut.
Securing the Plexiglass for Stability
To prevent the plexiglass from moving or vibrating during the cutting process, it is essential to secure it properly. This will ensure that you have better control over the saw and minimize the risk of chipping or cracking the material. Follow these steps to secure the plexiglass:
1. Place the plexiglass on a flat and stable surface. A workbench or table is ideal for this purpose.
2. Consider using clamps or vice grips to secure the plexiglass in place. Position them along the edges of the material to hold it securely.
3. If clamps are not available, you can also use masking tape or double-sided adhesive tape. Apply it along the edges of the plexiglass to firmly attach it to the work surface.
Properly Cleaning the Surface for Cutting
Before you start cutting, it is important to ensure that the surface of the plexiglass is clean and free from any debris or dirt. This will prevent dust particles from interfering with the cutting process and help you achieve smoother cuts. Follow these steps to clean the surface properly:
1. Use a soft cloth or a microfiber cloth to gently wipe away any dust or dirt from the plexiglass surface. This will remove any loose particles that could affect the cutting process.
2. If there are any stubborn stains or marks on the surface, you can use a mild detergent or a specialized plexiglass cleaner. Apply it to the cloth and gently scrub the affected area.
3. Make sure to rinse off any cleaning solution thoroughly and dry the plexiglass with a clean cloth before proceeding with the cutting process.
By taking the time to prepare the plexiglass adequately for cutting, you can ensure that the task goes smoothly and yields the desired results. Remember to measure and mark the cut line accurately, secure the plexiglass for stability, and clean the surface properly before cutting. These simple steps will enhance your chances of achieving clean and precise cuts with your circular saw.
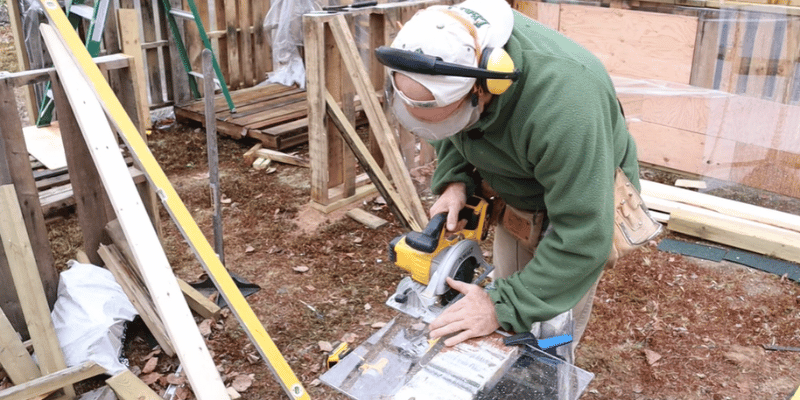
Setting Up The Circular Saw
Setting up your circular saw properly before cutting plexiglass is essential to ensure safe and precise results. In this section, we will cover the important steps of ensuring the saw is in good working condition, selecting the appropriate blade for plexiglass, and adjusting the saw settings for precise cutting. Let’s dive in!
Ensuring The Saw Is In Good Working Condition
Before starting any cutting project, it’s crucial to ensure that your circular saw is in good working condition and properly maintained. Follow these steps:
- Inspect the blade: Check the condition of the saw blade. Look for any signs of damage or dullness. If the blade is damaged or dull, replace it with a new one to ensure clean cuts and prevent accidents.
- Check the power source: Ensure that the saw is properly connected to a power source and that the power cord is in good condition, without any frayed wires or exposed parts.
- Examine the safety features: Double-check that the circular saw’s safety features, such as the blade guard and safety switch, are in proper working order. These features are designed to protect you from potential accidents.
Selecting The Appropriate Blade For Plexiglass
Choosing the right blade for cutting plexiglass is crucial to achieve smooth and precise cuts. Follow these guidelines:
- Look for triple-chip grind (TCG): The tooth geometry matters more than tooth count alone. A TCG blade alternates a beveled tooth (which chips material from the center of the cut) with a flat-top tooth (which cleans up the edges), and this chips the plastic away instead of grinding it — the single biggest factor in avoiding melted, gummy edges.
- 60 to 100 teeth: Within a TCG or fine-tooth blade, 60-100 teeth gives clean cuts with minimal sanding needed afterward. More teeth isn’t automatically better if the grind geometry is wrong for plastic.
- Consider a carbide-tipped blade: Carbide-tipped blades are ideal for cutting plexiglass as they are harder and more durable than regular steel blades. They provide cleaner cuts and last longer, thereby reducing the risk of blade damage.
Adjusting The Saw Settings For Precise Cutting
To achieve accurate and precise cuts on plexiglass, adjusting the saw settings correctly is crucial. Follow these steps:
- Set the cutting depth: Adjust the cutting depth of the circular saw to slightly exceed the thickness of the plexiglass sheet. This helps prevent the material from chipping or cracking during the cutting process.
- Control the cutting speed: Plexiglass requires a slower cutting speed compared to other materials. Reduce the speed of your circular saw to prevent excessive vibrations and to ensure clean and smooth cuts.
- Consider using a lubricant: Applying a lubricant, such as a silicone lubricant or soapy water, on the plexiglass surface can help to reduce friction and heat buildup during the cutting process.
By setting up your circular saw correctly, you can optimize the cutting process and achieve precise and clean cuts on plexiglass. Keep these guidelines in mind to ensure safety and a successful cutting project.
Data point: Blade manufacturers (per ACRYLITE®) specify a triple-chip grind with a slightly negative hook angle as the standard geometry for acrylic and plexiglass, since it pushes the material into the backer instead of lifting and chipping the edge as a standard wood-cutting tooth profile does.
A quick note on cut-off saws: an abrasive cut-off saw (the kind used on metal and masonry) is a different tool entirely and is not a good substitute here — the abrasive wheel generates far more heat than a TCG blade and will melt plexiglass edges badly. Stick with a circular saw and the right blade for this material.
Techniques For Cutting Plexiglass
Cutting plexiglass may seem tricky at first, but with the right techniques, you can achieve clean cuts and accurate measurements. Whether you’re working on a DIY project or a professional installation, using these methods will ensure your plexiglass pieces are cut precisely and with minimal effort. In this article, we will cover three effective techniques for cutting plexiglass: employing a scoring method, using a straight edge guide, and making multiple passes for thicker plexiglass.
Using A Scoring Method For Clean Cuts
One of the most effective ways to cut plexiglass is by using a scoring method. This technique involves using a sharp utility knife or a glass cutter to score a line along the area you wish to cut. To successfully use this method:
- Begin by securely clamping the plexiglass sheet to a work surface to prevent any movement during the cutting process.
- Place a straight edge guide along the scoring line, ensuring it is parallel to the cut you want to make.
- Apply firm pressure and make a continuous score along the guide, using multiple passes if necessary to create a deep groove.
- Once the groove is deep enough, place the scored line over the edge of your work surface, ensuring it is correctly aligned.
- Finally, apply downward pressure on the overhanging section of the plexiglass to cleanly snap it off along the scored line.
This scoring method produces clean cuts by minimizing the chances of cracking or splintering the plexiglass. It allows you to exert control over the cutting process, ensuring precise results every time.
Employing A Straight Edge Guide For Accurate Measurements
When you need to make precise measurements and cuts on a plexiglass sheet, using a straight edge guide is highly recommended. Follow these steps to employ this technique:
- Start by securing the plexiglass sheet to your work surface using clamps or a vise grip, ensuring it remains steady throughout the cutting process.
- Measure and mark the desired length or width of the cut using a permanent marker or a scribe tool.
- Position the straight edge guide along the marked line, ensuring it is secured in place.
- Use a circular saw with a fine-toothed blade specifically designed for plexiglass or acrylic, and carefully guide the saw along the straight edge guide.
- Apply consistent pressure on the saw and avoid rushing the process to minimize the chances of mistakes or damage to the plexiglass.
- Continue cutting along the marked line until the desired cut is complete.
Employing a straight edge guide not only ensures accurate measurements but also helps maintain a straight and even cut throughout the plexiglass sheet, regardless of its size or thickness.
Making Multiple Passes For Thicker Plexiglass
Thicker plexiglass sheets require a slightly different approach to achieve clean and precise cuts. Follow these steps to successfully cut thicker plexiglass:
- Securely clamp the plexiglass sheet to your work surface, making sure it is stable and won’t move during the cutting process.
- Select a circular saw with a fine-toothed blade suitable for cutting thicker materials.
- Adjust the saw’s cutting speed and depth according to the thickness of the plexiglass. It is generally recommended to make multiple shallow passes rather than a single deep cut.
- Begin the first pass, holding the saw firmly and applying steady, even pressure.
- After completing the first pass, repeat the process by making subsequent passes along the same line until the cut is through and clean.
- Remember to allow the saw blade to cool between passes to prevent overheating and potential damage to the plexiglass.
By making multiple passes, you reduce the chances of chipping, melting, or cracking the plexiglass, ensuring a clean and professional-looking cut.
Troubleshooting And Tips For Smooth Cutting
Looking to cut Plexiglass with a circular saw? Check out our troubleshooting and tips for smooth cutting. From selecting the right blade to maintaining steady control, this guide will help you achieve clean and precise results.
Avoiding Chipping Or Cracking During The Cutting Process
When cutting plexiglass with a circular saw, it is crucial to prevent chipping or cracking as it can ruin the integrity of the material. To avoid these issues, follow the below tips:
- Use a fine-toothed blade: When cutting plexiglass, opt for a fine-toothed blade rather than a rough one. A blade with more teeth per inch (TPI) will result in a smoother cut and reduce the chances of chipping or cracking.
- Apply masking tape: Prior to cutting, apply masking tape along the line where you will be cutting the plexiglass. This can help prevent the material from splintering or chipping during the cutting process.
- Reduce the blade speed: Operating the circular saw with a lower blade speed can significantly reduce the risk of chipping or cracking. Adjust the speed according to the thickness of the plexiglass, ensuring a more controlled and precise cut.
- Support the plexiglass adequately: When cutting plexiglass, ensure that it is adequately supported. Use a stable work surface and consider using clamps or a saw table to prevent the material from moving or vibrating during the cutting process. This stability can minimize the chances of chipping or cracking.
Dealing With Melting And Overheating Issues
During the cutting process, melting and overheating of the plexiglass can occur, leading to an uneven or damaged cut. To avoid such problems, try the following solutions:
- Choose the right blade material: Select a blade that is specifically designed for cutting acrylic materials. These blades usually have a lower tooth count and are made from carbide or diamond-tipped materials, which can prevent or minimize melting and overheating.
- Apply coolants: Using coolants such as water or a lubricant spray can help keep the temperature of the plexiglass down throughout the cutting process. Apply the coolant directly to the blade or the contact area between the blade and the plexiglass.
- Alternate the cutting direction: If you notice melting or overheating during the cutting process, try alternating the direction of the cut. This approach can prevent excessive heat buildup in one area and distribute the heat more evenly, reducing the potential for melting.
Removing Any Burrs Or Rough Edges After Cutting
After successfully cutting the plexiglass, it is essential to remove any burrs or rough edges to achieve a smooth and professional finish. Use the following methods:
- Sanding: One effective way to remove burrs and rough edges is by sanding the cut edge of the plexiglass. Use sandpaper with a fine grit, moving it along the edge in a smooth motion until all imperfections are eliminated.
- Filing: Another method is to use a fine file to carefully file down any rough edges. File in a consistent and gentle motion, ensuring that you do not apply excessive pressure, which could cause further damage to the plexiglass.
- Flame polishing: For a more professional finish, you can consider flame polishing the edges of the plexiglass. This method involves using a propane torch or a specially designed flame polisher to heat the surface of the edge until it becomes smooth and glossy.
Finishing And Polishing The Cut Plexiglass
After successfully cutting your plexiglass with a circular saw, it’s time to focus on giving the edges a polished and smooth finish. This will not only enhance the overall appearance of the piece but also make it safer to handle. Here are some essential steps to follow for achieving a professional-looking result.
Smoothing The Edges With Sandpaper Or A Router
Once the plexiglass has been cut, you’ll likely notice that the edges are rough and may have some imperfections. To achieve a smooth surface, you can use either sandpaper or a router.
To smooth the edges with sandpaper, start with a low-grit sandpaper, such as 120-grit, and gradually work your way up to higher grits, like 400-grit or even 600-grit. Using a firm but gentle motion, sand the edges in a back-and-forth motion until they become smooth to the touch. Be sure to wear safety gloves to protect your hands from any sharp edges.
Pro tip: To avoid scratching the plexiglass, make sure to keep your sandpaper wet throughout the process. You can do this by dipping it in water or using a spray bottle to mist the surface.
Another option is using a router to smooth the edges. If you’re familiar with using a router and have the necessary equipment, this can be a quicker and more precise method. By using a router bit specifically designed for plexiglass, you can achieve a polished edge in no time.
Applying A Finishing Touch To Enhance The Appearance
Once the edges have been smoothed, it’s time to add a finishing touch to make the cut plexiglass shine. There are several options available to enhance its appearance:
- Flame polishing: This technique involves using a propane torch to carefully heat the edges of the plexiglass. The heat melts the surface, creating a polished and glossy finish.
- Buffing with a polishing compound: Apply a small amount of polishing compound to a buffing wheel or cloth and gently buff the edges of the plexiglass. This will help remove any remaining scratches or imperfections, resulting in a clear and shiny finish.
- Using a plastic polish or cleaner: There are special plastic polishes and cleaners available that can be applied to the edges to remove any leftover blemishes and restore the shine. Simply follow the instructions on the product for best results.
Safety Precautions For Handling The Finished Piece
Once your cut plexiglass has been finished and polished, it’s crucial to take appropriate safety precautions when handling it:
- Wear gloves: Always wear protective gloves to avoid any accidental cuts from the edges.
- Use edge protectors: To further reduce the risk of injury, consider using edge protectors on the cut edges. This will help cushion the corners and protect both yourself and the plexiglass from damage.
- Store or display properly: To prevent any scratches or cracks, store or display the finished piece in a location where it won’t come in contact with sharp objects or excessive force.
By following these steps and adhering to the safety precautions, you can ensure that your cut plexiglass not only looks professional but is also safe to handle. With a polished finish and smooth edges, your plexiglass project is ready to be showcased in all its glory!
Best Plexiglass Blade Pick

FOXBC 80-Tooth TCG Blade for Plastic & Non-Ferrous Metal
The exact triple-chip-grind geometry this guide recommends, ready to drop onto a standard circular saw arbor.
- Best for: clean, chip-free cuts on plexiglass without a separate blade purchase per material
- Why we picked it: true TCG grind, not just a high tooth count fine blade
- Main drawback: 8-1/4″ size won’t fit every compact circular saw — check your saw’s blade size first
Round out your plexiglass cutting kit
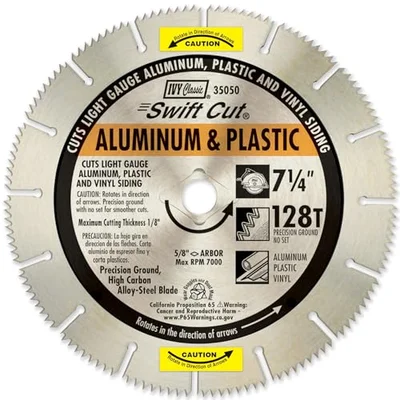 Option 1 128-Tooth Aluminum & Plastic Blade
|
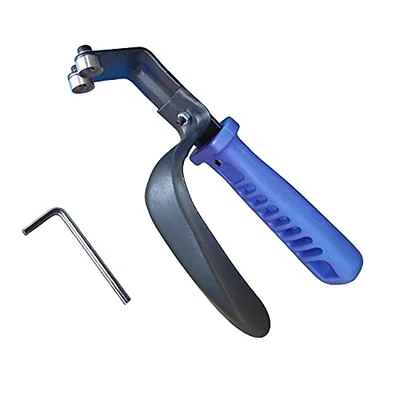 Option 2 Double Edge Deburring Tool
|
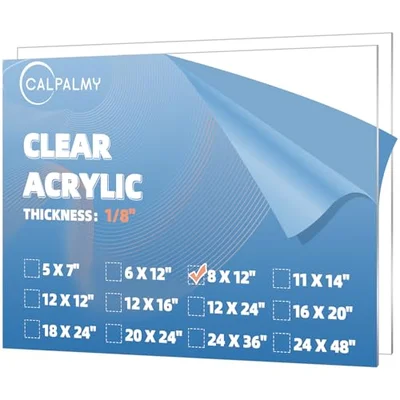 Option 3 8×12″ Clear Acrylic Practice Sheets (2-Pack)
|
As an Amazon Associate we earn from qualifying purchases.
Frequently Asked Questions On How To Cut Plexiglass With A Circular Saw
Can You Cut Plexiglass With A Circular Saw?
Yes, you can cut plexiglass with a circular saw using the right blade and proper technique. It is important to choose a fine-toothed blade specifically designed for cutting acrylic materials. Ensure that the plexiglass is securely clamped down, and make slow and steady cuts to prevent cracking or melting of the material.
Always wear safety goggles and gloves when working with power tools.
What Kind Of Blade Is Best For Cutting Plexiglass With A Circular Saw?
To cut plexiglass with a circular saw, it is recommended to use a fine-toothed blade specifically designed for cutting acrylic materials. These blades have more teeth per inch, which helps to prevent chipping or splintering of the plexiglass while cutting.
Using a blade with fewer teeth may cause the plexiglass to crack or melt, resulting in an uneven cut.
How Do You Prevent Plexiglass From Cracking While Cutting With A Circular Saw?
To prevent plexiglass from cracking while cutting with a circular saw, there are a few precautions you can take. First, ensure that the plexiglass is securely clamped down to prevent it from vibrating or moving during the cutting process. Secondly, use a fine-toothed blade designed for cutting acrylic materials to reduce the chance of chipping or splintering.
Lastly, make slow and steady cuts, allowing the blade to do the work and avoiding excessive pressure that could cause the plexiglass to crack.
Conclusion
To summarize, cutting plexiglass with a circular saw doesn’t have to be complicated. By following the steps outlined in this guide, you can ensure a smooth and precise cut every time. Remember to prioritize safety by wearing protective gear and taking necessary precautions.
With the right technique and the proper equipment, you’ll be able to tackle your plexiglass cutting projects with confidence and ease. Happy cutting!