How to Make Old Wood Look New: Restoration Tips
To make old wood look new, sand it down, apply wood stain or paint, and finish with a protective sealant. Old wood can be restored by sanding, staining, and sealing for a fresh look.
Bringing new life to old wood furniture or surfaces is a rewarding DIY project that can transform the overall aesthetics of your space. By following simple steps, you can revitalize weathered or worn-out wood to achieve a beautiful and updated appearance.
Whether you are refurbishing antique furniture or refreshing wooden floors, the process of rejuvenating old wood can enhance its natural beauty and durability. Embrace the charm of reclaimed wood by giving it a makeover using basic techniques that result in a polished and rejuvenated finish.
Preparing The Wood
Start by sweeping the wood surface to remove any dust or debris.
Next, wipe down the wood with a damp cloth to remove any dirt or grime.
Use a stripper to remove the old finish from the wood.
- Apply the stripper evenly and let it sit according to the manufacturer’s instructions.
- Scrape off the old finish using a putty knife or scraper.
- Repeat the process until all the old finish is removed.
Repairing Damaged Areas
Transforming old wood and repairing damaged areas can breathe new life into worn-out furniture and fixtures. With the help of effective techniques and tools, you can restore and make old wood look brand new again. Say goodbye to scratches, cracks, and decay as you revitalize your wooden pieces with expert care.
H3 headings must be in HTML syntax.
Fill In Cracks And Gaps
Before proceeding with refinishing old wood, make sure to address any cracks and gaps in the wood surface to restore its integrity.
- Inspect the damaged areas thoroughly to determine the extent of the cracks and gaps.
- Use a wood filler product to fill in the gaps and cracks smoothly.
- Apply the filler carefully and allow it to dry completely before sanding it down for a seamless finish.
Replace Missing Pieces
For wood that has missing pieces or chunks, consider replacing them for a uniform appearance across the surface.
- Identify the missing pieces and determine the type of wood needed for replacement.
- Cut the replacement piece to fit the exact dimensions of the missing section.
- Secure the replacement piece in place using wood glue or nails for a sturdy bond.
Sanding The Wood
Revive old wood by sanding it to remove imperfections and reveal its natural beauty. Start by selecting the right sandpaper grit and work your way up for a smooth finish. Finish off with a coat of sealant to protect and enhance the wood’s appearance.
Start With Coarse Grit Sandpaper
Sanding is an essential step when it comes to restoring old wood furniture or surfaces. This process not only removes imperfections but also prepares the wood for a smooth and seamless finish. To start the sanding process, it’s best to begin with coarse grit sandpaper. Coarse grit sandpaper, typically around 80-100 grit, is perfect for tackling rough and uneven surfaces. The coarse particles efficiently strip away old paint, varnish, or any other coatings, revealing the underlying wood.
Progress To Finer Grits
Once the initial sanding is complete with the coarse grit sandpaper, it’s time to progress to finer grits. Finer grit sandpapers, ranging from 120-220 grit, help to refine the surface further and achieve a smoother finish. These finer grits gradually remove any remaining scratches or roughness left by the coarse grit sandpaper. It’s important to note that as you progress to finer grits, the sandpaper becomes less abrasive, ensuring a delicate touch that won’t damage the wood.
Using finer grit sandpaper also enables you to prepare the wood for staining or painting, allowing the new finish to adhere better and result in a more polished appearance. The final sanding with a fine grit sandpaper should leave the wood surface smooth to the touch, free from any visible marks or imperfections.
To ensure a successful sanding process, it’s crucial to sand in the direction of the wood grain. This technique prevents any potential damage or scratches that could occur by sanding against the grain. Remember to apply consistent pressure and maintain a steady sanding motion to achieve an even-surfaced finish.
Applying A Fresh Finish
If you want to restore the beauty of old wood, applying a fresh finish is a crucial step. A well-applied finish can enhance the natural appeal of the wood, adding depth and protection to the surface. Whether you’re working on antique furniture or reviving wooden floors, the right finish can bring out the richness of the wood, giving it a renewed luster and charm.
Choose The Right Finish
Selecting the appropriate finish for your old wood is essential to achieve the desired outcome. Different finishes such as varnish, oil, or lacquer offer distinct characteristics. Consider the type of wood, the expected use, and your personal preferences when choosing the finish. Each finish provides a unique sheen and level of protection, so ensure you make an informed decision based on these factors.
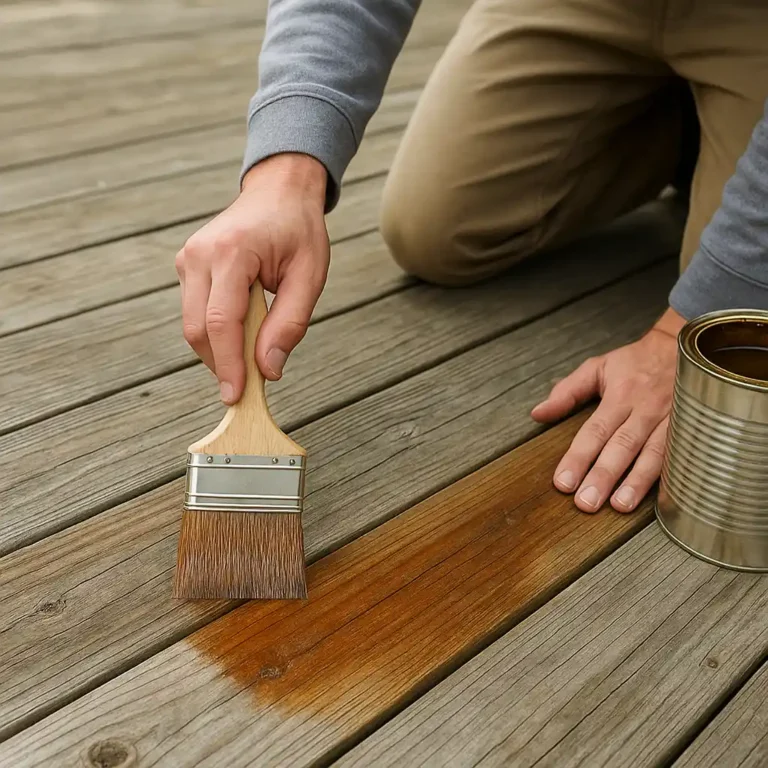
Apply The Finish Evenly
Even application of the finish is crucial for a uniform and professional look. Prior to application, ensure the surface is clean and smooth. Use a quality brush or applicator to apply the finish in thin, overlapping strokes, working with the grain of the wood. This technique helps to avoid streaks and uneven patches, ensuring an impeccable finish. Allow each coat to dry completely before applying the next, following the manufacturer’s recommendations for best results.
Final Touches
The final touches are crucial to bringing out the full beauty of your restored old wood furniture. These final steps ensure that your piece looks polished and rejuvenated, ready to take pride of place in your home.
Polish And Buff
After the stain and varnish have dried, the next step is to polish and buff the wood to a smooth and shiny finish. Use a clean, soft cloth to apply a small amount of high-quality furniture polish in a circular motion. Buff the wood gently to bring out its natural luster, paying special attention to any intricate details or carved areas.
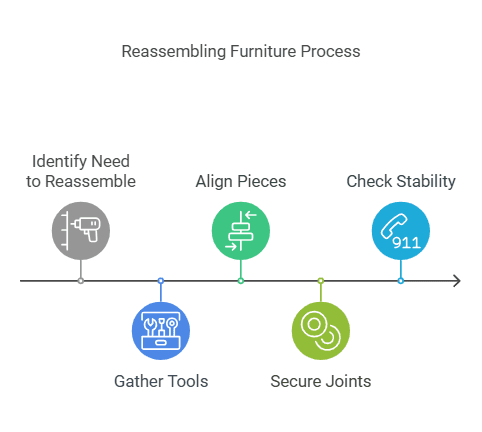
Reassemble Furniture If Needed
If you had to disassemble any parts of the furniture for the restoration process, now is the time to reassemble furniture if needed. Carefully reattach any legs, drawers, or other components, ensuring that everything is secure and properly aligned. Take this opportunity to tighten any loose screws or fittings to ensure the piece is structurally sound.
Frequently Asked Questions For How To Make Old Wood
How Do You Make Wood Older?
To make wood look older, you can use techniques like distressing, staining, and aging solutions. Sanding, burning, and painting can also create an aged appearance.
How Do You Make Wood Look Old And Rotten?
To make wood look old and rotten, you can use vinegar and steel wool solution to create an aged effect. Apply the solution to the wood and let it sit to darken the color. You can also add water or coffee to enhance the effect.
How Do You Make Wood Look Like Old Barnwood?
To make wood look like old barnwood, use a combination of staining, distressing, and sanding techniques. Start with a dark base stain, then apply a lighter top coat and sand to reveal the darker color. Add random dings and scratches for a weathered finish.
How Do You Age Wood With Vinegar?
To age wood with vinegar, create a mixture of steel wool and white vinegar. Apply the mixture to the wood surface and let it sit for at least 1 hour. The wood will darken as it reacts with the vinegar.
Sand lightly to achieve the desired aged look.
Conclusion
With these simple techniques, you can transform old wood into stunning pieces for your home. By sanding and refinishing, you can restore its natural beauty and give it a fresh lease on life. Embrace the charm of aged wood by distressing it with various techniques, bringing a rustic and vintage touch to any space.
Don’t let old wood go to waste – unleash your creativity and turn it into something truly extraordinary.