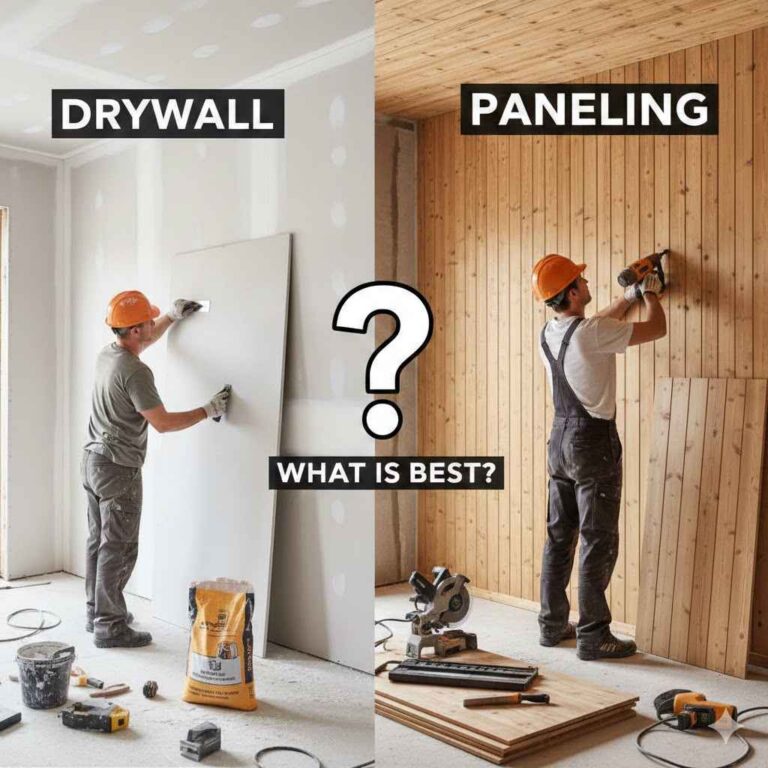
How To Make Wood Paneling Look Like Drywall: Transform Your Space Instantly
To make wood paneling look like drywall, you can use a combination of techniques such as filling the paneling grooves, sanding the surface, and priming and painting the paneling with a drywall texture paint. By following these steps, you can achieve a smooth and seamless finish that resembles drywall.
Wood paneling can be transformed into a sleek and modern look, blending seamlessly with the rest of the room’s decor. This article will guide you through the process of making your wood paneling look like drywall, allowing you to achieve the desired aesthetic for your space.
Why Wood Paneling
Wood paneling is a versatile option to achieve a seamless drywall appearance. It offers warmth and texture while maintaining the durability and charm of natural wood. With the right techniques and finishes, wood paneling can be transformed effortlessly into a sleek and modern design feature in any space.
Natural Charm And Warmth
Wood paneling has been a popular choice for homeowners for many years, and it’s easy to see why. One of the main reasons people opt for wood paneling is because of its natural charm and warmth. Unlike drywall, wood paneling brings a sense of authenticity and character to any space.
There’s something inherently inviting about the rustic feel that wood paneling provides. It adds a touch of nature indoors, creating a cozy and comfortable atmosphere. Whether you choose a knotty pine, cedar, or oak paneling, the rich tones and textures instantly create a warm and welcoming ambiance.
Versatility In Design
Another advantage of wood paneling is its versatility in design. Unlike drywall, which is a blank canvas, wood paneling offers a variety of options to suit different styles and preferences. Whether you want a traditional, rustic, or contemporary look, wood paneling can adapt to your vision.
With wood paneling, you have the opportunity to create a focal point or an accent wall that stands out. You can choose from different finishes, such as painted, stained, or natural, to achieve the desired effect. Additionally, wood paneling can be installed vertically or horizontally, giving you even more design possibilities.
| Benefits: | Summary: |
|---|---|
| 1. Natural charm and warmth | Brings a cozy and comfortable atmosphere |
| 2. Versatility in design | Adapts to different styles and preferences |
Overall, the choice to use wood paneling instead of drywall is a matter of personal preference, but the natural charm, warmth, and versatility offered by wood paneling are hard to beat. Whether you want to enhance a traditional or contemporary space, wood paneling can bring character and style to your home.
The Drawbacks Of Wood Paneling
Wood paneling, once a popular interior design trend, may not always be the most desirable option for modern homes. There are several drawbacks associated with wood paneling that can make your space feel outdated and restrict your design choices. In this section, we will explore these drawbacks in detail.
Outdated Aesthetics
When it comes to interior design, first impressions matter. Unfortunately, wood paneling can give your space a dated and old-fashioned appearance. The dark and heavy wood tones, along with the distinctive groove patterns, can create a rustic or retro vibe that may not align with your desired aesthetic. If you are aiming for a sleek and contemporary look, wood paneling might not be the best choice for your walls.
Limited Design Options
Another drawback of wood paneling is its limited design options. Unlike drywall, which allows for nearly limitless customization, wood paneling can be more restrictive. The fixed patterns and sizes of the panels can make it challenging to achieve the specific look and feel you envision for your space. Whether you want a smooth and seamless finish or prefer a textured wall, wood paneling may not offer the versatility and flexibility you desire.
| Wood Paneling | Drywall |
|---|---|
| Limited design options | Endless design possibilities |
| Can make space look outdated | Modern and versatile |
| Difficult to paint or update | Easy to paint and change |
Considering these limitations, you may be wondering how to achieve the aesthetics and design options of drywall while still keeping the warmth and texture of wood paneling. In the next section, we will explore some creative methods to make wood paneling look like drywall, allowing you to enjoy the best of both worlds.
Transforming Wood Paneling
Transforming wood paneling into a smooth and polished surface can instantly update the look of a room. Whether you are aiming for a modern aesthetic or simply want to freshen up outdated paneling, this step-by-step guide will walk you through the process of making wood paneling look like drywall.
Preparation And Cleaning
Before you begin, it’s essential to prepare the wood paneling for the transformation. Start by cleaning the surface thoroughly to remove any dirt, grease, or dust. This will ensure better adhesion and a smooth finish.
To clean the paneling:
- Use warm water and a mild detergent to wipe down the surface.
- Rinse with clean water and allow it to dry completely.
- If there are any stubborn stains or grease marks, gently scrub them with a mixture of baking soda and water.
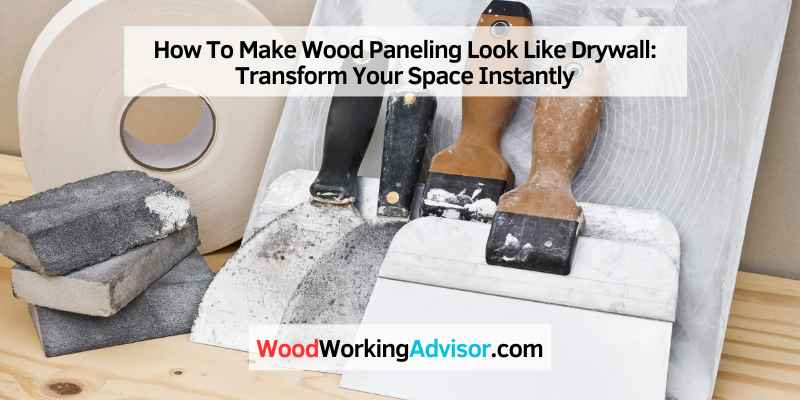
Filling The Panel Grooves
Next, you’ll fill in the grooves of the wood paneling to create a seamless look. This step is crucial for achieving a flat surface, as the grooves can peek through if not properly filled.
To fill the panel grooves:
- Apply a high-quality joint compound or wood filler to the grooves using a putty knife.
- Smooth out the filler, ensuring it is flush with the rest of the paneling.
- Allow the filler to dry completely according to the manufacturer’s instructions.
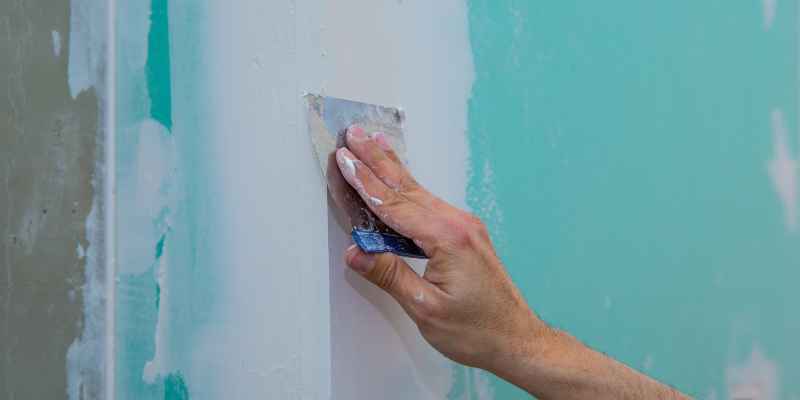
Sanding And Smoothing
Once the filler has dried, it’s time to sand down the paneling to create an even surface. Sanding will remove any leftover bumps or imperfections from the filler, ensuring a smooth and flawless finish.
To sand the paneling:
- Using medium-grit sandpaper, gently sand the entire surface of the paneling.
- Pay extra attention to the filled grooves to ensure they are smooth and blend seamlessly with the rest of the paneling.
- After sanding, wipe away any dust or debris with a clean cloth.
Priming The Surface
Before applying the final coat of paint, it’s vital to prime the wood paneling to enhance paint adhesion and prevent any bleed-through. Primer will also help create a uniform color and finish.
To prime the surface:
- Choose a high-quality primer suitable for wood surfaces and follow the manufacturer’s instructions for proper application.
- Apply an even coat of primer to the entire paneling, using a paintbrush or roller.
- Allow the primer to dry completely before moving on to the next step.
Once you’ve completed these steps, your wood paneling will be ready for a fresh coat of paint. Remember, transforming wood paneling into a smooth and polished surface is a rewarding process that will revitalize the look of any room in your home.
Choosing The Right Paint
Transform your wood paneling into the smooth look of drywall with the right paint selection. Achieve a seamless finish by following simple steps to create a stylish and modern update for any space.
When it comes to transforming wood paneling into a smooth and modern surface that resembles drywall, choosing the right paint is essential. Not all paints are created equal, and selecting the wrong type can lead to disappointing results. Whether you want to achieve a clean, minimalist look or unleash your creativity with vibrant colors, this section will guide you through the process of choosing the perfect paint for your wood paneling project.
Opting For A Primer-sealer
Before diving into the various paint options, it’s crucial to start with a primer-sealer. Applying a primer-sealer to your wood paneling will not only ensure better paint adhesion, but it will also create a uniform surface, covering any imperfections or dark colors that may bleed through. This step is particularly important if your wood paneling has a glossy or varnished finish, as it helps the paint to adhere properly.
Using a primer-sealer also provides an additional layer of protection for your wood paneling. It helps to prevent moisture from seeping into the wood, reducing the risk of warping or rotting over time. When choosing a primer-sealer, look for options specifically designed for wood surfaces and interior painting. Ensure that the primer-sealer is compatible with the paint you plan to use, as different primers may be recommended for different types of paint finishes.
Recommended Paint Finishes
Once you’ve properly primed and sealed your wood paneling, you can move on to selecting the right paint finish. The finish you choose will depend on the look and feel you want to achieve in your space. Here are a few options to consider:
- Eggshell finish: This finish combines a slight sheen with excellent durability, making it a popular choice for wood paneling. Eggshell provides a smooth, low-luster surface that is easy to clean and suitable for high-traffic areas.
- Satin finish: If you desire a slightly glossier look without the high shine of semi-gloss or gloss finishes, satin is the way to go. Satin finishes are known for their durability and ability to resist stains, making them a practical choice for wood paneling in kitchens, bathrooms, or children’s rooms.
- Semi-gloss/gloss finish: If you’re looking for a sleek and polished appearance, semi-gloss or gloss finishes are ideal. These finishes create a highly reflective surface that can make any room feel more luxurious. However, it’s important to note that glossy finishes tend to highlight imperfections, so proper surface preparation is crucial for a flawless result.
Remember, the paint finish you choose will impact both the aesthetics and functionality of your wood paneling. Consider factors such as lighting, room size, and personal preference when making your decision.
Painting Techniques For Wood Paneling
When it comes to transforming wood paneling into a smooth and modern-looking surface, proper paint application is key. Taking the time to prepare the wood paneling and using the right painting techniques can make a significant difference in the final result. In this section, we will explore two popular painting techniques – brush and roller – and discuss their pros and cons. We will also emphasize the importance of proper paint application to achieve a flawless, professional finish.
Brush Or Roller?
Choosing between a brush and a roller depends on the desired finish and the texture of the wood paneling. Both tools have their advantages and disadvantages, so let’s delve into the specifics.
The Importance Of Proper Paint Application
Proper paint application is crucial to achieve a flawless look when converting wood paneling into drywall-like surfaces. Understanding the techniques and best practices ensures optimal adhesion, coverage, and a smooth finish.
Creating A Smooth Finish
Follow these steps to create a smooth finish while painting wood paneling:
- Clean the surface thoroughly, removing any dirt, grime, or dust using a gentle cleanser or a degreaser.
- Fill any cracks, holes, or imperfections with a wood filler or spackling compound and sand the patched areas until smooth.
- Prime the wood paneling with a high-quality primer specifically designed for wood surfaces. This step ensures better paint adhesion and helps cover any remaining imperfections.
- Choose a high-quality paint suitable for wood surfaces, preferably in a satin or semi-gloss finish for easier cleaning. Test the paint on a small inconspicuous area to ensure compatibility and desired coverage.
- Using either a brush or roller, apply the paint evenly and in thin coats. Allow each coat to dry completely before applying the next layer.
- If using a brush, apply the paint in smooth, even strokes in the direction of the wood grain to maintain a natural look. Take your time to ensure consistent coverage and avoid visible brush marks.
- If using a roller, use a medium nap roller cover for smooth surfaces or a thicker nap for textured paneling. Roll the paint on in long, even strokes, overlapping each section slightly to avoid streaks or lines.
- If necessary, apply additional coats of paint until you achieve the desired opacity and a smooth finish. Sand lightly between each coat to remove any imperfections.
- Once the final coat is dry, inspect the painted wood paneling for any touch-ups needed. Make any necessary corrections for a flawless end result.
By following these painting techniques and maintaining attention to detail throughout the process, you can achieve wood paneling that resembles the seamless finish of drywall. With the right tools, preparation, and proper paint application, you can transform any room and create a modern and inviting space.

Frequently Asked Questions Of How To Make Wood Paneling Look Like Drywall
Can You Put Drywall Mud On Wood Paneling?
No, you cannot put drywall mud on wood paneling. Drywall mud is specifically designed for use on drywall surfaces, not wood. It won’t adhere properly and may crack or peel off over time. For wood paneling, it’s best to use a wood-friendly spackling compound or wood filler for any repairs or improvements.
How Do You Turn Wood Paneling Into Regular Walls?
To turn wood paneling into regular walls, you can follow these steps:
1. Start by removing any trim or molding attached to the paneling.
2. Fill the paneling grooves with spackle or joint compound, allowing it to dry completely.
3.Sand the paneling to create a smooth surface.
4. Apply a coat of primer to the paneling.
5. Finish by painting the paneling with your desired color.
What Is The Best Product To Fill Paneling Grooves?
To fill paneling grooves, spackling paste or wood filler can be the best products.
Can You Put Drywall Over Wood Paneling?
Yes, you can put drywall over wood paneling. It is a common method to update the look of a room. The paneling should be clean and free of any loose or damaged areas before attaching the drywall. It is recommended to use construction adhesive and screws to secure the drywall to the paneling.
Conclusion
To transform wood paneling into a sleek and modern drywall finish, these tips and techniques have been presented. By carefully following the step-by-step process outlined in this blog post, you can easily achieve the desired result. Remember, proper preparation, using fillers, and applying a fresh coat of paint are key to successfully disguising wood paneling.
So go ahead and give your walls a fresh look that resembles drywall, creating a more modern and updated living space.