How to Make a Kiln to Dry Wood: Solar, DIY & Dehumidification
Building a wood-drying kiln means constructing an insulated, ventilated enclosure — usually a solar kiln (~$600-$700 in materials, run on sun and a small fan) or a dehumidification kiln (uses a dehumidifier instead of heat) — that holds temperature and humidity steady until the wood reaches target moisture content. A solar kiln built to standard specs can dry 450 board feet of 1-inch hardwood in about 6 weeks; going too fast risks cracking and warping the entire batch. This guide covers sizing your kiln, the exact temperature/humidity targets, step-by-step construction, and how to monitor drying without guessing.
Introduction To Wood Drying Kilns
Wood drying kilns remove moisture from timber faster and more evenly than air-drying, making the wood usable for furniture, flooring, and other projects sooner. Green lumber straight off the saw can carry 30-100%+ moisture content depending on species; a kiln brings it down to a stable range for indoor use.
Purpose Of Drying Wood
Drying wood reduces its moisture content to a level suitable for its intended use — typically 7% for hardwood used indoors and 10% for softwood. Getting there prevents decay, improves strength, and minimizes the shrinkage and movement that shows up after the wood is built into a project.
Benefits Of Using A Kiln
A kiln gives you precise control over temperature and humidity, producing more uniform drying than stacking wood outside and waiting. Kiln-dried wood is also less prone to warping and cracking than air-dried wood, and it dries in weeks rather than the months or years air-drying can take.
Types Of Wood Drying Kilns
Three main kiln types are used for DIY and small-scale drying, and each fits a different budget and climate.
Conventional Kilns
Conventional kilns use an external heat source — gas, electric heaters, or wood — to actively control temperature, humidity, and airflow. They dry fastest but cost the most to build and run, which is why they’re mostly used by commercial sawmills rather than hobbyists.
Dehumidification Kilns
Dehumidification kilns use a standard dehumidifier to pull moisture out of the air inside an insulated box, which is an economical option that doesn’t depend on sunny weather. They run slower than conventional kilns but cost far less to build and operate for a small hobbyist batch.
Solar Kilns
Solar kilns use a greenhouse-style glazed roof to trap solar heat, reaching roughly 120-130°F on sunny days (occasionally spiking to 135°F, which is also hot enough to kill most wood-boring insects). According to Oregon State University’s Wood Innovation Center, a properly sized solar kiln can dry 450 board feet of 1-inch hardwood lumber in about 6 weeks of good weather, or 600 board feet of 2-inch hardwood in about 15 weeks — softwoods dry in roughly half that time.
Essential Materials And Tools
Gather these materials and tools before starting construction — running out mid-build is the most common reason a DIY kiln project stalls.
Construction Materials
- Insulating firebricks or rigid foam insulation panels
- Fire-resistant mortar (conventional kilns only)
- Steel rebar or treated 2×4 framing lumber
- Sheet metal or corrugated roofing panels
- Clear polyethylene or fiberglass glazing (solar kilns)
- Aluminum flashing
- Thermocouples or a digital thermometer/hygrometer
- Fire-resistant paint (conventional kilns only)
Measuring And Cutting Tools
- Tape measure
- Straight edge
- Pencil
- Circular saw
- Table saw
- Chop saw
- Hammer
- Level
Designing Your Kiln
Size your kiln to the wood you actually plan to dry, not to whatever space happens to be available — an oversized kiln wastes energy and dries unevenly. As a sizing rule of thumb from Oregon State’s solar kiln plans, maximum capacity in board feet should be about 10 times the kiln’s roof area in square feet, so a 100 sq ft roof supports roughly 1,000 board feet of lumber.
Determining Size And Capacity
Base your kiln’s size on four factors: the species you’re drying, board thickness, starting moisture content, and total volume you need dried at once. A small hobbyist solar kiln built on 90-100 sq ft handles 150-250 board feet per cycle — enough for most furniture-scale projects without oversizing the structure.
Ventilation And Air Flow Considerations
Proper airflow prevents mold growth and uneven drying — plan for adjustable vents, a location clear of flammable materials, and either natural convection or a small circulation fan. For a solar kiln, orient the glazed roof so its angle roughly matches your latitude in degrees, which maximizes solar gain year-round according to Virginia Tech Cooperative Extension’s solar kiln design guide.
Step-by-step Kiln Construction
Building The Frame
Construct a sturdy frame using treated lumber, sized so the interior dimensions accommodate your wood piles with airflow gaps on all sides.
- Ensure the dimensions accommodate the wood piles with room for stickers (spacer strips) between layers.
- Use a level to check for evenness on every wall and the roof line.
- Secure corners with metal brackets for wind and load resistance.
Installing Insulation And Heating Elements
Add insulation inside the frame to hold temperature steady, then install your heat source appropriate to the kiln type you chose.
- Apply heat-resistant insulation boards or firebrick to all interior walls.
- Install heating elements (conventional) or the dehumidifier unit (dehumidification kiln) evenly for consistent coverage.
- Connect to a thermostat or timer for repeatable control cycle after cycle.
Setting Up A Monitoring System
A monitoring system is what turns a kiln from guesswork into a repeatable process. At minimum, track temperature, humidity, and wood moisture content throughout the cycle.
Temperature And Humidity Gauges
Place digital temperature and humidity gauges in several locations throughout the kiln, since heat and moisture are rarely perfectly even inside a DIY structure. A gauge with a range covering at least 0-160°F and 0-100% relative humidity covers every kiln type in this guide.
Moisture Meters — The Step Most DIYers Skip
Temperature and humidity gauges tell you what the kiln is doing — a moisture meter tells you what the wood is actually doing, which is the number that matters. Pinless meters scan a wide area without marking the wood; pin meters give a more precise localized reading by measuring resistance between two probes. Check moisture content every few days as you approach your target (7% hardwood, 10% softwood for indoor use) rather than relying on a fixed timeline alone, since drying speed varies with species, thickness, and weather.
Best Moisture Meter Pick

Klein Tools ET140 Pinless Moisture Meter
Non-destructive scanning means you can check the same boards repeatedly through a whole drying cycle without leaving pin marks.
- Best for: tracking moisture loss on the same boards day-to-day inside the kiln
- Why we picked it: pinless scanning avoids damaging or marking lumber you’re about to sell or build with
- Main drawback: less precise on very thick stock than a pin-type meter
Compare more kiln-building supplies
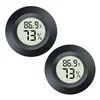 Option 1 Digital Hygrometer Thermometer, 2-Pack
|
 Option 2 Insulating Fire Brick, 2300°F Rated, 12-Pack
|
As an Amazon Associate we earn from qualifying purchases.
Operating Your Kiln Safely
Safe operation comes down to controlling temperature and humidity, stacking correctly for airflow, and following basic electrical and fire-safety precautions around your wood drying kiln.
Safety Precautions
- Wear protective gear, including gloves and safety goggles, when handling insulation and rough lumber.
- Ensure proper ventilation in the kiln area, especially for conventional kilns with active heat sources.
- Regularly inspect electrical components — heating elements, dehumidifiers, fans — for any signs of damage before each cycle.
Maintenance Tips
- Clean the kiln interior between cycles to prevent dust and mold spore buildup.
- Check and replace any worn-out or damaged parts (fan belts, gaskets, glazing) promptly.
- Monitor temperature and humidity levels consistently — a gap in monitoring is when defects go unnoticed.
Troubleshooting Common Kiln Issues
Most DIY kiln problems trace back to uneven airflow or moving too fast for the wood’s tolerance. These are the two you’ll run into most often:
Temperature Fluctuations
Uneven temperatures lead to inconsistent drying across the stack. Check heating elements and fans for proper function, and confirm good air circulation reaches every layer, not just the boards nearest the heat source or vent.
Wood Drying Defects
Warped wood usually results from improper stacking — stack uniformly with stickers directly above each other so weight transfers straight down. Check for mold growth too, which shows up when humidity stays high without enough airflow to carry moisture away.
Maximizing Efficiency
Optimizing your drying cycle and insulation are the two levers that matter most for getting the most out of a DIY kiln without wasting energy or time.
Optimizing Drying Cycles
Track the wood’s moisture content directly with a moisture meter rather than guessing from elapsed time — species, thickness, and starting moisture content all change how long a cycle should run. Softwoods generally dry in about half the time hardwoods need at the same thickness, so a fixed schedule for all species will over- or under-dry part of your batch.
Energy-saving Strategies
Insulating the kiln properly reduces heat loss and cuts energy consumption the most of any single upgrade. A heat-recovery system that captures and recycles exhausted heat back into the kiln further reduces energy use on conventional and dehumidification kilns. For a solar kiln, energy cost is close to zero beyond the small fan needed for air circulation — the tradeoff is being weather-dependent instead.
What a Real Build Looks Like
A standard-spec solar kiln built on roughly 90-100 sq ft of floor space handles about 150-250 board feet per cycle for around $600-$700 in materials — well within reach of a weekend DIY project for someone comfortable framing a small structure. At that size, expect roughly 450 board feet of 1-inch hardwood to dry in about 6 weeks of good weather, or 600 board feet of 2-inch stock in about 15 weeks; softwoods cut that time roughly in half. Sizing up or down from those numbers using the roof-area-to-board-feet ratio above scales the same math to a bigger or smaller build.
Conclusion And Next Steps
Once your kiln is built and running, monitor temperature, humidity, and wood moisture content on a regular schedule rather than assuming the cycle is going as planned.
Evaluating Kiln Performance
Use a thermometer and hygrometer to record temperature and humidity readings regularly, and make adjustments as needed. Inspect the wood itself too — check board ends for splitting or cracking, which signals the drying rate is too aggressive for that species or thickness.
Advanced Techniques For Experienced Users
Vacuum kilns pull moisture out under reduced atmospheric pressure and can dry wood significantly faster than a conventional or solar kiln, though the equipment cost is much higher than a DIY build justifies for hobbyist volumes. Experimenting with different temperature and humidity combinations for a given species — within safe drying-rate limits — lets you fine-tune color, strength, and stability results over multiple cycles.
Frequently Asked Questions
How Can I Build A Kiln To Dry Wood At Home?
Build an insulated box using plywood or firebrick, add a heat source (solar glazing, a heater, or a dehumidifier), and ensure proper ventilation with adjustable vents. Monitor temperature, humidity, and wood moisture content throughout the cycle rather than relying on a fixed timeline.
What Temperature Should I Set In The Kiln To Dry Wood?
Conventional and dehumidification kilns typically run 130-160°F. Solar kilns run cooler, around 120-130°F, occasionally reaching 135°F on hot days — still enough to kill most wood-boring insects. Monitor closely and adjust to avoid cracking or excessive warping.
How Long Does It Take To Dry Wood In A Kiln?
A standard solar kiln dries about 450 board feet of 1-inch hardwood in roughly 6 weeks of good weather, or 600 board feet of 2-inch hardwood in about 15 weeks; softwoods take roughly half as long. Conventional and dehumidification kilns can run faster depending on heat input. Always confirm with a moisture meter rather than the clock alone.
Can I Dry Wood Without A Kiln?
Yes — air-drying stacks wood with spacer strips (stickers) and lets natural airflow do the work, but it can take several months to multiple years depending on species and thickness. A dehumidification kiln splits the difference: no active heat source, but faster and more controlled than open-air drying.
For more on how kiln-dried lumber differs once it’s finished, see our guide on whether kiln-dried wood counts as treated wood.
Conclusion
Building a kiln for drying wood is a realistic weekend DIY project — a solar kiln runs about $600-$700 in materials and needs only sun and airflow, while a dehumidification kiln trades weather-dependence for a bit more upfront equipment cost. Size the kiln to your actual lumber volume, track moisture content with a real meter rather than a fixed schedule, and prioritize even airflow over speed to avoid cracking and warping your batch.