How to Paint a Metal Door to Look Like Wood (+ Real Cost)
A tintable oil-based gel stain brushed over a bonded metal primer turns a flat steel, aluminum, or hollow-core door into a convincing faux wood grain finish — but skip the degreaser-and-scuff-sand step and the paint peels within months. Aluminum doors also need a self-etching primer, not a standard bonding primer, or adhesion fails. This guide covers full prep by door type, the gel stain and glazing technique, real material costs, and the mistakes that ruin the finish.
Quick Answer
Clean and scuff-sand the door, apply a bonded metal primer (self-etching primer on aluminum), add a base coat close to your target wood tone, then brush on a tintable oil-based gel stain and drag a wood-graining tool through it while wet. Seal with exterior polyurethane once the stain has cured at least 24 hours. Total materials typically run $55–$65.
Preparation
Best Gel Stain Pick
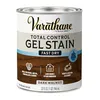
Varathane Total Control Dark Walnut Gel Stain – $16.83
A thick, low-odor water-based gel formula built for vertical surfaces like doors — it sits on top of the primer instead of soaking in, which is exactly what lets you drag a graining tool through it for the wood-grain effect this guide covers.
- Best for: vertical door panels where a runny stain would drip
- Why we picked it: thick vertical-surface formula plus wide color range for matching an existing wood tone
- Main drawback: water-based formula needs a light scuff-sand between coats if you’re layering two shades
Compare more faux wood door supplies
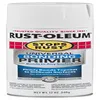 Option 1 Rust-Oleum Bonding Primer Spray – $9.88
|
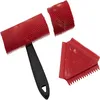 Option 2 ALLWAY GT3 Wood Graining Set – $11.49
|
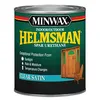 Option 3 Minwax Helmsman Spar Urethane – $22.88
|
As an Amazon Associate we earn from qualifying purchases.
To paint a metal door to look like wood, start by prepping and sanding the surface to ensure proper adhesion. Apply a base coat and then create a faux finish with glaze by applying a second coat, adding a second shade, and glazing the horizontal panels.
Finish with touch-ups, and the door will have a wood-like appearance. Follow these steps to give your metal door a rustic, personalized look.
Preparation is key when it comes to painting a metal door to look like wood. This process involves several steps, starting with cleaning the door to ensure that it is free of any dirt, grease, or other debris. Once the door is clean, it needs to be sanded to roughen up the surface and create better adhesion for the paint. Finally, the panels on the door need to be masked off to ensure that each section is painted with precision.
Cleaning The Door
Before you start painting the metal door, it is essential to clean it thoroughly. Use a degreaser, or a 1:1 mixture of rubbing alcohol and water, to remove any dirt, grime, or oil from the surface of the door — plain household cleaners often leave a residue that stops paint from bonding. Rinse the door with clean water and allow it to dry completely before moving on to the next step.
Sanding The Surface
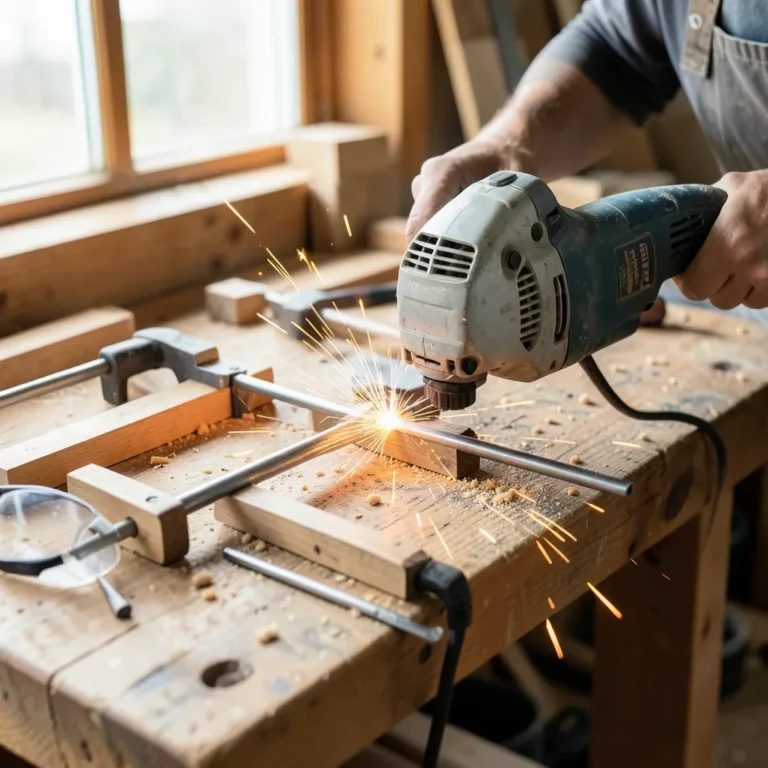
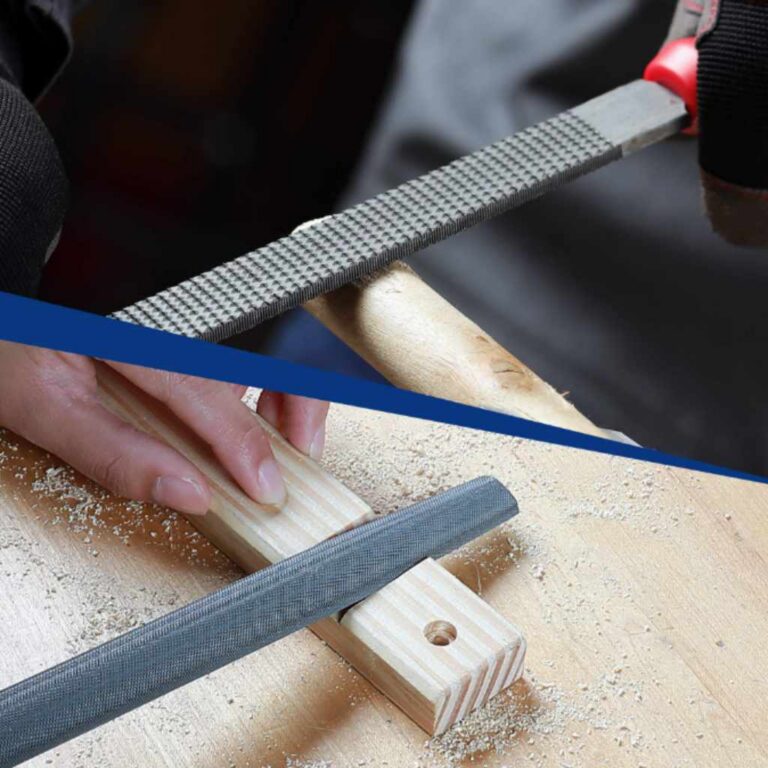
Sanding the surface of the metal door is crucial to prepare it for painting. Use 120-grit sandpaper to scuff the entire surface of the door — you’re not trying to remove material, just break the factory sheen so primer has something to grip. Be sure to clean off any grit or residue left behind from the sanding process before moving on to the next step.
Masking Off Panels
To create a realistic wood grain effect, the panels on the metal door need to be masked off. This step will ensure that each section is painted with precision and in the correct direction for the wood grain effect. Use painter’s tape to mask off each panel, making sure that the edges of the tape are pressed down firmly.
By following these three steps, you can properly prepare your metal door for painting to achieve a beautiful wood-like finish. Proper preparation is what separates a finish that lasts years from one that peels by next summer.
Steel, Aluminum & Hollow Metal Doors — What Changes
Not every metal door preps the same way. Solid steel entry doors and most hollow metal (commercial-style) doors are cold-rolled or hot-dip galvanized steel, and a standard bonding or rust-inhibitive metal primer works after the clean-and-scuff steps above. Aluminum is different: it’s non-porous, so a standard bonding primer will not grip it reliably — use a self-etching primer instead, which contains a mild acid that micro-etches the surface for real adhesion. If you’re prepping with a chemical deglosser or prep wipe rather than sanding, apply the first coat of primer within about 10 minutes, before the surface re-contaminates.
Base Coat And Stain Application
Learn how to paint a metal door to look like wood with the base coat and stain application technique. This DIY project involves sanding, applying a base coat, creating a faux finish with glaze, applying a second coat of glazed paint, and adding a second shade.
Follow the step-by-step process below to achieve a warm and rustic aesthetic.
Applying The Base Coat
Before applying the base coat, thoroughly clean the metal door to ensure proper adhesion. Once dry, apply a coat of bonding metal primer (self-etching primer on aluminum) with a brush or spray can and let it dry fully — most metal primers need a full 24 hours before the next coat in normal indoor temperatures, longer in cold or humid weather.
After the primer has cured, apply a base coat of paint with a brush or roller in a color close to your target wood tone — a lighter base reads more like pine or oak, a darker base reads more like walnut once the gel stain glaze goes over it. Two coats of base paint give the most even coverage. Let the base coat dry completely before moving to the stain step.
Choosing The Right Stain For Faux Wood Finish
Choosing the right stain is critical to achieving the desired wood grain finish. Tintable oil-based gel stains are the best choice for a faux wood finish on metal: they sit on top of the primer rather than soaking in the way a stain does on real wood, which is exactly what lets you drag a graining tool through it and leave visible lines.
When choosing a stain, consider the wood tone and grain pattern you’re matching. The stain should complement the base coat color and the surrounding trim. Test the stain on a scrap panel or hidden section before applying it to the entire door.
📊 One quart of gel stain covers roughly 200–250 sq ft and can be recoated in as little as 2 hours — enough for a full door with a shade to spare. Source: Varathane Total Control Gel Stain technical data, Rust-Oleum
Applying The Stain With A Foam Brush
For best results, use a foam brush to apply the stain. Start at the top of the door and work downwards in small sections — work one section at a time so the stain stays wet enough to grain before it sets. Apply the stain in the direction the wood grain should run, using long, even strokes, then quickly wipe off any excess with a clean cloth.
To create the wood grain effect, drag a wood-graining tool or a dry brush through the wet stain to add texture and swirls. Allow the stain to cure for at least 24 hours — longer in cold or humid conditions — before applying a protective clear coat.
Creating Faux Wood Grain
Transform your metal door into a charming wooden one with a faux wood grain painting technique. Apply a base coat, use glaze to create the wood grain effect, apply a second shade, and finally, touch up your project for the finished look.
Creating faux wood grain is the technique that actually sells the illusion on a metal door. This section covers using wood graining tools, applying glaze to create a faux finish, using a second shade for a more realistic look, glazing the horizontal panels separately, and building visual depth with layers.
Using Wood Graining Tools
A wood-graining tool (sometimes called a rocker) is what actually creates the look of natural wood grain in the wet stain. Hold it with your index finger guiding the direction and your thumb applying light downward pressure, then rock the tool gently up and down as you pull it through the stain — that rocking motion is what produces the heartwood arcs, not a straight drag. Practice on a scrap panel first; the motion takes a few tries to feel natural.
“The biggest mistake I see on a faux wood door is rushing the prep. Skip the scuff-sanding on a glossy factory finish and no primer will hold, no matter how good the stain looks going on wet.”
Applying Glaze To Create Faux Finish
Applying glaze over the base coat adds a translucent layer that mimics the depth of real wood. Work in small sections and use a soft-bristled brush to spread the glaze evenly — a common starting mix is roughly equal parts paint and clear glaze, thinned slightly with water if it’s dragging instead of flowing.
Using A Second Shade For More Realistic Look
To achieve a more realistic look, add a second shade of paint or glaze — slightly darker or lighter than the base coat. This adds definition to the wood grain and helps it read as natural rather than uniform. Choose a second shade that complements the base coat and creates a believable blend.
Glazing The Horizontal Panels
For an authentic look, glaze the horizontal panels of the door separately from the vertical ones. Tape off the vertical panels with painter’s tape and glaze the horizontal sections only — real wood doors are built this way, with the grain direction changing panel to panel, and matching that is what makes the faux finish convincing up close.
Creating Visual Depth With Layers
To build visual depth, layer multiple coats of glaze, blend different shades of paint, and vary the wood-graining tool between passes. Layering color and texture is what separates a flat paint job from one that reads as real wood from a few feet away.
Final Touches And Finish
To paint a metal door to look like wood, the final touches and finish are crucial. Apply a protective finish to seal in the wood grain effect created with a combination of base coats, glaze and tone coats, as well as careful touch-ups.
Follow these guidelines to finish transforming your metal door into a beautiful faux wood piece.
After completing all the steps, your metal door should look like real wood. It’s now time to add the final touches to protect the finish and make sure it lasts.
Applying Protective Finish
A protective topcoat is essential to prevent peeling, scratches, and chipping. An exterior-grade spar urethane or polyurethane sealant provides a durable coating and protects the finish from sunlight, heat, and rain. Apply it evenly with long strokes, starting at the top of the door, and let each coat cure fully — most exterior polyurethanes need at least 24 hours before the door is safe to rehang or expose to weather, and closer to 48 hours in cold or humid conditions.
Making Touch-Ups
After the protective finish is on, check for spots that need touch-ups. Use the same brush or roller from the base coat step to cover blemishes or scratches, and blend it smoothly with the surrounding area before the topcoat goes on.
Removing Tape and Masking
Once the paint and topcoat have fully dried, remove any masking tape used to protect hardware, windows, or surrounding surfaces. Peel the tape off in one motion, following the wood grain direction, to avoid jagged edges. If any residue remains, use a soft cloth and rubbing alcohol to remove it.
Adding Finishing Accessories
Finishing accessories complement the new wood look — decorative doorknobs, knockers, house numbers, or handles can enhance the door’s appearance further. Choose accessories that support the transformation rather than draw attention away from it.
What This Project Actually Costs
Most of the cost is in the stain, primer, graining tool, and topcoat — all one-time purchases that cover more than one door. Based on current retail pricing for the specific products in this guide, a single-door project runs about $61 in materials, not counting sandpaper, tape, or brushes you may already own.
| Material | Approx. Price | Covers |
|---|---|---|
| Bonding or self-etching primer | $9.88 | 1–2 doors |
| Base coat paint | varies (existing paint often works) | 1–2 doors |
| Tintable oil/gel stain (1 qt) | $16.83 | 200–250 sq ft, 1 door + extra |
| Wood-graining tool set | $11.49 | reusable, many doors |
| Exterior spar urethane topcoat | $22.88 | 1 door, 2–3 coats |
The graining tool and any leftover stain carry over to the next door or project, so a second door costs meaningfully less than the first.
Common Mistakes To Avoid
- Skipping the scuff-sand on a glossy door. Primer needs a rough surface to grip — glossy factory paint left untouched is the #1 cause of early peeling.
- Using a standard bonding primer on aluminum. Aluminum is non-porous; without a self-etching primer, adhesion fails even if the surface looks properly prepped.
- Sanding between glaze coats. Unlike a normal paint job, sanding a cured faux-grain layer removes the texture you just created — leave it alone once it’s dry.
- Rushing the cure time. Recoating or rehanging before the stain and topcoat have fully cured (24–48 hours depending on humidity) traps solvents and causes a cloudy or tacky finish.
- Fixing mistakes by scrubbing them out. If a section of stain looks wrong while it’s still wet, wipe it back with a rag and mineral spirits and re-grain it — don’t wait until it’s dry and try to sand it out.
Alternative Techniques And Products
Transform the look of your metal door to that of natural wood by applying alternative painting techniques and products. Turn heads with your newly crafted door that is not only unique, but also gives your home a timeless and rustic feel.
Painting a metal door to resemble wood can seem like a challenging project, but with the right tools and products it’s an achievable DIY upgrade. If your door is fiberglass rather than metal, the prep and product choices are different — see our guides on whether a fiberglass door can be painted and whether it can be stained instead. For a broader look at how stains, oils, sealers, and paints compare across materials, our wood finishing guide covers the full picture.
Gel Stains For Front Doors
Gel stains are an excellent option for a stained-wood finish on front doors. They’re polymer-based and adhere to metal better than traditional penetrating stains, and the thick formula resists drips and runs on vertical surfaces. Gel stains come in a range of colors and can be layered lighter or darker for the desired finish. Popular brands include Minwax, General Finishes, Retique It Water‑Based Gel Stains, and Heirloom Traditions Paints.
Using Chalk Paint For Antique Look
For an antique finish, chalk paint is a versatile option that creates a vintage or country feel. It dries to a matte finish that can be sanded and polished for an even more distressed look. Popular chalk paint brands include Annie Sloan, Rust-Oleum, and DecoArt Americana.
Best Paint For Steel Doors
For a steel door, Rust-Oleum Stops Rust Door Paint is a durable choice that resists weathering and fading, with corrosion inhibitors built in and a range of tintable colors. Rust-Oleum’s water-based door paint and touch-up latex paint are suitable alternatives depending on sheen and application method. If you’d rather skip the wood-grain effect and just refresh the door in a solid color, our guide on how to repaint a metal door covers the full prep-to-topcoat process.
Zar Wood Stain For Steel Doors
Zar Wood Stain penetrates the surface of a steel door for an even, consistent finish and can be applied with a brush or cloth, with color customized by how much excess is wiped off. It’s available in several finishes, including a semi-transparent oil-based option and matching deck and siding coatings.
Whether you choose gel stain, chalk paint, a dedicated steel door paint, or Zar wood stain, read and follow the manufacturer’s instructions for that specific product — cure times and recoat windows vary by brand.

Frequently Asked Questions About Painting A Metal Door To Look Like Wood
Can You Paint Metal Doors To Look Like Wood?
Yes, you can paint metal doors to look like wood. To achieve this effect, use a painting technique with a tintable oil-based gel stain over a bonded metal primer and base coat. Look for a paint specifically designed for metal doors, such as acrylic-latex or oil-based enamel, for good adhesion, durability, and resistance to rust and corrosion.
Is There A Way To Make Metal Look Like Wood?
Yes. Common DIY techniques include applying a base coat, a tintable oil-based gel stain, wood-graining, glaze, and a protective topcoat. You can use gel stain, wood stain, chalk paint, or specialty metal paint — just make sure the base products are rated for metal, such as acrylic-latex or oil-based enamel.
What Kind Of Paint Do I Use For A Metal Door?
For metal doors, use paint designed for metal, such as acrylic-latex or oil-based enamel. These provide better adhesion, durability, and resistance to rust and corrosion than paints formulated for wood or drywall.
Can You Use Wood Stain On A Metal Door?
Yes, a tintable oil-based gel stain works on a metal door and gives it a rustic wood-look finish. Use a bonded metal primer underneath so the stain and base coat have something to adhere to — plain wood stain applied directly to bare metal will not bond or wear well.
What Kind Of Gel Stain Works Best For Faux Wood Grain On A Metal Door?
A thick, tintable oil- or water-based gel stain made for vertical surfaces works best, since it sits on top of the primer instead of soaking in the way a penetrating stain would. Brands like Varathane Total Control, Minwax, General Finishes, and Retique It all make gel stains rated for metal, fiberglass, and MDF as well as wood.
Can You Paint A Hollow Metal Door To Look Like Wood?
Yes. Most hollow metal (commercial-style) doors are cold-rolled or galvanized steel, so the same clean, scuff-sand, bonding-primer, base coat, and gel stain process used on a residential steel door applies. Galvanized surfaces benefit from a primer rated for galvanized metal specifically, since a standard bonding primer can peel off a galvanized coating over time.
Does Painting An Aluminum Door To Look Like Wood Work The Same Way As Steel?
Mostly, but the primer is different. Aluminum is non-porous, so a standard bonding primer used on steel won’t reliably grip it — use a self-etching primer on aluminum instead, which micro-etches the surface for adhesion. Once primed, the base coat, gel stain, and graining steps are the same as for a steel door.
Conclusion
Painting a metal door to look like wood is a simple, cost-effective way to add a rustic, personalized touch to your home — and at around $60 in materials, it’s a fraction of the cost of a real wood door replacement.
Match your primer to your door material (standard bonding primer for steel, self-etching for aluminum), don’t rush the cure times, and the faux wood grain finish will hold up for years.
Sponsored / affiliate links. As an Amazon Associate I earn from qualifying purchases. I may earn additional commission from eligible campaigns.