How to Preserve Wood Logs With Bark (So It Doesn’t Crack or Peel)
Preserving wood logs with bark starts with sealing the cut ends and timing the harvest for late fall or winter dormancy, not brushing a single preservative coat onto the bark itself. Skip the dormant-season cut and the bark loosens within weeks as the log dries, no matter what you apply afterward. This guide covers the CA-glue and epoxy techniques that actually hold bark on, the Anchorseal end-grain method that stops checking, and which method fits your project.
This post contains affiliate links. As an Amazon Associate, Woodworking Advisor earns from qualifying purchases at no extra cost to you.
Quick Answer
Cut in late fall or winter dormancy, seal the cut ends with a wax-based sealer like Anchorseal to slow moisture loss, and run thin CA glue into any spot where bark is already lifting. Once the log is stable, protect the bark with several thin coats of spar urethane rather than one heavy coat.
When to Cut Your Log Matters More Than Any Product
Best Log-Sealing Pick
Anchorseal 2 Log & Lumber End Grain Sealer, 1 Quart
A wax-emulsion sealer made specifically for log and lumber end grain — around $28.45 for a quart, brushed on within hours of cutting.
- Best for: sealing freshly cut ends of any log to slow moisture loss and prevent checking
- Why we picked it: purpose-built for this exact job — sawmills use it to stop end-check cracking during air drying
- Main drawback: only slows checking at the cut ends; it does nothing for bark bonding along the length of the log
Compare more log-preservation options
 Option 1 Thin Liquid CA Glue, 60g
|
 Option 2 PC-Woody Epoxy Wood Repair Paste, 12oz
|
 Option 3 Varathane Outdoor Spar Gloss Urethane
|
As an Amazon Associate we earn from qualifying purchases.
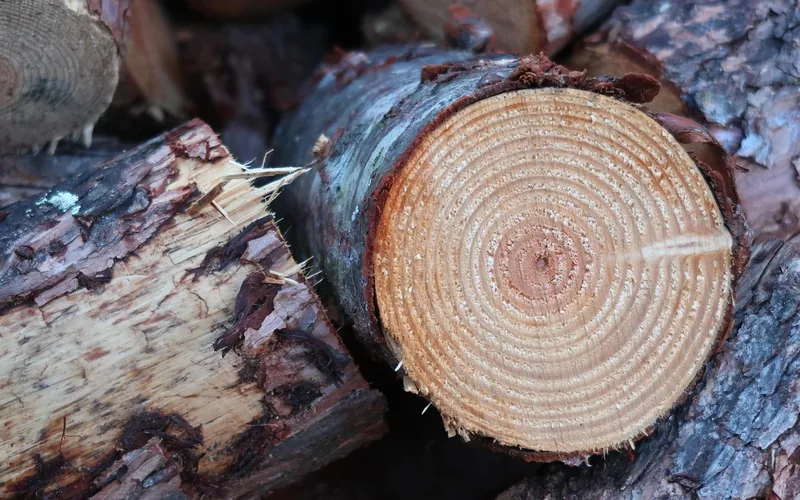
Bark separates from a log because it shrinks at a different rate than the wood underneath it as both dry out — a finish applied afterward cannot undo that mismatch, it can only slow it down. The single biggest factor in whether bark stays on is when the tree was cut, not what you paint on afterward.
- Cut in late fall or winter, after sap flow has stopped. Woodturning specialist Ernie Conover recommends harvesting between October and December — once the tree is dormant, there’s no sugar-rich sap actively pulling the cambium layer away from the wood.
- Avoid spring and early-summer cuts if you can. Wood cut while sap is actively running dries and shrinks unevenly, and the bark separates from the log far faster than dormant-season wood.
- Know your species. Some trees — cedar and many oaks among them — hold bark tightly even after the wood has fully died and dried. Others shed bark freely regardless of when you cut, so match your expectations to the species before you invest hours stabilizing it.
If you didn’t control the harvest timing — you’re working with a fallen log, a storm-downed tree, or wood someone else cut — skip ahead to the bonding and sealing steps below. They won’t fully replace a dormant-season cut, but they slow the same shrinkage problem.
How to Keep Bark From Falling Off a Log
Bark is the outer protective layer of a log that is not fused to the wood underneath it — it sits on top of a thin cambium layer, which is exactly why it separates as the wood dries and shrinks. Understanding that distinction matters: you’re not preserving one solid material, you’re keeping two materials with different shrink rates bonded together.
Once a log is already cut, two techniques actually bond bark to wood rather than just sitting on the surface:
- Thin cyanoacrylate (CA) glue at the bark-cambium interface. Woodturners doing natural-edge work run thin CA glue anywhere bark and wood are still in contact but starting to separate — it wicks into the gap and hardens fast, physically re-bonding the layers.
- Two-part epoxy for larger separated sections. Where a section of bark has already lifted more than a CA glue application can wick into, a penetrating epoxy applied to both surfaces and clamped while it cures gives a stronger, more permanent bond.
Be realistic about what these techniques can and can’t do. As restoration specialist Tim Inman puts it in a discussion on bark retention for turned wood:
“There is no chemical I know of that will prevent the bark from relaxing and letting go” — because bark and wood shrink at different rates during drying, no coating stops that process entirely; adhesives only slow it and re-bond what’s already come loose.
That’s the honest expectation to set going in: bark preservation on a whole log is maintenance, not a one-time fix. Budget for reapplying glue to a few spots each year rather than expecting a single treatment to lock every piece of bark in place permanently.
6 Steps to Preserve a Log With Bark Intact
This is the full process, in order. Skipping a step doesn’t just weaken the result — steps 2 and 3 in particular are the ones that actually determine whether bark stays attached long-term.
- Clean the log: Brush off loose dirt, moss, and any flaking bark with a stiff brush. Don’t power-wash bark that’s already loose — the water pressure will strip it.
- Seal the cut ends immediately: Brush a wax-based end-grain sealer like Anchorseal onto both cut faces within hours of cutting, extending it about an inch onto the bark where it meets the end grain. This is the single most effective step for preventing the radial cracks (checking) that split a log open as it dries.
- Bond any loose bark: Work thin CA glue into spots where bark has started lifting from the wood. For sections that have separated further, use a two-part epoxy on both surfaces and clamp until cured.
- Fill cracks and voids: If you’re preparing the log for furniture or display use, pack any splits or hollow areas with a two-part epoxy wood filler once the wood has dried enough that the crack has mostly stopped moving.
- Dry slowly, out of direct sun: Store the log off the ground in a shaded, well-ventilated spot. As a general rule, green wood needs roughly a year of air-drying per inch of thickness — a whole log dries far slower than a thin board because the moisture has so much farther to travel to the surface.
- Apply the final protective coat: Once the surface has dried and any glue or epoxy work has fully cured, brush on several thin coats of spar urethane rather than one heavy coat — thin coats bond evenly to the uneven bark surface, while a single thick coat pools in the bark’s grooves and cracks as it cures.
Filling Cracks and Voids in a Stump or Log
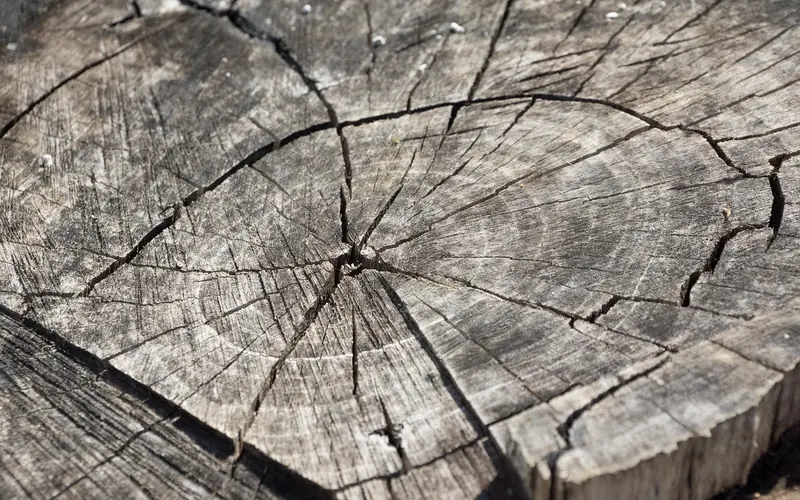
Larger stump sections being prepped for furniture — a side table, a seat, a rustic centerpiece — almost always develop some cracking as they dry, bark on or not. That’s normal, not a sign you did something wrong; it’s how a large mass of wood loses moisture unevenly from the outside in.
- Small cracks and surface checks: A two-part epoxy wood filler paste, tinted to roughly match the wood, packs into the gap and sands flush once cured.
- Large hollow voids: For a genuinely large cavity, fill the bulk of it with clean sand first, then cap it with epoxy — this saves epoxy (which is expensive in volume) and reduces the heat the epoxy generates as it cures, since large solid pours can get hot enough to crack the surrounding wood.
- Work in from both sides on a thick piece: Fill and cure one face, then flip the piece and fill the other — trying to fill a deep void from one side only often leaves the epoxy from setting evenly.
For rot or soft, punky wood rather than clean cracks, a penetrating epoxy consolidant is the right tool before you fill anything — our guide to repairing wood rot with epoxy covers that consolidant-then-filler process in full.
Choose Your Method by Project Type
Not every log needs the full six-step process. What you’re using the log for changes which steps actually matter.
| Project Type | Priority Steps | Skip |
|---|---|---|
| Rustic stump furniture | End-grain seal, crack/void filling, multi-coat spar urethane | Nothing — furniture pieces need the full process |
| Natural-edge turning blank | CA glue at the bark line during turning, end-grain seal before storage | Void filling — turned pieces are usually solid |
| Outdoor display log or garden edging | End-grain seal, one coat of spar urethane on the bark for UV protection | CA glue bonding — a little loose bark outdoors is cosmetic, not structural |
| Firewood or short-term storage | Off-ground, well-ventilated stacking only | Everything else — you’re burning it, not displaying it |
📊 Stacking split firewood bark-down outdoors traps water in the bark’s u-shaped trough, prolonging drying and accelerating decay — bark-up sheds that water instead. — Source: National Association of State Foresters, via Purdue Forestry & Natural Resources Extension
Common Mistakes to Avoid When Preserving Logs With Bark
- Cutting in spring or early summer. Sap flow during these months is exactly what pulls bark loose fastest — if you have any control over timing, wait for dormancy.
- Skipping the end-grain seal. Bare, freshly cut ends lose moisture many times faster than the sides of the log, which is what causes the radial checking cracks that split logs open. Sealing them within hours of cutting is cheap insurance a lot of guides skip entirely.
- Applying one thick coat instead of several thin ones. A heavy single coat of finish pools in the bark’s natural grooves and cracks as it cures, instead of following the bark’s texture.
- Power-washing loose bark. If bark is already lifting, water pressure strips it off rather than cleaning it — hand-brush instead.
- Ignoring bark beetle damage. Small round exit holes or fine sawdust-like frass under the bark mean an active infestation; sealing over it traps the insects inside rather than solving anything.
- Expecting a permanent fix from a single product. As covered above, no coating stops the underlying shrinkage mismatch between bark and wood — plan on spot-repairs over time, not a one-and-done treatment.
Long-Term Care for Preserved Logs With Bark
A preserved log — whether it’s furniture, a display piece, or garden edging — needs periodic attention, not a single fix-and-forget treatment.
- Inspect twice a year. Check for newly lifted bark, fresh cracks, or dull spots in the topcoat, especially after the first winter, when the wood is still equalizing to its environment.
- Keep it out of standing water. Whether indoors or outdoors, a log sitting directly on wet ground or concrete wicks moisture back up into the end grain no matter how well you sealed it — raise it on blocks or a stand.
- Reapply topcoat as it wears. Outdoor pieces typically need a fresh coat of spar urethane every one to two years; indoor pieces can go considerably longer.
- Touch up bark spot-bonds as needed. A small dab of CA glue on a newly lifted edge takes under a minute and prevents a bigger loss later.
- Keep it out of direct, prolonged sun if color matters to you. UV exposure fades and grays both bark and finish over time; rotating a display piece periodically evens out the fading.
For general moisture-content targets and storage conditions once your log is preserved, see our broader wood care and protection guide. And if what you’re actually working with is a cut cross-sectional slice or cookie rather than a whole log — a coaster or wall-art piece, say — the bark-stabilizing steps are different enough that our dedicated guide to preserving wood slices with bark is the better starting point.
Frequently Asked Questions
How do you keep bark from falling off a log?
Cut during dormant-season winter months when sap flow has stopped, then run thin CA glue or a two-part epoxy into any spot where bark is already lifting from the wood underneath. Seal the cut ends with a wax-based sealer to slow the moisture loss that drives the shrinkage in the first place. No method fully stops bark from eventually loosening in a few spots — the goal is slowing and re-bonding it, not a permanent one-time fix.
Should you remove bark before drying a log?
Only if you don’t intend to keep the bark on the finished piece. If you want the bark to stay for a rustic look, leave it on and follow the sealing and bonding steps above instead — removing it before drying makes sense only when bark isn’t part of the final design, since bark-free wood dries somewhat more evenly.
How long does it take for a log to dry with the bark on?
As a general woodworking rule, green wood air-dries at roughly one year per inch of thickness, and a whole log dries slower than a milled board of the same species because moisture has farther to travel to reach the surface. The bark itself doesn’t meaningfully slow this — most moisture still exits through the end grain, which is why sealing the cut ends matters more than sealing the bark.
Can you use polyurethane directly over bark?
Yes, and a spar-formula polyurethane is the better choice over a standard interior poly, since spar formulas stay flexible as the log continues to move slightly after drying, instead of cracking. Apply it in several thin coats rather than one heavy coat, which tends to pool in the bark’s texture and crack as it cures.
Does the tree species affect whether bark stays on a log?
Yes, significantly. Some species — cedar and many oaks, for example — hold bark tightly even after the wood has fully dried, while others shed bark freely regardless of cutting season or treatment. If you’re not sure which species you’re working with, learn how to identify wood logs first, then run a small test section before you invest hours stabilizing an entire log.
Conclusion
Preserving a log with bark intact comes down to sequence and expectations: cut it dormant if you can control that, seal the end grain immediately, bond any loose bark as it appears, and finish in thin coats rather than one heavy one. No product makes this permanent — treat it as ongoing maintenance, and the bark will stay presentable for years instead of shedding within a season.
Match the process to your project: a display log or firewood pile needs almost none of this, while a stump destined for furniture is worth the full six-step process, including crack filling and multiple topcoats.
Sponsored / affiliate links. As an Amazon Associate I earn from qualifying purchases. I may earn additional commission from eligible campaigns.