How to Get Dents Out of Wood: 5 Proven Methods
To get dents out of wood, use a damp cloth and an iron to apply heat and moisture to the dented area, then use steam or water to further relax the fibers. With gentle pressure, the dent should gradually lift.
Wood furniture adds a touch of elegance and warmth to any space, but it can easily acquire dents over time, whether from moving furniture or accidental impacts. These dents can be unsightly and diminish the overall appearance of the wood.
Fortunately, there are simple techniques you can employ to restore the wood’s smooth surface. We will explore effective methods for removing dents from wood using everyday household items, saving you the time and expense of professional repairs. With just a few steps and some patience, you can easily revitalize your wooden furniture and restore its original beauty. So, let’s dive in and learn how to get dents out of wood.
Understanding Wood Dents
Wood dents can be frustrating, but there are effective ways to remove them. Discover how to get rid of those unsightly marks on your wooden surfaces with these helpful tips and tricks.
Wood dents can happen to anyone, regardless of how careful you are with your furniture or wooden belongings. From accidental bumps to heavy objects being dropped, wood dents are a common annoyance. But fret not! In this section, we will delve into the causes and types of wood dents, equipping you with the knowledge to tackle this issue head-on.
What Causes Wood Dents?
Wood dents can occur due to various reasons. Here are some common causes that you should be aware of:
- Impact: A sudden impact or force applied to the wood surface can result in a dent. This can happen when a heavy object is dropped on the wood or if there’s a collision with the wood surface.
- Pressure: Continuous pressure or weight placed on a specific area of the wood can lead to dents over time. This can happen with furniture legs that exert constant pressure on the floor or when objects are left in the same place for an extended period.
- Moisture: Wood that is exposed to excessive moisture or humidity can become swollen and susceptible to denting. This is especially true for untreated or poorly finished wood.
Different Types Of Wood Dents
Wood dents can manifest in various forms, each requiring different techniques for repair. Here are the different types of wood dents you might encounter:
- Minor Surface Dents: These dents are shallow and usually only affect the surface of the wood. They can be caused by light impacts or pressure. Fortunately, these minor surface dents are relatively easy to fix.
- Deep Dents: Deep dents occur when the impact or pressure on the wood is significant. These dents can be more challenging to repair, as they may penetrate deeper into the wood fibers.
- Compression Dents: Compression dents occur when wood fibers are compressed, causing a localized indentation. These dents are commonly seen in wooden floors due to furniture legs or heavy objects being placed in the same spot for an extended period.
- Bruised Wood: Bruised wood is a dent that occurs when the impact crushes the fibers, leaving a darkened or discolored mark on the wood surface. Repairing bruised wood requires special techniques to restore the wood’s original appearance.
By understanding the causes and types of wood dents, you are one step closer to effectively addressing this issue. In the following sections, we will explore different methods and techniques to get dents out of wood, allowing you to restore the beauty of your wooden items effortlessly.
So let’s dive in!
Recommended Tools For Dent Repair
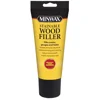
The real fix for dents with torn or crushed fibers, or under a heavy finish, that steam can’t reach.
Best for: deep dents, gouges, and finished pieces where steam has already failed.
Why we picked it: takes stain, so it can be color-matched to blend with the surrounding wood.
Main drawback: won’t match wood grain pattern up close.

Beautural Mini Travel Steam Iron
A small, controllable iron for the heat/steam methods above — easier to work with than a full-size clothes iron.

220-Grit Sanding Sponge (8-Pack)
For the final sand-flush step after wood filler cures.

Plastic Putty Knife (3-Pack)
Flexible blades for pressing filler into the dent without scratching the surrounding wood.
As an Amazon Associate, we earn from qualifying purchases.
Method 1: Heat And Water
Remove dents from wood effortlessly with Method 1: Heat and Water. This simple technique utilizes heat and water to restore your wood to its former glory.
Applying Heat And Water To The Dent:
Using heat and water is an effective method for removing dents from wood. This technique involves applying heat to the wood to expand it, followed by the application of water to help restore its original shape. Here’s how heat and water can help you get those dents out:
Heat application:
- Use a hairdryer or heat gun to warm the surface area of the dent.
- Slowly move the hairdryer or heat gun back and forth over the dent, ensuring that the heat is evenly distributed.
- The heat will cause the wood to expand, making it easier to restore its original shape.
Water application:
- Dip a clean cloth or sponge in hot water and wring out any excess moisture.
- Place the damp cloth or sponge directly over the heated dent.
- Allow the wood to absorb the moisture, which will further aid in the process of expanding the fibers and removing the dent.
How Heat And Water Can Remove Dents:
The combination of heat and water helps to remove dents from wood by utilizing the expansion and contraction properties of the material. Here’s how this method works:
Heat-induced expansion:
- When heat is applied to the wood, the molecules within the material start to move and expand.
- This expansion process causes the wood fibers around the dent to push outward, reducing its visibility.
- As the heated wood cools down, it contracts again, but the dent is significantly less pronounced.
Moisture-assisted restoration:
- The application of hot water to the heated wood fibers aids in their expansion.
- As the water is absorbed by the wood, it interacts with the heat and allows for further expansion and flexibility.
- The combination of heat and water working together helps the wood fibers regain their original shape, effectively removing the dent.
Precautions To Take When Using This Method:
While using heat and water to remove dents from wood can be quite effective, it’s essential to take some precautions to ensure the best results and avoid any damage. Consider the following:
Avoid excessive heat:
- Be cautious not to expose the wood to excessive heat, as it can lead to discoloration or even cause the wood to warp.
- Use a moderate heat setting on your hairdryer or heat gun to prevent overheating the wood.
Use distilled water:
- Use distilled or filtered water to prevent any minerals or impurities in tap water from leaving unsightly marks on the wood’s surface.
Test in an inconspicuous area:
- Before applying heat and water to the dent, test the method on an inconspicuous area of the wood to ensure it doesn’t cause any damage or adverse effects.
Patience is key:
- Take your time when applying heat and water to the dent. Rushing the process may result in unsatisfactory outcomes.
- Allow the wood to cool and dry naturally after treatment to avoid any potential issues.
Remember to use caution and follow these precautions when using the heat and water method to remove dents from wood. With proper care, patience, and attention to detail, you can restore the beauty and integrity of your wooden surfaces.
Method 2: Steam Treatment
Steam treatment is an effective method for removing dents from wood. By applying steam to the affected area, the wood fibers expand and regain their original shape, restoring the surface to its former glory. This gentle and non-invasive technique is a great way to rejuvenate your wooden furniture or flooring.
Creating and applying steam to the dent:
- Heat water in a pot or kettle until it produces a steady stream of steam.
- Position the spout of the kettle or pot 2-3 inches above the dented area.
- Allow the steam to directly hit the dent for about 3-5 minutes, ensuring consistent exposure.
- Gently rub the steamed area with a clean cloth to raise the wood fibers.
- Repeat the process if the dent hasn’t fully disappeared, applying steam and rubbing until satisfied.
Benefits of using steam to remove dents:
- Steam is a natural and non-invasive method for fixing dents in wood.
- It softens the wood fibers, making it easier to reshape and restore the damaged area.
- The process is simple and doesn’t require any expensive tools or materials.
- Steam treatment is effective on both small and large dents in various types of wood.
- It provides a cost-effective solution for repairing furniture and wooden surfaces.
Safety measures to bear in mind:
- Always prioritize safety when working with hot steam to avoid burns or injuries.
- Use protective gloves and eyewear to shield yourself from potential steam burns.
- Keep your face and hands at a safe distance from the steam source to prevent accidents.
- Ensure proper ventilation in the area by opening windows or working in a well-ventilated space.
- Be cautious when handling hot water or steam, as it can cause scalding.
Remember, steam treatment is a convenient and efficient method for removing dents from wood surfaces. By following the proper safety precautions and using the steam correctly, you can successfully repair dents and restore the beauty of your wooden items.
Method 3: Using A Wet Cloth And Iron
One effective method for removing dents from wood is to use a wet cloth and an iron. Wet the cloth, place it over the dent, and then apply heat with an iron. The combination of moisture and heat will help to restore the wood’s original shape.
If you’re dealing with dents in wood, one effective method to try is using a wet cloth and iron. This technique works well to raise dents by causing the wood to expand and regain its original shape. Here are the steps to follow to remove dents with this method:
- Start by wetting a cloth: Begin by dampening a cloth with water. Make sure it is not soaking wet but damp enough to provide moisture to the wood.
- Place the cloth on the dent: Lay the damp cloth directly over the dent, making sure it covers the entire affected area.
- Preheat the iron: While keeping the cloth in place, preheat an iron to a low or medium temperature setting. Avoid using high heat as it can damage the wood.
- Iron over the cloth: Once the iron is heated, gently press it over the damp cloth. Move the iron back and forth in a circular motion, applying slight pressure to the dent. Continue this process for about 20-30 seconds.
- Lift the cloth and check the result: Remove the cloth and inspect the wood to see if the dent has improved. If there is still a slight dent visible, repeat the process for a few more seconds.
Why this method is effective for wood dents:
- The combination of moisture from the cloth and heat from the iron helps to expand the wood fibers, allowing them to regain their natural shape.
- The gentle pressure applied with the iron helps to lift the dent by encouraging the wood to swell back into place.
- This method is particularly effective for minor dents and shallow depressions in wood surfaces.
Tips for better results:
- Ensure that the cloth is only damp and not dripping wet, as excessive moisture can cause the wood to warp or swell beyond repair.
- Use a low or medium heat setting on the iron to prevent scorching or burning the wood.
- Be patient and repeat the process as needed, gradually raising the dent with each attempt.
- Test the method on a small, inconspicuous area of the wood surface first to avoid any potential damage.
Now that you know how to remove dents using a wet cloth and iron, you can give this method a try on your wooden furniture, floors, or any other surfaces with minor dents. With a little patience and careful execution, you can restore your wood to its former pristine condition.
Method 4: Utilizing A Damp Cloth And An Electric Iron
This method involves using a damp cloth and an electric iron to remove dents from wood surfaces. Gently heat the area with the iron and apply pressure with the cloth until the dent is gone.
Applying A Damp Cloth And An Electric Iron To The Dent
Wood furniture can add warmth and sophistication to any space, but unfortunately, it is prone to dents. If you’re wondering how to remove these dents without causing any further damage, using a damp cloth and an electric iron might just do the trick.
This method can help restore your wood furniture to its former glory, with a few simple steps. Let’s dive in and explore the benefits of using an electric iron for dents and some important considerations to keep in mind.
Advantages Of Using An Electric Iron For Dents
Using an electric iron to remove dents from wood furniture offers several advantages. Here are a few key benefits of this method:
- Efficient heat distribution: An electric iron provides even heat distribution, which ensures that the wood is heated uniformly. This helps in effectively reducing the dent without causing excessive heat damage to the surrounding area.
- Controlled temperature: Most electric irons come with adjustable temperature settings, allowing you to select the appropriate heat level for your specific wood type. This control ensures that you don’t overheat the wood, preventing any potential cracks or discoloration.
- Versatility: Apart from removing dents, an electric iron can also help eliminate minor scratches and dings on the surface of the wood. This versatility makes it a handy tool for overall wood furniture maintenance.
Important Considerations When Using This Method
While utilizing a damp cloth and an electric iron can be an effective technique for removing dents, it’s crucial to consider a few important factors before getting started:
- Wood type: Different types of wood may react differently to heat. Before applying the iron, identify the specific wood type of your furniture and research the appropriate temperature range for that wood. This will help you determine the ideal heat setting for the iron.
- Test on hidden area: Before you begin working on the dent, it’s always a good idea to test the method on a hidden or inconspicuous area of the furniture. This way, you can ensure that the heat from the iron won’t cause any unexpected damage or discoloration.
- Moisture level: When using a damp cloth, make sure it is damp and not dripping wet. Excessive moisture can seep into the wood, potentially causing swelling or warping. Aim for a cloth that is slightly damp to the touch.
- Patience and caution: Removing dents from wood furniture is a delicate process. Take your time and apply gentle pressure with the iron. Rushing or exerting too much force can lead to further damage.
Keep these considerations in mind to achieve the best results when utilizing a damp cloth and an electric iron to get dents out of wood. With proper caution and technique, you can restore the smooth surface of your wood furniture without any hassle.
Remember, while this method may work for small to medium-sized dents, severe dents or damages may require professional assistance.

Method 5: Wood Filler For Dents That Won’t Steam Out
The heat and steam methods above work by re-swelling compressed wood fibers — but they only work on unfinished or lightly finished wood, and only on dents where the fibers are compressed, not torn or gouged. If the wood grain is broken, the finish is heavy lacquer or polyurethane that won’t let steam through, or the dent is simply too deep to raise, wood filler is the honest fix.
When To Use Wood Filler Instead Of Steam
Reach for filler when: the dent has torn or crushed wood fibers (steam can’t re-swell broken fibers), the piece has a thick finish that blocks moisture and heat from reaching the wood, or you’ve already tried steam/heat and the dent is still visible. Filler won’t match the wood’s exact grain pattern, but it’s the only reliable option for these cases.
How To Apply It
- Clean the dent and let it dry completely.
- Choose a stainable wood filler if the piece is stained, or a color-matched filler for painted or clear-coated wood.
- Press the filler into the dent with a putty knife, slightly overfilling since it shrinks a little as it cures.
- Let it cure fully per the product’s instructions (usually a few hours to overnight).
- Sand flush with fine-grit sandpaper (220 grit or higher) once cured.
- Match the finish: stain, seal, or topcoat to blend with the surrounding wood.
This method won’t be invisible on close inspection, but it’s the realistic fix for a dent the steam methods above can’t reach.
Frequently Asked Questions On How To Get Dents Out Of Wood
Can A Dent Be Removed From Wood?
Yes, a dent in wood can be removed using various techniques and tools.
How Do You Fix A Dent In Wood?
To fix a dent in wood, fill it with wood filler, let it dry, sand the area smooth, and apply a matching stain or finish.
How Can Shallow Dents In Wood Be Removed?
To remove shallow dents in wood, apply steam or water to the area and use a hot iron to restore the wood’s shape.
How Do You Remove Grooves From Wood?
To remove grooves from wood, follow these steps:
1. Sand the surface with fine-grit sandpaper in a circular motion.
2. Fill the grooves with wood putty and smooth them with a putty knife.
3. Sand the filled area again until it’s even with the rest of the wood.
4. Apply a wood sealer or stain to finish and protect the repaired surface.
Conclusion
Removing dents from wood can be a simple and rewarding task. By following the steps outlined in this blog post, including using steam or hot water to “raise” the dent, sanding the area with caution, and applying a suitable finish, you can restore the beauty and integrity of your wooden furniture or flooring.
Remember to take your time and be gentle in your approach, as rushing or using excessive force can lead to further damage. As always, prevention is key, so consider using protective pads or coasters to avoid dents in the future.
With a bit of patience and the right techniques, you can easily get dents out of wood and enjoy a flawless and attractive finish for years to come.