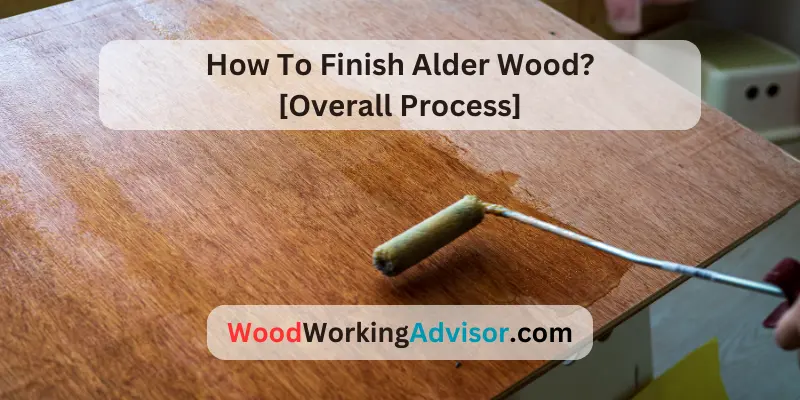
How To Finish Alder Wood? [Overall Process]
Are you ready to unveil the hidden beauty of Alder wood and transform your woodworking projects into true works of art? The key lies in the art of finishing. Just imagine the rich, warm tones and captivating grain patterns that can be brought to life through the proper techniques. Whether you’re working on furniture, cabinets, or decorative items, understanding how to finish Alder wood properly is essential.
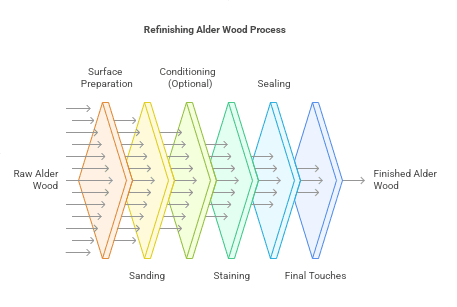
The process of finishing Alder wood involves several key steps to enhance its beauty and durability. From surface preparation and sanding to applying stains or dyes, followed by the application of protective topcoats, each stage contributes to achieving a stunning and long-lasting finish for your woodworking projects.
In this comprehensive guide, I will delve deep into the world of Alder wood finishing.
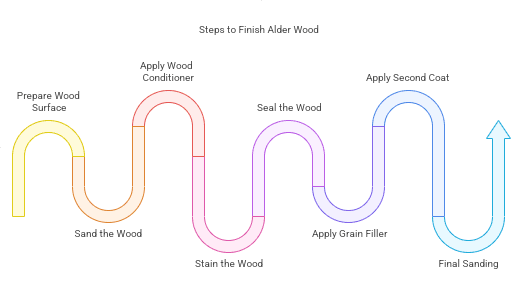
9 Steps To Finish Alder Wood Like A Pro:
Discover the essential steps to achieve a beautiful and durable finish for your Alder wood projects. From preparation to application, follow this guide for successful results.
Step 1: Prepare The Wood Surface
Before applying any finish, it’s crucial to prepare the Alder wood surface properly. Start by ensuring the wood is clean and free from any dust, dirt, or contaminants. Use a soft cloth or brush to remove any debris. This step ensures that the finish adheres properly and provides a smooth, professional-looking result.
Step 2: Sand The Wood
To achieve a smooth and even finish, sanding is essential. Begin with coarse-grit sandpaper (around 80 to 120 grit) to remove any rough patches, uneven surfaces, or imperfections. Work in the direction of the wood grain to prevent scratches. Gradually progress to finer grits (such as 180 or 220) to create a silky-smooth surface. This step helps to open up the wood’s pores, allowing the finish to penetrate evenly.
Step 3: Apply A Wood Conditioner (Optional)
Alder wood has a tendency to absorb stains unevenly due to its varying grain density. To achieve a more consistent finish, you can apply a wood conditioner before staining. Wood conditioners help to seal the wood and promote even stain absorption. Follow the manufacturer’s instructions for application, usually by applying a thin coat and allowing it to penetrate the wood for the recommended time.
Step 4: Stain The Wood
Choose a stain color that complements your desired aesthetic. Before applying the stain, thoroughly mix it to ensure an even color distribution. Using a brush, cloth, or foam applicator, apply the stain in the direction of the wood grain. Work in manageable sections, applying an even coat and avoiding excessive buildup or pooling.
Allow the stain to penetrate the wood for the recommended time, typically 5-15 minutes, and then wipe off any excess with a clean cloth. This step brings out the natural beauty of the Alder wood and adds depth and color to the grain.
Step 5: Seal The Wood
To protect the stained Alder wood and enhance its durability, it’s important to apply a sealer or topcoat. Choose a finish that suits your needs, such as polyurethane, varnish, or lacquer. Apply the sealer with a brush or applicator, following the manufacturer’s instructions. Ensure even coverage and allow sufficient drying time between coats.
Multiple coats may be necessary to achieve the desired level of protection and sheen. Sand lightly between coats with fine-grit sandpaper (such as 220) to create a smooth surface. Once the final coat is dry, the Alder wood is ready to showcase its beauty for years to come.
Step 6: Apply A Wood Grain Filler (Optional)
If you desire an extra smooth and uniform finish, especially for open-grain woods like Alder, you can consider using a wood grain filler. This product helps fill in the pores and grain lines of the wood, resulting in a more level surface. Apply the wood grain filler typically by spreading it across the wood using a plastic putty knife. Allow it to dry and then sand the surface lightly to remove any excess filler, ensuring a smooth and consistent surface.
Step 7: Apply A Second Coat Of Sealer (Optional)
Depending on the desired level of protection and the type of finish used, you may choose to apply a second coat of sealer. This can provide added durability and enhance the overall appearance of the wood. Follow the same application process as in Step 5, ensuring even coverage and allowing adequate drying time between coats.
Step 8: Final Sanding And Finishing Touches
After the last coat of sealer has fully dried, perform a final sanding using fine-grit sandpaper (such as 320 or higher) to smooth out any imperfections or unevenness. Be gentle and work in the direction of the wood grain to avoid scratches.
Once satisfied with the smoothness, wipe off any dust with a tack cloth or a clean, lint-free cloth. Apply any additional finishing touches, such as polishing or buffing, to achieve the desired level of shine and luster.
Step 9: Allow For Curing And Drying
After completing the finishing process, allow the Alder wood to cure and dry fully. This curing period can vary depending on the type of finish used, environmental conditions, and the specific product’s instructions. It’s important to give the finish enough time to harden and develop its protective properties.
Common Mistakes To Avoid When Finishing Alder Wood:
When finishing Alder wood, it’s important to be aware of common mistakes that can compromise the quality of the final result. Here are some mistakes to avoid:
- Insufficient Sanding:
It is important to avoid skipping or rushing through the sanding process when working with wood, as it can result in an uneven or rough surface. Dedicate sufficient time to sanding the wood properly, beginning with coarse-grit sandpaper and progressing gradually to finer grits. This method guarantees a smooth and uniform surface, allowing the finish to adhere effectively.
- Inadequate Surface Preparation:
Failing to clean the wood surface thoroughly before applying the finish can result in poor adhesion and a less desirable appearance. Remove any dust, dirt, or contaminants using a soft cloth or brush. Additionally, make sure the wood is completely dry before proceeding with the finishing process.
- Applying The Stain:
Applying too much stain can lead to an overly dark or blotchy appearance. Follow the manufacturer’s instructions for the stain application, and avoid excessive buildup or pooling of the stain on the wood surface. Wipe off any excess stain after the recommended soaking time to achieve a more balanced and consistent color.
- Not Allowing Sufficient Drying Time:
Rushing the drying process can result in a tacky or uneven finish. Each coat of sealer or topcoat needs adequate time to dry and cure. Follow the manufacturer’s instructions for drying times and ensure proper ventilation in the workspace to promote drying.
- Neglecting To Protect The Work Area:
Failing to use appropriate measures to protect the surrounding area can lead to accidental spills, drips, or damage to nearby objects. Place drop cloths or protective coverings on surfaces, use painter’s tape to mask off areas, and work in a well-ventilated and controlled environment to minimize potential mishaps.
10 Tips For Finishing Alder Wood Efficiently With Care:
When it comes to finishing Alder wood, efficiency and care are key factors in achieving the desired results. Whether you’re a beginner or an experienced woodworker, these tips will provide you with valuable insights and strategies to achieve exceptional results in your Alder wood finishing projects.
Tip 1: Choose The Right Finish
Select a finish specifically designed for Alder wood, considering its unique characteristics. Opt for finishes that enhance the natural beauty of the wood while providing adequate protection.
Tip 2: Proper Surface Preparation
To achieve a flawless finish, it is essential to meticulously sand the wood surface, eliminating any imperfections and creating a smooth foundation. Initiate the process with coarse-grit sandpaper and steadily advance to finer grits, ensuring a polished outcome. This systematic approach guarantees the removal of blemishes and provides an ideal surface for the application of the finish.
Tip 3: Apply Thin Coats
When applying the finish, use thin and even coats to achieve better control and avoid drips or uneven drying. Multiple thin coats are more effective than a single thick coat. Follow the manufacturer’s recommendations for the number of coats.
Tip 4: Sand Between Coats
Lightly sand the wood surface between coats to eliminate any roughness or imperfections. Use fine-grit sandpaper and wipe away the sanding residue before applying the next coat for a smoother finish.
Tip 5: Allow Proper Drying Time
Give each coat of finish adequate time to dry and cure before applying subsequent coats or handling the wood. Rushing the process can lead to smudging, uneven drying, or compromised results. Follow the manufacturer’s instructions for drying times.
Tip 6: Use Quality Tools And Techniques
Use high-quality brushes, applicators, or sprayers for the application of the finish. Follow proper techniques, such as applying with the grain, to achieve an even and professional-looking finish.
Tip 7: Ensure Good Ventilation
Work in a well-ventilated area or use fans to maintain proper air circulation during the finishing process. This helps in drying the finish properly and prevents the buildup of fumes.
Tip 8: Protect Surrounding Areas
Cover nearby surfaces with protective materials, such as drop cloths or plastic sheets, to prevent accidental spills or splatters from damaging surrounding objects.
Tip 9: Follow Safety Precautions
Wear appropriate safety gear, such as gloves and eye protection, when working with finishes. Read and follow the safety instructions provided by the manufacturer.
Tip 10: Enjoy The Results
After the finish has fully cured, admire the beauty of your finished Alder wood project. Properly finished Alder wood can exhibit rich tones and a smooth, lustrous appearance.
Related Questions:
What Type Of Finish Is Best For Alder Wood?
The best finish for Alder wood depends on the specific project and desired outcome. Oil-based finishes, such as Danish oil or tung oil, are popular choices for Alder wood as they enhance the natural beauty of the wood while providing a durable and protective finish. These finishes penetrate the wood fibers, bringing out the rich tones and grain patterns of Alder.
In addition, water-based finishes, such as polyurethane or acrylic finishes, are also suitable options. They offer low odor, fast drying times, and provide good protection against moisture and wear. Water-based finishes are available in various sheen levels, from matte to high gloss.
How Can You Prepare Alder Wood For Finishing?
To prepare Alder wood for finishing, start by sanding the surface with progressively finer grit sandpaper to achieve a smooth texture. Clean the wood thoroughly to remove any dust or debris. Consider using a wood conditioner to promote even stain absorption.
If desired, apply a wood stain of your choice and wipe off any excess. Finally, seal or finish the wood with an appropriate product, such as an oil-based, water-based, or lacquer-based finish, following the manufacturer’s instructions for application and drying times.
Can You Stain Alder Wood To Achieve A Different Color?
You can stain Alder wood to achieve a different color. Alder is known for its ability to absorb stains evenly, allowing for various shades and finishes. Before applying the stain, make sure the wood is clean and properly sanded. Test the stain on a small, inconspicuous area to determine the desired color and absorption rate. Apply the stain evenly and wipe off any excess for a uniform finish.
How Long Does It Take For The Finish To Dry On Alder Wood?
The drying time for finishes on Alder wood can vary depending on factors such as temperature, humidity, and the specific product used. Follow the manufacturer’s instructions for the recommended drying time. In general, water-based finishes dry faster than oil-based finishes.
Allow sufficient time for the finish to cure before subjecting the wood to normal use or applying additional coats. It’s advisable to avoid excessive handling or exposure to moisture until the finish has fully cured.
How To Stain Alder Wood?
To stain alder wood, begin by preparing the surface through sanding and cleaning. Apply a wood conditioner to ensure even absorption, then select your desired stain color and apply it with a brush or cloth in the direction of the grain. Allow the stain to penetrate for the recommended time before wiping off any excess. Finish with a clear topcoat to protect and enhance the wood’s appearance.
Final Touch:
The process of how to finish Alder wood is a rewarding process that enhances its natural beauty and protects it for years to come. Applying the right finish, whether oil-based, water-based, or lacquer-based, adds a protective layer and brings out the unique characteristics of Alder wood.
Remember to always read and follow the instructions provided by the product manufacturer to ensure a successful and long-lasting finish. With patience and attention to detail, you can transform Alder wood into a stunning final product that will be both visually appealing and durable.