How to Effortlessly Remove Glued Vinyl Flooring
To remove glued vinyl flooring, use a heat gun or hairdryer to soften the adhesive. Then, carefully peel off the flooring.
Are you looking to update your home by replacing your old vinyl flooring with a new, fresh look? Removing glued vinyl flooring might seem like a challenging task, but with the right tools and techniques, it can be done efficiently.
In this guide, we’ll show you how to remove glued vinyl flooring effectively, so you can start your renovation project with ease. By following these simple steps, you can have your old flooring removed in no time and prepare your space for a stylish new upgrade. Let’s get started on transforming your floors and giving your home a brand-new feel.
Credit: www.homedepot.com
Prepare The Work Area
Before removing glued vinyl flooring, ensure to prepare the work area. Clear the space of any obstacles and cover nearby furniture or fixtures with protective materials to prevent damage. Additionally, open windows for ventilation and wear appropriate safety gear for the job.
Clear The Space
Before removing glued vinyl flooring, start by organizing and decluttering the work area for easier access.
- Move furniture and items out of the way to create a clear workspace.
- Ensure there are no obstacles that might hinder the removal process.
Gather Necessary Tools
Having the right tools on hand is essential to efficiently remove glued vinyl flooring.
- Safety goggles to protect your eyes from debris.
- Gloves for hand protection while working with adhesive materials.
- Utility knife for cutting the vinyl flooring into manageable sections.
- Pry bar or putty knife to lift and loosen the flooring from the subfloor.
- Heat gun or hair dryer to soften the adhesive for easier removal.
:max_bytes(150000):strip_icc()/RemovingVinylFlooring-5b561e26c9e77c00372a8ae6.JPG)
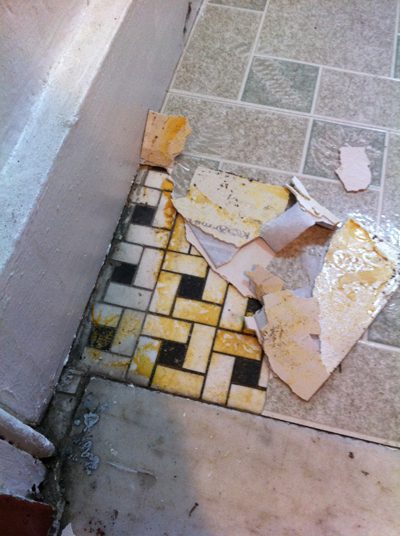
Credit: www.thespruce.com
Loosen The Vinyl Flooring
Loosening the vinyl flooring is the initial step in effectively removing glued vinyl flooring. It is crucial to start at the edges and utilize heat to soften the adhesive for a smoother removal process.
Start At The Edges
Start by gently lifting the edges of the vinyl flooring using a putty knife or a similar tool. This allows you to create a starting point for the removal process.
Use Heat To Soften The Adhesive
Apply heat to the glued vinyl flooring using a heat gun or a hairdryer. The heat helps soften the adhesive, making it easier to peel off the flooring without damaging the subfloor.
Remove The Vinyl Flooring
When it’s time to remove vinyl flooring, it’s important to do so carefully to avoid damaging the subfloor underneath. Whether you’re renovating your home or simply replacing old vinyl flooring, here are the steps to follow to remove the vinyl flooring and the adhesive residue left behind.
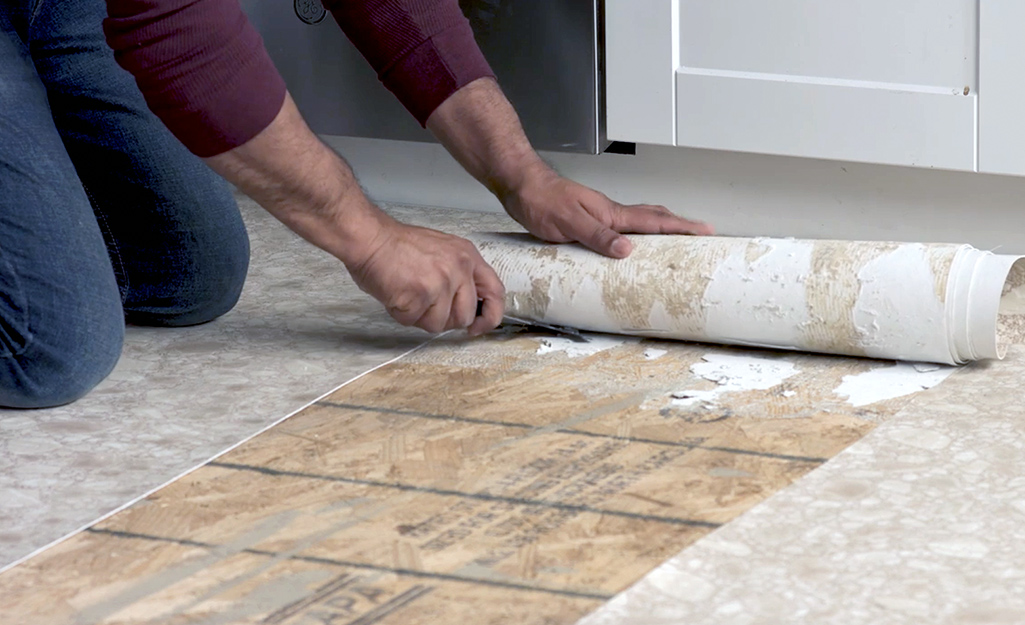
Peel Off The Vinyl
To start, carefully peel away the vinyl flooring from the edges. Use a putty knife or utility knife to lift the edges of the flooring. Work slowly and methodically to avoid tearing or ripping the vinyl.
As you peel, be mindful of any adhesive underneath. If the adhesive is particularly sticky, you may need to use a heat gun to loosen it before continuing to peel off the vinyl.
Scrape Off The Adhesive Residue
Once the vinyl is removed, you’ll need to address the adhesive residue left behind. Scrape off the adhesive using a putty knife or floor scraper. Work in small sections, applying even pressure to loosen and remove the adhesive.
If the adhesive proves stubborn, consider using a commercial adhesive remover or applying heat to soften it for easier removal. Be sure to thoroughly clean the subfloor once all the adhesive has been removed.
Clean Up
Once you have successfully removed the glued vinyl flooring, it is time to focus on the clean-up process. Taking the necessary steps to clean the subfloor and remove any lingering adhesive will ensure that your new flooring installation goes smoothly. In this section, we will explore two crucial steps: sweeping the subfloor and removing any lingering adhesive.
Sweep The Subfloor
Before moving forward, it is important to start with a clean base. Begin by sweeping the subfloor to remove any dust, debris, or loose particles. Use a broom or vacuum cleaner to thoroughly clean the entire area. Pay special attention to corners and edges.
Remove Any Lingering Adhesive
Even after removing the vinyl flooring, you may find some adhesive residue remaining on the subfloor. To ensure a smooth and even surface for your new flooring, follow these steps:
- Prepare the necessary materials: Gather a putty knife, warm water, and a cleaning solution suitable for vinyl adhesive removal.
- Test a small area: Apply a small amount of cleaning solution to a discreet spot on the subfloor to ensure it does not damage the surface. Wait for a few minutes and then wipe it away with a clean cloth.
- Apply the cleaning solution: If the test area shows no signs of damage, apply the cleaning solution to the adhesive residue. Allow it to sit for a few minutes to soften the adhesive.
- Scrape away the residue: Using a putty knife, gently scrape away the softened adhesive. Be careful not to damage the subfloor during this process. Continue until all residue has been removed.
- Rinse the area: After successfully removing the adhesive residue, rinse the subfloor with warm water to remove any remaining cleaning solution. Dry the surface thoroughly before proceeding with the installation of the new flooring.
By sweeping the subfloor and effectively removing any lingering adhesive, you are ready to proceed with confidence to install your new flooring. Remember to follow the manufacturer’s instructions for your specific flooring type for the best results.
Final Steps
Now that you have successfully removed the glued vinyl flooring, it’s time for the final steps to complete the process. These final steps will ensure that your subfloor is in good condition and ready for new flooring installation. Let’s dive into the details.
Inspect The Subfloor:
Before moving forward, take a moment to inspect the subfloor. Carefully examine its condition to identify any uneven spots, cracks, or damage that require attention. This step is crucial as it allows you to address any issues early on, ensuring a smooth installation for your new flooring.
Consider Floor Preparation For New Flooring:
Once you have inspected the subfloor, it’s time to consider the necessary floor preparation steps for your new flooring. Taking the time to properly prepare the subfloor will not only extend the lifespan of your new flooring but also ensure its stability and longevity.
Here are a few floor preparation tips to keep in mind:
- Remove any remaining traces of adhesive or glue from the subfloor surface. This can be done using appropriate adhesive removers or scraping tools.
- Ensure the subfloor is clean and dry before installing the new flooring. Any dust, debris, or moisture can affect the adhesion of the new flooring.
- Repair any damages or imperfections on the subfloor. Fill in cracks, level uneven areas, and make sure the surface is smooth and even.
By following these floor preparation steps, you are setting a solid foundation for your new flooring and ensuring its durability.

Credit: centaurmachines.com
Frequently Asked Questions Of How To Remove Glued Vinyl Flooring
What Is The Easiest Way To Remove Vinyl Flooring Glue?
To remove vinyl flooring glue, use a heat gun or hairdryer to soften the glue, then scrape it off with a putty knife.
Is Glue Down Vinyl Flooring Hard To Remove?
Removing glue down vinyl flooring can be challenging due to the strong adhesive bond. It requires time and effort for complete removal.
How Do Professionals Remove Vinyl Flooring?
Professionals remove vinyl flooring by first lifting the edges, then peeling it off. They use heat guns or steam to loosen the adhesive and scrape it away. After removing the flooring, they clean the subfloor to prepare for the new flooring installation.
How Do You Remove Glued-down Linoleum?
To remove glued-down linoleum, follow these steps: First, warm the adhesive with a heat gun, then use a scraper or putty knife to gently lift the linoleum. If the glue is stubborn, apply adhesive remover and let it sit for a few minutes.
Finally, scrape off the remaining adhesive.
Conclusion
Removing glued vinyl flooring can be a challenging but rewarding task. By following the proper steps and using the right tools, you can successfully remove the old flooring and prepare for a new installation. Remember to prioritize safety, take your time, and seek professional help if needed.
Good luck!