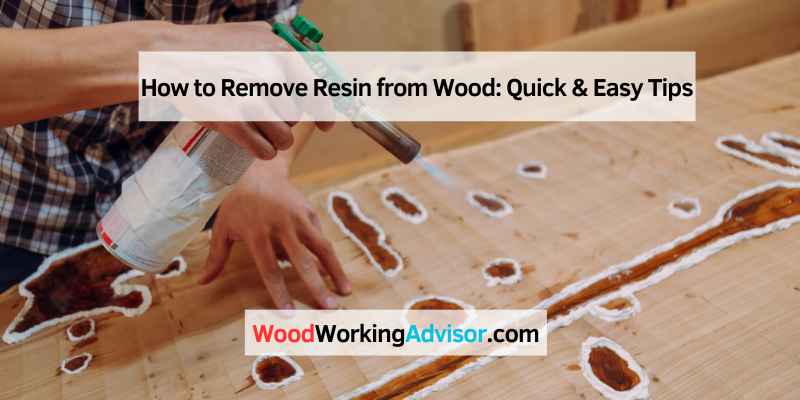
How to Remove Resin from Wood: Quick & Easy Tips
To remove resin from wood, use a heat gun or rubbing alcohol followed by scraping. Additional methods include using a solvent or sanding the affected area gently.
Resin removal can restore the wood’s natural beauty and prolong its lifespan. Resin can often find its way onto wooden surfaces, detracting from their appearance and making them sticky to the touch. Fortunately, with the right tools and techniques, removing resin from wood can be a straightforward process.
By following some simple steps, you can effectively eliminate resin buildup and restore the wood to its former glory. Whether you opt for a heat gun, rubbing alcohol, or a solvent, each method offers a reliable way to tackle this common issue. This guide will explore various approaches to help you successfully remove resin from wood surfaces, ensuring they remain looking their best for years to come.
Introduction To Resin Removal
Resin is a common material used for various wood projects, but removing it can be a daunting task. There are several methods to remove resin from wood, including using solvents, heat guns, and sanding. It’s important to be patient and take the necessary precautions to avoid damaging the wood surface.
Why Removing Resin Is Essential
When it comes to maintaining the natural beauty of wooden surfaces, removing resin is an essential task. Resin, a sticky and viscous substance produced by trees, can find its way onto wood surfaces through various scenarios. Not only does resin detract from the appearance of the wood, but it can also compromise its durability and longevity. By promptly and effectively removing resin, you can ensure that your wooden furniture, floors, or other items remain in pristine condition for years to come.
Common Scenarios For Resin Spills
Resin spills can occur in various situations, and knowing how to handle them can save you from unnecessary frustration. Here are some common scenarios where resin spills may happen:
- Outdoor activities: Whether you’re camping, hiking, or simply enjoying a picnic in nature, resin from trees can easily come into contact with your wooden belongings.
- Woodworking projects: If you’re an avid woodworker, you’re likely familiar with the challenges of resin spills. When working with raw wood, it’s common for resin to seep out and create unsightly stains.
- Household accidents: Accidents happen, and sometimes resin spills occur indoors. Whether it’s from a broken tree branch near a window or a mishap during a DIY project, resin can quickly become an unwelcome guest in your home.
By being aware of these common scenarios, you can be better prepared to tackle resin spills head-on and protect your wooden surfaces from potential damage.

Safety First: Preparing To Clean
When it comes to removing resin from wood, safety should be your top priority. Before diving into the cleaning process, it’s essential to take the necessary precautions to protect yourself and ensure a safe workspace. Here’s how you can prepare to clean resin from wood while prioritizing safety.
Protective Gear
Protective gear is crucial when working with resin and cleaning agents. Be sure to wear protective gloves, safety goggles, and a respirator mask to shield yourself from potential skin irritation, eye damage, and respiratory issues. These items will help safeguard you from any harmful chemicals and particles during the cleaning process.
Ventilation And Workspace Setup
Proper ventilation is key to minimizing exposure to fumes and ensuring a safe environment. Set up your workspace in a well-ventilated area, such as a garage or outdoor space. Open windows and doors to allow for adequate airflow, and consider using a fan or air purifier to further improve ventilation. Additionally, lay down a protective covering to prevent any spilled cleaning solutions from damaging the surrounding area.
Materials And Tools Needed
To remove resin from wood, you will need materials like rubbing alcohol, a plastic scraper, and a cloth. Tools such as a heat gun or hairdryer can help soften the resin for easier removal. Remember to work in a well-ventilated area for safety.
When it comes to removing resin from wood, you’ll need the right materials and tools to get the job done effectively. Here’s a rundown of what you’ll need:
List Of Cleaning Agents
- Denatured alcohol
- Mineral spirits
- Acetone
- Naphtha
- Paint thinner
- Vinegar
- Baking soda
- Dish soap
Tools For Scraping And Application
- Plastic scraper or putty knife
- Steel wool or sandpaper
- Clean cloth or rag
- Soft-bristled brush
- Spray bottle
- Protective gloves
- Eye protection
- Respirator mask
It’s important to choose the right cleaning agent for your specific type of resin and to follow all safety precautions when using them. Always wear protective gloves, eye protection, and a respirator mask to avoid any harm from the chemicals. Once you have the right materials and tools, you’ll be well on your way to removing resin from your wood surfaces with ease.
Simple Steps For Fresh Resin Spills
When fresh resin spills on wood, quick action is key to effective removal.
Blotting The Resin
- Use a clean cloth to blot excess resin gently.
- Continue blotting to avoid spreading the resin further.
Applying Heat Gently
- Use a hairdryer on low heat to soften the resin.
- Gently scrape the softened resin with a plastic scraper.
Techniques For Hardened Resin
When resin hardens on wood surfaces, it can be tough to remove. However, with the right techniques, you can effectively clean hardened resin from wood. Here are some methods you can use:
Mechanical Removal Methods
- Use a scraper to gently scrape off the hardened resin from the wood surface.
- Sand the area with coarse sandpaper to help break down the hardened resin.
- Heat the resin with a heat gun to soften it before scraping it off.
Solvent-based Cleaning
- Apply a solvent like acetone or rubbing alcohol to the hardened resin.
- Let the solvent sit on the resin for a few minutes to help dissolve it.
- Scrub the area with a brush to remove the dissolved resin.
Natural And Eco-friendly Alternatives
Explore natural and eco-friendly alternatives to remove resin from wood effectively. Try using vinegar, baking soda, or lemon juice for a chemical-free solution that is gentle on the environment. These methods are safe, affordable, and sustainable for your wood cleaning needs.
Natural and Eco-Friendly Alternatives for Removing Resin from Wood
If you have ever worked with resin, you know how challenging it can be to remove it from wood. While there are several chemical-based products available in the market, they can be harsh on the environment and may cause skin irritation. Luckily, there are some natural and eco-friendly alternatives that you can use to remove resin from wood. In this blog post, we will discuss two such methods: Using vinegar and Lemon and salt method.
Using vinegar
Vinegar is an excellent natural cleaning agent that can be used to remove resin from wood. Here’s how you can use vinegar to remove resin:
1. Take a clean cloth and dampen it with vinegar.
2. Place the damp cloth on the resin and let it sit for around 15-20 minutes.
3. Remove the cloth and gently scrub the resin with a soft-bristled brush.
4. Repeat the process until all the resin is removed.
Note: Do not use vinegar on unfinished or unsealed wood as it may cause damage.
Lemon and salt method
Another natural and eco-friendly alternative to remove resin from wood is the Lemon and salt method. Here’s how you can use this method:
1. Cut a lemon in half and sprinkle some salt on one of the halves.
2. Rub the lemon half on the resin until it starts to break down.
3. Repeat the process until all the resin is removed.
4. Once you have removed the resin, wipe the wood with a clean cloth.
Note: Do not use this method on unfinished or unsealed wood as lemon juice may cause damage.
Conclusion
By using natural and eco-friendly alternatives, you can easily remove resin from wood without harming the environment or your skin. These methods may take a bit longer than chemical-based products, but they are worth the effort. Try these methods the next time you need to remove resin from wood, and you will be amazed at how well they work!
Finishing Touches: Restoring The Wood
After successfully removing the resin from your wood surface, it’s time to give it some finishing touches to restore its natural beauty. This final step involves sanding and smoothing the wood, followed by the application of a wood finish. Let’s dive into these steps to bring your wood back to life.
Sanding And Smoothing
To start the restoration process, you’ll need to sand the wood to ensure a smooth and even surface. Here’s a simple guide to help you:
- Begin by selecting the appropriate sandpaper grit. For rough surfaces, start with a coarse grit (around 60-80), and gradually move to finer grits (120, 180, and 220) for a smoother finish.
- Wrap the sandpaper around a sanding block or use a random orbital sander for larger areas. This will provide better control and even pressure distribution.
- Using moderate pressure, sand the wood along the grain in a back-and-forth motion. Be sure to keep the sandpaper flat against the wood surface to prevent uneven sanding marks.
- Continue sanding until the surface feels smooth and any imperfections or rough spots are removed.
- Once you’re satisfied with the smoothness, wipe away the dust using a clean cloth or a tack cloth specifically designed for removing dust particles.
Applying Wood Finish
After sanding, it’s time to protect and enhance the wood by applying a suitable wood finish. Follow these steps:
- Choose a wood finish that suits the type of wood you are working with. Common options include varnish, lacquer, shellac, or a natural oil finish like tung oil or linseed oil.
- Apply the wood finish using a brush, roller, or cloth, following the manufacturer’s instructions. Make sure to work in the direction of the wood grain for a more natural and uniform appearance.
- Apply thin coats of the finish, allowing each coat to dry completely before applying the next one. This will help prevent drips, bubbles, or unevenness in the final result.
- Depending on the type of finish, you may need to lightly sand between coats to promote adhesion and create a smoother finish.
- Once you’ve achieved the desired finish and the final coat is dry, give the wood a gentle buff with a soft cloth to enhance its shine.
By following these steps, you can restore the wood’s natural beauty and protect it for years to come. Take your time, pay attention to detail, and enjoy the satisfaction of bringing your wood back to life.
Preventive Measures For The Future
When it comes to working with resin and wood, taking preventive measures can save you a lot of time and effort in the long run. By implementing these simple steps, you can protect your wood from resin stains and ensure a smooth and hassle-free working process.
Proper Storage Of Resin Materials
Properly storing your resin materials is crucial in preventing any accidental spills or leaks that can damage your wood surfaces. Follow these steps to ensure the safe storage of your resin:
- Store resin containers in a cool and dry place, away from direct sunlight.
- Make sure the containers are tightly sealed to prevent any air exposure.
- Keep resin containers upright to avoid any leakage.
- Store resin away from any heat sources or open flames to prevent any ignition.
Protective Coatings For Wood
Applying a protective coating to your wood can act as a barrier between the resin and the surface, making it easier to remove any spills or drips. Consider the following options for protective coatings:
- Sealants: Apply a high-quality sealant to the wood surface before working with resin. This will create a protective layer and make it easier to clean up any resin spills.
- Wax: Applying a layer of wax to the wood can help prevent resin from seeping into the pores of the wood. This makes the resin removal process much simpler.
- Release agents: Using a release agent, such as silicone or mold release spray, can help prevent resin from sticking to the wood. This will make it easier to remove any excess resin after the project is complete.
By implementing these preventive measures, you can ensure that your wood surfaces remain resin-free and maintain their natural beauty. Taking these extra steps will save you time and effort in the future, allowing you to enjoy your woodworking projects without the worry of resin stains.

Frequently Asked Questions
How Can I Remove Resin From Wood Without Damaging The Surface?
To remove resin from wood without damaging the surface, you can use a mixture of warm water and mild soap to gently scrub the affected area. Alternatively, applying mineral spirits or rubbing alcohol with a soft cloth can also help dissolve the resin without causing harm to the wood.
What Are The Best Tools For Removing Resin From Wood?
The best tools for removing resin from wood include a plastic scraper or putty knife, which can effectively lift the resin without scratching the wood. Additionally, using fine-grit sandpaper can help smooth out any remaining residue. Always test the tools on a small, inconspicuous area first to avoid damage.
Is It Possible To Prevent Resin From Sticking To Wood Surfaces?
Yes, it is possible to prevent resin from sticking to wood surfaces by applying a protective finish, such as polyurethane or varnish. These coatings create a barrier that can make it easier to remove resin in the future. Regular maintenance and cleaning can also help prevent resin buildup on wood.
Can I Use Heat To Remove Resin From Wood?
Yes, using heat can be an effective method to remove resin from wood. Gently heating the affected area with a hairdryer or heat gun can soften the resin, making it easier to scrape away. However, be cautious not to apply excessive heat, as it may damage the wood.
Conclusion
Incorporating these methods, you can effectively remove resin from wood without causing damage to the surface. Remember to prioritize safety by using protective gear and working in a well-ventilated area. By following these steps, you can restore your wood to its natural beauty and preserve its longevity.