How To Sand Wood Without Sandpaper: Innovative Techniques
To sand wood without sandpaper, you can use alternatives such as a sanding block, sanding sponge, or steel wool. These tools provide a similar abrasive effect to traditional sandpaper.
Woodworking and furniture restoration often involve the need to sand wood surfaces. Sanding helps to smooth out imperfections and create a smooth, even finish. While sandpaper is a popular and effective tool for this task, there are alternative methods that can be used when sandpaper is not available or suitable.
We will explore different techniques and tools that can be used to sand wood without sandpaper. Whether you are a DIY enthusiast or a professional woodworker, these alternatives can come in handy in various situations. So, let’s dive in and learn how to achieve a smooth sanded finish without sandpaper.
1. Preparation
Before you start sanding wood without sandpaper, it’s important to properly prepare the wood surface. This will ensure that you achieve the best results and a smooth finish. The preparation process involves gathering necessary materials and cleaning the wood surface.
1.1 Gather Necessary Materials
To effectively sand wood without sandpaper, you’ll need a few alternative materials to help you achieve the desired results. Here’s a list of materials you’ll need:
- Steel wool: Choose a fine-grade steel wool that is appropriate for your woodworking project. It can effectively remove old finishes and smooth out the wood surface.
- Sanding sponge: Look for a sponge with an abrasive side. This will allow you to sand curved surfaces and corners with ease.
- Scraping tools: Use a putty knife or scraper to remove any stubborn or uneven areas on the wood surface.
- Power tools: Depending on the size and type of wood surface you’re working on, you may need a power sander or a rotary tool with a sanding drum attachment.
It’s essential to gather these materials before you start the sanding process to ensure a smooth workflow.
1.2 Clean The Wood Surface
Prior to sanding, it’s crucial to clean the wood surface thoroughly. Dirt, dust, and debris can hinder the sanding process and create a less than perfect finish. Follow these steps to clean the wood surface effectively:
- Remove loose particles: Use a soft brush or a vacuum cleaner to remove any loose dirt or debris from the wood surface.
- Wipe with a damp cloth: Dampen a clean cloth or sponge with water and gently wipe the wood surface to remove any remaining dust or grime.
- Allow the wood to dry: Give the wood surface enough time to dry completely before proceeding with the sanding process. This will prevent any moisture from interfering with the sanding results.
Taking the time to properly clean the wood surface will ensure that you achieve a smooth and flawless finish when sanding without sandpaper.
2. Use Of Alternative Tools
When it comes to sanding wood, most people automatically think of sandpaper as the go-to tool. However, there are other alternative tools you can use to achieve the same results. These tools not only provide different options but can also be more efficient in certain situations. Let’s explore some of these alternative tools:
2.1 Scraper
A scraper is a handy tool when it comes to removing old finishes, paint, or adhesive from wood surfaces. It consists of a sharp-edged blade that is typically made of metal or plastic. The blade is used to scrape away the unwanted material, leaving behind a smooth and clean surface.
Using a scraper is straightforward. Hold the tool at a slight angle and apply even pressure as you push it along the wood surface. Make sure to keep the blade sharp, as a dull blade can be less effective and may even cause damage to the wood.
2.2 Wire Brush
A wire brush is another effective alternative tool for sanding wood. The bristles on a wire brush are usually made of steel or brass, and they help to remove paint, rust, or other residue from wood surfaces. It is particularly useful for cleaning or preparing rough wood before applying a finish.
To use a wire brush, simply run it over the wood surface in the direction of the grain. Apply gentle pressure to avoid scratching the wood, and be mindful of any loose bristles that could get stuck in the wood. After using the wire brush, it is essential to thoroughly clean the wood surface to remove any debris that may have been loosened during the process.
2.3 Steel Wool
Steel wool is a versatile tool that can be used for various woodworking tasks, including sanding. It is available in different grades, ranging from coarse to fine, allowing you to choose the appropriate one based on your specific needs.
To use steel wool for sanding, simply rub it gently over the wood surface in the direction of the grain. This helps to smooth out any rough areas and remove light scratches. It is important to note that steel wool can produce fine metal particles, so it is crucial to clean the wood thoroughly afterward to prevent any potential rust or staining.
Overall, these alternative tools offer effective ways to sand wood without using traditional sandpaper. Whether you choose to use a scraper, wire brush, or steel wool, be sure to practice proper technique and take necessary precautions to achieve the desired results.
3. Sanding Techniques
In order to achieve a smooth, polished finish on your wooden surfaces, sanding is an essential step. While sandpaper is commonly used for this task, there are alternative techniques you can try that don’t require the use of sandpaper. Here, we’ll explore three effective sanding techniques that can help you achieve excellent results.
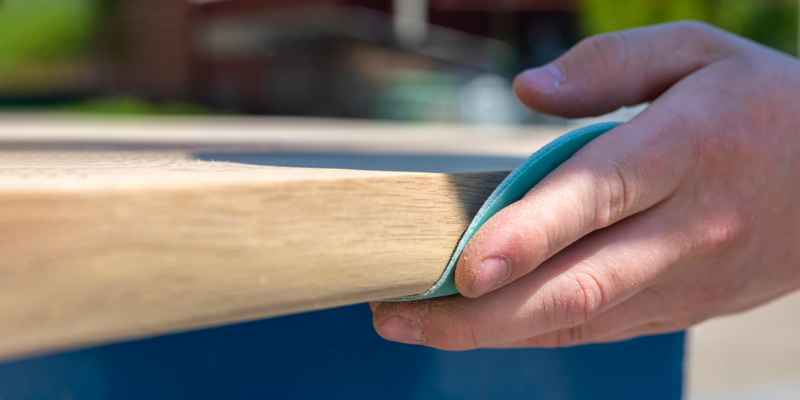
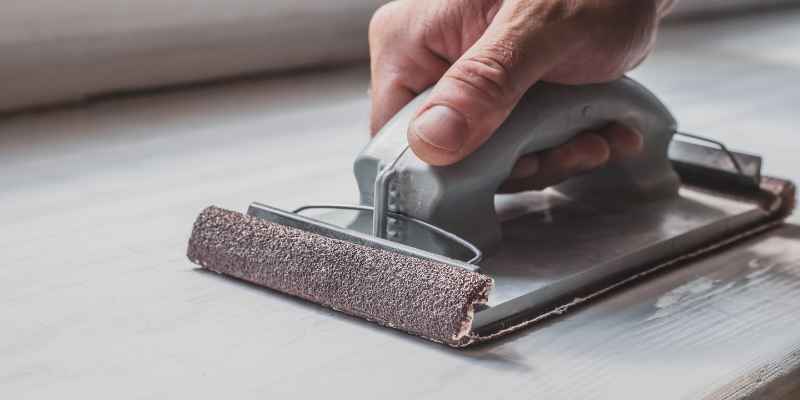
3.1 Sanding Block
A sanding block is a simple tool that can be used to sand wood without sandpaper. It consists of a block of wood or foam with a sanding surface attached. To use a sanding block, follow these steps:
- Choose a suitable grit sanding surface for your project. A coarser grit is perfect for removing rough surfaces, while a finer grit is ideal for achieving a smooth finish.
- Secure the sanding surface to the block. Make sure it is firmly attached and evenly distributed.
- Hold the sanding block firmly and apply even pressure as you move it back and forth along the wood grain. This consistent motion helps to prevent uneven sanding and ensures a uniform finish.
- Continue sanding the surface until you achieve the desired level of smoothness. Be sure to check your progress frequently to avoid over-sanding.
Using a sanding block allows you to have better control over the sanding process, resulting in a more even and professional-looking finish.
3.2 Sanding Spindle
If you have delicate or intricate woodwork, a sanding spindle can be a great alternative to traditional sandpaper. It is a cylindrical tool with sanding sleeves of varying sizes and grits that attach to the spindle.
To use a sanding spindle, follow these steps:
- Select the appropriate size and grit of sanding sleeve for the task at hand. Smaller sleeves are suitable for detailed work, while larger sleeves are more effective for larger surfaces.
- Attach the desired sanding sleeve to the spindle according to the manufacturer’s instructions.
- Hold the sanding spindle and carefully guide it along the wood, ensuring gentle and controlled movements.
- Repeat the process until you achieve the desired level of smoothness.
The sanding spindle is especially useful for getting into tight spaces and intricate designs, making it a valuable tool for detailed woodworking projects.
3.3 Sanding Dremel
The Dremel tool is a versatile and powerful handheld tool that can also be used for sanding wood without sandpaper. By attaching sanding attachments or sanding drums to the Dremel, you can effectively sand your wood surfaces.
Here’s how to use a Dremel for sanding:
- Choose the appropriate sanding attachment or sanding drum for your project.
- Attach the selected accessory to the Dremel tool according to the manufacturer’s instructions.
- Hold the Dremel tool firmly and gently guide it along the wood surface, applying consistent pressure as you work.
- Move the tool in smooth, circular motions for even sanding.
- Inspect the wood frequently to gauge your progress and avoid over-sanding.
A sanding Dremel is perfect for intricate details and hard-to-reach areas on your woodworking projects. It provides precision and control, allowing for excellent finishing results.
4. Natural Abrasives
When it comes to sanding wood, sandpaper is the go-to tool for most people. However, there are alternative methods that can be just as effective. In this section, we will explore natural abrasives that you can use to sand wood without sandpaper. These options are not only eco-friendly but also provide unique textures and finishes to your woodworking projects. Let’s dive in!
4.1 Coconut Husk
If you’re looking for an inexpensive and easily accessible natural abrasive, coconut husk is a fantastic option. The tough and coarse fibers of the husk make it a great substitute for sandpaper. To use coconut husk, you first need to remove the outer shell and extract the fibers. Once you have the fibers, you can either use them directly or create a composite block for easier handling. Simply rub the coconut husk fibers against the wood surface in a circular motion to remove rough patches and achieve a smooth finish.
4.2 Walnut Shells
Walnut shells are another natural abrasive that can be used to sand wood without sandpaper. The shells are hard and gritty, making them ideal for removing old finishes or smoothing out uneven surfaces. To use walnut shells, you can either crush them into fine particles or purchase pre-ground walnut shell grit. Apply the walnut shell grit onto the wood surface and use a sanding block or cloth to sand the wood. The fine particles of the walnut shells will provide effective abrasion without causing damage to the wood.
4.3 Corn Cob
Corn cobs might seem like an unconventional choice for sanding wood, but they can actually work wonders. The hard, woody inner core of the corn cob can be used as a gentle abrasive. To use corn cob, you can either use the whole cob or grind it into a powder. Apply the corn cob directly to the wood surface or mix it with a bit of water to create a paste. Rub the corn cob or paste onto the wood, focusing on areas that need sanding. The corn cob will help smooth the wood without leaving deep scratches or marks.
These natural abrasives provide excellent alternatives to traditional sandpaper, allowing you to sand wood in an eco-friendly and unique way. Whether you choose coconut husk, walnut shells, or corn cob, you’ll be able to achieve a smooth finish and bring out the natural beauty of your woodworking projects.
5. Finishing And Polishing
Once you have sanded your wood without sandpaper using the methods mentioned above, it’s time to finish and polish the surface. These final steps will enhance the appearance of the wood, protect it from damage, and give it a smooth and professional finish.
5.1 Using Tung Oil
One popular way to finish wood without sandpaper is by using tung oil. Tung oil is a natural oil that penetrates the wood, bringing out its natural beauty and providing long-lasting protection. Here’s how you can apply tung oil:
- Wipe the wood with a clean, lint-free cloth to remove any dust or debris.
- Pour a small amount of tung oil onto the cloth or directly onto the wood.
- Spread the oil evenly across the surface, working in the direction of the wood grain.
- Allow the oil to soak into the wood for about 10-15 minutes.
- Wipe off any excess oil with a dry cloth.
5.2 Applying Beeswax
If you prefer a more traditional and natural finish, beeswax is an excellent option. Beeswax not only provides a protective layer on the wood but also gives it a warm and polished look. Here’s how you can apply beeswax:
- Ensure the wood is clean and dry.
- Rub a small amount of beeswax onto the surface using a soft cloth or your fingers.
- Apply the wax in a circular motion, covering the entire area.
- Allow the wax to sit for a few minutes.
- Using a clean cloth, buff the wood in a circular motion to achieve a smooth and shiny finish.
5.3 Buffing With A Cloth
Another way to enhance the smoothness and shine of the wood is by buffing it with a cloth. This simple technique can make a significant difference in the final appearance of your wood piece. Follow these steps to achieve a polished finish:
- Ensure the wood is clean and free of any dust.
- Take a clean, soft cloth and fold it into a small square or ball.
- Using circular motions, gently rub the cloth across the wood surface.
- Continue buffing until you achieve the desired level of shine.
- Inspect the wood for any missed spots or unevenness and repeat the process if necessary.
By following these finishing and polishing methods, you can achieve a professional and polished look for your wood without the need for sandpaper. Whether you choose to use tung oil, beeswax, or simply buffing with a cloth, these techniques will bring out the natural beauty of the wood and protect it for years to come.
Conclusion
To sum it up, sanding wood without sandpaper is not only possible, but it can also be a refreshing and eco-friendly alternative. By utilizing various household items like steel wool, abrasives, or even a plane, you can achieve smooth and polished surfaces.
Remember to always prioritize safety precautions and choose the appropriate method for your specific project. Embrace the versatility of these techniques and let your creativity soar! Happy sanding!