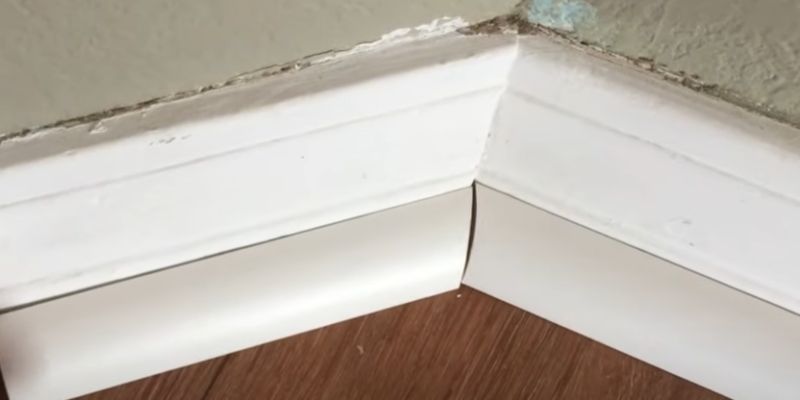
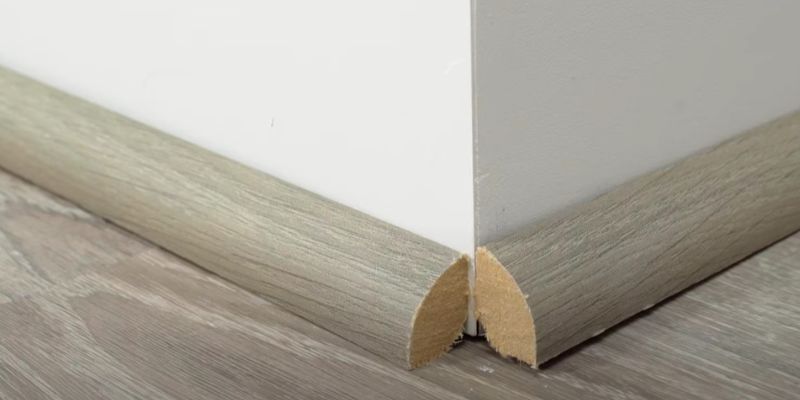
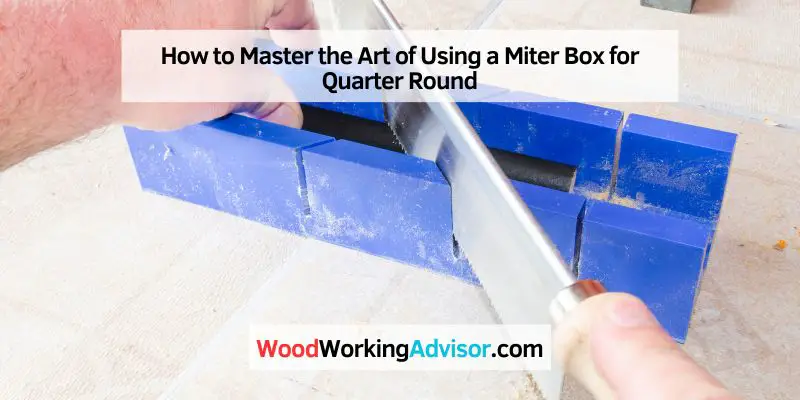
To use a miter box for a quarter round, simply place the quarter round material into the miter box at the desired angle, align the saw blade of a miter saw with the line on the miter box, and carefully cut through the quarter round. This process ensures accurate and precise cuts for quarter-round installation.
When installing quarter-round molding, it is crucial to achieve accurate and clean cuts to ensure a professional finish. To achieve this, you can use a miter box in conjunction with a miter saw. A miter box is a tool that helps guide the saw to make accurate angled cuts.
By following a few simple steps, you can effectively use a miter box to cut the quarter-round molding. We will discuss the steps to use a miter box for a quarter round, allowing you to achieve seamless results in your installation process.
Choosing The Right Miter Box
A miter box is a useful tool for cutting quarter-round molding with precision. When it comes to choosing the right miter box for the job, there are a few important considerations to keep in mind.
Type Of Cuts
One of the key factors to consider is the type of cuts you will be making. Miter boxes come in various designs, each suited for specific types of cuts. Some miter boxes are designed for simple 45-degree cuts, while others offer more versatility with adjustable angles for compound cuts.
Before choosing a miter box, determine the types of cuts you need to make for your specific project. This will help you select a miter box that can accommodate your cutting needs.
Considerations For Material
Another important consideration when choosing a miter box is the material of the box itself. Miter boxes are typically made from either plastic or metal.
Plastic miter boxes are lightweight and economical, making them a popular choice for occasional DIYers or those on a budget. However, they may not be as durable as their metal counterparts.
Metal miter boxes, on the other hand, are known for their strength and durability. They can withstand repeated use and are often preferred by professionals or frequent users. However, metal miter boxes tend to be more expensive than plastic options.
Consider the frequency of use and the level of durability required for your project when choosing between a plastic or metal miter box.

Conclusion
By considering the type of cuts you need to make and the material of the miter box, you can choose the right one that best suits your needs. Whether you opt for a plastic miter box or invest in a sturdy metal one, having the right tool can make your quarter-round cutting process much smoother and more precise.
Selecting The Correct Saw
When it comes to using a miter box for a quarter round, selecting the correct saw is crucial to ensure accurate and precise cuts. Using the wrong saw can lead to uneven or jagged cuts, making it difficult to achieve a professional finish. Here, we will discuss two important aspects to consider when selecting a saw: understanding saw types and blade selection.
Understanding Saw Types
There are several types of saws that can be used with a miter box to cut quarter-round. Each saw has its own characteristics and is designed for specific purposes. Understanding the different saw types will help you choose the right one for your quarter-round cutting needs. Here are the most common saws used with a miter box:
- Miter Saw: This saw is specifically designed for making angled cuts, such as those required for quarter rounds. It has a rotating base and a fixed blade that can be adjusted to different angles. The miter saw is known for its precision and accuracy, making it an ideal choice for quarter-round cutting in a miter box.
- Backsaw: Also known as a tenon saw, this type of saw is well-suited for making accurate and fine cuts. It has a rigid back that provides stability and control while cutting. The backsaw usually has a fine-toothed blade, making it suitable for cutting quarter rounds with precision.
- Hacksaw: This saw is equipped with a fine-toothed blade and is commonly used for cutting metal. It can also be used for cutting quarter-round, especially if you need to make cuts in tight spaces or corners. The hacksaw is versatile and easy to maneuver, making it a handy tool for quarter-round cutting tasks.
Blade Selection
Once you have determined the appropriate saw type for your quarter-round cutting, it is essential to select the right blade. The blade you choose should match the material and thickness of the quarter round to achieve the desired results. Here are a few important points to consider when selecting a blade:
- Number of Teeth: Blades with a higher number of teeth per inch (TPI) are ideal for making smooth and precise cuts on delicate materials like quarter rounds. High TPI blades are also suitable for cutting hardwoods or softwoods, providing cleaner cuts without splintering the wood.
- Tooth Configuration: Blades with a fine-tooth configuration are preferred for cutting quarter-round. These blades have closely spaced teeth, which helps in achieving clean and accurate cuts. Additionally, a blade with alternate top bevel (ATB) teeth can minimize tear-outs and splintering.
- Blade Material: Choosing a blade made of high-quality material, such as carbide-tipped or high-speed steel, can enhance the cutting performance and lifespan of the blade. These materials are known for their durability and ability to maintain sharpness for longer periods.
By selecting the correct saw type and blade for your quarter-round cutting needs, you can ensure precise and professional-looking results. Take your time to evaluate the options available and make an informed decision. With the right tools at hand, you can confidently tackle your quarter-round cutting projects using a miter box.
Preparing The Workpiece
Preparing the workpiece before using a miter box for the quarter round is crucial to ensure precise and clean cuts. Proper measurement and marking, as well as securely securing the quarter round, are essential steps in this process.
Measuring And Marking
To start, accurately measure the length needed for the quarter round and mark the cutting points using a pencil. Double-check the measurements to avoid errors.
Securing The Quarter Round
Before cutting, secure the quarter round firmly in the miter box to prevent any movement during the cutting process. Use clamps or the built-in clamping mechanism of the miter box to hold the quarter round securely in place.
Making Precise Cuts
One of the essential aspects of using a miter box for quarter-round installation is making precise cuts. By carefully measuring and cutting your quarter-round pieces, you can ensure a professional-looking finish that aligns perfectly with your corners and walls. In this section, we will discuss two key steps that will help you achieve accurate cuts – understanding correct angles and employing techniques for accuracy.
Correct Angles
The first step to achieving precision with your quarter-round cuts is understanding the correct angles needed for your specific installation. Quarter round typically rests at a 45-degree angle against the wall and the floor. To create a seamless and tight fit, you need to replicate this angle in your cuts.
Ensure your miter box is properly positioned before making your cuts. A miter box is a tool that assists in cutting precise angles by holding the material securely in place. It has slots at fixed angles, allowing you to guide your saw accurately.
Techniques For Accuracy
Once you have determined the correct angles for your quarter-round cuts and positioned your miter box accordingly, it’s time to focus on techniques that will further enhance accuracy.
Here are some techniques to consider:
- Measure Twice, Cut Once: Taking precise measurements ensures that your cuts will be accurate. Double-checking your measurements before making any cuts saves you time and reduces the risk of errors.
- Use Clamps: Clamping your quarter round securely in the miter box prevents it from shifting during the cutting process. This stability helps you achieve clean and straight cuts.
- Start with Longer Pieces: When cutting multiple quarter-round pieces, it’s best to start with longer pieces first. This allows you to make adjustments and fine-tune your cuts as you progress.
- Practice First: If you’re new to using a miter box, it’s a good idea to practice on scrap wood before working on your actual quarter round. This will give you a chance to familiarize yourself with the miter box and develop a steady-cutting technique.
By following these techniques, you will improve the accuracy of your cuts and achieve a professional finish with your quarter-round installation.
Applying Finishing Touches
When it comes to completing a trim project, applying finishing touches is essential to achieve a polished and professional look. In the case of installing a quarter round using a miter box, there are a few crucial steps involved in this final stage. Here, we will guide you through the process of sanding and smoothing the quarter round and fitting it into place, ensuring a seamless finish.
Sanding And Smoothing
Before fitting the quarter round, it’s important to sand and smooth the edges for a neat and refined appearance. Follow these steps:
- Start by putting on safety goggles and dust masks to protect yourself from fine particles and debris.
- Using medium-grit sandpaper, sand the outer edges and corners of the quarter round.
- Continue sanding until the surface feels smooth to the touch.
- Once the sanding is complete, use a damp cloth or tack cloth to remove any remaining dust.
- Allow the quarter round to dry thoroughly before proceeding to the next step.
Fitting The Quarter Round
After sanding and smoothing the quarter round, it’s time to fit it into place using the miter box. Follow these steps:
- Measure the length of the first wall where you will be installing the quarter-round.
- Using a pencil, mark the measurement on the backside of the quarter round, ensuring to leave enough material for the mitered corners.
- Place the quarter round inside the miter box, aligning the marked line with the appropriate angle guide.
- Secure the quarter round in place with one hand, while using the other to carefully saw along the marked line.
- Repeat the process for each wall, ensuring to cut the opposite angles for corners to fit together seamlessly.
- After cutting all the pieces, dry-fit them together to ensure a snug fit and make any necessary adjustments.
- Once satisfied with the fit, use a finish nail gun or a hammer and finishing nails to secure the quarter round to the wall.
- Repeat the process for all remaining walls until the quarter round is fully installed.

Frequently Asked Questions For How To Use A Miter Box For Quarter Round
How Do You Cut Quarter-Round Molding With A Miter?
To cut quarter-round molding with a miter, measure and mark the angle, set the miter saw to the correct angle, and make the cut. Ensure the molding is secured firmly to avoid accidents. Sand the edges for a smooth finish.
How Do You Use A Miter Box For Trim?
To use a miter box for trim, place the piece of trim in the box and align the desired angle. Hold the trim securely and cut along the marked line using a hand saw. Use caution and follow safety guidelines when using a miter box.
How Do You Cut Baseboard Outside Corners With A Miter Box?
To cut the baseboard’s outside corners with a miter box, follow these steps:
1. Measure and mark the angle on the baseboard.
2. Align the baseboard in the miter box with the marked angle.
3. Use a saw to cut along the marked line.
4. Fit the cut ends together for a seamless corner.
What Angle Do You Cut Quarter-Round Inside Corners?
To cut quarter-round inside corners, you should miter the ends at 45-degree angles. Ensure the angles are facing one another for a tight fit.
Conclusion
Using a miter box for the quarter round is a practical and efficient way to achieve precise cuts for your trim project. By following the simple steps and using the right tools, you can achieve professional results with ease. With the right technique and practice, you’ll be able to enhance the appearance of your space and create a more polished finish.


