Ryobi Battery Won’t Charge? Real Fixes and a Safety Warning
If your Ryobi battery won’t charge, start with the boring stuff: wipe the contacts clean, try a different outlet, and let it sit on the charger for a full, uninterrupted cycle before you assume it’s dead. Corrosion and sawdust on the contacts cause more “dead” batteries than actual dead cells do, and a pack that’s been sitting fully drained for months can look unresponsive when it’s really just in a deep-discharge state the charger needs time to wake up. Below are the real causes, the fixes that actually work, what the charger’s blinking lights mean, and one situation where you should stop and not charge the battery at all.
Quick Fixes to Try First
Run through this list before assuming the battery itself is bad. Most charging failures on Ryobi ONE+ packs come down to one of these five things.
- Wipe the contacts. Use a dry cloth or electrical contact cleaner on both the battery’s metal strips and the charger’s contact points – dust and grime from a wood shop build up fast and block the connection.
- Try a different outlet. A tripped GFCI outlet or a dead outlet looks exactly like a dead charger. Test the outlet with another device first.
- Give it a full, uninterrupted charge cycle. An over-discharged pack can take longer than usual to start showing a charge – don’t pull it off the charger after five minutes and call it dead.
- Swap batteries to isolate the fault. Put a different Ryobi battery on the same charger. If it charges normally, your original battery is the problem, not the charger.
- Read the LED pattern instead of guessing – see the light-meaning section below.
Best Replacement Ryobi Charger
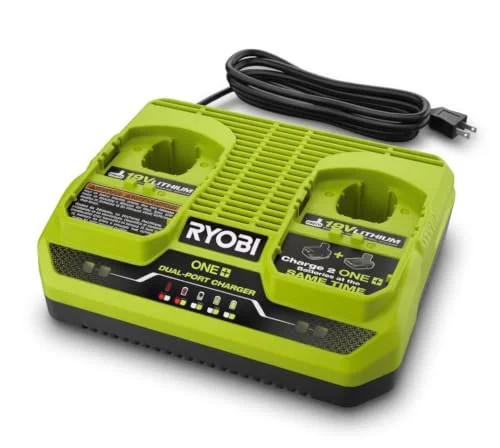 |
RYOBI ONE+ 18V Dual-Port Simultaneous Charger (PCG005) – $73.40 If the swap-battery test above points to a bad charger, this is the genuine Ryobi replacement to grab instead of guessing with a cheap universal one.
|
Why a Ryobi Battery Really Stops Charging
Once you’ve ruled out an obvious outlet or contact problem, the cause usually falls into one of four buckets:
- Corroded or dirty contacts – the most common cause by far, especially on batteries that live in a shop with sawdust and humidity.
- Deep discharge / “sleep mode.” Lithium-ion packs have a protection circuit that shuts the battery down if it’s drained too low for too long. Some chargers can recover this with a slow trickle charge; others can’t.
- Worn-out cells. Every charge cycle degrades a lithium-ion battery a little. A pack that’s a few years old and has seen heavy use may simply be at the end of its useful life.
- A faulty charger, not the battery – which is exactly what the swap test above is for.
Step-by-Step: How to Get It Charging Again
Clean the Contacts First
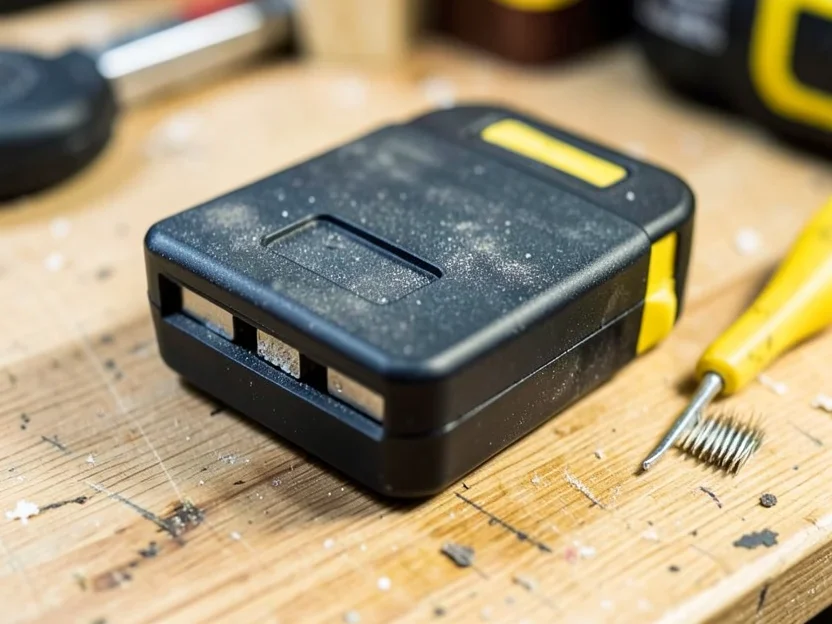
Unplug the charger, then use a dry cloth, a pencil eraser, or electrical contact cleaner on both the battery’s metal contact strips and the matching contacts inside the charger. Don’t use anything wet or abrasive enough to scratch the metal. This alone fixes a surprising number of “dead” batteries.
Try a Full Recovery Charge
If the battery has been sitting unused for a long time, place it on the charger and leave it alone for a few hours rather than checking every few minutes. Some Ryobi chargers include a recovery mode for deeply discharged packs that needs extra time before the LED shows any progress. If there’s still zero response after several hours, move to the next step.
Isolate the Fault With a Swap Test
Borrow a known-good Ryobi ONE+ battery and try it on your charger. If the borrowed battery charges normally, the charger is fine and your original battery is the problem. If the borrowed battery also fails to charge or triggers a fault light, the charger itself is bad and needs replacing.
What the Charger’s LED Lights Actually Mean
Ryobi’s chargers communicate status through a red and green LED, and guessing at the pattern wastes time. Here’s what each combination means on a standard Ryobi 18V ONE+ charger:
- Green flashing, red steady: the battery is actively charging – this is normal.
- Green solid, red off: charging is complete.
- Red flashing alone (green off): the charger is testing the battery, often because the pack is too hot or too cold – this is not automatically a dead battery.
- Both lights flashing together: a fault – either the battery or the charger is defective. Run the swap test above to find out which.
- Orange light fading in and out: the battery is outside its safe charging temperature range. Let it sit at room temperature for 20-30 minutes and try again.
Stop: When You Should Not Charge the Battery
If the battery is visibly swollen, cracked, leaking, or was recently dropped or damaged, do not put it on the charger and do not try to use it. A swollen or physically damaged lithium-ion pack is a genuine fire and thermal-runaway risk, not just a performance problem. Set it aside in a non-flammable area and take it to a battery recycling center or your local hazardous-waste drop-off instead of charging it, using it, or throwing it in household trash.
When to Replace the Battery or Charger
Lithium-ion batteries degrade gradually with every charge cycle, and there’s no fixing that with cleaning or a recovery charge. If your battery is several years old, has seen daily use, and the run time has dropped noticeably even after a full charge, it’s likely just worn out rather than faulty. If the swap test points to the charger instead, replacing a single charger is usually cheaper than replacing a pack, and a dual-port charger like the one above cuts your downtime in half if you run more than one battery. For anyone building out a full ONE+ kit from scratch, our Ryobi 18V battery and charger buying guide breaks down which kit combinations make sense.
How to Prevent This Next Time
A few storage habits do more to prevent future charging problems than any fix after the fact:
- Don’t store a battery fully drained. If a pack is going into storage for the winter or sitting unused for months, leave it at roughly 40-50% charge rather than fully empty or fully full – deep discharge over a long period is what pushes packs into the protective shutdown state described above.
- Keep batteries out of extreme heat. A battery left in a hot truck bed or a closed shed in summer degrades faster and is more likely to trigger the temperature-fault light when you try to charge it.
- Wipe contacts occasionally, not just when there’s a problem. A quick wipe every few months in a dusty shop prevents the corrosion buildup that causes most charging failures in the first place.
- Don’t leave a fully charged battery sitting on the charger for weeks. Most Ryobi chargers stop actively charging once the pack is full, but pulling it off once the green light goes solid is still better for long-term battery health than leaving it connected indefinitely.
Frequently Asked Questions
Why is my Ryobi battery not charging?
The most common causes are dirty or corroded contacts, a deeply discharged battery in protective shutdown, worn-out cells from age and use, or a faulty charger. Clean the contacts and run the swap test above to narrow it down before assuming the battery is dead.
How do I revive a Ryobi ONE+ battery that won’t take a charge?
Clean the contacts, then leave the battery on the charger for a full, uninterrupted cycle of several hours rather than checking it every few minutes – a deeply discharged pack can need extra time before the charger registers any progress. If it still shows no response, test it on a different charger to confirm the battery itself is the problem.
What does it mean when my Ryobi charger’s lights are both flashing?
Both lights flashing together indicates a fault with either the battery or the charger. Put a different known-good battery on the same charger: if it charges normally, your original battery is bad; if it also faults, the charger needs to be replaced.
Is it safe to charge a swollen Ryobi battery?
No. A swollen, cracked, leaking, or dropped lithium-ion battery should never be charged or used – it’s a genuine fire and thermal-runaway risk. Take it to a battery recycling center or hazardous-waste drop-off point instead.
Most Ryobi charging problems are fixable in a few minutes with a clean set of contacts and a little patience. The exceptions are worn-out cells, which need replacing, and physically damaged batteries, which need to be retired safely rather than charged.
Sponsored / affiliate links. As an Amazon Associate I earn from qualifying purchases. I may earn additional commission from eligible campaigns.