
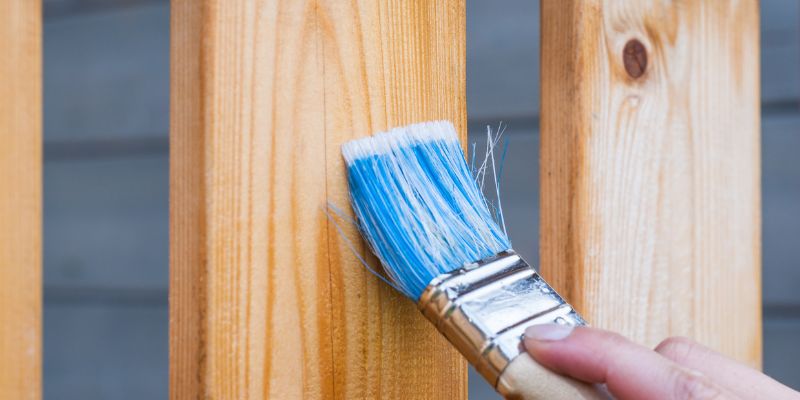
Should You Sand between Coats of Paint
No, you should not sand between coats of paint as it can lead to an uneven surface. Sanding is typically done before the first coat and after the final coat of paint to achieve a smooth finish.
Sanding between coats can remove too much paint and compromise the overall look and durability of the paint job.
Why Sanding Between Coats Of Paint Is Important
Sanding between coats of paint is crucial for achieving a smooth and professional finish. It helps to remove any imperfections, such as brush strokes or drips, and promotes better adhesion for the next coat.
Smooth Surface
One of the main reasons why sanding between coats of paint is important is to achieve a smooth surface. When you apply multiple coats of paint on a surface, there can be imperfections such as brush marks, drips, or uneven texture. By sanding between each coat, you can smooth out these imperfections, resulting in a flawless finish.
But why is a smooth surface important? A smooth surface not only enhances the aesthetic appeal of the painted surface but also allows for better light reflection, giving your paint job a professional and polished look.
Better Adhesion
Another reason to sand between coats of paint is to ensure better adhesion. Sanding creates a slightly rough texture on the surface, providing a better grip for the subsequent coat of paint. This improved adhesion helps the paint to bond well with the surface, reducing the chances of peeling, cracking, or flaking over time.
Sanding also helps to remove any gloss or sheen from the previous coat, allowing the new coat to adhere properly. Without sanding, subsequent coats of paint may have difficulty sticking to the previous layer, resulting in an uneven and less durable finish.
By sanding between coats, you not only improve the overall adhesion but also increase the longevity of your paint job.
When To Sand Between Coats Of Paint
Knowing when to sand between coats of paint can make a significant difference in the overall finish and durability of your paint job. Sanding between coats helps smooth out any imperfections, avoids buildup of paint clumps, and promotes better adhesion between layers. To achieve the best results, follow these guidelines:
Before The First Coat
Prior to applying the first coat of paint, it’s crucial to properly prepare the surface. This includes cleaning the surface to remove any dirt, dust, or grease, and repairing any holes or cracks with spackling or putty. Once the surface is clean and smooth, it’s time to sand.
Use a fine-grit sandpaper (such as 220-grit) to gently sand the surface. This will help create a slightly rough texture that allows the paint to adhere better. Sanding also helps remove any existing gloss or sheen, which can prevent the new coat of paint from adhering properly. After sanding, wipe down the surface with a damp cloth to remove any sanding residue before applying the first coat of paint.
Between Subsequent Coats
When applying multiple coats of paint, it’s important to sand between each coat to achieve a smooth and flawless finish. Before sanding, make sure the previous coat of paint is completely dry, usually within 24 hours.
Start by inspecting the painted surface for any imperfections, such as drips, brush strokes, or rough spots. Lightly sand these areas using fine-grit sandpaper. Focus on smoothing out the imperfections without sanding too aggressively, as that can remove too much paint. Once sanded, wipe the surface with a clean cloth to remove any dust or debris before applying the next coat.
It’s worth noting that not every coat of paint may require sanding. If the previous coat has dried with a smooth and even finish, you may be able to proceed directly to the next coat without sanding. However, it’s always a good idea to inspect the surface and sand if necessary to ensure a flawless final result.

The Process Of Sanding Between Coats Of Paint
Sanding between coats of paint is an essential step in achieving a smooth and professional finish. It helps to remove imperfections, promote adhesion, and create a uniform surface for the next coat of paint to adhere to. This process ensures a flawless and long-lasting paint job.
The Process of Sanding Between Coats of Paint
When it comes to painting a surface, sanding between coats of paint can make a significant difference in achieving a smooth and professional finish. Sanding helps to remove imperfections, such as brush strokes, drips, and bumps and creates a surface that is easier to work with for subsequent coats of paint.
Choosing The Right Grit
To effectively sand between coats of paint, it is essential to choose the right grit sandpaper. Grit refers to the coarseness of the sandpaper, and selecting the appropriate grit ensures optimal results.
| Grit | Usage |
|---|---|
| 120 – 150 | Ideal for removing small imperfections |
| 220 – 240 | Suitable for smoothing the surface |
| 320 – 400 | Useful for creating a smooth finish |
Depending on the condition of the paint job and the desired outcome, you may need to start with a coarser grit and gradually move to a finer grit. Remember to always test a small inconspicuous area before sanding the entire surface.
Preparing The Surface
Before sanding between coats of paint, proper surface preparation is crucial. This ensures that the sanding process is more effective and results in a flawless finish.
- Start by cleaning the surface using a mild detergent solution or a degreaser to remove any dirt, grime, or oily residue.
- Repair any visible imperfections, such as cracks or holes, using a suitable filler or spackling compound.
- Allow the filler to dry completely and then sand it using the appropriate grit sandpaper, following the manufacturer’s instructions.
- Remove any dust or debris using a tack cloth or a lint-free cloth before proceeding with sanding between coats of paint.
Sanding Techniques
To achieve optimal results when sanding between coats of paint, it’s essential to use the right sanding techniques.
- Begin sanding with light pressure, moving the sandpaper in a circular or back-and-forth motion.
- Keep the sandpaper flat against the surface to ensure an even sanding.
- Work systematically, starting from one corner and gradually moving to the rest of the area.
- Periodically check the surface with your fingertips to ensure smoothness.
- Wipe away any sanding dust using a tack cloth or a lint-free cloth before applying the next coat of paint.
Remember, sanding between coats of paint requires patience and attention to detail. By following the proper process, you can achieve a professional-looking finish that enhances the overall quality of your paint job.
Tips For Effective Sanding Between Coats Of Paint
When it comes to achieving a smooth and professional finish on your painted surfaces, sanding between coats of paint is often essential. This step helps to create a seamless and even surface, ensuring the final result is flawless. However, effective sanding between coats requires a strategic approach and the right tools. In this section, we will provide you with some valuable tips for effective sanding between coats of paint.
Using The Correct Tools
Using the correct tools is crucial for successful sanding between coats of paint. A few essential tools you will need include:
-
- Sandpaper or sanding block: Choose the appropriate grit for your particular project. Finer grits, such as 320 or higher, are generally recommended for sanding between paint coats.
- Sanding pole or hand sander: These tools can help you reach high or wide areas without having to strain yourself.
- Dust mask and safety goggles: Protecting yourself is essential to avoid inhaling dust or getting debris in your eyes.
Applying The Right Pressure
When sanding between coats of paint, it is important to apply the right amount of pressure. You want to remove imperfections, without removing too much paint or damaging the underlying surface. Here are a few tips to help you apply the right pressure:
-
-
- Use light to moderate pressure: Applying excessive pressure can result in uneven sanding or streaks.
- Let the sandpaper do the work: Instead of using excessive force, let the sandpaper or sanding block glide smoothly over the surface.
- Sand in a circular or back-and-forth motion: This allows for even sanding and reduces the risk of leaving visible marks on the surface.
-
Avoiding Over-sanding
Over-sanding can be just as problematic as under-sanding when it comes to achieving a smooth finish. Here are some useful tips to help you avoid over-sanding:
-
-
- Check the surface regularly: Stop sanding once the imperfections have been leveled and the surface feels smooth to the touch.
- Double-check with proper lighting: Examine the surface under good lighting to ensure you haven’t sanded too much.
- Clean the surface after sanding: Remove all dust and debris before applying the next coat of paint to maintain a clean and flawless surface.
-
By following these tips, you can ensure that your sanding between coats of paint is effective and efficient, leading to a beautifully finished project. Remember to use the correct tools, apply the right pressure, and avoid over-sanding to achieve the best results. With these practices in place, your painted surfaces will look professional and seamless.
Common Mistakes To Avoid When Sanding Between Coats Of Paint
Sanding between coats of paint is a crucial step for achieving a smooth and professional finish. However, there are common mistakes to avoid. Learning when and how to sand properly can make a significant difference in the final outcome of your paint job.
When it comes to achieving a smooth and flawless finish on your painted surfaces, sanding between coats of paint is an essential step. However, it’s important to be aware of the common mistakes that many DIY enthusiasts make when sanding. Avoiding these pitfalls will not only save you time and effort but also help you achieve professional-looking results.
Skipping Sanding Altogether
One of the most common mistakes people make is skipping the sanding step altogether. They assume that the new coat of paint will cover up any imperfections, but that couldn’t be further from the truth. Sanding between coats is crucial for creating a smooth surface by removing any rough patches, bumps, or dried drips from the previous coat.
If you skip this step, the new coat of paint will only magnify the flaws, resulting in an uneven finish that is far from desirable. So, even if it may seem time-consuming, never skip sanding between coats of paint.
Not Cleaning The Surface
Cleaning the surface before sanding is another crucial step that is often overlooked. If you don’t clean the surface properly, you risk trapping dirt, dust, or debris underneath the next coat of paint. This can lead to a bumpy texture and an unprofessional finish.
Before sanding, wipe down the surface with a clean cloth or sponge to remove any loose dust or dirt. You can also use a mild detergent or a cleaning solution specifically designed for removing grease or grime. Ensure that the surface is completely dry before proceeding with the sanding process.
Using The Wrong Grit
Using the wrong grit sandpaper is another mistake that can ruin your paint job. The grit refers to the size of the abrasive particles on the sandpaper, and it determines the level of abrasion. Using sandpaper with too coarse grit can result in deep scratches and grooves on the surface, while using sandpaper with too fine grit may not provide enough abrasion to smooth out imperfections.
To find the right grit, consider the condition of the surface. If there are minor imperfections, such as small bumps or drips, start with medium-grit sandpaper (around 120-150 grit). For more significant flaws or rough surfaces, you may need to use a coarser-grit sandpaper (around 80-100 grit). After sanding with the coarse-grit paper, finish off with finer-grit sandpaper (around 180-220 grit) to ensure a smooth finish.
By avoiding these common mistakes of skipping sanding altogether, not cleaning the surface, and using the wrong grit sandpaper, you can achieve professional-looking results when sanding between coats of paint. Take the time to properly prepare the surface, choose the right grit sandpaper, and invest effort into the sanding process to ensure a flawless and long-lasting paint finish on your surfaces.
Conclusion
As you have learned throughout this blog post, sanding between coats of paint can greatly improve the final result of your project. By following proper sanding techniques and using the right tools, you can achieve a smooth and professional finish.
Sanding helps to create a strong bond between coats, reduces imperfections, and enhances the overall durability of the paint job. So, if you want to achieve a flawless and long-lasting finish, don’t skip the step of sanding between coats of paint.
Happy painting!