What Size Finish Nailer for Baseboards? (15 vs 16 vs 18 Gauge)
A 16-gauge finish nailer is the right size for most baseboards, which run 1/2 to 3/4 inch thick — switch to 15-gauge once trim passes 3/4 inch, and skip 18-gauge brads except on thin shoe molding. The wrong gauge either splits stock-grade MDF baseboard or leaves nail heads that back out as the wood dries. This guide covers gauge-by-thickness picks, the PSI range that actually drives nails flush, and which nailer to buy.

Finish Nailer Gauge by Baseboard Thickness
Best Baseboard Finish Nailer Pick
Metabo HPT 16-Gauge Finish Nailer NT65M2S – $129.00
Fires the 16-gauge nails this guide recommends for most 1/2–3/4 inch baseboard, with a tool-free depth dial for the flush-set technique covered below.
- Best for: Standard 1/2–3/4 inch MDF or pine baseboard
- Why we picked it: Tool-free depth-of-drive dial makes the flush-nail technique this guide covers easy to set without extra tools
- Main drawback: Straight magazine only — can struggle to reach tight inside corners
Compare more finish nailer options
 Option 1 Bostitch 16-Gauge Finish Nailer – $154.99
|
 Option 2 Metabo HPT 15-Gauge Angled Finish Nailer NT65MA4 – $137.00
|
 Option 3 NuMax 3-in-1 16/18-Gauge Finish Nailer Combo – $42.79
|
As an Amazon Associate we earn from qualifying purchases.
Nail gauge works backwards from what most people expect — the bigger the number, the thinner the nail. Matching gauge to your baseboard’s actual thickness (not a general “15 or 16 gauge” guess) is what keeps the nail from splitting thin stock or barely holding thick stock. The chart below adds the compressor PSI setting most guides leave out, since running too low a PSI at the right gauge still leaves proud nail heads.
| Baseboard Thickness | Nailer Gauge | Nail Length | Starting PSI | Fill Difficulty |
|---|---|---|---|---|
| 1/2 inch (thin MDF) | 18-gauge brad* | 1¼–1½ in | 70–80 PSI | Minimal — tiny hole |
| 1/2–3/4 inch (standard) | 16-gauge finish | 1½–2 in | 80–100 PSI | Light — one caulk pass |
| 3/4–1 inch (thick MDF/pine) | 15-gauge finish | 2–2½ in | 90–110 PSI | Moderate — needs filler |
| 1 inch+ (hardwood casing, crown) | 15-gauge angled | 2½ in | 100–120 PSI | Moderate — needs filler |
*18-gauge only holds up on baseboard this thin because there’s little mass for the wood to flex against — on anything 3/4 inch or thicker, a brad this size backs out as the wall and baseboard move with humidity.
Choosing the Right Finish Nailer
Beyond gauge, three things decide which specific nailer works for your job: the baseboard material, whether you’ll reach inside corners, and whether this is a one-off repair or an ongoing trim habit.
Considerations for Baseboards
- Trim thickness: match the gauge to the chart above — don’t default to “15 or 16” without checking your actual stock.
- Material: MDF baseboard splits more easily at the ends than solid pine, so keep nails at least 1½ inch from any cut end.
- Angled vs. straight magazine: an angled nailer reaches into inside corners and behind door casing that a straight-magazine nailer can’t.
Understanding Nail Gauge vs. Brads
A finish nailer and a brad nailer are different tools, not just different settings. Finish nailers fire 15- or 16-gauge nails built for real holding power; brad nailers fire thinner 18-gauge nails meant for delicate trim like shoe molding and quarter round, not load-bearing baseboard attachment.
See our 16-gauge vs. 18-gauge nailer breakdown if you’re deciding between the two tools generally, or our full nail gauge and length chart by trim type if you already own a nailer and just need the right fastener for it.
How to Nail Baseboard With a Finish Nailer
Getting the gauge right only matters if the technique behind it is right too. These four steps cover the setup and motion that keep nail heads flush and baseboard split-free.
- Set your starting PSI: dial your compressor to the low end of the range for your gauge (see the data point above), then test on a scrap piece before nailing the wall.
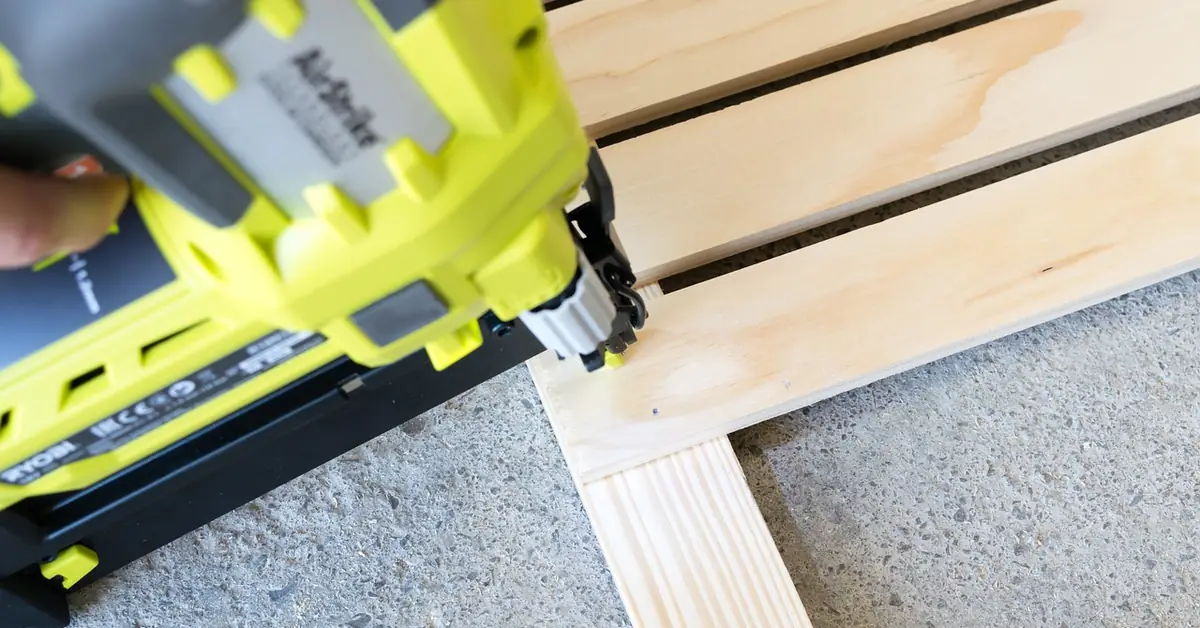
- Hold the nailer at 30–45 degrees: angling the tool against the baseboard lets the nail bite into the stud without blowing out the face of the trim.
- Set nail depth to the baseboard thickness: the head should sit just below the surface — deep enough to conceal, not so deep it tears the wood fibers around the hole.
- Space nails every 16 inches into studs, plus one nail within 2 inches of each end and near every miter joint, so the board can’t cup away from the wall between fasteners.
📊 Pneumatic finish nailers typically run on 70–120 PSI depending on gauge, nail length, and wood hardness — start at the low end and increase in small steps until the nail sets flush. — Source: Quincy Compressor, 2026

“We default to a 16-gauge nailer for standard 3/4-inch MDF baseboard and only reach for 15-gauge on hardwood casing over an inch thick. The mistake we see most often is running an 18-gauge brad nailer on thick baseboard because it’s already in the toolbox — it looks fine going in, then the board starts creeping loose within a year as the wall breathes with the seasons.”
Maintenance and Safety
Regular Cleaning and Lubrication
- Clear debris and nail fragments from the magazine and nose after each use with compressed air or a soft brush.
- Check for loose parts or a worn no-mar tip before every project — a cracked tip is what causes the crescent-shaped dents you sometimes see around nail heads.
- Oil the driver at the point your manual specifies if the nailer isn’t oil-free; skipping this is the most common cause of a nailer that starts double-firing.
- Store the nailer disconnected from the air line, in a dry case, away from temperature swings.
Safety Precautions
- Wear safety glasses and hearing protection — pneumatic nailers are loud enough at close range to matter over repeated use.
- Disconnect the air supply before clearing a jam or changing nails — never clear a jam on a nailer that’s still pressurized.
- Keep your off-hand clear of the firing line, and never bump-fire toward a hand holding the baseboard in place.
Frequently Asked Questions
What size finish nailer is best for baseboards?
A 16-gauge finish nailer is best for standard baseboard 1/2 to 3/4 inch thick. Move up to 15-gauge for baseboard or casing over 3/4 inch, since the thicker nail holds better in denser stock without needing more of them.
Can I use a brad nailer for baseboards?
You can, but it’s not the best choice for anything but thin trim. An 18-gauge brad nailer works fine on 1/2-inch shoe molding or base cap, but on standard 1/2–3/4 inch baseboard the thinner brad lacks the holding power of a 15- or 16-gauge finish nail and can let the board work loose over time.
What PSI should I use for a finish nailer on baseboard?
Start at 70–80 PSI for 16-gauge work and 90–110 PSI for 15-gauge, then test on scrap and increase in 5-PSI steps until the nail sets flush without tearing the wood surface. Running too high overdrives the nail through the face; too low leaves the head proud.
What length nails should I use for baseboards?
Use 1½ to 2 inches for standard 1/2–3/4 inch baseboard, and 2 to 2½ inches for thicker baseboard or crown molding, so the nail reaches at least 3/4 inch into the wall stud behind the drywall, not just the baseboard itself.
How many nails should I use for each section of baseboard?
Space nails about every 16 inches to land on wall studs, plus one nail within 2 inches of each end and one near every miter or scarf joint. Placing nails closer than that on thin stock is what causes splitting, not extra holding power.

Conclusion
Match the nailer gauge to your baseboard’s actual thickness — 16-gauge for the 1/2–3/4 inch range most homes use, 15-gauge once you’re past 3/4 inch, and 18-gauge brads reserved for thin shoe molding only. Get the PSI and angle right alongside the gauge and a baseboard install should need zero callbacks for popped or loose trim.
Sponsored / affiliate links. As an Amazon Associate I earn from qualifying purchases. I may earn additional commission from eligible campaigns.