Wood Veneer at Home Depot: EDGEMATE & PureEdge Prices Compared
Home Depot sells wood veneer under two house brands, EDGEMATE and PureEdge, not the wide species range specialty suppliers carry — sheets run roughly $16 to $80 depending on backing type and size. Buy the wrong backing and paper-backed veneer will bubble the moment you paint over it before the glue fully cures. This guide covers real EDGEMATE and PureEdge pricing, which backing to pick, and the three application methods that actually hold.
Insert your Affiliate Disclosure reusable block here

What Wood Veneer Does Home Depot Actually Sell?
Best Veneer Installation Glue Pick
Titebond Cold Press Veneer Glue, 32 oz.
A water-based PVA formula built specifically for bonding paper- and wood-backed veneer without the fumes or flash-off timing of contact cement.
- Best for: flat panels — cabinet doors, drawer fronts, tabletops
- Why we picked it: longer open time than contact cement gives you room to reposition the veneer before it sets
- Main drawback: needs clamping or a vacuum press for full contact, not ideal for vertical surfaces
Compare more veneer installation tools
 Option 1 POWERTEC 12″ Long Handle J Roller
|
 Option 2 Virutex AU93 Edge Banding Trimmer
|
 Option 3 Edge Supply Birch Iron-On Edge Banding, 3/4″ x 50 ft.
|
As an Amazon Associate we earn from qualifying purchases.
Home Depot does not stock loose, unbacked veneer sheets like a specialty veneer supplier does. In-store and online, its wood veneer selection is almost entirely two house brands: EDGEMATE, which sells paper-backed and 2-ply wood-backed sheets in around seven standard species, and PureEdge, which sells a smaller line of real wood-backed veneer for a wood-on-wood look. Both are exclusive Home Depot brands — you won’t find them at a specialty veneer supplier or on the open market.
Species availability is standard commercial: red oak, white oak, cherry, maple, mahogany, birch, and white pine. If you need a figured, exotic, or book-matched species, Home Depot won’t have it — see the comparison further down.
| Product Line | Backing / Size | Typical Price | Best For |
|---|---|---|---|
| EDGEMATE, paper backer | 10 mil paper, 24 x 96 in. | $22 – $37 | Flat cabinet doors, drawer fronts |
| EDGEMATE, 2-ply wood backer | 24 x 96 in. | $40 – $55 | Slightly uneven substrates, hides minor defects |
| EDGEMATE, paper backer | 10 mil paper, 48 x 96 in. | $70 – $85 | Large panels, fewer seams to match |
| PureEdge, wood backer | 24 x 96 in. | $55 – $65 | Closest to solid-wood look and feel |
| EDGEMATE edgebanding | 13/16 in. x 25–250 ft. rolls | $8 – $30 | Finishing raw plywood/MDF edges only |
Prices are typical Home Depot online listings as of 2026 and vary by store, species, and promotions — confirm current pricing at homedepot.com or your local store before buying.
Home Depot vs. a Specialty Veneer Supplier
Home Depot wins on convenience and same-day pickup, not selection. A dedicated veneer supplier stocks 100+ species including figured, curly, and book-matched cuts, sells raw unbacked veneer by the square foot, and will custom-cut sheets to your dimensions. Home Depot sells about seven standard species in fixed sheet sizes only.
- Pick Home Depot when: you need a standard species (oak, maple, cherry) same-day for a small cabinet-refacing or repair job and don’t need a specific grain match.
- Pick a specialty supplier when: you need an exotic or figured species, a book-matched panel for a visible tabletop, or raw veneer you plan to press yourself with vacuum bagging.
Paper-Backed vs. Wood-Backed Veneer: Which Should You Buy?
Paper-backed veneer is real wood laminated to a thin paper substrate. It’s the cheapest option and bends easily around curves, but it needs a perfectly flat, smooth surface underneath — any bump or grain telegraphs straight through to the face.
Wood-backed veneer (EDGEMATE’s 2-ply or PureEdge’s wood-backed line) bonds the face veneer to a cross-grain wood substrate. It’s more forgiving of minor surface imperfections and feels closer to solid wood when you cut or sand the edge, but it’s stiffer and costs roughly 40–60% more.
How to Install Wood Veneer From Home Depot
There are three ways to attach Home Depot veneer, and the right one depends on which backing you bought. Contact cement and cold-press veneer glue both work for paper- and wood-backed sheets; the iron-on PVA method only works on 10 mil paper-backed veneer.
- Prepare the substrate: Sand the surface smooth and wipe away all dust, oil, and old adhesive residue — any debris under paper-backed veneer will show through the face.
- Cut oversized: Measure the panel and cut the veneer roughly 1/2 inch larger on every side so you have room to trim the final edge cleanly.
- Apply adhesive: For contact cement or cold-press veneer glue, coat both the substrate and the back of the veneer, let it tack per the label, then press. For the iron-on method, run a household iron on its highest cotton setting slowly across the veneer, starting from the center and working outward.
- Roll out air pockets: Immediately work a J-roller over the full surface, center to edges, with firm pressure to force out trapped air before the adhesive sets.
- Trim and finish: Once the adhesive has cured fully (check the product label — rushing this step is the single biggest cause of bubbling), trim the overhang flush with an edge-banding trimmer or sharp utility knife, then sand lightly before staining or sealing.
Why Home Depot Veneer Bubbles or Peels After Installation
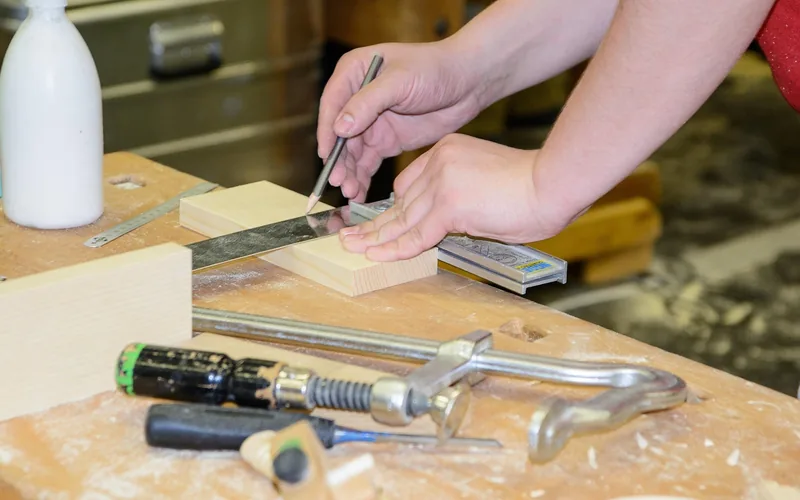
Bubbling and peeling are the most common complaints in EDGEMATE product reviews, and they trace back to two mistakes rather than a defective product. First, applying too little adhesive near the panel edges and corners — those areas need full, even coverage or they lift first. Second, painting or clamping the veneer before the glue has fully cured; one common failure pattern is bubbling that appears specifically after painting over cabinet refacing veneer too soon, caused by trapped moisture from the paint reacting with adhesive that hadn’t set yet.
If a section has already bubbled, you can often fix it without replacing the whole sheet: slice the bubble open along the grain with a sharp blade, inject a small amount of wood glue underneath with a syringe or thin applicator, then clamp or roll it flat until the glue cures.
Where Wood Veneer From Home Depot Works Best
Cabinet refacing is the single biggest use case for Home Depot’s veneer line — a 24 x 96 in. sheet covers a standard cabinet door and costs a fraction of replacing the door outright. It also works well for furniture repair (patching a chipped edge or resurfacing a tabletop), wall paneling accents, and dressing up a plain plywood panel for shelving or built-ins.

If your project calls for something other than a flat panel — a specific grain match, a curved surface, or a species Home Depot doesn’t stock — compare it against wood-look laminate or the broader material options in our types of wood guide before you commit to a sheet size.
Frequently Asked Questions
Is Home Depot wood veneer real wood?
Yes. Both EDGEMATE and PureEdge are real wood sliced paper-thin and bonded to a backing — they are not printed laminate or vinyl. The backing (paper, 2-ply wood, or solid wood) supports the thin wood face during handling and installation, but the visible surface is genuine wood veneer.
What’s the difference between paper-backed and wood-backed veneer?
Paper-backed veneer is cheaper and bends more easily but requires a perfectly flat, smooth substrate. Wood-backed veneer costs roughly 40–60% more but hides minor surface imperfections better and feels closer to solid wood at a cut edge.
Can I stain or paint Home Depot wood veneer?
Yes, but let the adhesive cure fully first — usually 24 hours minimum, longer for contact cement in cool or humid conditions. Painting or applying a heavy finish before the glue has set is the most common cause of bubbling reported by buyers.
Does Home Depot cut wood veneer to a custom size?
No. Home Depot sells EDGEMATE and PureEdge veneer in fixed sheet sizes (typically 24 x 96 in. or 48 x 96 in.) that you trim yourself. For a custom pre-cut size or shape, a specialty veneer supplier is the better option.
Why is my veneer bubbling after gluing?
Bubbling almost always means either too little adhesive near the edges and corners, or the veneer was painted, clamped, or handled before the glue fully cured. Slice the bubble along the grain, work a little glue underneath, and clamp it flat to fix it without replacing the sheet.
Bottom Line
Home Depot’s wood veneer works well for standard-species cabinet refacing and furniture repair jobs you want same-day — EDGEMATE for a budget flat panel, PureEdge if you want it to feel more like solid wood. For exotic species, figured grain, or a custom cut, a specialty veneer supplier is worth the extra shipping wait.
Sponsored / affiliate links. As an Amazon Associate I earn from qualifying purchases. I may earn additional commission from eligible campaigns.