Automotive Sheet Metal Repair: Expert Tips for Restoring Your Vehicle’s Body
Automotive sheet metal repair involves fixing and restoring the damaged body panels of a vehicle. This process includes repairing dents, scratches, and other forms of damage caused by accidents or wear and tear.
It is crucial to address these issues promptly to maintain the structural integrity and aesthetics of the vehicle. Additionally, proper sheet metal repair ensures the safety of the occupants by restoring the vehicle’s original strength. By entrusting this task to a professional, you can be confident in receiving high-quality repairs that will enhance the appearance and value of your vehicle.
Choosing The Right Tools
When it comes to automotive sheet metal repair, having the right tools is essential for a successful outcome. Whether you are a DIY enthusiast or a professional, having the right tools can make all the difference in achieving precision and excellent results. In this section, we will discuss the essential tools for sheet metal repair as well as advanced tools for those who require more precision in their work.
Essential Tools For Sheet Metal Repair
When it comes to sheet metal repair, there are a few essential tools that every automotive enthusiast or professional should have in their arsenal. These tools not only help in the repair process but also ensure that the job is done efficiently and effectively.
- Hammer and Dolly Set: This classic combination is a must-have for any sheet metal repair task. The hammer is used to reshape and mold the damaged metal, while the dolly works as a backing tool to provide support and stability.
- Body Filler: Body filler is used to fill in dents and imperfections in the sheet metal. It is an essential tool for achieving a smooth and seamless finish in the repair process.
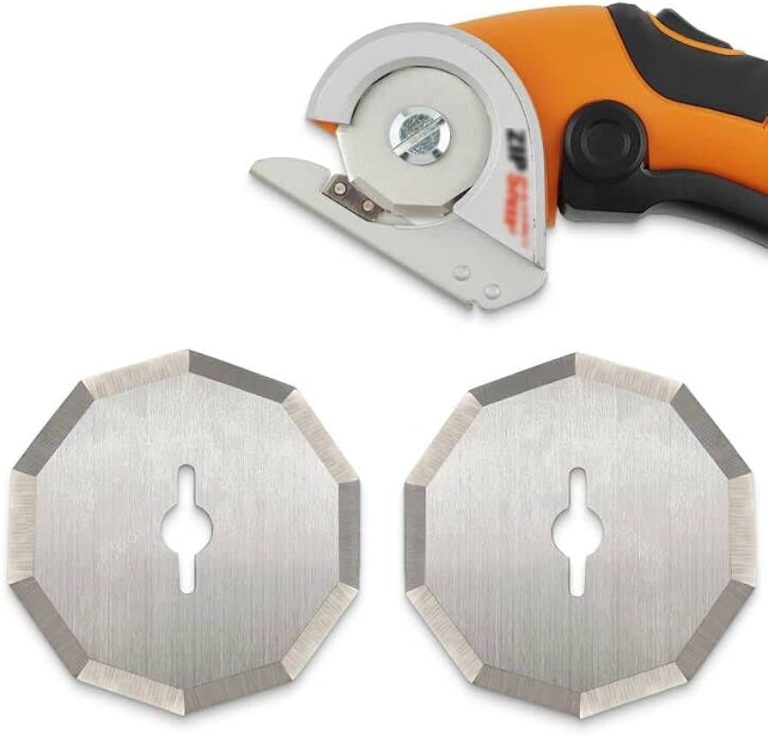
- Sheet Metal Cutters: These specialized cutters are designed to make precise straight cuts in sheet metal. They come in various sizes and shapes to accommodate different repair needs.
- Nibbler: A nibbler is a versatile tool that allows for the cutting of intricate shapes and curves in sheet metal. It is particularly handy when dealing with complex repair jobs.
- Spot Welder: A spot welder is used for creating strong and durable welds in vehicle body panels. It is an essential tool for repairing and restoring structural integrity to the sheet metal.
Advanced Tools For Precision Work
If you are looking to take your sheet metal repair skills to the next level, there are a few advanced tools that can help you achieve a higher level of precision and accuracy in your work. These tools are particularly useful for professionals or those who require absolute perfection in their repairs.
| Tool | Description |
|---|---|
| English Wheel | An English wheel is a tool used to shape and form sheet metal into smooth, curved surfaces. It allows for precise control over the metal shaping process, resulting in seamless repairs. |
| Metal Shrinking Disc | This advanced tool is used to shrink metal, allowing for precise control over the metal’s shape and eliminating any warping or distortion that may occur during the repair process. |
| Rotary Files | Rotary files are used to remove excess material and shape sheet metal, particularly in hard-to-reach areas. They are perfect for achieving intricate details and fine finishes in the repair work. |
| Heat Shrink Torch | A heat shrink torch is a tool used to heat the metal for shrinking and shaping purposes. It provides precise and concentrated heat, ensuring that the metal retains its original strength and properties. |
By choosing the right tools for your automotive sheet metal repair, you can ensure that your repairs are not only efficient but also of the highest quality. Whether you opt for the essential tools or the advanced ones, having the right tools in your workshop will undoubtedly elevate your repair skills and lead to exceptional results.

Preparing The Work Area
When it comes to automotive sheet metal repair, preparing the work area is a critical first step. This ensures that the repair process goes smoothly and safely. In this section, we will discuss the important aspects of preparing the work area for sheet metal repair, including cleaning the damaged area and ensuring proper ventilation and safety measures.
Cleaning The Damaged Area
Before beginning any repair work, it is essential to clean the damaged area thoroughly. This involves removing any dirt, grease, or debris from the surface of the metal. A clean surface is crucial for the successful application of repair materials and ensures a strong bond. Using a mild detergent and water, gently clean the damaged area and dry it completely before proceeding with the repair.
Ensuring Proper Ventilation And Safety Measures
Proper ventilation is crucial when working with sheet metal repair materials. Ensure that the work area is well-ventilated to prevent the inhalation of fumes and airborne particles. Additionally, it’s important to wear appropriate safety gear, including gloves, goggles, and a respirator, to protect yourself from any potential hazards.
Assessing The Damage
When it comes to automotive sheet metal repair, assessing the damage is the first crucial step in the restoration process. Proper evaluation is essential to determine the necessary repairs and ensure the vehicle’s structural integrity and aesthetics are preserved.
Identifying Types Of Damage (dents, Scratches, Rust)
Automotive sheet metal damage can manifest in various forms, including dents, scratches, and rust. Each type of damage requires different repair techniques and materials.
Determining The Extent Of The Damage
To accurately assess the extent of the damage, technicians need to thoroughly inspect the affected areas, considering factors such as depth, spread, and severity. Proper diagnosis ensures a comprehensive repair plan is developed and executed successfully.
Removing The Damaged Metal
When repairing automotive sheet metal, removing damaged metal is crucial for a successful repair process. This step involves carefully cutting out the damaged area, ensuring a clean and precise removal. By eliminating the compromised metal, the repair can be effectively completed to restore the vehicle’s structural integrity.
Using Cutting Tools To Remove Damaged Sections
When it comes to automotive sheet metal repair, removing the damaged metal is a crucial step in achieving a seamless and professional repair. Using cutting tools is one of the most effective methods to remove the sections of the metal that are beyond repair.
There are several cutting tools available that can help you get the job done smoothly. One commonly used tool is the reciprocating saw, also known as a “sawzall”. This tool uses a back-and-forth motion of the blade to cut through the damaged metal with ease. Make sure to choose a metal-cutting blade for better efficiency.
In addition to the reciprocating saw, you can also opt for an angle grinder equipped with a cutting wheel. This tool spins rapidly to slice through the damaged metal effortlessly. Remember to wear protective gear, such as gloves and goggles, to ensure your safety during the cutting process.
Avoiding Unnecessary Removal Of Metal
When removing damaged sections of automotive sheet metal, it’s essential to avoid unnecessary removal of metal. Removing more metal than needed can lead to a longer and more complicated repair process, as well as additional expenses.
To avoid such complications, it’s crucial to carefully assess the damaged area before making any cuts. Look for any signs of rust, corrosion, or deformation that require immediate attention. By accurately identifying the damaged sections, you can ensure that only the affected areas are removed, saving time and effort in the repair process.
In some cases, it might be necessary to create a guide using masking tape or a marker to clearly indicate the portions of metal that need to be removed. This can help you maintain precision and prevent any unnecessary removal.
Remember, automotive sheet metal repair is a meticulous process that requires attention to detail. By using the right cutting tools and avoiding unnecessary removal of metal, you can ensure a successful repair that restores the structural integrity and aesthetics of the vehicle.
Shaping And Forming New Metal
When it comes to automotive sheet metal repair, shaping and forming new metal is a critical aspect. Using shaping tools is key to match the original contours accurately.
Using Shaping Tools To Match The Original Contours
Shaping tools help to recreate the intricate curves and lines of the original sheet metal, restoring the vehicle’s appearance.
Working With Different Gauges Of Sheet Metal
It’s crucial to work with different gauges of sheet metal to ensure the repair is sturdy and long-lasting. Using the appropriate gauge prevents future issues.
Welding Techniques For Repair
When it comes to automotive sheet metal repair, welding techniques for repair play a crucial role in restoring the structural integrity of the vehicle.
Types Of Welding Methods For Different Repairs
For different repairs, various welding methods can be employed, such as MIG welding, TIG welding, and spot welding.
Ensuring Strong And Durable Welds
- Ensure clean surfaces before welding.
- Use the correct welding wire and gas for the specific metal.
- Control the heat input to prevent warping.
- Perform proper penetration for strong bonds.
Applying Body Filler And Primer
The process of applying body filler and primer is crucial in automotive sheet metal repair to create a smooth and flawless surface for painting. This phase involves filling in imperfections with body filler and priming the surface for painting.
Filling In Imperfections With Body Filler
1. Prepare the surface: Clean the metal surface thoroughly with a degreaser and ensure it is completely dry before applying body filler.
2. Mix the body filler: Follow the manufacturer’s instructions to properly mix the body filler and hardener. Use a clean mixing board and tools to ensure proper consistency.
3. Applying the filler: Using a body filler applicator, spread the filler evenly over the imperfections, ensuring it is slightly raised to allow for sanding down to the desired level.
Priming The Surface For Painting
1. Select the appropriate primer: Choose a high-quality automotive primer suitable for the specific metal and paint type to ensure adhesion and longevity.
2. Applying the primer: Using a spray gun or a paintbrush, apply a thin, even coat of primer over the entire repaired area. Allow the primer to dry completely before proceeding to sanding and painting.
3. Sanding the primer: After the primer is fully dried, sand the surface with fine-grit sandpaper to achieve a smooth and level base for the paint.
Finishing And Painting
Refinishing and painting automotive sheet metal repairs elevate the overall aesthetic appeal and protection of vehicles. Skilled technicians employ specialized techniques to restore damaged areas seamlessly, ensuring a flawless finish that enhances the vehicle’s appearance and durability. This meticulous process contributes significantly to maintaining the vehicle’s value and longevity.
Sanding And Smoothing The Repaired Area
When it comes to automotive sheet metal repair, one crucial step in achieving a seamless finish is sanding and smoothing the repaired area. This process involves removing any imperfections, rough edges, or unwanted textures to ensure a smooth and even surface for painting. Sanding the repaired area prepares it for the next step, which is selecting the right paint.
Selecting The Right Paint For A Seamless Finish
To achieve a flawless final result, selecting the right paint is essential. The chosen paint should seamlessly blend with the surrounding surface, making the repaired area virtually indistinguishable. When selecting the paint, consider factors such as color matching, texture, and durability.
Here are some tips to help you select the right paint for your automotive sheet metal repair:
- Research the original paint: Start by researching the original paint used on your vehicle. This information will guide you in finding a paint that closely matches the existing color and finish.
- Consult an expert: Seek advice from experienced professionals or consult with automotive paint specialists. They can provide valuable insights into the best paint options for your specific repair.
- Consider the paint type: Different paint types, such as acrylic, enamel, or urethane, offer various benefits and finishes. Assess your requirements and choose a paint type that suits your needs.
- Test the paint: Before applying the paint to the repaired area, it’s always a good idea to test it on a small inconspicuous spot. This test will help you determine if the color and finish match your expectations.
- Proper application: Follow the manufacturer’s instructions for applying the paint. Ensure you use proper techniques, such as even strokes and an adequate amount of paint, to achieve a seamless finish.
Remember, the right paint selection can make a significant difference in the overall appearance and longevity of your automotive sheet metal repair. Take your time to research and choose wisely for a flawless finish.

Frequently Asked Questions Of Automotive Sheet Metal Repair
What Are The Common Types Of Automotive Sheet Metal Damage?
Sheet metal damage in vehicles commonly includes dents, scratches, and corrosion. Dents are often caused by collisions or hail, while scratches can result from various sources. Corrosion often occurs due to exposure to moisture and salt on the roads.
How Can I Repair Dents In Automotive Sheet Metal?
Dents in automotive sheet metal can be repaired using various methods, such as paintless dent repair (PDR) or traditional bodywork techniques. PDR is a non-invasive method that uses specialized tools to massage the metal back into shape without the need for fillers or repainting.
What Are The Benefits Of Using Professional Automotive Sheet Metal Repair Services?
Professional automotive sheet metal repair services offer precise, high-quality repairs that maintain the structural integrity and aesthetic appeal of the vehicle. Additionally, they can help prevent further damage and preserve the vehicle’s resale value. Moreover, professional repair ensures the use of proper techniques and materials for long-lasting results.
How Do I Prevent Corrosion On Automotive Sheet Metal?
To prevent corrosion on automotive sheet metal, regular cleaning and maintenance are essential. This includes promptly addressing any chips or scratches in the paint, as well as applying protective coatings or sealants. Additionally, storing the vehicle in a garage and avoiding exposure to harsh environmental conditions can help prevent corrosion.
Conclusion
Automotive sheet metal repair is a crucial aspect of maintaining and restoring the overall aesthetics, safety, and functionality of vehicles. By entrusting this task to skilled professionals, car owners can ensure the smooth and seamless repair of damaged sheet metal.
Whether it’s fixing dents, rust, or other structural issues, the expertise of these professionals can bring back the pristine condition of automobiles, enhancing their longevity and resale value. Don’t delay in getting your vehicle’s sheet metal repairs done to enjoy a reliable and visually appealing ride.