Stitch and Glue Boat Plans: How the Building Method Works
Stitch and glue boat plans build a hull from flat plywood panels: you wire the edges together, then epoxy fillets and fiberglass tape do the real structural work. The wires are only a temporary jig, which is the detail most beginner guides get wrong. This page explains how the method works, what a good plan set should contain, and how to choose between plans and a kit.
If you are picking a first project, the design matters more than the method. A narrow kayak, a flat-bottomed skiff and a small dinghy all use the same basic sequence, but they ask very different things of you in panel layout, epoxy volume and finishing time. For a kayak-specific walkthrough, see our guide to building a plywood kayak.
What the Method Actually Is (and the Myth About the Stitches)
Best Marine Epoxy Pick
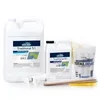 |
TotalBoat Traditional 5:1 Marine Epoxy, 1 Gallon Kit (Slow Hardener), $149.99 Stitch and glue rides on epoxy fillets and tape, so this is the one consumable worth choosing deliberately before you cut a single panel.
|
In stitch and glue construction, flat plywood panels are cut to shape from a plan, then drawn together along their edges with short lengths of soft wire or cable ties threaded through small holes drilled along each seam. Because the panels are flexible in one direction, they bend into the curved hull shape without molds or a strongback, which is why hobby builders like the method.
The common myth is that the stitches hold the boat together. They do not. The wire only positions the panels while you lay a bead of epoxy thickened with a filler, known as a fillet, along the inside of each seam, then wrap fiberglass tape over it. Once that cures, the joint is a bonded epoxy and glass structure, and most plans have you snip and remove the wires afterward. Your plan will say which stitches come out and which are left, so follow it rather than a forum tip.
Two practical details from the supplier side are worth knowing. A builder resource page for the method lists 16 gauge copper wire for stitching, and wood flour and fumed silica as the fillers for thickening epoxy into fillets. The epoxy itself is mixed at a fixed ratio; the kit featured above is a 5:1 resin to hardener system, and mixing to the stated ratio matters more than mixing quickly.
What a Good Stitch and Glue Plan Set Should Include
Designers sell the same method in very different packages, and price alone does not tell you which one you are getting. Before you buy, look for these items on the designer’s listing or sample pages:
- Panel layouts or full-size patterns: a printed or PDF pattern you trace or print to scale is much faster than lofting the shapes yourself from a table of offsets.
- A materials list with plywood thickness and grade: panel thickness often differs between hull and bulkheads, so a vague “marine plywood” line is a warning sign.
- An assembly sequence: stitching order, when to fillet, when to tape and when to remove wires.
- An epoxy schedule: which seams get fillets, which get tape, and how many coats seal the raw edges.
- Build-hour estimates and skill level: honest designers state these; treat a plan that does not as unfinished.
What the Plan Listings We Checked Show
We looked at the plan pages of two suppliers on September 30, 2026. The prices below are as listed on those pages at that time and can change. We have not built these boats, and you should confirm on each listing that the design uses stitch and glue construction before buying, since these shops also sell other construction methods.
| Supplier and plan | Listed price | Format |
|---|---|---|
| Duckworks, Mayfly 14 | $50 | Printed plans |
| Duckworks, Pollywog 8 | $65 | |
| Duckworks, Goat Island Skiff | $100 | |
| Duckworks, Surf Scoter 22 Cruiser | $265 | |
| Boat Builder Central (Bateau), Phantom 22 | $132 | Plans |
| Boat Builder Central (Bateau), Extreme Flats 22 | $165 | Plans |
The takeaway is that the plans themselves are a small part of the total. A $50 to $265 plan can lead to a materials bill many times larger, which is why we cover the real numbers in our wooden boat cost guide.
Plans or Kit: The Trade-Off Nobody Prices Correctly
Chesapeake Light Craft (CLC) is a well-known kit supplier for this method, and a UK reseller describes its kits as easy to build with detailed instruction manuals for first-time builders. The real question is what you are paying for. On CLC’s builder forum, one builder said kits cost several hundred dollars more than sourcing the parts yourself, and another said the kit saved about 20 hours of cutting. Those are individual builders’ opinions, not published figures, but they capture the trade-off well.
- Kit: panels arrive pre-cut, so you skip layout and cutting and start at stitching. You pay a premium for that time. One builder on the same thread also reported that some parts did not fit well, so expect to trim and adjust even with a kit.
- Plans: you buy the design cheaply, then trace, cut and scarf the panels yourself. Builders on the forum described a lot of time spent transferring lines and cutting. You gain design flexibility and lower cost, at the price of more hours and more chances for a layout error.
A sensible split is to buy a kit for the first boat and plans for the second. The fun part of the method is stitching and filleting, and for many beginners the cutting is where enthusiasm runs out.
Choosing Plywood and Epoxy That Will Not Let You Down
Plywood grade matters because every seam is only as good as the veneers it bonds to. Marine plywood is made with waterproof glue and, in the better grades, fewer internal voids. Okoume is a common choice for hobby boats because it is light and takes epoxy well; our okoume versus mahogany comparison covers how it differs from mahogany-faced panels. Whatever you buy, ask the supplier for the thickness and grade printed on the panel, and seal every cut edge with epoxy because raw plywood edges absorb water.
Epoxy is where a first build most often goes wrong. Mix ratios are not forgiving: measure with the pumps or scales that came with your system, mix thoroughly, and do not eyeball it. Work in the temperature range the manufacturer states, because pot life shortens quickly in a warm shop. If you are still choosing a bonding product for other marine jobs, our guide to the best waterproof wood glue for marine projects explains where glues stop and epoxy begins.
Epoxy Safety You Should Not Skip
Follow the manufacturer’s safety data sheet for whatever epoxy you buy. Uncured epoxy is a skin irritant, and repeated skin contact can lead to sensitization in some people, so wear nitrile gloves, keep it off bare skin, and ventilate the shop. Sanding cured epoxy and plywood produces fine dust, so wear a well-fitted dust mask and eye protection. Do not use solvents to clean epoxy off skin; follow the label’s first aid advice instead.
A Practical Order of Work
- Cut and mark the panels: transfer the plan’s shapes onto plywood, cut slightly outside the line, then sand to the line.
- Join long panels: if the hull sides are longer than a plywood sheet, join them with the scarf or butt joints your plan specifies before assembly.
- Drill stitch holes: drill along each seam at the spacing your plan gives, and keep the holes matched from panel to panel.
- Stitch and shape: thread wire through the holes and pull the seams together until the plan’s reference lines match. Do not overtighten; the panels should sit flush without being crushed.
- Tack, then fillet: tack the seams with thickened epoxy, cure, then run continuous fillets inside each joint.
- Tape and coat: lay fiberglass tape over the cured fillets, wet it out with epoxy, then remove the temporary wires as the plan instructs.
- Fair, seal and finish: sand, fill low spots, seal every surface with epoxy, then paint or varnish.
If you are weighing plywood options, our page on marine grade plywood versus pressure treated shows why ordinary construction plywood is a poor substitute for a boat build.
Frequently Asked Questions About Stitch and Glue Boat Plans
What are stitch and glue boat plans?
Stitch and glue boat plans are drawings, and often full-size panel patterns, for boats built from flat plywood panels. You cut the panels, hold their edges together with temporary wire or cable-tie stitches, then bond the seams with thickened epoxy fillets and reinforce them with fiberglass tape. The plans tell you the panel shapes, the assembly order and the epoxy schedule.
Are stitch and glue boats safe?
A stitch and glue boat can be safe when it is built to a competent designer’s plans, with marine-grade plywood, fully sealed epoxy joints and the recommended flotation, but the method alone does not guarantee it. Safety depends on the design being right for the water you use it on, on clean fillets and taped seams, and on sealing every raw plywood edge. Wear a life jacket and test a new boat in shallow, calm water first.
How long does it take to build a stitch and glue boat?
There is no single number. Build time depends on the design, the size and how much of the panel cutting you do yourself. Designers usually publish estimated build hours for each model, so check the listing for the boat you want. One builder on a boat-kit forum said a kit saved roughly 20 hours of cutting compared with working from plans.
Should a first-time builder buy a kit or plans?
In one CLC builder-forum thread, most respondents recommended a kit for a first boat, because the panels arrive pre-cut and the build is more encouraging. Plans cost less, but you transfer the lines and cut every panel yourself. If you are comfortable with a jigsaw and accurate layout, plans are a reasonable choice, especially if you want to modify the design.
Conclusion
Stitch and glue is popular because it removes molds and heavy joinery, not because it removes the need for care. Choose a design whose plan set is complete, decide honestly between a kit and plans, spend your money on the plywood and epoxy, and treat the fillets and tape as the real structure. The wires are just there to hold the shape while the epoxy does its job.
Sponsored / affiliate links. As an Amazon Associate I earn from qualifying purchases. I may earn additional commission from eligible campaigns.