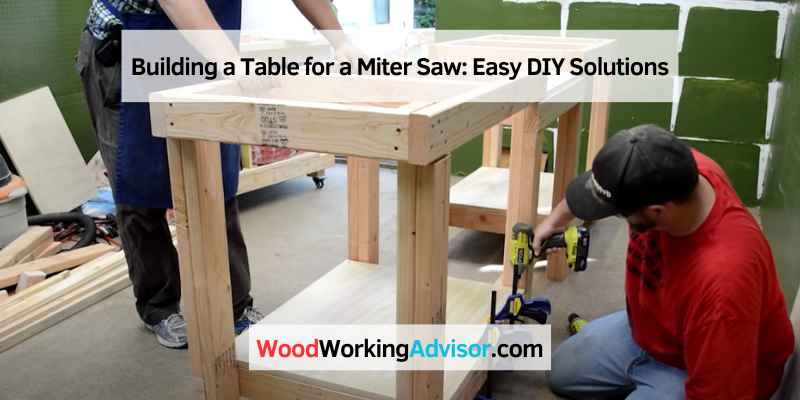
Building a Table for a Miter Saw: Easy DIY Solutions
Building a table for a miter saw can provide stability and improve precision during cutting. Constructing a solid, well-designed table will enhance your woodworking projects and ensure accurate cuts with ease.
We will discuss the steps involved in building a table for a miter saw, including the necessary materials, measurements, and assembly process. Whether you are a professional woodworker or a hobbyist, having a dedicated table for your miter saw can greatly enhance your work and make your projects more efficient.
Follow these simple guidelines to create a sturdy and reliable table that will elevate your woodworking experience.
Design Considerations
When it comes to building a table for a miter saw, design considerations play a crucial role in ensuring the functionality and efficiency of the finished product. By taking into account important aspects such as size and dimensions, as well as sturdiness and stability, you can create a table that not only provides a suitable working space but also enhances the safety and accuracy of your woodworking projects. Let’s delve into these design considerations in more detail:
Size And Dimensions
Choosing the appropriate size and dimensions for your miter saw table is essential for maximizing its usability. The dimensions of the table should be determined based on the available space in your workshop, as well as the size of your miter saw and the materials you plan to work with.
The table should be large enough to comfortably accommodate the length and width of the longest workpieces you typically handle. This ensures that you have enough support for accurate cuts and prevents materials from falling off the table during cutting.
Additionally, consider the height of the table relative to your own height. You’ll want the table to be at a comfortable working height that allows for optimal control and minimizes strain on your back and arms.
Sturdiness And Stability
A sturdy and stable miter saw table is crucial for safe and accurate cutting. When designing your table, prioritize the selection of robust materials that can withstand the weight of both the miter saw and the workpieces.
One option is to use thicker plywood or other durable materials to construct the tabletop, creating a solid and stable surface. Additionally, reinforcing the structure with crosspieces or braces can provide extra stability and prevent any wobbling or flexing during use.
Furthermore, incorporating adjustable leveling feet or adding a stabilizing mechanism, such as a leg support system or a base with locking casters, can ensure that your table remains steady on uneven surfaces or when moving it around your workshop.
By carefully considering the design aspects of size and dimensions, as well as sturdiness and stability, you can create a miter saw table that caters to your specific needs. Building a table with these considerations in mind will result in a reliable and safe workspace that enhances your woodworking projects.
Preparation
Before you start building a table for your miter saw, it’s crucial to take the time to prepare and ensure you have all the necessary materials and measurements. The preparation stage lays the foundation for a successful and efficient construction process.
Measuring And Marking
Accurate measurements are the key to building a sturdy and functional miter saw table. Carefully measure the dimensions of your miter saw and the available space in your workshop. Mark where the saw will be placed on the table, ensuring there’s enough space for the material you’ll be cutting. Double-check your measurements to avoid any errors later in the construction process.
Choosing The Right Wood
Selecting the appropriate wood is essential for the durability and stability of your miter saw table. Opt for hardwood such as oak, maple, or birch for enhanced strength and resistance to wear and tear. Avoid using softwoods like pine as they may not withstand the heavy loads and constant use that a miter saw table requires. Consider the dimensions of the wood and ensure it’s sufficient for the table’s surface and legs.
Construction Steps
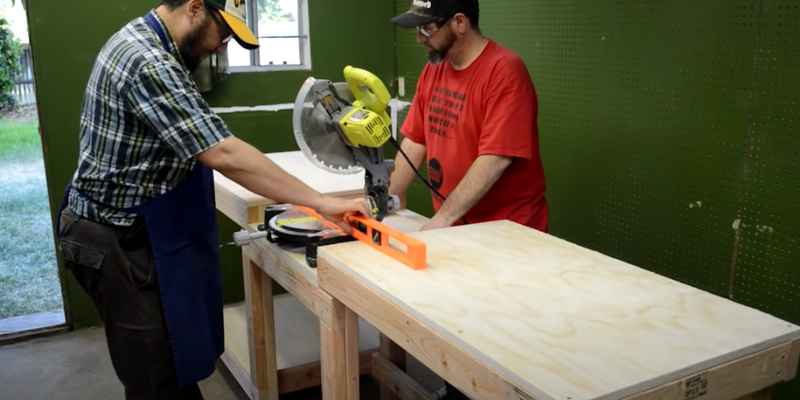
When building a table for a miter saw, start by gathering materials, then measure and cut the lumber according to the specifications. Assemble the base and tabletop, ensuring stability, and finish with a smooth sanding and paint for a polished look.
Cutting The Wood
Bold Text Building a sturdy table for your miter saw requires some essential construction steps. One of the initial aspects is cutting the wood precisely to ensure a stable and durable tabletop.
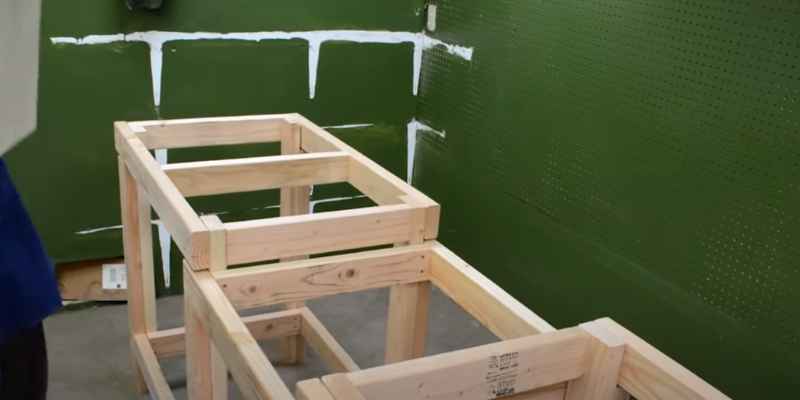
Assembling The Frame
Next, assembling the frame is crucial to provide adequate support for the saw. Using high-quality materials and precise measurements will ensure the stability of the table.
Adding Support Braces
Further bolstering the frame with support braces is essential to enhance the overall strength and stability of the table. Effective bracing ensures the durability required for heavy-duty miter saw operations.
Enhancements And Accessories
In addition to creating a strong and stable base for your miter saw, there are several enhancements and accessories that you can incorporate into your table to enhance its functionality and make your woodworking projects even easier. These enhancements and accessories not only improve the accuracy and efficiency of your cuts, but also contribute to a cleaner and safer work environment. Let’s explore a few key additions that you can consider for your table.
Fence Alignment System
A fence alignment system is an invaluable addition to your miter saw table, ensuring precise and consistent cuts every time. With a properly aligned fence, you can confidently tackle a wide variety of woodworking tasks, from simple crosscuts to intricate angled cuts.
A fence alignment system consists of a guide or gauge that allows you to align the fence with the blade of your miter saw. This ensures that your workpiece is positioned accurately before making the cut, minimizing the chances of inaccuracy and resulting in clean, professional-looking cuts.
By incorporating a fence alignment system, you eliminate the need for manual measurements and guesswork, saving time and reducing errors. Whether you are working with small trim pieces or large boards, this enhancement provides the precision you need for flawless results.
Dust Collection Port
Woodworking can generate a significant amount of airborne dust and debris, which not only makes your working environment messy but also poses health risks. To maintain a clean and safe workspace, it is crucial to incorporate a dust collection system into your miter saw table.
A dust collection port acts as a conduit for capturing and collecting the dust generated during the cutting process. By connecting a vacuum or dust collection system to this port, you effectively minimize the dust particles that become airborne, ensuring better visibility and reducing the need for constant clean-up.
Not only does a dust collection port help to keep your workspace tidy, but it also reduces the risk of respiratory issues caused by inhaling fine wood dust. This enhancement contributes to a healthier working environment, allowing you to focus on your projects without distractions.
Example of a dust collection port:
| Component | Description |
|---|---|
| Inlet | A small opening where the dust enters the port. |
| Hose connection | Used to connect the dust collection system or vacuum to the port. |
| Sealing mechanism | Ensures a tight connection between the port and the vacuum, minimizing dust leakage. |
With a dust collection port integrated into your miter saw table, you can enjoy a cleaner and healthier work environment, allowing you to concentrate on your woodworking projects with peace of mind.
Finishing Touches
After constructing your table for a miter saw, it’s time to add the finishing touches that will not only enhance its appearance but also protect it for years to come.
Sanding And Smoothing
- Use medium-grit sandpaper to smooth any rough edges or surfaces.
- Ensure all corners are rounded for safety and a polished look.
- Wipe the table with a tack cloth to remove any dust particles.
Applying Protective Finish
- Choose a stain or sealant that suits your desired look and provides durability.
- Apply the finish evenly with a brush or cloth, following the manufacturer’s instructions.
- Allow the finish to dry completely before using the table with your miter saw.
Safety Measures
When building a table for a miter saw, safety is paramount. It’s crucial to follow proper safety measures throughout the construction process. Below are some essential safety precautions to keep in mind:
Using Proper Tools
Using the right tools for the job reduces the risk of accidents. Ensure you use sharp blades, stable work surface, and secure clamps for optimal safety.
Wearing Safety Gear
Prioritize wearing safety glasses, ear protection, and a dust mask when operating power tools. This safeguards you from potential harm.
Frequently Asked Questions Of Building A Table For A Miter Saw
What Are The Key Considerations When Building A Table For A Miter Saw?
When building a table for a miter saw, it’s crucial to consider the size, stability, and material of the table. It should also accommodate the specific needs of your miter saw and provide adequate support for your woodworking projects.
How Can I Ensure The Accuracy Of The Miter Saw Table?
To ensure accuracy, use a precise measuring tape, level, and square tool. Additionally, double-check all measurements and carefully align the table components. Regular maintenance and calibration of the miter saw will also contribute to its accuracy.
What Safety Precautions Should I Keep In Mind While Using A Miter Saw Table?
Always wear safety goggles and ear protection when operating the miter saw. Keep your hands at a safe distance from the blade and use a push stick for narrower cuts. It’s essential to read and understand the user manual before using the miter saw.
Can I Customize The Miter Saw Table To Fit My Specific Woodworking Needs?
Yes, you can customize the table by adding features like extensions, fences, or clamps based on your woodworking requirements. However, ensure that any customizations maintain the stability and safety of the miter saw table.
Conclusion
Building a table for a miter saw is a practical and rewarding project that can greatly enhance your woodworking experience. By providing a stable and secure platform for your saw, the table ensures accurate cuts and safety. With the right materials and a well-thought-out design, you can create a customized table that meets your specific needs.
Whether you’re a beginner or a seasoned woodworker, this project is a worthwhile investment that will improve your efficiency and overall craftsmanship. Happy building!