Can Plywood Be Stained? Discover the Power of Transformation
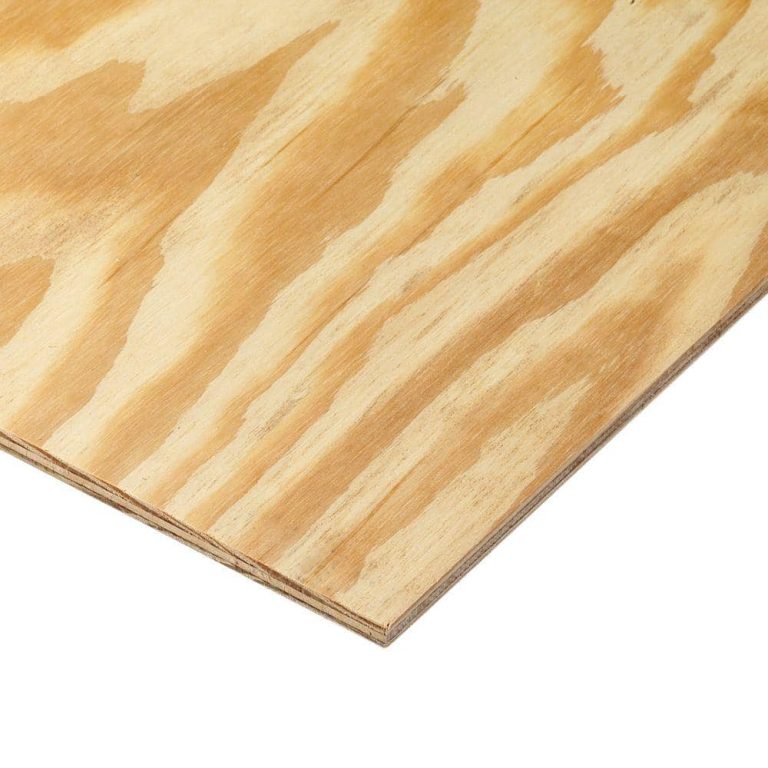
Yes, plywood can be stained like any other wood material. Plywood, a versatile material commonly used in construction and furniture making, can also be stained to enhance its appearance.
Staining plywood allows you to achieve the desired color and tone while maintaining its natural grain. Whether you are working on a DIY project or a professional carpenter, staining plywood can add depth and character to your finished piece. With various stain colors and finishes available on the market, you can easily transform plywood into a beautiful, customized work of art.
We will explore the process of staining plywood, including preparation, application, and finishing techniques. So, if you are keen to give your plywood project a personal touch, read on to learn how to stain plywood effectively.

Credit: www.powertownsend.com
The Process Of Staining Plywood
Staining plywood can be an effective way to enhance its beauty and protect it from damage. Whether you’re working on a DIY project or refinishing existing plywood surfaces, the process of staining plywood involves a few key steps to ensure a successful and long-lasting result. In this article, we will guide you through the process of staining plywood, starting with choosing the right stain and ending with the final application.
Choosing The Right Stain
Before diving into the staining process, it’s crucial to choose the right stain for your plywood. There are various types of stains available on the market, including oil-based, water-based, and gel stains. Each type has its own advantages and characteristics, so it’s important to consider your project requirements and desired finish when making a selection.
Oil-based stains are known for their durability and deep penetration into the wood grain, providing rich and long-lasting color. Water-based stains, on the other hand, are eco-friendly and dry quickly, making them a popular choice for DIY enthusiasts. Gel stains offer a thicker consistency, allowing for better control during application and providing enhanced color coverage.
Preparing The Plywood Surface
Properly preparing the plywood surface is crucial to ensure that the stain adheres evenly and the final result is flawless. Follow these steps to prepare the plywood surface:
- Clean: Start by thoroughly cleaning the plywood surface to remove any dirt, dust, or debris that could interfere with the staining process. You can use a soft brush or cloth to remove loose particles and then wipe the surface with a damp cloth to eliminate any remaining residue.
- Sand: Next, sand the plywood surface lightly using fine-grit sandpaper. This step helps smooth out any rough spots, unevenness, or imperfections on the surface, ensuring a uniform stain application. Remember to sand along the wood grain, applying gentle pressure to avoid damaging the plywood.
- Seal: To achieve a more consistent stain color, sealing the plywood surface is recommended. Applying a wood conditioner or pre-stain sealer helps prevent the wood from absorbing too much stain, resulting in an uneven finish. Follow the manufacturer’s instructions for application and drying times.
Once you have chosen the right stain and prepared the plywood surface, you are ready to move on to the staining process. Remember to follow the instructions provided by the stain manufacturer for the best results. In the next section, we will guide you through the steps of applying the stain to your plywood surface.

Credit: www.powertownsend.com
Factors Affecting The Staining Of Plywood
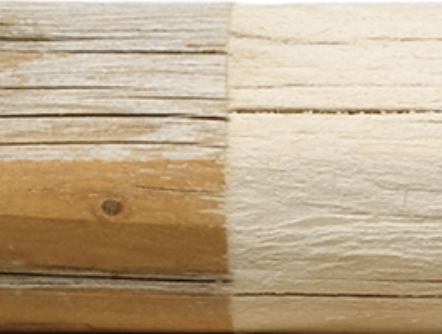
Staining plywood can enhance its appearance and protect it from moisture and wear. However, there are various factors that can affect how well plywood takes to staining. These factors include the plywood grade and quality, as well as the veneer type used in the plywood.
Plywood Grade And Quality
Plywood is available in different grades, ranging from A to D. Each grade has specific characteristics that affect the staining process. Higher-grade plywood, such as A or B, is typically made of higher-quality wood and has fewer visible defects, such as knots or patches. This makes it easier to achieve a smooth and even stain finish. Lower-grade plywood, such as C or D, may have more imperfections that can affect stain absorption and result in a less consistent finish. It’s important to consider the grade and quality of plywood when planning to stain it.
Plywood Veneer Type
The veneer used on plywood can also impact its ability to take on stain. Plywood veneers can be constructed from different types of wood, such as birch, oak, or maple. Each type of veneer has its own unique characteristics, such as grain patterns and porosity. Some types of wood veneer may absorb stain more readily, resulting in a darker and more vibrant finish, while others may require more preparation and multiple coats of stain to achieve the desired color. Understanding the veneer type of the plywood can help in selecting the right stain and application technique.
Techniques For Achieving Desired Results
When staining plywood, using the right techniques is essential to achieve the desired results. Whether you want to achieve a uniform stain application or create custom finishes, there are specific methods that can help you accomplish your staining goals. Let’s explore some effective techniques for achieving the desired results when staining plywood.
Applying Stain Evenly
Applying stain evenly on plywood is crucial for a professional and polished finish. To achieve this, start by sanding the plywood to create a smooth surface that will absorb the stain uniformly. Use a pre-stain wood conditioner to minimize blotchiness and ensure the stain is absorbed evenly. Applying the stain with a brush in the direction of the wood grain can help achieve a consistent color. Additionally, wiping off any excess stain with a clean cloth after a few minutes of application can prevent over-saturation and promote an even finish.
Creating Custom Stain Finishes
For those looking to create custom stain finishes on plywood, there are various techniques to explore. Experiment with layering different stain colors to achieve a unique look. You can also try diluting the stain with water or mixing it with other pigments to create custom hues. Furthermore, using a wood conditioner or sealer before applying the stain can help control the absorption of the color, allowing for more precise customization. Remember to always test your custom stain mixtures on a scrap piece of plywood to ensure the desired result before applying it to your project.
Tips For Enhancing Plywood Stain
Staining plywood can give it a beautiful and polished appearance, making it suitable for a wide range of interior projects. However, not all plywood is created equal, and achieving the desired stain color and finish can sometimes be challenging. To help you get the best results, here are some tips for enhancing plywood stain:
Using Pre-stain Conditioners
Plywood can have uneven absorption properties due to its composition, which can result in blotchy or streaky stain application. To prevent this, it’s recommended to use a pre-stain conditioner before applying the stain. Pre-stain conditioners are designed to penetrate the wood fibers and create a more uniform surface for stain application.
To use a pre-stain conditioner:
- Clean the plywood surface using a damp cloth to remove any dirt or debris.
- Apply the pre-stain conditioner using a brush or cloth, following the manufacturer’s instructions.
- Allow the conditioner to penetrate the wood for the recommended duration, typically around 10-15 minutes.
- Wipe off any excess conditioner with a clean cloth.
Sealing And Protecting The Stained Surface
Once you have achieved the desired stain color on your plywood, it’s crucial to protect and seal the surface to ensure its longevity and durability. Sealing the stained surface can also enhance the richness of the stain color and add a subtle sheen.
Here are some options for sealing and protecting the stained plywood:
| Sealant Type | Advantages | Disadvantages |
|---|---|---|
| Clear Polyurethane | Provides a durable, waterproof finish. Available in various sheen levels. | May yellow over time and may not be suitable for exterior applications. |
| Varnish | Offers excellent protection and enhances the natural beauty of the wood. Can be used on interior and exterior projects. | Requires multiple coats for optimal protection. Application can be time-consuming. |
| Lacquer | Dries quickly and forms a hard, durable finish. Ideal for high-traffic areas. | Requires proper ventilation during application. May require professional equipment for spraying. |
Regardless of the sealant type you choose, always follow the manufacturer’s instructions for application and drying times. Ensure that the stained plywood is fully dry before applying the sealant to avoid any smudging or damage to the stain.
By using pre-stain conditioners and selecting the appropriate sealant, you can enhance the appearance and longevity of your stained plywood, making it a visually pleasing and durable choice for your interior projects.
Inspiring Design Ideas With Stained Plywood
If you’re looking to add a touch of rustic charm or a modern twist to your home decor, stained plywood can be an excellent choice. Not only is it a cost-effective alternative to traditional wood, but it also offers a unique and versatile way to add color and texture to your living space. From interior design projects to creative DIY ventures, stained plywood can transform the look and feel of any room. In this article, we’ll explore some inspiring design ideas that showcase the beauty and versatility of stained plywood.
Stained Plywood In Interior Design
Stained plywood can instantly elevate the aesthetics of your interior space. Whether you’re a fan of sleek and contemporary designs or prefer a more rustic and farmhouse-inspired look, stained plywood has you covered. Here are a few ways you can incorporate stained plywood into your interior design:
- Accent Walls: Create a focal point in any room by using stained plywood to create an eye-catching accent wall. Choose a bold color stain for a dramatic effect or opt for a more subtle hue to complement your existing decor.
- Furniture: From coffee tables to bookshelves, stained plywood can be used to create unique and functional furniture pieces. Consider staining the plywood with a rich walnut or mahogany color for a sophisticated touch.
- Ceiling Treatments: Bring visual interest to your ceilings by installing stained plywood panels. This can add warmth and depth to your space and create a striking visual contrast with lighter walls.
- Cabinetry: Give your kitchen or bathroom a makeover by replacing traditional cabinet doors with stained plywood. This can add a modern and eclectic touch to your space without breaking the bank.
Stained Plywood In Diy Projects
If you’re a fan of hands-on projects, stained plywood opens up a world of possibilities for your DIY ventures. Here are some exciting ways you can incorporate stained plywood into your next DIY project:
- Shelving Units: Create customized storage solutions in your home by building shelving units with stained plywood. The stained finish adds a touch of elegance to the shelves, making them both functional and aesthetically pleasing.
- Wall Art: Get creative with stained plywood by using it as a canvas for your artwork. Cut out unique shapes and designs, stain them in various colors, and arrange them on your wall to create a stunning focal point.
- Room Dividers: Add privacy and style to an open-concept space by constructing room dividers with stained plywood. Choose a stain color that complements your existing decor, and you’ll have a functional and visually appealing partition in no time.
- Planters: Give your plants a stylish home by building custom planters with stained plywood. The natural warmth of the stained wood will beautifully enhance the greenery in your home and bring a touch of nature indoors.
As you can see, stained plywood offers endless possibilities in interior design and DIY projects. Its affordability, versatility, and unique beauty make it an excellent choice for those who want to add a distinctive touch to their living spaces. Whether you’re looking to create a bold statement or add subtle elegance, stained plywood is a practical and stylish option.
Credit: www.sashco.com
Frequently Asked Questions Of Can Plywood Be Stained
Is It Better To Stain Or Paint Plywood?
Staining plywood enhances natural wood grain and provides protection. It’s a better choice for showcasing wood’s beauty and durability. Paint covers plywood completely but hides its texture. Ultimately, the decision should be based on the desired aesthetic and long-term maintenance.
What Is The Best Way To Stain Plywood?
To stain plywood, start by sanding the surface to remove any roughness. Then, apply a coat of wood conditioner to ensure even absorption. Next, use a brush or rag to apply the stain in long, even strokes, following the wood grain.
Allow the stain to dry, and finish with a clear protective coat.
What Is The Best Finish For Plywood?
The best finish for plywood is dependent on the intended use and desired appearance. Options include varnish, paint, or sealants like polyurethane or epoxy. Consider factors such as durability, waterproofing, and aesthetic preferences when selecting the best finish for your plywood.
Does Sanded Plywood Stain Well?
Yes, sanded plywood stains well due to its smooth surface, allowing the stain to penetrate evenly. This results in a uniform and attractive finish for your project.
Conclusion
Staining plywood is possible with proper preparation and technique. Remember to sand the surface, apply a wood conditioner, and choose the right type of stain for your project. Experimenting on scrap pieces can help achieve the desired finish. With the right tools and knowledge, transforming plywood into a beautifully stained surface is within reach.