How to Finish Plywood for a Desk: 8 Steps + Edge-Banding Fix
Water-based or oil-based wipe-on polyurethane is the most durable finish for a plywood desk, except where a mirror-flat, void-free surface is wanted, where two-part epoxy wins instead. Skip sanding past 220 grit or leave the edges raw and the finish will crack, absorb unevenly, or peel within months. This guide covers the 8-step coating process, iron-on edge-banding, filling plywood voids, and choosing between polyurethane and epoxy.
Quick Answer
Sand to 220 grit, fill any voids with epoxy putty, iron on edge banding to cover the raw plies, then apply 3 coats of wipe-on polyurethane (2–3 hours between coats). For a glass-flat, void-free desktop instead, swap the polyurethane for a two-part epoxy tabletop coating.
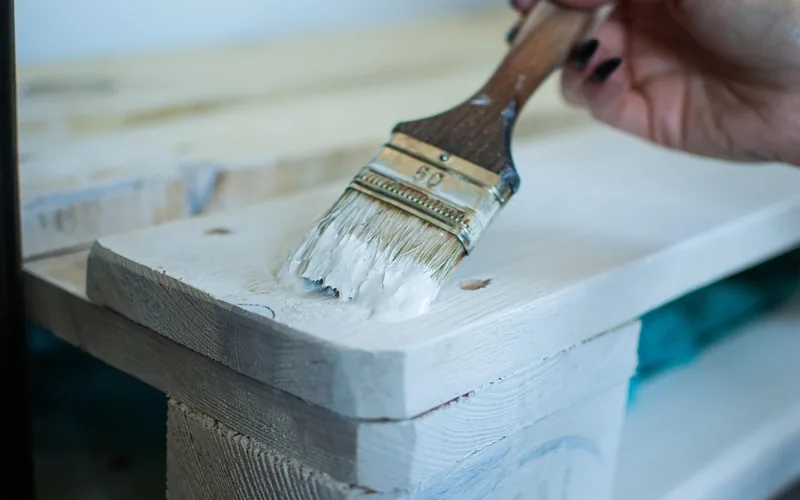
8 Steps to Finish Plywood for a Desk: A Complete Process
Best Plywood Desk Finishing Kit
Edge Supply Birch Iron-On Edge Banding, 50 ft – $15.99
Pre-glued birch veneer that irons on in minutes — exactly the Step 5 edge-banding this guide covers, and enough length for a full 4×8 desktop with edge to spare.
- Best for: covering raw plywood edges before staining or finishing
- Why we picked it: German hot-melt adhesive matches the iron-on method in Step 5
- Main drawback: birch only takes stain evenly if the plywood face is also birch
Compare more desk-finishing options
 Option 1 Minwax Water-Based Wipe-On Poly, Satin – $19.24
|
 Option 2 Minwax Oil-Based Wipe-On Poly, Satin – $21.59
|
 Option 3 J-B Weld KwikWood Epoxy Putty – $6.19
|
As an Amazon Associate we earn from qualifying purchases.
A finish for a plywood desk has to survive daily wear, not just look good on day one. Lacquer and varnish both lay down a workable coat, but wipe-on polyurethane is the most practical choice for most desks — it is the most abrasion-resistant of the common brush-on finishes and it is forgiving for a first-timer to apply. Follow these eight steps in order; skipping the void-filling or edge-banding steps is the single most common reason a plywood desk finish looks unfinished even after three coats.
Step 1: Choose Your Workspace
Work in a room you can keep genuinely dust-free for a few days, not just clean-looking. Airborne dust and sawdust are the number one cause of a gritty, bubbled finish — any dust that lands on a wet coat is sanded in permanently once it dries.
Sweep and vacuum the floor, close windows during application, and avoid the same space you just finished sanding in until the dust has settled for at least 30 minutes.
Step 2: Gather Your Supplies
Buying the right plywood grade before you finish saves rework later — if you have not settled on a grade yet, our ACX vs CDX plywood comparison and plywood cut-to-size guide cover which face grade and cutting option is worth the extra cost for a desktop. Once your panel is cut, gather:
- Orbital sander with 120, 180, and 220 grit sandpaper
- Two-part epoxy wood filler or putty for voids
- Iron-on edge banding matched to your plywood species, plus a household iron
- High-quality bristle brush or lint-free applicator pad
- Wipe-on polyurethane (water- or oil-based) or a two-part epoxy tabletop coating
- Tack cloth and mineral spirits for cleanup
Step 3: Sand the Surface
Start with 120 grit to level any mill marks, move to 180 grit to remove the 120-grit scratch pattern, then finish with 220 grit for the smoothness a wipe-on finish needs. Sand with the grain the whole way — cross-grain scratches show through as dark lines once stain or finish hits the wood. If you are building a full tabletop rather than a desk, our plywood tabletop guide covers laminating two layers for stiffness.
Vacuum the surface, then wipe it down with a tack cloth. Any dust left behind at this stage ends up baked into the first coat.
Step 4: Fill Voids and Gaps
Plywood core voids — the small gaps between plies — print through a clear finish like a shadow and soak up extra finish unevenly, leaving dull patches. Mix a water-thin, two-part epoxy filler (not a foaming glue) and overfill each void by about 1/32 inch with a plastic squeegee so it sits slightly proud of the surface.
Let the epoxy cure for at least 4 hours, then sand it flush at 180 grit. This one step is the difference between a desktop that looks cast in one piece and one that reads as patched plywood under the finish.
Step 5: Edge-Band the Edges
Raw plywood edges show every ply as a striped sandwich and take stain unevenly, so cover them with iron-on wood veneer edge banding before you finish. Center the banding over the edge with equal overhang on both sides, then run a household iron slowly along its length until the hot-melt adhesive underneath fully melts.
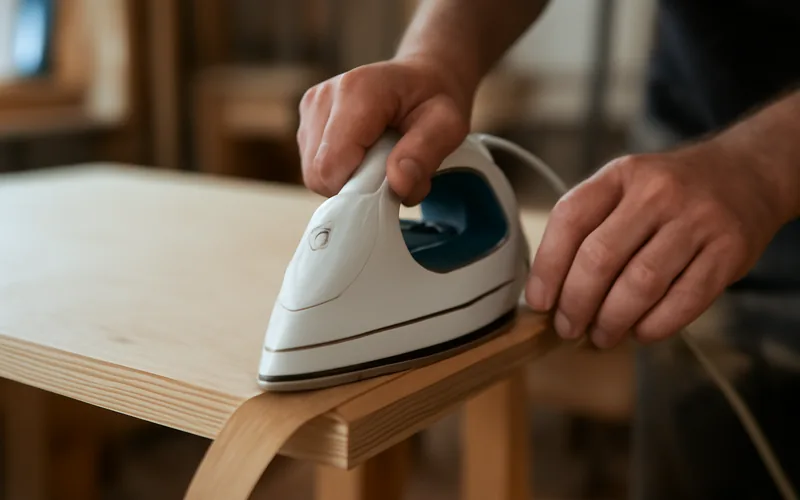
Wait 5–10 minutes for the adhesive to cool completely before trimming the overhang flush with a sharp blade or edge trimmer. Sand the trimmed edge with 220 grit so it blends into the face without a visible seam.
Step 6: Apply the First Coat
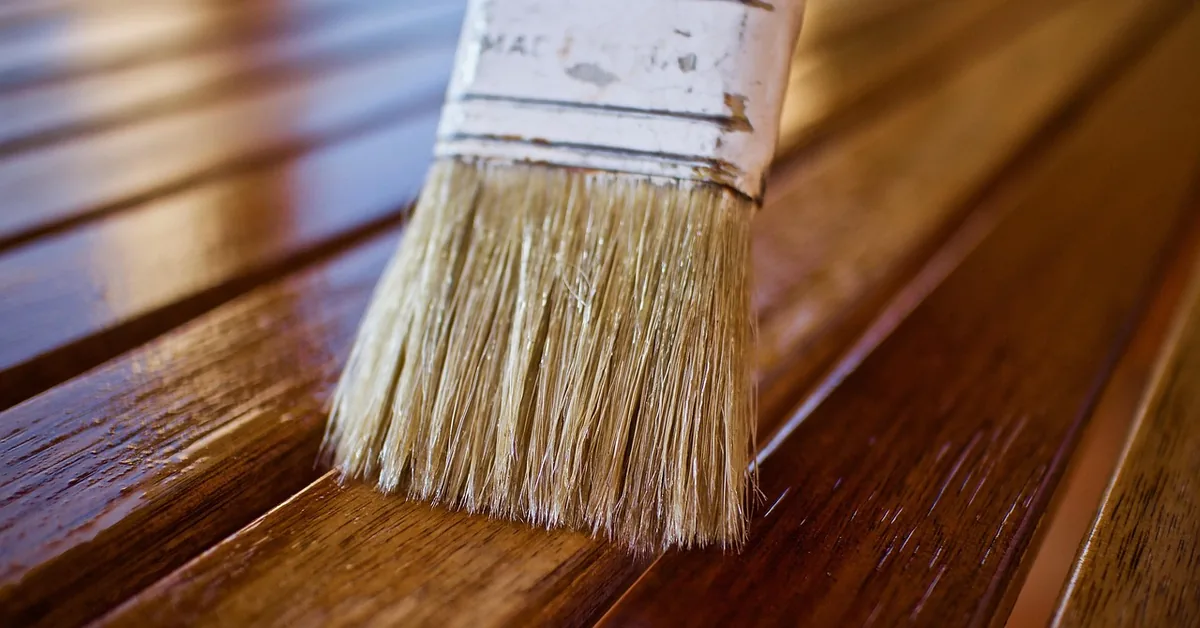
Pour finish into a separate container rather than dipping straight from the can, and load the brush or applicator pad without over-soaking it. Work in one direction along the grain, in a straight line, and if you miss a spot, leave it for the next coat rather than going back over a partially-dried section.
Step 7: Apply Middle Coats
Wipe-on polyurethane needs at least 3 coats to build meaningful abrasion resistance on a work surface. Between coats, knock down any dust nibs with 220 grit, wipe with a tack cloth, and apply the next coat once the previous one is dry to the touch. If a coat still feels tacky well past its recoat window, do not add another layer on top — see our guide on repairing a sticky wood finish first.
Step 8: Apply the Final Coat
Check the whole surface under raking light for missed spots or dust nibs before the last coat goes on — this is the one that stays. Apply it slowly and evenly, then let it cure fully before setting anything on the desk.
Choosing a Finish for Your Plywood Desk
The right finish depends on the look you want and how hard the desk gets used:
- Lacquer dries fast and gives a glossy, slightly tinted look with good resistance to wear — birch plywood takes a lacquer finish especially well.
- Varnish gives a clear, natural-looking coat but is less rigid than polyurethane, so it dents more easily under daily desk use.
- Spray lacquer works well on small plywood pieces but is hard to apply evenly across a full desktop — save it for trim and edges, not the whole surface.
- Clean brushes with mineral spirits between coats; dried finish trapped in the bristles will show up as grit in the next coat.
For most desks, the real decision is polyurethane versus epoxy:
| Factor | Polyurethane | Epoxy |
|---|---|---|
| Abrasion resistance | About 4x higher than epoxy — handles keys, grit, and daily wear | Scratches more easily from dragged objects |
| UV stability | Resists yellowing near windows | Can yellow or grow brittle with sun exposure |
| Filling flaws | Thin coats — needs Step 4 void-filling done first | Self-levels and fills shallow voids as it cures |
| Typical cost | About $20–25 per quart | Often $40–60+ per kit for full desktop coverage |
📊 Minwax oil-based wipe-on polyurethane is dry to recoat in 2–3 hours and safe for light use in 24 hours — Source: Minwax, official product specifications
“Skipping the edge banding is the single biggest reason a plywood desk still looks unfinished after three coats — the raw layered edge grabs finish unevenly no matter how carefully you brush the face.”
An oil-based wipe-on poly is harder and more abrasion-resistant than a water-based one, while water-based poly dries faster between coats and stays clearer over light woods — and if your desktop is a different species like maple rather than plywood, the same water- vs oil-based tradeoff applies in our maple finishing guide. Neither is wrong for a desk; pick based on how much daily wear the surface will see versus how fast you need it finished. For a deeper look at general plywood finishing beyond desks, see our complete plywood finishing guide.
Frequently Asked Questions
Can plywood be used for a desk?
Yes. Plywood is strong, resists warping better than solid wood panels of the same thickness, and holds up well as a desktop once the edges are banded and voids are filled before finishing. Choose 3/4-inch A- or B-grade face veneer for the smoothest, most even finish.
Why should you finish plywood for a desk?
A finish seals the wood against moisture, spills, and scuffs, and it is what actually protects the surface through years of daily use rather than just improving its color. Unfinished plywood absorbs stains, swells with humidity, and wears rough at the edges within months — and if damage still happens, see how to get dents out of finished wood.
Is painting a finish option for a plywood desk?
Yes, paint is one of the simplest and cheapest finishes for plywood and needs no extra clear topcoat if you use a durable enamel. It hides the plywood grain and any patched voids completely, which is useful if you would rather not match filler color to the wood.
What is the best finish for a plywood desk?
Wipe-on polyurethane is the best all-around choice for most desks because it has roughly 4x the abrasion resistance of epoxy and is easy to apply in thin, even coats. Choose epoxy instead only if you specifically want a glass-flat, void-free look.
How long does it take to finish plywood for a desk?
Budget 3–4 days for a full 3-coat polyurethane finish, including sanding, void-filling, and edge-banding time before the first coat goes on. Oil-based wipe-on poly is dry to recoat in 2–3 hours but needs about 72 hours to fully cure before heavy use.
Can you leave plywood unfinished for a desk?
You can, but unfinished plywood roughens, absorbs stains permanently, and swells or cracks with humidity changes much faster than a sealed surface. If you want a natural look without a glossy finish, a coat of clear polycrylic still protects the wood while barely changing its appearance.
Final Verdict
Finishing plywood for a desk is straightforward once you treat void-filling and edge-banding as real steps rather than optional extras — they are what separate a desk that looks built-in-one-piece from one that reads as patched plywood. Sand in stages, fill and band the edges before the first coat, and give each coat of polyurethane the full recoat window instead of rushing it. If the desk will sit somewhere with direct sun or outdoor exposure, check our best finish for an outdoor wood table guide instead, since UV exposure changes which finish holds up best.
Sponsored / affiliate links. As an Amazon Associate I earn from qualifying purchases. I may earn additional commission from eligible campaigns.