
Can You Sand Plywood: Expert Tips and Power Tools for Smooth Results
Yes, you can sand plywood to achieve a smoother finish and prepare it for painting or staining. Sanding plywood helps smooth out any rough patches or imperfections and ensures a more even and professional-looking surface.
Additionally, it allows for better adhesion of paint or stain and helps achieve a more desirable end result. Whether you are refinishing an old piece of plywood furniture or working on a new project, sanding is a crucial step to enhance its appearance and durability.
By following the proper sanding techniques and using the right grit sandpaper, you can achieve a smooth and refined surface on your plywood.

Credit: www.homedepot.com
Choosing The Right Sandpaper
When it comes to sanding plywood, using the right sandpaper is crucial for achieving smooth and even results. The right grit size and sandpaper type can make all the difference in the final finish. In this section, we will discuss the factors to consider when choosing the right sandpaper for sanding plywood.
Grit Size Matters
Grit size refers to the coarseness or fineness of the sandpaper. It determines how aggressively the sandpaper will remove material from the plywood surface. When sanding plywood, it is important to start with a coarser grit to remove any imperfections or rough spots.
The following table provides an overview of common grit sizes and their recommended uses:
| Grit Size | Recommended Use |
|---|---|
| 40-60 | Initial sanding to remove rough surfaces or paint |
| 80-120 | Smoothing out surfaces and removing minor imperfections |
| 180-220 | Fine sanding for a smooth finish |
Keep in mind that the specific grit sizes may vary depending on the project and personal preference. Be sure to test the sandpaper on a small, inconspicuous area of the plywood before committing to a particular grit size.
Consider Sandpaper Type
Not all sandpaper is created equal, and different types are suitable for different purposes. Here are some commonly used sandpaper types:
- Garnet sandpaper: This type of sandpaper is ideal for sanding wood surfaces. It is affordable and provides good results for general sanding tasks.
- Aluminum oxide sandpaper: Known for its durability, aluminum oxide sandpaper is great for sanding plywood. It is available in various grit sizes and can handle both rough and fine sanding.
- Silicon carbide sandpaper: If you’re dealing with harder materials or need to sand metal surfaces, silicon carbide sandpaper is the way to go.
Consider the nature of your plywood project and choose the sandpaper type that suits your needs best. Remember, using the right sandpaper can contribute to a smoother, more professional-looking finish.
Credit: www.homedepot.com
Sanding Plywood By Hand
Yes, you can sand plywood by hand using sandpaper. Begin with coarse-grit sandpaper to even out the surface, then switch to finer grits for a smooth finish. Remember to sand in the direction of the wood grain to achieve the best results.
Proper Technique
When it comes to sanding plywood by hand, it’s important to follow the proper technique. This will ensure that you achieve smooth and even results. Here are the steps to sand plywood by hand:
1. Clean the surface: Start by removing any dust or debris from the plywood surface. Use a soft brush or a damp cloth to wipe away any loose particles.
2. Select the right sandpaper: Choose the appropriate grit sandpaper for your project. Coarser grits like 80 or 100 are suitable for removing rough surfaces or paint, while finer grits like 220 or 320 are ideal for achieving a smooth finish.
3. Begin sanding: Hold the sandpaper firmly with one hand and use the other hand to apply even pressure as you move the sandpaper across the plywood in long, straight strokes. Always sand with the wood grain to prevent scratches.
4. Change the sandpaper: As you sand, the sandpaper may become clogged with dust, reducing its effectiveness. Periodically check the sandpaper surface and replace it when necessary.
5. Check for smoothness: After sanding a section, run your hand over it to check for smoothness. If you feel any rough spots or imperfections, continue sanding until the surface is uniformly smooth.
6. Repeat as needed: Depending on the condition of the plywood, you may need to repeat the sanding process with progressively finer grit sandpaper for a smoother finish.
Remember to take breaks and rest your hand to prevent fatigue and ensure more precise sanding. Proper technique and patience are key to achieving a satisfactory result.
Avoiding Common Mistakes
While sanding plywood by hand, it’s important to avoid common mistakes that can lead to uneven or damaged surfaces. Here are some pitfalls to watch out for:
- Applying too much pressure: Exerting excessive force on the sandpaper can cause uneven sanding and may even damage the plywood. Instead, use steady, even pressure to achieve consistent results.
- Sanding against the grain: Sanding against the grain can result in scratches and an uneven finish. Always follow the direction of the wood grain for smooth sanding.
- Skipping grits: Gradually progressing through different grits of sandpaper is essential for achieving a smooth surface. Avoid jumping from coarse grits to fine grits without intermediate steps.
- Not cleaning the surface: Neglecting to remove dust, debris, or previous finishes from the plywood before sanding can lead to poor adhesion and subpar results.
By being aware of these common mistakes and following the proper technique, you can ensure that your plywood sanding project is a success. Remember to take your time, work systematically, and enjoy the process of transforming rough plywood into a smooth, beautiful surface.
Power Tools For Sanding Plywood
Sanding plywood is an essential step in woodworking projects to achieve a smooth and polished finish. Utilizing power tools for sanding plywood can make the task more efficient and effective. In this section, we will explore the benefits of using orbital sanders and belt sanders for sanding plywood.
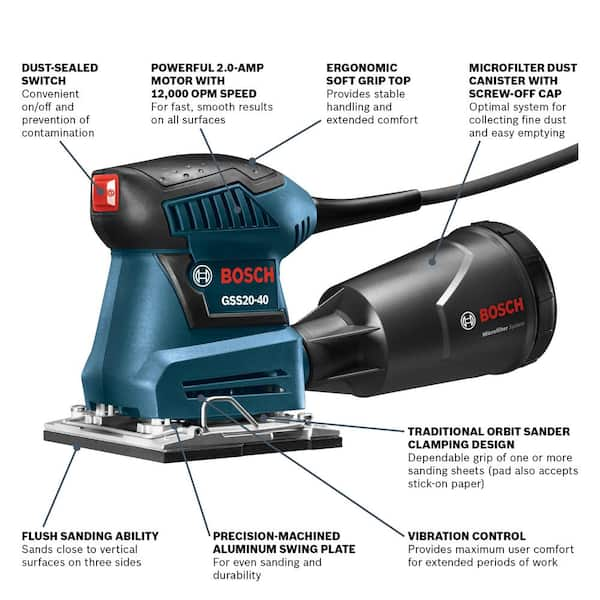
Introduction To Orbital Sanders
An orbital sander is a versatile power tool that is perfect for sanding plywood. It features a circular sanding pad that moves in an orbital motion, providing a random sanding pattern to prevent swirl marks on the plywood surface. The lightweight and ergonomic design of orbital sanders make them easy to maneuver and ideal for achieving a smooth finish on plywood surfaces.
Benefits Of Using A Belt Sander
When sanding large plywood surfaces or removing substantial material, a belt sander is an excellent choice. The powerful motor and continuous sanding belt of a belt sander allow for rapid material removal and efficient sanding of plywood. This power tool is particularly effective for leveling uneven plywood surfaces and quickly smoothing rough edges.

Finishing Touches
Safety Measures
Ensuring safety precautions while sanding plywood is crucial to prevent accidents and injuries. By following these safety measures, you can protect yourself and create a safe working environment:
Protective Gear
Wearing the right protective gear is essential to shield yourself from potential hazards. Here are some protective items you should always have:
- Dust Mask: Wear a dust mask to avoid inhaling harmful particles released during sanding.
- Safety Glasses: Protect your eyes from flying debris by wearing safety glasses.
- Ear Protection: Reduce the risk of hearing damage by using earplugs or earmuffs in noisy workshops.
- Gloves: Use gloves to safeguard your hands from sharp edges or splinters.
Workshop Precautions
When sanding plywood, it’s important to take additional precautions in your workshop to minimize the risks. Consider the following measures:
- Ventilation: Ensure proper ventilation to dissipate dust and maintain good air quality in the workshop.
- Clear Workspace: Remove any clutter or obstacles that may cause accidents during the sanding process.
- First Aid Kit: Keep a well-stocked first aid kit readily available in case of minor injuries or accidents.
- Secure Workpiece: Secure the plywood firmly in place, using clamps or vices, to prevent slipping or movement during sanding.
- Avoid Loose Clothing: Wear fitted clothing to avoid any garments getting caught in the sanding machinery.
By adhering to these safety measures and regulations, you can minimize the risks associated with sanding plywood and ensure a secure and productive workflow.
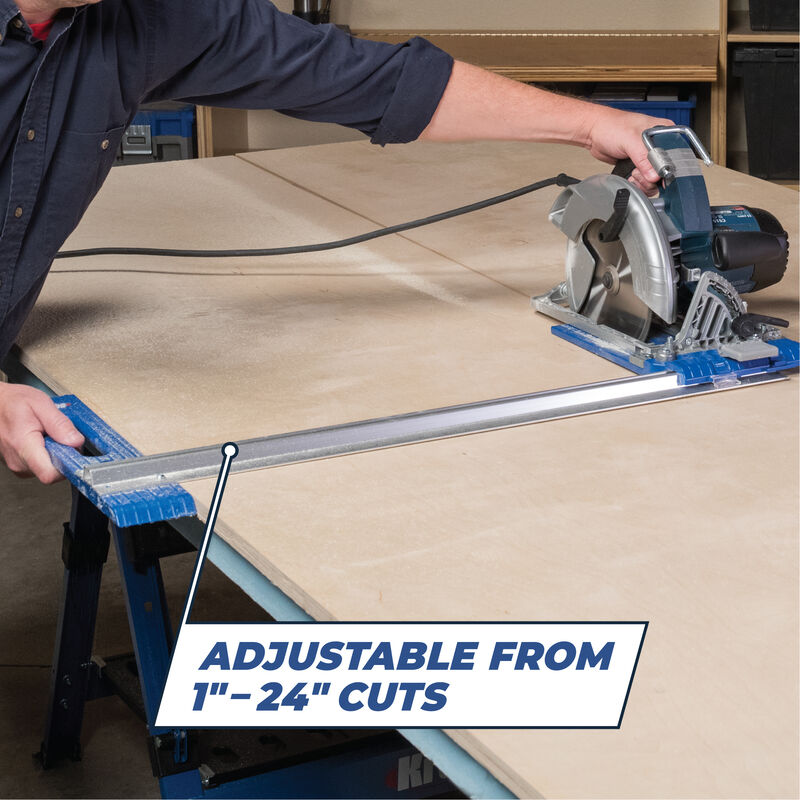
Credit: www.kregtool.com
Frequently Asked Questions On Can You Sand Plywood
What Happens When You Sand Plywood?
Sanding plywood smooths its surface, removes imperfections, and prepares it for finishing. It creates a uniform texture and allows for better paint or stain adherence. Sanding also helps to reduce splintering and rough edges, resulting in a more polished and professional appearance.
Can You Sand And Refinish Plywood?
Yes, you can sand and refinish plywood. Sanding helps remove imperfections, while refinishing adds a protective layer and enhances the wood’s appearance. Sanding and refinishing plywood can restore its beauty and increase its lifespan.
What Is The Best Way To Smooth Out Plywood?
The best way to smooth out plywood is by sanding it with fine-grit sandpaper in a circular motion. Start with a coarser grit and progress to a finer one for a smooth finish. Use a sanding block or orbital sander for better results.
Can You Sand The Edge Of Plywood Smooth?
Yes, you can sand the edge of plywood smooth. Using sandpaper or a sanding block, gently sand the edges in a back-and-forth motion until they are smooth to touch. Remember to follow the grain of the wood and wear protective goggles and a mask.
Conclusion
Sanding plywood is a viable option for achieving a smooth, finished surface. By following proper sanding techniques and using the right tools, you can achieve professional-looking results. Whether you’re working on a DIY project or a professional construction job, understanding how to sand plywood effectively is essential for achieving a polished final product.