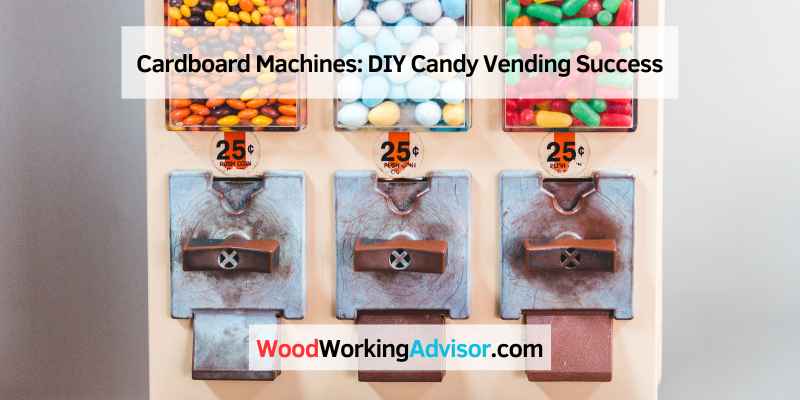
Cardboard Machines: DIY Candy Vending Success
You can make functional machines out of cardboard. Cardboard machines can range from simple candy dispensers to complex hydraulic robotic arms.
Cardboard is a versatile and affordable material that is easy to find and work with. It can be used to make various types of machines, from candy dispensers to elaborate robots. With a little creativity and some basic DIY skills, you can construct cardboard machines that work just as well as their industrial counterparts.
Inspiring Cardboard Machines
With the advancements in technology, it’s easy to overlook the creativity and ingenuity of simple materials such as cardboard. However, people have taken cardboard to the next level by creating inspiring cardboard machines. By adding a little bit of creativity, cardboard can be transformed into functional and visually appealing machines, from simple candy dispensers to complex robotic arms. Here, we’ll explore some of the inspiring cardboard machines you can create at home.
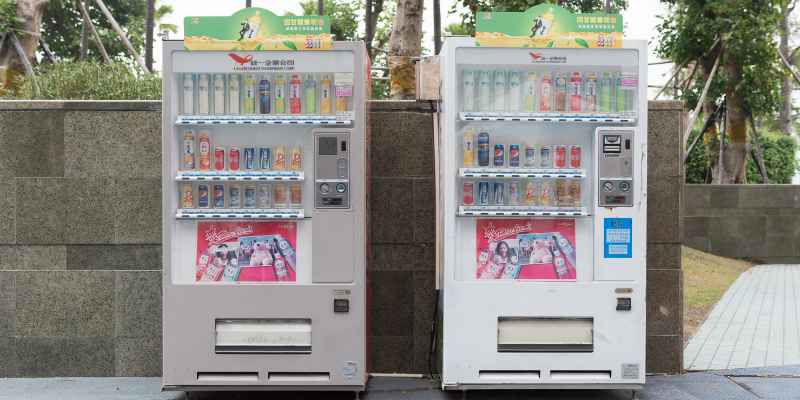
How To Make Multi Candy Vending Machine From Cardboard
If you’ve got a sweet tooth or want a catchy and fun way to serve up candy, try this multi candy vending machine made from cardboard. In this DIY project by Mr. RK Prajapati, you can learn how to make a vending machine with pull-out candy drawers and a pulley wheel that drops candy into the dispenser – all made from cardboard.
How To Make A Chocolate Vending Machine From Cardboard Without Dc Motor
If you want to add a little bit of excitement to your chocolate bar collection, try creating a vending machine that dispenses chocolate bars. Million Gears on YouTube offers a tutorial on creating a chocolate vending machine using just cardboard and a few basic tools. The innovative design includes a drop-down shelf, spring mechanism and an easy-to-use coin slot.
DIY Paper Cardboard Vending Machine – Products – Forever Shiny Limited
If you’re looking to add a touch of industrial style to your candy or gumball dispensing, try out this DIY vending machine tutorial by Forever Shiny Limited. This tutorial gives step-by-step instructions on how to create a vending machine that looks like it belongs in a shopping mall.
How To Make Mini Candy Vending Machine From Cardboard!
This simple and efficient candy dispenser uses gravity to dispense your favorite candies. In this DIY video by DIY Vending Machine on YouTube, you’ll learn how to create your very own candy vending machine using just cardboard and other household materials. The outcome is a fun and interactive candy dispenser that your family and friends will love.
How To Make A Pinball Machine With A Cardboard Box: Diy Stem …
Looking for a fun party game or STEM project for kids? This pinball machine created from a cardboard box is a great way to keep your kids entertained and educated. The project, featured on BBC’s website, requires a few simple tools and materials, including rubber bands and marbles, and demonstrates how easy it is to create an engaging and functional game using cardboard.
Materials Required
Making cardboard machines requires sheets of sturdy cardboard, glue or tape, cutting tools, and creative imagination. From candy dispensers to robotic arms and vending machines, cardboard machines can be created easily with basic materials.
Cardboard machines are versatile and require a few supplies to get started. Here are the materials you will need to build a hydraulic robotic arm:
Hydraulic Robotic Arm
The hydraulic robotic arm is an exciting and complex project to build. You will need the following supplies:
– Cardboard (preferably heavy-duty)
– Scissor or box cutter
– Ruler
– Pencil
– Glue gun
– Tubing
– Syringe or water bottle
– Rubber band
– Sticks
– String
What You Will Need
Before starting, make sure you have all of the supplies listed above. Once you have everything ready, let’s begin by following these steps:
Let’s Cut The Pieces Neatly Along The Lines
Using your ruler and pencil, measure and mark the cardboard sheets’ dimensions. Carefully cut the cardboard pieces using a box cutter, following the lines drawn as accurately as possible.
How To Build A Cardboard Arm
To build the hydraulic robotic arm, you will need to make two parts of the structure. One part will act as the base, while the other will function as the robotic arm. Start with the robotic arm, which should be made of cardboard sticks. Once completed, attach it to the base using string and rubber bands.
How To Connect Both Parts Of The Structure
Secure the robotic arm on the stand by attaching the two parts of the structure with rubber bands, ensuring they are equal in height and aligned evenly. You can use glue to reinforce the connection.
How To Make A Robot Control Panel
Create a robot control panel using cardboard, tubing, a water bottle or syringe, and two cardboard sticks. Attach the tubing and syringe to the cardboard sticks using strings and glue to create a control panel that can control the arm’s movement.
Hydraulic Press
To create a hydraulic press, use a cardboard box and tubing. Cut a hole in the box and attach tubing to each side. Secure one side of the tubing to the syringe or water bottle at the control panel’s base. The hydraulic press will power the arm’s movement.
How To Make A Cardboard House
Once you have completed the hydraulic robotic arm, you can jump onto making a cardboard house using the same material. Measure and mark the cardboard sheets’ dimension, and cut them out using a box cutter. Assemble the pieces of cardboard together, creating the walls and roof of the house, and use glue to connect them.
How To Make Electricity With A Hair Dryer
To make electricity using a hairdryer, you will need cardboard sheets, scissors, copper wires, LED light, and a hairdryer. Cut the cardboard into small squares, wrap one end of the copper wires around the hairdryer at the end of the cord, and connect the other end of the wire to the LED light. Hold the copper wire and place a cardboard sheet between the strands of wire while holding the hairdryer close to the cardboard sheet. The heat produced by the hairdryer will generate an electric current, lighting up the LED light.
In conclusion, building a cardboard machine, such as a hydraulic robotic arm or a cardboard house, is an exciting DIY project that requires a few supplies to get started. With the right materials, a little creativity, and patience, you can make an incredible, functional machine using nothing but cardboard and supplies available at home.
Step-by-step Instructions
Learn how to create cardboard machines step-by-step with the help of tutorials on YouTube, Instructables, and Forever Shiny Limited. From mini candy vending machines to robotic arms, these DIY projects offer endless opportunities for creativity and fun. Get started on your next cardboard creation today!
Building cardboard machines can be an enjoyable and creative experience. However, it can also be tricky due to the intricacies involved. Follow this step-by-step guide to build a functional cardboard arm and connect both parts of the structure. Finally, you will learn how to secure the arm on the stand and build a robot control panel with ease.
Let’s cut the pieces neatly along the lines
Before you begin building, it is essential to cut the cardboard pieces according to the required size accurately. You can use a template to simplify this process. Ensure that the cuts are neat along the lines to make the structure sturdy and stable.
How to build a cardboard arm
Once you have the pieces cut, the next step is to attach them to produce the cardboard arm. You can do this by folding the cardboard sections and securing them with tape. Ensure that the tape is tight and runs along the outer perimeter of the arm.
How to connect both parts of the structure
Connecting both parts of the structure is crucial to make a functional cardboard machine. You can do this by using glue or tape, depending on your preference. However, ensure that the connection is strong enough to support the arm when it moves.
How to secure the arm on the stand
Once the machine is assembled, you need to secure the arm on the stand. Using a thick cardboard base and arm support, ensure that the arm is attached to the stand’s top. This process requires precision and patience because it can be challenging to hold the arm while securing it on the stand.
How to build a robot control panel
A robot control panel determines how the arm of your cardboard machine moves. Cut out a cardboard box and drill holes for buttons and switches that will act as the machine’s control panel. Attach the control panel to the base or top of the machine as per your preference.
In conclusion, building cardboard machines is a fun and exciting experience, but it requires precision, patience, and creativity. Follow these step-by-step instructions to build a functional cardboard arm, connect both parts of the structure, secure the arm on the stand, and build a robot control panel.
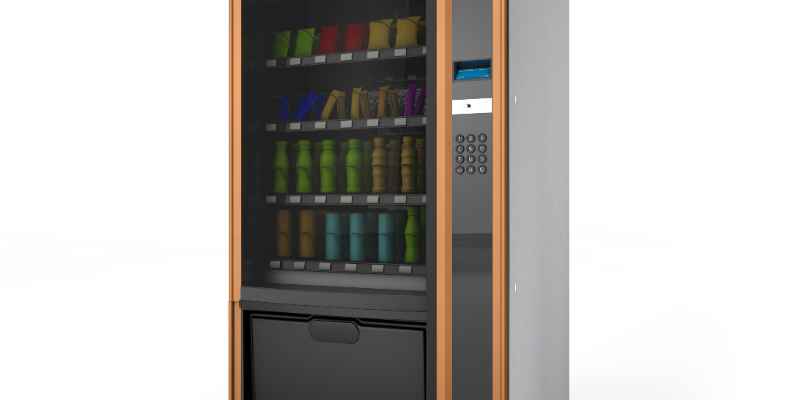
Building The Candy Vending Machine
Learn how to build a candy vending machine from cardboard with a few simple steps. With DIY videos and craft kits available on Amazon, you can easily make your own vending machine for a fun and interactive project. Plus, recycling cardboard is an eco-friendly option!
If you’re looking for a fun and creative DIY project to work on, then building a candy vending machine from cardboard is an excellent option. Not only is it easy to do, but it’s also a great way to teach kids about the basics of engineering and mechanics. In this article, we’ll show you how to build your own candy vending machine from cardboard, step by step. From understanding how candy machines work to assembling the candy shelf, we’ll cover it all.
How Do Candy Machines Work
Before starting your candy vending machine project, it’s essential to understand how these machines work. A candy vending machine typically consists of four main components – a coin mechanism, a dispenser, a candy shelf, and a main mechanism. The coin mechanism is the part of the machine where you put in coins to get candy. The dispenser is the part of the machine that dispenses the candy, and the candy shelf is where the candy is stored. The main mechanism is the part of the machine that connects all these components together and makes the machine work.
Measurements
To build your own candy vending machine from cardboard, you’ll need to start by taking accurate measurements of each component. Starting with the candy shelf, measure the length and width of the cardboard. Ensure that the cardboard is strong enough to hold the weight of the candy. The dispenser should be big enough to accommodate the size of the candy you plan to put in. The coin mechanism should fit perfectly into the dispenser. Lastly, ensure that all components fit together.
Assemble The Candy Shelf
Once you have taken the measurements, cut the cardboard according to the size you measured. Fold in the edges and glue or tape them together to create a shelf. The candy shelf should be slightly tilted to allow the candy to slide down to the dispenser. Once you have assembled the shelf, glue it into the box.
Mentos Machine
If you want to include Mentos in your candy vending machine, you’ll need to create a new opening where the Mentos can be inserted. Cut out a hole where the Mentos will drop through.
Second Stage Of The Gumball Machine
To create the second stage of the gumball machine, cut two cardboard pieces to the same length as the dispenser. Fold each cardboard piece into a square, one square should fit inside the other. These squares should act as the funnel where the candy is stored and rolled down towards the dispenser.
Bank With A Gumball Vending Machine
If you’d like to create a bank-like gumball vending machine, you’ll need to create a small opening near the dispenser where money can be inserted. Be careful to ensure that the coin mechanism fits correctly with the dispenser.
Main Mechanism
To create the main mechanism, you’ll need to create a pulley. This system will allow the candy to drop when the coin is inserted into the mechanism. You can use a small rubber belt for this part. Attach one end of the belt to the pulley and the other end to the candy shelf.
An Incredible Candy Machine
Once all the components are in place, it’s time to test out your incredible candy machine. Insert a coin, and the candy should drop into the dispenser. If it doesn’t work properly, adjust the pulley system to ensure the candy drops when the coin is inserted.
Spring Mechanism
To ensure that each piece of candy dispenses correctly, you can add a spring mechanism. This mechanism should be attached to the dispenser and the candy shelf to push the candy down towards the dispenser.
Building your own candy vending machine from cardboard is sure to be a fun and rewarding project. Follow these steps, and you’ll soon have a fully functional machine that dispenses candy with each coin inserted.
Using Cardboard For Creative Projects
Create amazing Cardboard Machines for your next crafty project. From candy vending machines to mini pinball machines and even a hydraulic robotic arm, the possibilities are endless. Use simple materials to build complex and fun machines that work without breaking the bank.
Cardboard is a versatile material that can be used for many creative projects. From cardboard machines, houses, and armors to simple crafts like boxes, there’s no limit to what you can create with cardboard.
How can we make cardboard?
Cardboard is made from paper pulp that is created by chopping wood into small pieces and then boiling them in water. The resulting pulp is then mixed with glue, water, and other additives to create a slurry, which is then smoothed out onto a flat surface and rolled into thin sheets. The sheets are then cut and stacked to create the cardboard we know and love.
What do we use cardboard for?
Cardboard has a wide range of applications, from the obvious tasks like packing boxes for moving, to more creative projects like those mentioned above. Cardboard can also be used for creating costumes, sculptures, and even furniture. It can be painted, taped, glued, and cut to create just about anything you can imagine.
How to make a time machine out of cardboard?
Building a time machine out of cardboard is a fun and creative project that you can do with your children or on your own. Follow these simple steps to create your very own cardboard time machine:
1. Cut a large opening for a door in your box using a box cutter.
2. Label the box “Time Machine” using paint or markers and let your imagination run wild.
3. Create a control panel using cardboard and small components like buttons, switches, and dials.
4. Add some lights to your machine by using small LEDs or Christmas lights.
5. Sit back and let your imagination take you on a trip through time.
What is Cardboard Made Of – General Kinematics?
As mentioned earlier, Cardboard is made from paper pulp. However, the pulp can be derived from different sources, including recycled materials like newspapers and magazines, or virgin materials like wood chips. General Kinematics is a company that specializes in recycling processes and could provide more details.
In conclusion, cardboard is a great material for creating unique and fun projects. Its versatility, affordability, and ease of use make it an ideal medium for creative expression. Whether you’re making a cardboard machine or a simple bookmark, with a little imagination and effort, you can create something truly amazing.
Box Making Machines For Cardboard
Box making machines for cardboard are essential for any business that regularly uses cardboard boxes for shipping or storage. These machines automate the process of creating custom sizes and shapes of cardboard boxes, increasing productivity and efficiency in the workplace.
If you’re looking for a solution for your cardboard box-making needs, Boxmat Boxmakers are a top choice. These machines are designed for industrial use and can produce a variety of box types, including corrugated, single or double-wall boxes, and more. Boxmat machines offer a high level of precision and efficiency, allowing you to produce boxes at a faster rate than manual methods. The machines are also versatile, allowing you to produce boxes in different sizes and styles, with minimal setup and adjustment required.
Machines for cardboard
When it comes to making boxes from cardboard, there are several different machines available on the market today. Each machine is designed for a specific purpose, with varying levels of complexity and automation. Below are some of the most common machines used for cardboard box-making:
– Boxmat Boxmakers
– Cardboard balers
– Cardboard shredders
– Cardboard compactors
– Cardboard bubble wrap machines
– Cardboard pulleys
– Cardboard soda dispensers
– Cardboard gumball machines
Of these machines, Boxmat Boxmakers are among the most sophisticated and effective. They use advanced technology to cut and crease cardboard with precision, resulting in boxes that are both sturdy and attractive. With Boxmat machines, you can produce a wide range of box types and sizes, making them ideal for businesses that need to produce boxes in large quantities.
In addition to box-making machines, there are also many DIY tutorials available online that show you how to make your own cardboard machines. These tutorials range in complexity from simple cardboard ATMs to complex hydraulic robotic arms. If you’re looking for a fun and creative way to make your own cardboard machine, there’s no shortage of inspiration available online.
If you’re interested in purchasing a Boxmat Boxmaker or another machine for cardboard box-making, there are many suppliers available online. Be sure to shop around and compare prices, features, and customer reviews before making your final decision. With the right machine, you can produce high-quality boxes quickly and efficiently, helping to streamline your production process and boost your bottom line.
Frequently Asked Questions Of Cardboard Machines
How Do You Make A Vending Machine Out Of Cardboard Only?
To make a vending machine out of cardboard only, follow these steps:
1. Cut cardboard pieces to create the vending machine structure
2. Create compartments for items to be dispensed
3. Install a mechanism that releases the items when a coin is inserted
4. Decorate the vending machine as desired.
There are several DIY videos and tutorials available online for reference.
How To Make A Time Machine Out Of Cardboard?
To make a time machine out of cardboard, first, cut a large opening for a door using a box cutter. Then, label the box “Time Machine” and decorate it. Next, create a time travel dial and buttons using construction paper.
To make cardboard, glue two sheets of paper together. Cardboard is used for packaging, making boxes, and various paper products.
How Can We Make Cardboard?
To make cardboard, glue two sheets of paper together, aligning the corners and edges as closely as possible. This will create the foundation for the cardboard. Cardboard is commonly used for packaging goods like corrugated boxes and cereal boxes, tissue boxes, and milk or juice cartons.
What Do We Use Cardboard For?
Cardboard is a versatile material used for packaging, shipping, and creating crafts. It is commonly used for making corrugated cardboard boxes to package or ship goods. Boxboard is utilized in creating cereal boxes, paper towels, tissue boxes, milk or juice cartons, and more.
It can also be used for creative DIY projects and crafts.
Conclusion
Cardboard machines offer an amazing range of creative opportunities for those who enjoy DIY crafts. With a bit of imagination, simple materials like cardboard can be transformed into fully functional vending machines, robotic arms, and even time machines! Not only is this a fun and rewarding hobby, but it also promotes mindfulness and sustainable living, as cardboard is an affordable and eco-friendly material.
So why not give it a try and see where your creativity takes you?