
Dado Joint With Circular Saw: Mastering the Technique
The dado joint can be created with a circular saw. A dado joint is made by cutting a slot or groove into two pieces of wood to fit them together.
Essential Tools
Essential Tools for Creating Dado Joints:
Circular Saw
A circular saw is a powerful tool that is essential for creating precise dado joints.
Dado Blade
The dado blade is a specialized blade that attaches to the circular saw, allowing for accurate and clean cuts for dado joints.
Safety Equipment
When working with a circular saw and dado blade, it is crucial to wear safety equipment such as goggles, gloves, and ear protection to prevent accidents.
Preparing The Workspace
To set up your workspace for creating a dado joint with a circular saw, ensure you have a stable work surface and proper safety gear. Clear clutter and have your materials organized before starting the cutting process. Maintain focus and precision throughout the task for optimal results.
When it comes to woodworking, having a well-prepared workspace is essential for safety and efficiency. Before diving into the specifics of making a dado joint with a circular saw, it’s important to take the time to properly set up your workspace. In this article, we will walk you through the process step by step, starting with setting up the circular saw.
Setting Up The Circular Saw
To start, ensure that your circular saw is in proper working condition and the blade is sharp. It’s crucial to have a clean and sharp blade to achieve accurate and smooth cuts. Inspect the blade for any signs of wear or damage, and replace it if necessary.
Next, make sure the circular saw is securely locked onto a stable surface, such as a workbench. This will prevent it from moving or vibrating during operation, ensuring precise cuts.
When positioning the saw, ensure that the blade is facing away from you and any obstructions. This will help prevent accidents or injuries while you are working. Keep your workspace clear of any clutter or debris that may interfere with the cutting process.
Choosing The Right Blade Width
The width of the blade you choose for making dado joints will depend on the desired width of the joint itself. Typically, dado joints are made using blades that range from 1/8-inch to 1/4-inch in width.
If you need a wider joint, you can make multiple passes with a narrower blade. However, keep in mind that making multiple passes can be time-consuming and may require more precision. It’s always best to choose a blade width that aligns with your project requirements from the start.
Aligning The Blade Depth And Fence
To create uniformly-sized dado joints, it’s crucial to properly align the blade depth and fence of your circular saw. Start by adjusting the blade depth according to the desired depth of the joint. Use a combination square or a depth gauge to ensure accuracy.
Next, align the fence parallel to the blade. This will help guide the material and maintain consistent width throughout the cut. Measure and mark the desired location of the dado joint on the workpiece, and ensure that the fence is positioned correctly.
Once everything is set up, you are ready to start making dado joints with your circular saw. Remember to wear appropriate safety gear, such as goggles and ear protection, and take your time to ensure precise cuts. With a well-prepared workspace and the right equipment, you’ll be on your way to creating strong and professional dado joints in no time.
Step-by-step Guide
Creating dado joints with a circular saw is a great way to add strength and stability to your woodworking projects. Follow this step-by-step guide to learn how to create perfect dado joints with your circular saw.
Marking The Dado
Before making any cuts, it’s essential to accurately mark the location of the dado on your workpiece. Use a combination square or marking gauge to ensure precision. Measure and mark the location of the dado on both the workpiece and the material it will connect to, ensuring alignment.
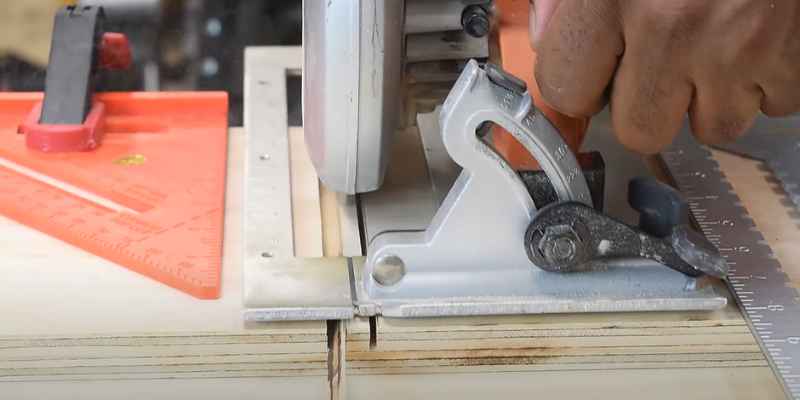
Making The Cut
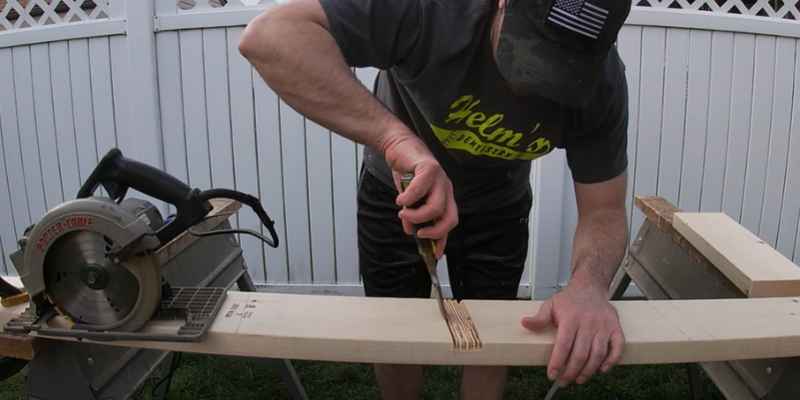
Once the dado is marked, it’s time to make the cut using a circular saw. Set the blade depth to match the width and depth of the dado. Position the saw at the beginning of the mark and carefully guide it, keeping it straight and steady. Use a scrap piece of wood to support the workpiece as you make the cut to prevent tear-out and splintering.
Adjusting For Different Widths
If you need to create dado joints of varying widths, you can adjust the width by making multiple passes with the circular saw. Move the saw slightly to the side and make another pass, gradually widening the dado until it fits your requirement.
Common Mistakes To Avoid
When it comes to creating dado joints with a circular saw, it’s crucial to be aware of the common mistakes that can occur during the process. These mistakes can lead to subpar results and potentially compromise the structural integrity of your woodworking projects. By understanding and avoiding these pitfalls, you can ensure clean and precise dado cuts that contribute to strong and professional-looking joinery.
Incorrect Blade Depth
Incorrect blade depth can be a major issue when cutting dado joints with a circular saw. Setting the blade depth too shallow can result in incomplete cuts, leaving uneven or unsatisfactory joints. Conversely, cutting too deep can cause tear-out and damage to the surrounding wood, leading to imprecise joints that compromise the overall quality of your project. It’s essential to meticulously adjust the blade depth to match the intended width and depth of the dado joint, ensuring a snug and seamless fit for the joinery.
Inconsistent Cuts
Consistency is key when it comes to creating dado joints with a circular saw. Inconsistent cuts, whether in terms of depth or width, can result in joint irregularities that affect the structural reliability of the assembled pieces. Utilizing a reliable guide and taking the time to measure and mark the cuts accurately can help in achieving uniform and precise dado joints. Additionally, maintaining a steady and controlled cutting pace can further contribute to achieving consistent and clean cuts, enhancing the overall quality of the joinery.
Tips For Success
Looking to achieve success with using a dado joint and a circular saw? Here are some helpful tips! Start by ensuring your saw is properly set up, use a straight edge as a guide, and make multiple shallow passes to achieve a cleaner and more precise joint.
With proper technique and practice, mastering the dado joint with a circular saw can lead to successful woodworking projects.
Practice On Scrap Wood
Before attempting the dado joint on your actual project, it is crucial to practice on scrap wood first. This will allow you to familiarize yourself with the technique and make any necessary adjustments before working on your desired material. By practicing on scrap wood, you can also assess the depth and width of the cut, ensuring it fits your exact specifications. Remember, practice makes perfect, and taking the time to refine your technique on scrap wood will greatly increase your chances of a successful dado joint.
Maintaining A Steady Pace
When making a dado joint with a circular saw, it is essential to maintain a steady pace throughout the process. Rushing or going too slow can negatively impact the quality of your cut. By maintaining a steady pace, you ensure that the blade cuts smoothly and accurately, resulting in a clean and precise dado joint. Take your time and focus on maintaining a consistent speed from start to finish, and you’ll achieve the desired result.</p
Advanced Techniques
Utilize circular saw for precise and clean through dado joints.
Set depth and width adjustments on your circular saw accurately.
Slowly make multiple passes to achieve the desired dado width.
Check dado width with a caliper for utmost accuracy.
Create strong and seamless joints for furniture and cabinetry.
Perfect for joining shelves, dividers, and other woodworking projects.
Enhance structural integrity and aesthetic appeal of your pieces.
Frequently Asked Questions On Dado Joint With Circular Saw
What Are The Advantages Of Using A Dado Joint With A Circular Saw?
A dado joint created with a circular saw provides strong and durable connections between wood pieces. It also allows for easier assembly and offers a clean and professional finish to woodworking projects.
How To Set Up A Circular Saw For Creating Dado Joints?
To set up a circular saw for creating dado joints, begin by adjusting the saw blade to the desired cutting depth. Then, use a straight edge or guide to ensure precise and straight cuts. Secure the workpiece tightly and make careful, controlled passes with the saw to create the dado joint.
What Safety Measures Should Be Taken When Using A Circular Saw For Dado Joints?
When using a circular saw for dado joints, it’s crucial to wear appropriate safety gear, such as goggles and ear protection. Additionally, always ensure that the workpiece is securely clamped in place and use caution to avoid accidental injuries during cutting.
Regularly inspect and maintain the saw for optimal safety.
Conclusion
The dado joint is an essential technique that every woodworker should master. With the help of a circular saw, you can easily create strong and durable joints in your woodworking projects. By following the steps mentioned in this blog post, you can achieve precise and clean dado cuts.
So, don’t hesitate to try this technique and take your woodworking skills to the next level. Happy woodworking!