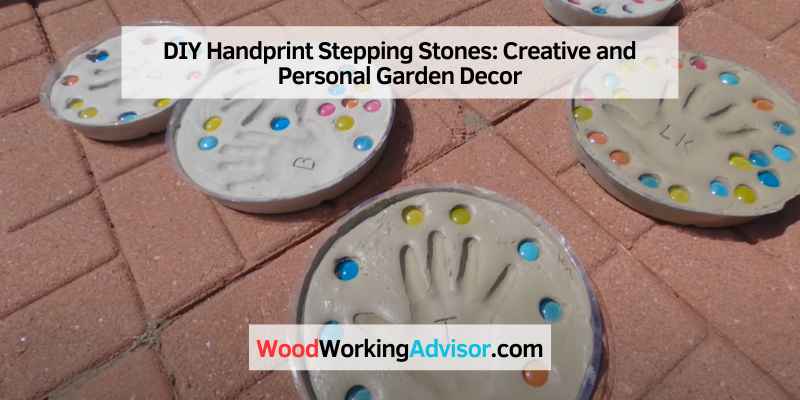
DIY Handprint Stepping Stones: Creative and Personal Garden Decor
Make your own DIY handprint stepping stones using a sand/Portland cement mixture that doesn’t contain pebbles, such as a concrete patch mix available in any hardware store, or make your own by mixing one part Portland cement to two parts sand. Making personalized stepping stones for your yard is an affordable and fun way to spruce up your outdoor space.
With a few simple supplies and some creativity, you can create unique handprint stepping stones to commemorate special memories for your family and friends. We’ll explore different methods to create handprint stepping stones, how to add personal touches and decorations, and how long to wait before adding handprints to your concrete for the best results.
By the end of this article, you’ll be ready to start crafting your very own DIY handprint stepping stones.
Benefits Of Having Diy Handprint Stepping Stones In Your Garden
DIY handprint stepping stones add a personal touch to your garden and are a fun project to do with kids. Using simple materials and following easy steps, you can create unique and durable stepping stones that will last for years.
If you enjoy spending time in your garden, you might already know the importance of having beautiful decor. However, store-bought garden decor can be quite pricey, which is one of the reasons why DIY Handprint Stepping Stones have gained popularity among homeowners. Creating personalized garden decor can not only add a personal touch to your garden but is also cost-effective, easy to make, and a perfect art and craft project for families.
Personalized Garden Decor
One of the significant benefits of having DIY Handprint Stepping Stones in your garden is that they offer a personalized touch to your outdoor space. Instead of using mass-produced garden decor, you can create unique designs with your family’s handprints or footprints. It is a great way to add sentimental value to your garden and make it feel more special.
Cost-effective
Another benefit of creating DIY Handprint Stepping Stones is that they are cost-effective. Purchasing store-bought garden decor can be quite expensive, but making these stepping stones yourself can save you a lot of money. The materials needed to make these stepping stones are readily available and affordable, making it a budget-friendly project that can be completed with minimal expense.
Easy to Make
You don’t have to be an expert in DIY or crafting to create your own Handprint Stepping Stones. The process is easy and straightforward, which makes it an ideal project for families to work on together. With the help of concrete, some water, and various decorative items such as gems or pebbles, you can create beautiful stepping stones that will enhance the aesthetics of your garden.
To make Handprint Stepping Stones, you will need to mix up enough premixed concrete with water to fill a form of your choice. Use a piece of scrap wood to smooth and level the top of the concrete. Personalize the stepping stone while still wet with stones, handprints, or other decorations.
Ideal Art and Craft project
Making DIY Handprint Stepping Stones is an ideal art and craft project for families to work on together. It is an excellent opportunity for parents to spend quality time with their children while getting creative and enjoying the outdoors. It is also a great way for children to learn about DIY projects and how they can use their imagination to create something special.
In conclusion, creating your own DIY Handprint Stepping Stones is a fun, cost-effective, and easy way to add a personalized touch to your garden decor. It is an ideal art and craft project for families, enabling parents and children to spend quality time together while enjoying the outdoors. So go ahead and get creative with your handprints or footprints to make beautiful stepping stones that will enhance the aesthetics of your garden.
Supplies Needed For Diy Handprint Stepping Stones
Create beautiful and personalized stepping stones with your child’s handprints using a DIY kit. You will need premixed concrete, a mold, water, and optional decorations like gems or stones. Follow the simple steps in online tutorials and enjoy a fun family project that adds charm and character to your garden or yard.
Supplies Needed for DIY Handprint Stepping Stones
Handprint stepping stones can add a personalized touch to your garden while creating a fun and memorable activity for kids. Before you begin this exciting project, there are certain supplies you will need to gather. Here is a list of essential supplies for making your own handprint stepping stones.
Concrete Mix
To make stepping stones, you will need an appropriate concrete mix. It’s best to use a sand/Portland cement mixture that doesn’t contain pebbles, such as a concrete patch mix which can be purchased in any hardware store. You can also make your own mix by mixing one part Portland cement to two parts sand.
Water
Water is an essential component of making the concrete mix. It’s best to mix the concrete with clean water and follow the manufacturer’s instructions for the appropriate amount of water to add to the mix.
Sandpaper
After the concrete has dried, you will need sandpaper to smooth any rough edges or surfaces. Sandpaper can help you achieve a smooth and polished finish on your stepping stones.
Disposable Gloves
Concrete can be harsh on the skin, so wearing disposable gloves is necessary to protect your hands. It’s also important to keep them clean to avoid any unwanted prints or smudges on the stepping stones.
Mixing Container
To mix the concrete properly, you will need a suitable mixing container. It could be a large bucket or a wheelbarrow, depending on the amount of concrete you are mixing.
Stones/Gems
Decorating your handprint stepping stones with stones or gems can add a unique touch. You can add them while the concrete is still wet or glue them on after the concrete has dried.
Decorations
There are endless possibilities when it comes to decorating your handprint stepping stones. You can use paints, stains, stencils, or any other decorative items that you like.
In conclusion, to make your own handprint stepping stones, you will need a concrete mix, water, sandpaper, disposable gloves, a mixing container, stones/gems, and decorations. With these materials and a little creativity, you can create beautiful and memorable stepping stones for your garden.
How To Make Handprint Stepping Stones For Your Garden
Easily personalized handprint stepping stones can add a special touch to your garden. All you need is premixed concrete, a form, and decorations like stones or handprints to create unique stepping stones for your yard. Follow tutorials and tips online to learn more.
Are you looking for a creative way to add personality and a pop of color to your garden? Look no further than DIY handprint stepping stones! These unique stones are a fun and easy way to make your garden stand out from the rest. In this article, we will teach you how to make handprint stepping stones for your garden, including creating a stepping stone mold, mixing the concrete mix, pouring the concrete mix into the mold, adding handprints or footprints onto the stepping stones, decorating the stepping stones, and drying and curing.
Creating A Stepping Stone Mold
First, you need to create a mold for your stepping stones. You can purchase pre-made molds at a hardware store, or you can create your own using a disposable aluminum cake pan, a plastic plant saucer, or even a pizza box. Whatever mold you choose, make sure it is the size and shape you want for your stepping stone.
Mixing The Concrete Mix
Next, it’s time to mix your concrete. You can purchase ready-to-mix concrete at your local hardware store, or you can mix your own using one part Portland cement and two parts sand. In a large mixing bowl, add your concrete mix and water, then stir until it reaches a thick consistency.
Pouring The Concrete Mix Into The Mold
Once your concrete mix is ready, carefully pour it into your mold, making sure to fill it completely. Use a piece of scrap lumber to smooth and level the concrete even with the top of the mold.
Adding Handprints Or Footprints Onto The Stepping Stones
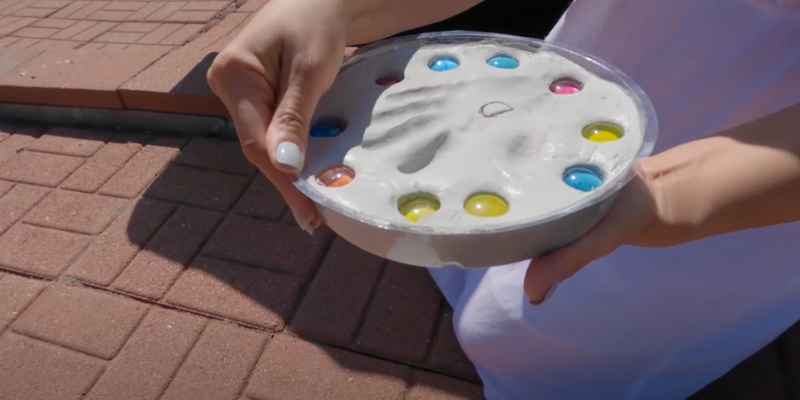
While the concrete is still wet, add your handprints or footprints onto the stepping stones. This is the fun and personalized part! To make sure your handprint or footprint is visible, press firmly into the concrete and hold for a few seconds. You can also add small decorations like stones, beads, or glass tiles.
Decorating The Stepping Stones
After you have added your handprints or footprints, it’s time to decorate the stepping stones. You can use acrylic paints, mosaic tiles, or even decoupage with napkins or photos. Get creative and make each stepping stone unique!
Drying And Curing
Once you have finished decorating your stepping stones, allow them to dry and cure completely. This usually takes about 24 hours, depending on the temperature and humidity in your area. After they have cured, you can remove them from the mold and place them in your garden.
Making DIY handprint stepping stones is a fun and easy project that the whole family can enjoy. By following these steps, you can create beautiful and unique stepping stones that will add personality and charm to your garden for years to come.
Tips For Designing Your Diy Handprint Stepping Stones
Create unique and personalized stepping stones with handprints or footprints using premixed concrete and household items. Mix the concrete with water and pour it into molds while adding stones, gems, or other decorations. Wait for the concrete to cure and stiffen before adding the handprints and let it dry in the sun.
Customize your garden with these fun and easy-to-make DIY handprint stepping stones.
Creating personalized handprint stepping stones is a fun, easy DIY project. Choosing the right size, shape, texture, and color of the stones can be a daunting task, but it doesn’t have to be. Here are some tips for designing your DIY handprint stepping stones.
Choosing the Right Size and Shape of Stepping Stones
Selecting the right size and shape of the stepping stones is a crucial first step. Consider the size of your garden and the number of stones you want to create. The shape of the stone can be round, square, or any other shape that you desire. It is essential to choose a shape that is not too complicated to pour and design. So, keep it simple and easy.
Playing with Textures and Colors
Playing with textures and colors can give your stepping stones a unique look. You can experiment with different types of concrete mixes, dyes, and pigments to get the desired textures and colors. Using mixed colors with white concrete highlights your handprint or footprint beautifully.
Personalizing with Handprints, Footprints, or Names
Making handprint or footprint stepping stones adds a personal touch to your garden. You can also personalize stones with unique designs, such as hearts, stars, or other fun images. You can even personalize the stones with names or initials, making the stones even more special.
Additional Decorating Ideas
Once you have created the stepping stones, decorate them further with additional materials. Inserting marbles, glass beads, and stones can add a beautiful pattern to the stone’s surface. You can also add hand-painted designs or write inspiring messages. You could also add medallions with your favorite designs or use stencils to paint intricate patterns.
Creating personalized handprint stepping stones can be a fun project for the family. Using these tips, you can make the process of designing your DIY stepping stones much more manageable and enjoyable. Happy DIY-ing!

How To Properly Maintain Your Diy Handprint Stepping Stones
To properly maintain your DIY handprint stepping stones, make sure to keep them clean and free from debris. Avoid using harsh chemicals and instead use a mild soap and water solution to clean the stones. Additionally, check for any cracks or damage and repair as needed to ensure the longevity of your stepping stones.
Regular Cleaning
To maintain the appearance of your DIY handprint stepping stones, it’s important to clean them from time to time. Gently scrub the stones using a soft-bristled brush and mild soap. Avoid using harsh chemicals or abrasive cleaners as they may damage the integrity of the stones. Rinse the stones with water and dry them with a towel to prevent water stains or discoloration. To prevent mold and mildew growth in the crevices, clean the stones regularly with a damp cloth.
Resealing The Stepping Stones
To keep your DIY handprint stepping stones looking new, it’s important to regularly reseal them. Apply a coat of sealant to the surface of the stones to protect them from moisture, stains and other outdoor elements. Use a clear waterproof sealant that’s compatible with the material of your stones. Follow the manufacturer’s instructions carefully and apply the sealant in a well-ventilated area. Consider resealing your stepping stones every 2-3 years to maintain their long-term durability.
Replacing Any Damaged Or Broken Stones
If any of your DIY handprint stepping stones become damaged or broken, it’s important to replace them as soon as possible. Cracked or chipped stones can be a safety hazard and may cause accidents. To replace the stones, carefully remove the damaged stone and dispose of it safely. Replace it with a new stone of the same size and shape. Use a waterproof adhesive to secure the new stone in place. Allow the adhesive to dry completely before using the stepping stone again. Regular inspection of your stepping stones will help identify any broken or damaged stones that need replacement.
Proper maintenance is key to keeping your DIY handprint stepping stones looking great and keeping them safe for years to come. Regular cleaning, resealing, and replacing damaged stones will ensure that your stepping stones remain in good condition. Always follow manufacturer’s instructions and recommendations for each step in maintaining your handprint stepping stones.
Frequently Asked Questions On Diy Handprint Stepping Stones
What Is The Best Concrete Mix For Handprint Stepping Stones?
For handprint stepping stones, it is best to use a sand/Portland cement mix that doesn’t contain pebbles. You can purchase a concrete patch mix from any hardware store or make your own by mixing one part Portland cement to two parts sand.
Wait about two hours after pouring the mix before making handprints.
How Do You Make Stepping Stones With Hand Prints?
To make personalized stepping stones with handprints, mix enough premixed concrete with water to fill the form. Smooth and level the concrete with a piece of scrap lumber and personalize it with stones, handprints, or other decorations while still wet.
Wait approximately two hours before adding handprints to the surface to allow it to cure and stiffen. It is cheaper to make your own stepping stones using a sand and Portland cement mixture without pebbles.
How Long Before You Can Put Handprints In Concrete?
Wait for approximately two hours after pouring the concrete before putting handprints in it. The surface needs to have cured and stiffened enough to hold impressions. Remember that the time may vary according to the outside temperature. It is best to use a sand/Portland cement mixture that doesn’t contain pebbles, such as a concrete patch mix which can be purchased in any hardware store.
Alternatively, mix one part of Portland cement to two parts of sand to create your own mix.
Is It Cheaper To Make Your Own Stepping Stones?
Yes, making your own stepping stones is cheaper compared to buying ready-made stepping stones or even a ready concrete mix. You can make stepping stones with your own concrete mix, which is pretty affordable. Mix the concrete until it’s like a thick cake batter and personalize the stepping stone while still wet.
Conclusion
Creating your own handprint stepping stones is not only a fun activity to do with your kids but also a great way to add a personal touch to your garden. With just a few simple steps and readily available materials, you can create a beautiful and lasting addition to your outdoor space.
From mixing the concrete to decorating the stones with handprints and other decorations, the process is both easy and fulfilling. So why not give it a try and enjoy the benefits of this DIY project for years to come?