DIY Miter Saw Stand: Boost Your Woodworking Game
Looking to build a DIY miter saw stand? Check out these tips and ideas for a customized solution that fits your needs perfectly.
Whether you’re a woodworking enthusiast or a professional contractor, a well-designed miter saw stand can significantly improve your efficiency and accuracy when working with a miter saw. In this blog, we’ll explore the benefits of a DIY miter saw stand, provide step-by-step instructions for building one, and discuss important factors to consider during the construction process.
By the end, you’ll have all the information you need to create a functional and durable miter saw stand that enhances your workshop setup.
Introduction To DIY Miter Saw Stands
DIY miter saw stands are a game-changer for woodworking enthusiasts. Building your own stand not only saves money but also allows you to customize it to fit your specific needs. In this guide, we’ll explore the benefits of having a custom stand and the essential tools and materials required for the project.
Benefits Of Having A Custom Stand
A custom miter saw stand offers enhanced flexibility, ensuring that it perfectly complements your workspace and workflow. It can be tailored to accommodate unique features such as storage compartments, extensions, and even wheels for mobility.
Essential Tools And Materials
Before diving into the project, gather the necessary tools and materials. You’ll need a miter saw, measuring tape, drill, screws, plywood, and sturdy casters for easy maneuverability.

Choosing The Right Design
When it comes to creating a DIY miter saw stand, choosing the right design is crucial for ensuring functionality, safety, and ease of use. The design you select will impact the stability of the stand, the support it provides for your materials, and the overall convenience of your work area. To help you make an informed decision, let’s explore the factors to consider when choosing a design and examine some popular options favored by woodworkers.
Factors To Consider
Before diving into the various designs available, it’s important to consider several key factors that will influence your decision. These include the amount of space available in your workshop, the type of projects you typically work on, and the level of mobility you require from your miter saw stand. Additionally, take into account your preferred working height and the materials you’ll be cutting on the stand. By evaluating these factors, you can narrow down your options and choose a design that best suits your needs.
Popular Designs Among Woodworkers
Woodworkers often gravitate towards specific designs that offer a blend of versatility, durability, and practicality. Among the most popular designs are the traditional portable miter saw stand, the compact folding stand, and the customizable modular stand. Each design presents unique advantages, such as portability, space-saving capabilities, and the ability to accommodate various workpiece sizes. By exploring these favored designs, you can gain insight into the features that resonate with experienced woodworkers and determine which design aligns with your own preferences.
Preparation Steps
Before starting your DIY miter saw stand project, make sure to gather all the necessary tools and materials. Measure and cut each piece accurately, following the instructions and plans closely. Double-check your work before assembling to ensure a sturdy and safe finished product.
If you are planning to build your own DIY miter saw stand, you must start with the preparation steps. These steps will ensure that you have all the necessary materials and measurements before you start the construction process. Here are the three main preparation steps you need to follow:
Measuring Your Miter Saw
The first step in building a DIY miter saw stand is to measure your miter saw. You need to determine the length, width, and height of your miter saw so that you can build a stand that fits it perfectly. To measure your miter saw, follow these simple steps:
- Place your miter saw on a flat surface
- Measure the distance from the front of the saw to the back of the saw
- Measure the width of the saw from one side to the other
- Measure the height of the saw from the bottom of the base to the top of the saw
Once you have these measurements, you can use them to design your miter saw stand.
Gathering Your Materials
The next step is to gather all the materials you need to build your DIY miter saw stand. Here are some of the materials you will need:
- 2x4s
- plywood
- screws
- wood glue
- casters
- paint or stain
Make sure that you have all the materials you need before you start building your stand. You can purchase these materials from your local hardware store or online.
Designing Your Miter Saw Stand
Before you start building your miter saw stand, you need to design it. You can use a simple sketch or a computer-aided design (CAD) program to create a plan for your stand. Your design should include the measurements of your miter saw and the materials you will use. It should also include any additional features you want to add, such as storage space or a power strip.
Once you have completed these preparation steps, you can start building your DIY miter saw stand. With the right preparation and materials, you can create a stand that will make your woodworking projects easier and more efficient.
Building The Base
Building the base of your DIY miter saw stand is a crucial step in ensuring stability and functionality.
Cutting The Wood
1. Measure and cut the lumber according to your stand’s dimensions.
2. Use a miter saw to make precise cuts for accuracy.
Assembling The Frame
1. Lay out the pieces in the desired configuration for the base.
2. Attach the pieces together using screws or nails for sturdiness.
Adding Support And Mobility
When it comes to DIY projects, having a miter saw stand that offers both support and mobility is essential. Adding support ensures stability and accuracy while working, while mobility allows you to easily move the stand around your workspace. In this section, we will guide you through the process of installing the legs and attaching wheels to your DIY miter saw stand.
Installing The Legs
To provide the necessary support for your miter saw stand, you need to install sturdy legs. Follow these steps to securely install the legs:
- Measure and mark the desired height for your stand’s legs, ensuring it is suitable for your working comfort and the saw’s height.
- Cut four pieces of lumber to the desired length for the legs, making sure they are all equal.
- Position each leg at the corner of the stand and use clamps to hold them in place.
- Pre-drill holes through the legs and into the frame of the stand.
- Secure the legs to the stand using screws, ensuring they are tightly fastened.
- Repeat the process for all four legs, double-checking their alignment and stability.
Attaching Wheels For Easy Movement
Adding wheels to your miter saw stand allows you to effortlessly move it around your workspace, making it more versatile and convenient. Follow these steps to attach wheels:
- Choose wheels that are suitable for the weight and size of your miter saw stand.
- Position each wheel at the bottom of a leg, ensuring they are evenly spaced.
- Mark the locations for the screws that will attach the wheels.
- Pre-drill holes at the marked locations.
- Align the holes of the wheels with the pre-drilled holes on the legs.
- Secure the wheels to the legs using screws, ensuring they are tightly fastened.
- Test the movement of your miter saw stand by gently pushing it in different directions.
By following these steps, you can add both support and mobility to your DIY miter saw stand. With sturdy legs and wheels, you’ll have a reliable and easy-to-move stand that enhances your woodworking projects.
Creating The Work Surface
Create a sturdy DIY miter saw stand for a practical work surface. Constructed with precision and efficiency in mind, this custom stand provides a stable platform for all your woodworking projects.
The work surface is the most important part of any miter saw stand. It is where you will place your wood and make your cuts. Creating a sturdy and reliable work surface is essential for any DIY project. Here are the steps to create a work surface for your miter saw stand.
Mounting The Miter Saw
The first step in creating a work surface for your miter saw stand is mounting the saw. You will need to measure the dimensions of your saw and create a space for it on your work surface. Once you have determined the dimensions, you can create a cutout in the work surface to accommodate the saw. Use screws to secure the saw to the work surface.
Adding Extensions For Large Projects
If you plan on working on larger projects, you may need to add extensions to your work surface. Extensions can be attached to the sides of the work surface to provide additional support for larger pieces of wood. You can use hinges to attach the extensions to the work surface, allowing them to fold down when not in use.
Strengthening The Work Surface
To ensure your work surface is strong enough to handle heavy wood, you may need to add additional support. You can add cross braces underneath the work surface to prevent it from sagging. You can also add a back panel to the work surface to provide additional support.
Creating a work surface for your miter saw stand is an important step in any DIY project. By following these steps, you can ensure your work surface is sturdy and reliable, allowing you to make accurate cuts every time.
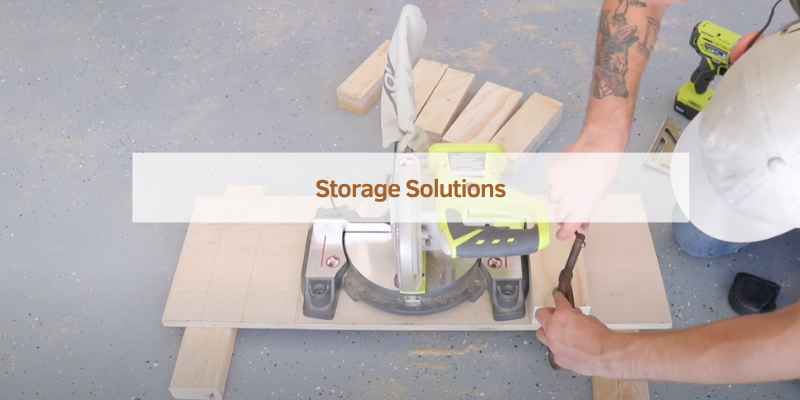
Storage Solutions
One of the key aspects of a DIY miter saw stand is efficient storage solutions. Proper organization can enhance productivity and workflow in your workspace.
Incorporating Drawers And Shelves
Maximize space by adding drawers for small tools and accessories. Shelves can hold materials for quick access.
Tool Holders And Accessories
Install tool holders for easy access to frequently used items. Accessories like measuring tapes can be within reach.
Finishing Touches
After building your DIY miter saw stand, it’s time for the finishing touches to make it both functional and aesthetically pleasing.
Sanding And Painting
Sand the stand for a smooth finish before applying a coat of paint to protect it from moisture.
Safety Checks And Maintenance Tips
Regularly inspect the stand for loose bolts and ensure all safety features are working properly.
Frequently Asked Questions
What Is A DIY Miter Saw Stand?
A DIY miter saw stand is a portable workstation specifically designed to support and stabilize a miter saw. It provides a dedicated space for cutting materials with precision and safety. It can be customized to fit your specific needs and can be easily constructed using common materials.
Why Should I Build My Own Miter Saw Stand?
Building your own miter saw stand allows you to tailor it to your workspace and personal preferences. It also offers cost savings compared to purchasing a pre-made stand. Additionally, DIY projects provide a sense of accomplishment and allow you to showcase your woodworking skills.
What Are The Benefits Of Using A Miter Saw Stand?
Using a miter saw stand offers several benefits, such as increased stability and safety when operating the saw. It also provides a dedicated space for cutting materials, keeping your work area organized and reducing the chances of accidents. A miter saw stand can also enhance accuracy and precision in your cuts.
What Materials Do I Need To Build A Diy Miter Saw Stand?
To build a DIY miter saw stand, you will typically need basic materials like plywood, lumber, screws, and hinges. The specific materials required may vary depending on the design you choose. It’s important to carefully plan and measure before purchasing materials to ensure they are sufficient for your project.
Conclusion
Building your DIY miter saw stand can enhance your woodworking efficiency. By following these steps, you can create a customized stand that suits your needs perfectly. Embrace the satisfaction of crafting your workspace and enjoy the convenience it brings to your projects.
Let your creativity shine!