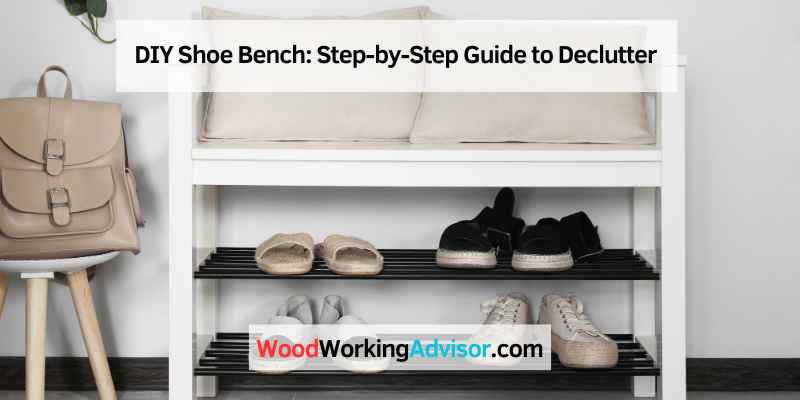
DIY Shoe Bench: Step-by-Step Guide to Declutter
Looking to build a DIY shoe bench? Follow this simple guide to create a functional and stylish storage solution for your entryway or mudroom.
With just a few materials and basic woodworking skills, you can construct a shoe bench that keeps your footwear organized and easily accessible. In this blog, we’ll walk you through the step-by-step process, from gathering the necessary tools and materials to assembling the bench and adding finishing touches.
Whether you’re a seasoned DIY enthusiast or a novice looking to tackle your first project, this DIY shoe bench is a practical and rewarding undertaking that will enhance the functionality of your living space. Let’s get started on creating your very own custom shoe bench!
Introduction To DIY Shoe Bench Projects
Discover the art of DIY Shoe Bench projects, a creative way to organize your footwear while adding a touch of personal style to your space. Transform ordinary benches into functional storage solutions with these innovative and customizable ideas.
Benefits Of Having A Shoe Bench
A shoe bench is a practical addition to any home, offering a convenient and organized solution for storing and accessing shoes. By incorporating a shoe bench into your entryway or closet, you can declutter your space and streamline your daily routine. Here are some key benefits of having a shoe bench:
- Efficient use of space: With a shoe bench, you can maximize the use of your available space by providing a dedicated area for shoe storage. This helps to prevent shoes from cluttering the floor or getting misplaced.
- Easy organization: A shoe bench typically features multiple compartments or shelves, allowing you to categorize and arrange your shoes. This makes it easier to find the pair you need without digging through a pile of shoes.
- Convenience: By having a shoe bench near your entrance, you can quickly slip on or take off your shoes as you enter or leave your home. This saves you time and reduces the chances of tracking dirt or mud inside.
- Enhanced durability: Placing your shoes on a shoe bench instead of the floor can help extend their lifespan. The bench provides a stable and clean surface, protecting your shoes from dirt, dust, and accidental damage.
- Improved aesthetics: Shoe benches come in various styles and designs, allowing you to choose one that complements your home decor. By adding a shoe bench, you can enhance the overall aesthetics of your entryway or closet.
Why Choose DIY Over Store-bought?
While you can find shoe benches in stores, opting for a DIY (Do-It-Yourself) project offers several advantages. Here are some reasons why choosing DIY over store-bought can be a rewarding choice:
- Cost-effective: DIY shoe benches are often more budget-friendly compared to their store-bought counterparts. You have the freedom to select affordable materials and customize the design according to your preferences.
- Personalized design: By building your own shoe bench, you can tailor it to suit your specific needs and style. Whether you prefer a rustic, modern, or minimalist look, DIY allows you to create a shoe bench that reflects your personality.
- Satisfaction of creation: Engaging in a DIY project can be a fulfilling experience. Building a shoe bench with your own hands gives you a sense of accomplishment and pride, knowing that you created a practical piece of furniture.
- Customizable size: DIY shoe benches can be adapted to fit your available space perfectly. Whether you have a small entryway or a spacious closet, you can adjust the dimensions of the bench to optimize your storage capacity.
- Opportunity for creativity: DIY projects encourage creativity and innovation. You can experiment with different materials, colors, and finishes to make your shoe bench truly unique and eye-catching.
Materials And Tools Required
When it comes to creating a DIY shoe bench, the first step is to gather all the necessary materials and tools. This will ensure a smooth and efficient construction process. Let’s take a look at the materials and tools required to build a sturdy and functional shoe bench.
Choosing The Right Wood
Choosing the right wood is crucial for the durability and aesthetic appeal of your shoe bench. Opt for sturdy and long-lasting wood such as oak, maple, or pine. These woods are resilient and can withstand the daily wear and tear of a shoe bench.
Essential Tools For The Job
Having the right tools is essential for a successful DIY shoe bench project. Here are the essential tools you’ll need:
- Measuring tape
- Saw (circular or miter)
- Drill and drill bits
- Screwdriver set
- Sandpaper (coarse and fine grit)
- Wood glue
- Clamps
- Level
- Pencil
- Safety goggles
Designing Your Shoe Bench

Designing your own shoe bench allows you to create a functional and stylish storage solution that perfectly suits your space and needs. Whether you have a small entryway or a spacious mudroom, considering the dimensions and custom features of your shoe bench is crucial. In this section, we will explore the key factors to consider when designing your shoe bench.
Dimensions And Space Considerations
Before you start building your shoe bench, it’s important to determine the dimensions that will best fit your space. Measure the available area where you plan to place the bench to ensure it fits seamlessly into your entryway or room.
Consider the height of the bench, keeping in mind that it should be comfortable to sit on while putting on or taking off your shoes. A height of around 18 to 20 inches is usually ideal for most people.
The depth of the shoe bench is another important consideration. Make sure it is deep enough to accommodate the size of your shoes without them protruding too much. A depth of around 12 to 14 inches is typically suitable for most shoe sizes.
Additionally, think about the width of the bench. If you have a narrow space, opting for a slimmer bench can help maximize the available area. However, if you have enough room, a wider bench can provide extra seating or storage space.
Custom Features To Consider
When designing your shoe bench, you have the opportunity to incorporate custom features that enhance its functionality and aesthetics. Here are some ideas to consider:
- Shoe Cubbies: Include individual compartments or cubbies to neatly store each pair of shoes. This allows for easy organization and prevents shoes from getting mixed up.
- Shelves or Baskets: Add shelves or baskets above or below the bench to store additional items such as hats, scarves, or gloves.
- Hooks or Pegs: Install hooks or pegs along the sides or back of the bench to hang coats, bags, or umbrellas.
- Cushions: Consider adding cushions to the seating area for extra comfort and style. Choose a fabric that complements your overall design.
- Material and Finish: Select a material and finish that align with your personal style and the existing decor of your space. Wood, metal, or a combination of both can create a timeless and durable shoe bench.
By considering these custom features, you can create a shoe bench that not only provides storage for your footwear but also adds functionality and beauty to your entryway or room.
Step-by-step Construction Process
When it comes to building a DIY shoe bench, following a step-by-step construction process is essential to ensure a successful outcome. By breaking down the construction into specific stages, you can efficiently tackle each task and create a functional and stylish shoe bench for your home. Below, we outline the step-by-step construction process, from cutting the wood to size to adding the finishing touches.
Cutting The Wood To Size
Start by measuring and cutting the wood pieces according to the dimensions of your shoe bench design. Use a saw to make precise cuts, ensuring that the pieces are uniform in size for a professional finish.
Assembling The Frame
Assemble the frame by joining the cut wood pieces using screws or nails. Use a drill to create guide holes for the screws and ensure a secure fit. Pay attention to the alignment and stability of the frame during assembly.
Adding The Shelves And Finishing Touches
Once the frame is assembled, add the shelves according to your design specifications. Secure the shelves in place using appropriate fasteners. Finally, add the finishing touches such as sanding the surfaces, applying a coat of paint or stain, and adding any decorative elements to enhance the overall appearance of the shoe bench.
Finishing And Decoration
Finishing and decoration are important steps in creating a DIY shoe bench that not only serves its purpose but also adds to the aesthetic appeal of your home. In this section, we will discuss the different finishing options and decorative elements to enhance your shoe bench.
Selecting The Right Finish
Choosing the right finish for your shoe bench is essential in protecting the wood from wear and tear, moisture, and other environmental factors. Here are some popular finishing options:
| Finish Type | Pros | Cons |
|---|---|---|
| Paint | Comes in various colors, hides imperfections | May chip or peel, hides wood grain |
| Stain | Enhances wood grain, durable | May require multiple coats, limited color options |
| Varnish | Protects against scratches and water damage, enhances wood grain | May yellow over time, may require sanding between coats |
Consider the look you want to achieve and the level of protection your shoe bench needs when selecting the right finish.
Decorative Elements To Enhance Your Bench
Adding decorative elements to your shoe bench can make it stand out and complement the style of your home. Here are some ideas:
- Brackets or corbels for a rustic look
- Baskets or crates for extra storage
- Cushions or pillows for added comfort
- Engraving or stenciling for a personalized touch
- Hardware such as knobs and handles for a polished finish
Choose the decorative elements that fit your style and needs to elevate your shoe bench from functional to fashionable.
Organizing Your Shoes With The New Bench
Transform your cluttered shoe collection into a neat and organized space with this DIY shoe bench. This new bench not only provides a storage solution for your shoes, but also adds an aesthetic value to your entryway or closet.
Best Practices For Shoe Storage
Use the shoe bench to neatly arrange your footwear.
Keep frequently worn shoes easily accessible.
Store seasonal shoes in labeled bins underneath.
Maintaining A Clutter-free Area
Regularly declutter by donating or storing rarely worn shoes.
Utilize the bench as a seating area to put on and take off shoes.
Keep the bench surface clear by placing a shoe tray for dirty shoes.
Additional Tips And Tricks
Troubleshooting Common Issues
For stability, ensure all joints are securely fastened.
If the bench feels wobbly, check for uneven legs.
Ideas For Expanding Your Storage
- Consider adding hooks for hanging bags or coats.
- Use baskets or bins underneath for shoe storage.
Conclusion And Next Steps
Upon completing your DIY shoe bench, the next steps involve organizing your shoes and enjoying the newly created storage space. Consider adding decorative elements to personalize your bench and enhance the overall look of your entryway or closet.
Enjoying Your New Space
Create a cozy spot with your DIY shoe bench. Add pillows for comfort.
Future DIY Projects To Consider

Enhance organization with a wall-mounted coat rack and floating shelves.
Frequently Asked Questions
How To Build A DIY Shoe Bench?
To build a DIY shoe bench, measure space, cut wood to size, assemble using screws, and add a cushion for comfort.
What Are The Benefits Of A Shoe Bench?
A shoe bench helps keep shoes organized, provides a seating area, saves space, and enhances the entryway decor.
Which Materials Are Best For A Shoe Bench?
Wood, metal, and wicker are popular materials for a shoe bench due to durability, style options, and ease of maintenance.
Can A Shoe Bench Be Customized To Fit A Space?
Yes, you can customize a shoe bench by adjusting dimensions, adding storage compartments, or incorporating design elements to suit your space.
Conclusion
DIY shoe bench is an excellent option for those who want to keep their entryway organized and tidy. It is a simple yet functional piece of furniture that can be built with basic materials and tools. By following the step-by-step instructions outlined in this post, you can create a shoe bench that fits your space and style.
Plus, you’ll have the satisfaction of knowing you built it yourself! So, don’t hesitate to try this fun and practical DIY project.