DIY Staining Wood: Expert Tips and Tricks
To DIY stain wood, start by sanding the surface, then apply a wood conditioner and stain with a brush or cloth, following the grain. Staining wood is a popular way to enhance its natural beauty and protect it from wear and tear.
By choosing the right stain and technique, you can achieve the desired color and finish. This article will guide you through the steps to successfully stain your wood projects, from preparing the surface to applying the final coat. Whether you are a seasoned DIYer or just starting out, you will find valuable tips and tricks to achieve professional results.
So let’s get started and transform your wood into a beautifully stained masterpiece.
Choosing The Right Wood
Selecting the right wood for DIY staining is crucial for optimal results. Consider the wood’s type, grain pattern, and density to achieve the desired finish. Matching the wood type with the appropriate stain will enhance the project’s overall aesthetic appeal.
Types Of Wood To Consider
When it comes to staining wood, choosing the right type of wood is crucial in achieving the desired results. Different types of wood have different grain patterns, textures, and absorption rates, all of which can affect how the stain adheres and looks on the surface. Here are some popular types of wood that are commonly used for DIY staining projects:
1. Hardwoods:
– Oak: Known for its durability, oak is a popular choice for staining. It has a prominent grain pattern that adds character to the finished product.
– Mahogany: This tropical hardwood has a rich, reddish-brown color and is highly resistant to pests and rot. It stains beautifully and can give a luxurious look to your project.
– Walnut: Walnut wood has deep, chocolate-brown tones and a fine grain pattern. It is often used for furniture and cabinetry due to its high-quality appearance.
2. Softwoods:
– Pine: Pine is a versatile softwood that is widely available and relatively affordable. It has a light color and a distinctive grain pattern that can absorb stain unevenly if not properly prepared.
– Cedar: Cedar is a popular choice for outdoor projects like decks and fences due to its natural resistance to decay and insects. It has a warm, reddish-brown color that can be enhanced with stain.
Factors To Keep In Mind
When selecting the right wood for your staining project, there are a few factors to consider:
1. Project Use: Consider the purpose and location of your project. If it will be exposed to the elements or heavy wear, choose a wood that is durable and resistant to rot and pests.
2. Grain Pattern: Each wood species has a unique grain pattern, ranging from fine and straight to bold and wavy. Think about the aesthetic you want to achieve and choose a wood with a grain pattern that complements your vision.
3. Absorption Rate: Different woods absorb stain differently. Some woods, like oak, absorb stain evenly and deeply, while others, like pine, may require prepping with a wood conditioner to prevent blotching.
4. Budget: The price of wood varies depending on the species and quality. Consider your budget when choosing the right wood for your project. Keep in mind that some exotic hardwoods can be costly, but they may offer long-term durability and beauty.
In conclusion, selecting the right type of wood is essential in achieving the desired results when staining. Consider the type of wood, its grain pattern, absorption rate, and your budget before making a final decision. By taking these factors into account, you can ensure your DIY staining project turns out beautifully and stands the test of time.

Credit: m.youtube.com
Preparation And Safety Measures
Preparation and safety measures are crucial when it comes to staining wood. Before diving into the exciting DIY project of staining wood, it is essential to gather the necessary tools and materials. Additionally, following safety precautions is vital for a hassle-free and accident-free experience. By taking the time to prepare and prioritize safety, you can ensure a successful and enjoyable DIY staining wood project!
Gathering Necessary Tools And Materials
Before starting the staining process, gather the following tools and materials:
- Wood stain
- Cloth or brush for applying stain
- Wood conditioner (if applicable)
- Sandpaper or sanding block
- Drop cloth or plastic sheet to protect the work area
- Painter’s tape
- Disposable gloves to protect your hands
- Eye protection, such as safety goggles
- Dust mask to protect against wood dust
Safety Precautions To Follow
When staining wood, it is essential to follow these safety precautions:
- Work in a well-ventilated area or ensure adequate ventilation by using fans or opening windows and doors.
- Wear disposable gloves and eye protection to safeguard yourself from the stain and other harmful chemicals.
- Put on a dust mask to protect your respiratory system from wood dust, which can be a health hazard.
- Ensure the work area is clean and free from clutter to prevent accidents and tripping hazards.
- Always read and follow the manufacturer’s instructions and warnings provided with the stain and other products you are using.
- Keep children and pets away from the work area to avoid accidents.
- If using power tools, such as sanders, follow proper safety guidelines and use protective equipment.
- Dispose of waste and hazardous materials responsibly, following local regulations and guidelines.
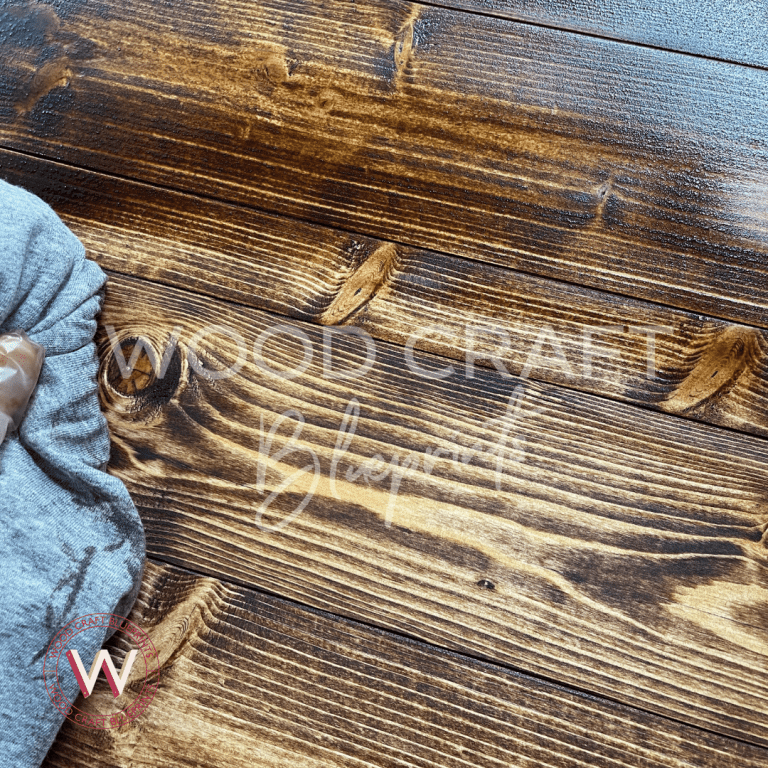
Applying The Stain
Applying the stain to your wood project is an important step in DIY wood staining. Ensure a smooth and even application by following these simple tips and techniques.
Preparing The Wood Surface
Step 1: Sand the wood surface evenly to remove rough spots and create a smooth finish.
Step 2: Clean the wood with a tack cloth to remove any dust or debris that could affect the staining process.
Step 3: Apply a pre-stain wood conditioner if working with soft woods to ensure an even stain application.
Techniques For Applying Stain
Brushing: Use a high-quality brush to apply the stain in the direction of the wood grain for an even finish.
Wiping: Apply the stain with a cloth or sponge, working in small sections and wiping off excess to control the intensity of the color.
Spraying: Use a paint sprayer for large surfaces, ensuring even coverage and allowing for quick application.
Tips for Wood Staining:
Sand the wood surface before staining.
– Use a brush for precise application.
– Wipe off excess stain for better control.
– Consider using a pre-stain wood conditioner for soft woods.
– Experiment with different techniques to achieve the desired finish.
Achieving Desired Finish
When it comes to DIY staining wood, achieving the desired finish is key to a successful project. Whether you’re a beginner or a seasoned DIY enthusiast, it’s important to know the techniques and tips for getting the perfect stain application and adjusting the intensity to match your vision.
Tips For Even Stain Application
Applying wood stain evenly can be challenging, but with the right approach, you can achieve professional-looking results. Consider these tips for ensuring a consistent and smooth application:
- Use a high-quality brush or applicator to ensure even coverage.
- Start with a pre-stain wood conditioner to minimize blotchiness.
- Apply the stain in the direction of the wood grain for a seamless finish.
- Wipe off any excess stain to prevent pooling and ensure uniform coloration.
Adjusting Stain Intensity
Getting the right intensity of stain is crucial in achieving your desired finish. Here are some ways to adjust the stain intensity:
- Test the stain on a scrap piece of wood to determine the desired color depth.
- Adjust the number of coats applied to control the darkness of the stain.
- Consider diluting the stain with a compatible thinner for a lighter hue.
- Sand the wood between coats to lighten the overall color and achieve a more subtle effect.
Adding A Protective Finish
Adding a protective finish to your DIY stained wood project is crucial to ensure its longevity and durability. A good topcoat not only enhances the aesthetic appeal of the wood but also provides protection against wear, moisture, and UV rays. It acts as a shield, preserving the natural beauty of the stained wood while safeguarding it from daily wear and tear.
Choosing The Right Topcoat
Choosing the right topcoat is essential to ensure the best results for your stained wood project. There are various types of topcoats available, including polyurethane, varnish, lacquer, and shellac. Consider the specific requirements of your project, such as the level of durability needed and the desired finish appearance, when selecting the appropriate topcoat.
Applying Topcoat For Durability
Proper application of the topcoat is crucial to enhance durability. Ensure that the stained wood is clean and dry before applying the topcoat. Use a high-quality brush or applicator to apply thin, even layers of the topcoat, allowing sufficient drying time between coats. This will ensure a strong and protective finish that will prolong the life of the stained wood while maintaining its visual appeal.
Frequently Asked Questions On Diy Staining Wood
What Household Items Can I Use To Stain Wood?
You can use household items like coffee, tea, vinegar, or even steel wool soaked in vinegar to stain wood.
How Do You Stain Wood For Beginners?
To stain wood for beginners, start by sanding the wood surface, then apply the stain with a brush or cloth, following the wood grain. Wipe off excess stain and let it dry. For an even finish, consider applying a second coat and finish with a clear protective sealant.
Can I Make My Own Wood Stain?
Yes, you can make your own wood stain using natural ingredients like coffee, tea, and vinegar. Mix them to create unique shades.
What Is The Fastest Way To Stain Wood?
The fastest way to stain wood is by using a spray or wipe-on stain for quick application and absorption. Preparing the surface with sanding and a wood conditioner can help the stain penetrate more effectively for a faster result.
Conclusion
To sum up, DIY wood staining is a rewarding and cost-effective way to enhance your space. With the right tools and techniques, you can achieve professional-looking results. Remember to prepare properly, choose the right stain, and take your time for a flawless finish.
Happy staining!