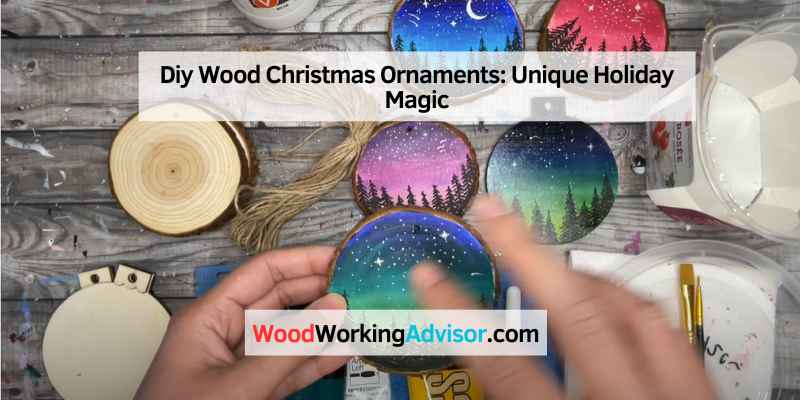
DIY Wood Christmas Ornaments: Unique Holiday Magic
Create DIY wood Christmas ornaments for a festive touch to your holiday decor. Personalize ornaments for a unique touch.
The holiday season is a time for spreading joy and cheer, and what better way to do that than by adding a personal touch to your Christmas decorations? DIY wood Christmas ornaments are a fun and creative way to bring a touch of rustic charm to your tree.
By crafting your own ornaments, you can customize them to suit your style and theme, making your holiday decor truly one-of-a-kind. Whether you’re a seasoned crafter or just starting out, making your own Christmas ornaments is a rewarding and enjoyable activity for the whole family to enjoy. So, gather your supplies, unleash your creativity, and get ready to deck the halls with your own handmade ornaments this holiday season.
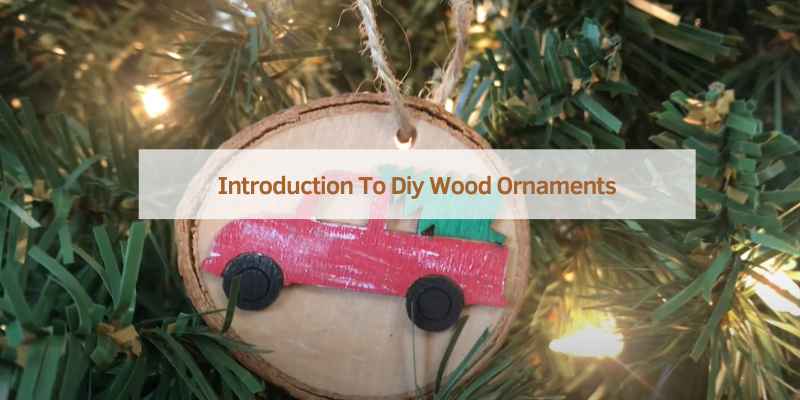
Introduction To DIY Wood Ornaments
Get ready to add a touch of rustic charm to your holiday decor with DIY wood ornaments. These delightful ornaments are not only eco-friendly but also offer a wonderful opportunity to unleash your creativity. Whether you’re a seasoned crafter or new to the DIY scene, making your own wooden ornaments is a fantastic way to personalize your holiday decorations and create lasting memories. In this blog post, we’ll explore the magic of DIY holidays and delve into the reasons why choosing wood for your ornaments is a fantastic idea.
Why Choose Wood
Wooden ornaments are a timeless addition to any holiday decor. The natural warmth and texture of wood bring a cozy and inviting feel to your home during the festive season. Opting for wood also aligns with sustainable and eco-friendly practices, making it a great choice for environmentally conscious individuals. Furthermore, wood provides a versatile canvas for creativity, allowing you to paint, carve, or personalize your ornaments to suit your unique style and theme. The durability of wood ensures that your ornaments can be cherished for years to come, becoming cherished heirlooms that are passed down through generations.
The Magic Of DIY Holidays
The holiday season is brimming with opportunities to infuse your home with handmade charm. DIY wood ornaments not only showcase your creativity but also make for heartfelt gifts that are cherished by recipients. Engaging in DIY projects fosters a sense of accomplishment and allows you to tailor your decor to perfectly reflect your personal style. Embracing the magic of DIY holidays enables you to create a warm and welcoming ambiance in your home while making memories with loved ones. The process of crafting wood ornaments can become a cherished tradition, bringing joy and a sense of togetherness during the festive season.
Selecting The Right Wood
When it comes to creating DIY wood Christmas ornaments, selecting the right wood is essential for achieving a beautiful and long-lasting result. The type of wood used can greatly impact the overall appearance and durability of the ornaments. Additionally, sourcing sustainable wood is crucial to ensure that your holiday decorations are not only visually appealing but also environmentally friendly.
Types Of Wood For Ornaments
There are various types of wood that are well-suited for crafting Christmas ornaments. Pine, cedar, and birch are popular choices due to their workability and natural beauty. These woods are readily available at most craft stores and can be easily shaped and decorated to suit your desired ornament designs.
Sourcing Sustainable Wood
When sourcing wood for your DIY Christmas ornaments, it’s important to consider the sustainability of the materials. Opt for FSC-certified or reclaimed wood to minimize the environmental impact of your crafting projects. By choosing sustainably sourced wood, you can create stunning ornaments while minimizing deforestation and promoting responsible wood harvesting practices.
Tools And Materials Needed
Gather essential tools and materials like wood slices, acrylic paints, brushes, twine, and glue for creating stunning DIY wood Christmas ornaments. Get creative with designs and colors to craft unique festive decorations.
Are you looking to add a personal touch to your Christmas decor this year? DIY wood Christmas ornaments are a fun and easy way to do just that. Before you start, make sure you have the necessary tools and materials.
Basic Woodworking Tools
To create your own DIY wood Christmas ornaments, you’ll need a few basic woodworking tools. These include a saw, sandpaper, drill, and a wood burning tool if you want to add some decorative touches. A saw will help you cut your wood into the desired shape and size, while sandpaper will help you smooth out any rough edges. A drill will be useful for creating holes to hang your ornaments, and a wood burning tool can be used to add designs or text to your ornaments.
Decorative Supplies
In addition to basic woodworking tools, you’ll also need some decorative supplies to make your DIY wood Christmas ornaments stand out. These supplies include paint, paint brushes, glitter, ribbon, and any other embellishments you want to add. Use paint to add color to your ornaments, and glitter to give them some sparkle. Ribbon can be used to create a hanger for your ornaments, or to add a bow for some extra flair. Get creative with your decorations and make your DIY wood Christmas ornaments truly unique.
With these tools and materials, you’ll be able to create beautiful and personalized DIY wood Christmas ornaments that will add a special touch to your holiday decor. Don’t forget to have fun and let your creativity shine!
Designing Your Ornaments
Sketching Ideas
Start by sketching out your design ideas on paper.
Play with different shapes and patterns.
Themes And Inspirations
Draw inspiration from nature, traditions, or your favorite holiday memories.
Choose a theme that resonates with you and your style.
Cutting And Shaping
Create unique and eye-catching DIY wood Christmas ornaments by cutting and shaping wood into beautiful designs. Craft personalized decorations that will add a touch of charm to your holiday season.
Safety First
When it comes to cutting and shaping wood for DIY Christmas ornaments, safety should always be your top priority. Before starting any woodworking project, make sure you have the necessary safety equipment and tools. Wear protective goggles, gloves, and a dust mask to keep yourself safe from flying wood chips and dust particles. Additionally, ensure that your work area is well-ventilated and free from any clutter or tripping hazards.
Step-by-step Cutting Guide
To create beautiful wood Christmas ornaments, you’ll need to follow a step-by-step cutting guide. Here’s a simple guide to help you get started:
- Gather all the materials you’ll need for your project, including the wood, pattern templates, pencil, ruler, and a coping saw or a jigsaw.
- Using the ruler and pencil, measure and mark the wood according to the dimensions specified in your pattern template.
- Secure the wood firmly in a vise or clamp to prevent it from moving during the cutting process.
- If using a coping saw, carefully follow the marked lines and use steady, even strokes to cut through the wood. If using a jigsaw, attach the appropriate blade for your wood thickness and follow the same marked lines.
- Take your time and cut slowly to ensure accuracy and prevent any potential accidents.
- Once you’ve finished cutting, use sandpaper or a sanding block to smooth out any rough edges or surfaces on the wood.
- Finally, remove any sawdust or debris from the wood using a clean cloth or a brush before moving on to the shaping process.
Remember, practice makes perfect, so don’t be discouraged if your first attempts don’t turn out exactly as planned. With time and experience, you’ll develop the skills needed to create stunning DIY wood Christmas ornaments.
Now that you have a better understanding of the cutting and shaping process, you’re ready to bring your creative ideas to life. Get your tools ready and let your imagination run wild as you transform simple pieces of wood into beautiful Christmas decorations.
Decorating Techniques
Creating DIY wood Christmas ornaments allows for endless creativity in decorating techniques. Let’s explore two popular methods:
Painting And Staining
- Painting ornaments adds a pop of color.
- Staining enhances the natural beauty of wood.
- Use acrylic paint for vibrant colors.
- Apply wood stain for a rustic look.
Adding Textures And Layers
- Use stencils to create intricate designs.
- Glue on embellishments like beads or sequins.
- Layer different materials for a 3D effect.
- Embossing powders add texture and shine.
Personalizing Your Ornaments
Elevate your holiday decor with DIY wood Christmas ornaments for a personalized touch. Handcrafted ornaments add a rustic charm to your festive celebrations, making each decoration unique and special. Get creative with designs and colors to make your tree stand out this season.
Making DIY wood Christmas ornaments is a fun and creative activity that can be enjoyed by all ages. One way to make your ornaments even more special is to personalize them with names, dates, photos, or quotes. Here are some ideas on how to incorporate personal touches into your DIY wood Christmas ornaments.
Incorporating Names And Dates
Adding names and dates to your DIY wood Christmas ornaments is a great way to commemorate special occasions such as weddings, births, or graduations. You can use paint pens or wood burning tools to write the names and dates onto the wood. Another idea is to use letter stamps to imprint the names and dates onto the wood. You can also use stencils to create a clean and uniform look.
Using Photos And Quotes
Another way to personalize your DIY wood Christmas ornaments is to use photos or quotes. You can print out photos onto transfer paper and then transfer them onto the wood using a heat press or iron. You can also decoupage photos onto the wood using a mod podge. Quotes can be hand-written onto the wood or printed out onto transfer paper and transferred onto the wood. You can also use vinyl lettering to create a clean and professional look.
Personalizing your DIY wood Christmas ornaments is a great way to add meaning and sentimentality to your holiday decorations. Whether you choose to incorporate names, dates, photos, or quotes, your personalized ornaments are sure to be treasured for years to come.
Preserving And Storing
DIY wood Christmas ornaments are a wonderful way to add a personal touch to your holiday decorations. Whether you made them yourself or received them as a gift, it’s important to take care of them so they last for many holiday seasons to come. Preserving and storing your DIY wood Christmas ornaments properly is key to their longevity.
Protective Finishes
Adding a protective finish to your DIY wood Christmas ornaments is an important step in preserving them. Not only does it help to protect the wood from damage, but it can also enhance the overall appearance. Some popular finishes for wood ornaments include:
- Clear sealant
- Polyurethane
- Lacquer
- Wax
Before applying any finish, make sure the wood is clean and dry. Follow the manufacturer’s instructions for application and drying times. Once the finish is dry, your DIY wood Christmas ornaments will be better protected from moisture, dust, and other potential damage.
Storage Tips For Longevity
Proper storage is also important for preserving your DIY wood Christmas ornaments. Here are some tips:
| Tip | Description |
| Store in a dry, cool place | Avoid storing your ornaments in areas that are damp or humid, such as basements or attics. |
| Wrap in acid-free tissue paper | Protect your ornaments from scratches and other damage by wrapping them in acid-free tissue paper. |
| Use a storage container with dividers | Avoid tossing your ornaments into a box where they can bump into each other and potentially break. Use a storage container with dividers to keep them separated. |
| Avoid direct sunlight | Exposure to sunlight can cause your ornaments to fade or discolor over time. Store them in a location that is shielded from direct sunlight. |
By following these simple storage tips, your DIY wood Christmas ornaments can last for many years to come. Enjoy the memories they bring and the personal touch they add to your holiday décor.

Frequently Asked Questions
How Do You Make DIY Wood Christmas Ornaments?
Creating DIY wood Christmas ornaments is easy and fun. Start by gathering wooden pieces, such as popsicle sticks or small cutouts. Decorate them with paint, glitter, or other festive materials. Use hot glue or string to attach a loop for hanging.
Get creative and personalize your ornaments with unique designs and colors.
What Are Some Popular Designs For DIY Wood Christmas Ornaments?
There are numerous popular designs for DIY wood Christmas ornaments. Some popular options include snowflakes, Christmas trees, reindeer, snowmen, and stockings. You can also incorporate other festive elements like holly leaves, ornaments, or jingle bells. Let your imagination run wild and create ornaments that reflect your personal style.
Can I Use Recycled Wood For DIY Christmas Ornaments?
Absolutely! Using recycled wood for DIY Christmas ornaments is a great way to be eco-friendly and add a rustic touch to your decorations. Look for old pallets, scrap wood, or even fallen branches. Sand them down, paint or stain them, and transform them into unique ornaments that have a charming, upcycled appeal.
What Tools Do I Need For Making DIY Wood Christmas Ornaments?
For making DIY wood Christmas ornaments, you’ll need some basic tools. These include a saw or craft knife for cutting the wood, sandpaper for smoothing the edges, paintbrushes or markers for decorating, and a hot glue gun or string for attaching hanging loops.
You may also want to have a ruler or measuring tape handy for precise cuts.
Conclusion
Incorporating DIY wood Christmas ornaments into your holiday décor adds a personal touch that can’t be replicated. Whether you opt for simple designs or intricate patterns, these ornaments are a timeless addition to your festive celebrations. Embrace the joy of crafting and create unique ornaments that will be cherished for years to come.