How to Change a Chainsaw Chain in 10 Minutes (Right Direction, Every Time)
To change a chainsaw chain, first remove the side cover and then remove the old chain. Install the new chain and then tighten the nuts, followed by tensioning the chain.
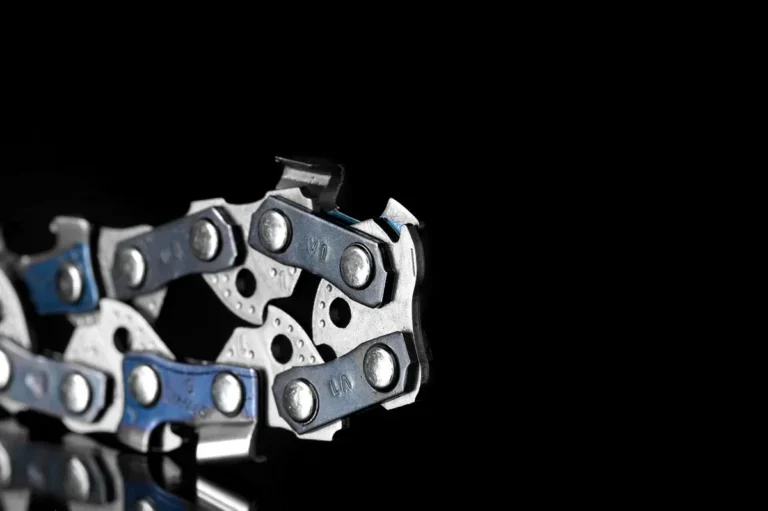
The single most common mistake: installing the chain backward. Every cutting link’s edge has to face forward, toward the bar’s tip, along the top of the bar — put it on backward and the saw will still run and the chain will still turn, it just won’t cut, which confuses a lot of first-timers into thinking something else is wrong.
Maintaining a chainsaw is important to keep it in good condition and extend its lifespan. One of the crucial aspects of chainsaw maintenance is replacing the chain when it becomes dull or damaged. Knowing how to replace a chainsaw chain is a necessary skill for any chainsaw owner.
While it may seem daunting, changing a chainsaw chain is a relatively straightforward process that can be done with just a few tools. We’ll provide step-by-step instructions on how to change a chainsaw chain. Whether you’re a professional logger or a DIY enthusiast, this guide will help you keep your chainsaw running smoothly.
Safety First
Best Replacement Chainsaw Chain
 |
Oregon 18″ Replacement Chainsaw Chain (2-Pack) – $24.57 This is the type of chain referenced in Installing The New Chain above.
|
Chain replacement takes most people 10-15 minutes once they’ve done it twice — the delay on a first attempt is almost always spent hunting for the right wrench size, not the actual mechanical work. Bar-mounting nut sizes and torque specs vary by brand (Stihl, Husqvarna, and Poulan Pro don’t all use the same bar stud spacing), so keep the owner’s manual’s parts diagram open the first time through.
Wear Protective Gear
Before you begin, make sure you are wearing the necessary protective gear to prevent any accidents or injuries. This includes:
- Protective goggles or safety glasses to shield your eyes from flying debris.
- Ear protection such as earplugs or earmuffs to reduce the noise level.
- Heavy-duty gloves to protect your hands from sharp edges and cuts.
- Sturdy work boots with non-slip soles to provide stability and protect your feet.
- A long-sleeved shirt and pants to shield your skin from potential scratches or cuts.
Ensure Chainsaw Is Off
Before you start changing the chainsaw chain, it is crucial to ensure that the chainsaw is completely turned off and the engine is cooled down. This will prevent any accidental starts or injuries. Follow these steps:
- Locate the on/off switch and flip it to the “off” position.
- Wait for the engine to cool down, allowing it enough time to dissipate the heat.
- Double-check that the chainsaw is completely powered off by pulling the starter cord gently.
Remember, safety is paramount when working with chainsaws. By following these safety precautions and wearing the appropriate protective gear, you can minimize the risks and ensure a safe chainsaw chain replacement process.
Preparing Your Work Area
A cluttered bench is how small parts disappear — the side-cover screws and the tensioning pin are both small enough to roll off the edge and vanish into sawdust. Clear a flat, well-lit surface first and lay your tools out in the order you’ll actually use them, so you’re not digging through a toolbox mid-job with a bar in one hand.
Gather Necessary Tools
Before starting the process of changing the chainsaw chain, it’s important to gather all the necessary tools. These may include protective gloves, a safety helmet, safety goggles, a wrench, a screwdriver, and a new chainsaw chain.
Secure Chainsaw On A Stable Surface
Once you have all the required tools, the next step is to secure the chainsaw on a stable surface. This will ensure the safety of the person changing the chain as well as prevent any accidents. Place the chainsaw on a flat and level surface and make sure it is securely positioned to prevent any movement during the chain replacement process.
Removing The Old Chain
A lot of first-timers try to yank the old chain off the bar before loosening the tensioning screw — that’s the wrong order and it turns a 30-second step into a fight with pliers. Loosen the screw first; the chain should go slack in your hands with almost no effort. If you’re only doing this because the old chain is dull rather than damaged, sharpening it a few more times is usually cheaper than replacing it — a file gauge costs under $10 and most homeowner chains have 4-6 sharpenings left in them before they need retiring.
Remove the side cover
To begin, locate the side cover of your chainsaw. This cover is usually held in place by a few screws or nuts. Use the appropriate tool, such as a screwdriver or wrench, to remove these screws and detach the side cover from the chainsaw body. Set the cover aside in a safe place, as you will need it later when installing the new chain.
Release chain tension
After removing the side cover, you will need to release the tension in the chain. This is important to ensure that the chain can be easily removed without any resistance. Locate the tensioning screw on the inside side of the guide bar and loosen it slightly. This will allow the chain to become loose and make it easier for you to detach it.
Detach the old chain
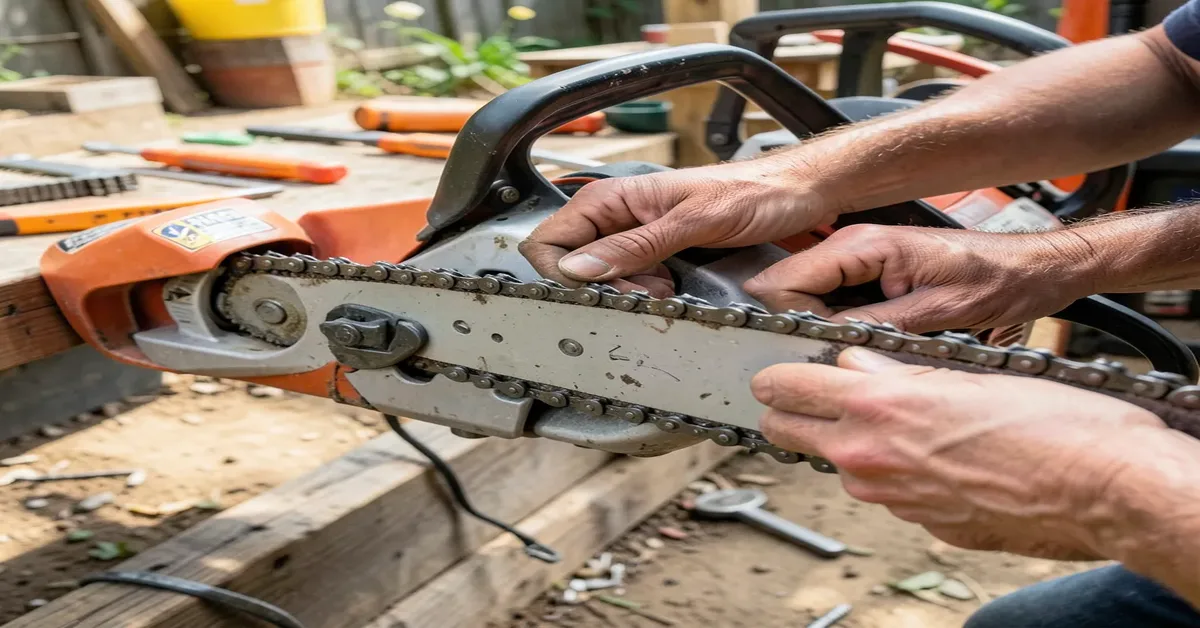
With the tension released, you can now proceed to detach the old chain from the guide bar and the chainsaw sprocket. Simply lift the chainsaw guide bar by the tip so that the chain sags slightly. Then, carefully slide the chain off the guide bar and sprocket, ensuring that it doesn’t snag or get tangled during the process. Once the chain is fully detached, you can safely remove it from the chainsaw.
The removed chain still has sharp cutting edges even when it’s too dull to cut wood well, so set it down flat on the bench rather than looping it over your wrist while you unbox the replacement.
Installing The New Chain
Before you unbox the replacement, check three numbers on the packaging against your old chain: pitch (almost always 3/8″ or .325″ on homeowner saws), gauge (.050″, .058″, or .063″ — measure a drive link with calipers if the box doesn’t list it), and drive link count. A chain with the right pitch but the wrong gauge will still sit on the bar and look fine, then bind or throw itself off within the first few cuts. Once those three numbers match, the actual installation is straightforward.
Align The New Chain
Before installing the new chain, ensure the chainsaw is turned off and the engine is cooled down. Lay the chainsaw on a flat surface, and then align the new chain with the guide bar, making sure the teeth are pointing towards the front of the chainsaw.
Attach Chain Onto The Bar
Once the new chain is aligned with the guide bar, carefully fit the chain onto the bar, ensuring that the drive links sit into the sprocket and the chain is correctly positioned on the bar. Rotate the chain around the bar to ensure it moves freely and smoothly.
Reattach The Side Cover
With the new chain properly placed on the guide bar, reattach the side cover by aligning it with the bar and chain. Secure the cover in place by tightening the nuts or screws, ensuring that the cover is snug but not overly tightened, allowing the chain to move freely.
Adjusting Chain Tension
Correct tension means the chain sits snug against the underside of the bar, but you can still pull it away from the bar by hand roughly 1/8 to 3/16 inch at the midpoint before it snaps back into place. Too loose and it can jump the bar or the drive sprocket mid-cut; too tight and it strains the clutch and bar-tip sprocket, and on some saws it’ll bog the engine down under load.
- Loosen the tensioning screw on the inside of the guide bar so the chain has slack to work with.
- Lift the tip of the guide bar so the chain sags slightly, then turn the adjustment wheel clockwise until the chain sits flush against the underside of the bar without sagging.
- Keep holding the bar tip up while you tighten the tensioning screw clockwise until it’s snug — not wrench-tight, just snug — then let the bar drop and run the 1/8 to 3/16 inch pull test by hand.
Re-check tension after the chain has been cutting for about a minute. A brand-new chain stretches slightly as it seats onto the bar and sprocket, and most of that stretch happens in the first few cuts rather than gradually over weeks — which is why a chain that felt right in the garage can feel loose again the first time you actually use it.
Final Checks
Don’t skip these checks just because the chain looks like it’s sitting correctly — a chain can look properly seated and still be one tooth off on the drive sprocket, which isn’t something you can catch by eye from a few feet away.
After installing the new chainsaw chain, it is essential to perform some final checks before starting the chainsaw. These checks ensure that the chainsaw is ready for use and can operate safely. Here are the final checks to perform:
Ensure Everything is Secure:
Firstly, check that all the nuts, bolts, and screws on the chainsaw are tight and secure. Ensure that the side cover is tightly fastened and that the air filter cover is firmly in place. Check that the bar and chain are properly aligned and that the chain tension is correct.
Check Chain Movement:
Next, check the movement of the chain. Pull the chain away from the bar slightly and release it. The chain should immediately snap back into place and should not sag or droop. Ensure that the chain moves smoothly around the bar and that there is no binding or jerking.
Tension the Chain:
Finally, tension the chain again. Turn the adjustment wheel clockwise until the chain is snug against the bar but still moves freely. Do not over-tighten the chain as this can cause damage to the chainsaw and result in a dangerous situation.
By performing these final checks, you can ensure that your chainsaw is safe and ready to use. Always follow the manufacturer’s instructions and safety guidelines when operating a chainsaw. With proper maintenance and care, your chainsaw will provide you with years of reliable service.
Maintenance Tips
Proper maintenance of your chainsaw chain is essential for optimal performance and longevity. Here are some important maintenance tips to ensure that your chainsaw chain remains in top condition.
Regular Cleaning
Regular cleaning of your chainsaw chain is crucial to prevent the buildup of dirt, sawdust, and debris, which can affect its cutting efficiency and lead to premature wear. After each use, clean the chain thoroughly using a brush or compressed air to remove any accumulated residue. This will help maintain the sharpness of the cutting teeth and ensure smooth operation.
Lubrication And Storage Tips
Proper lubrication is vital for the smooth functioning of the chainsaw chain. Apply a high-quality chain lubricant regularly to reduce friction and prevent overheating during operation. Additionally, when storing your chainsaw, ensure that it is kept in a dry and clean environment to prevent rust and corrosion. Store the chainsaw in a protective case or sheath to safeguard the chain from damage and ensure its longevity.
Troubleshooting Common Issues
Most “the chain won’t stay on” complaints trace back to one of two things: the drive links resting on top of the sprocket teeth instead of engaging them, or tension set while the bar tip was resting flat on the bench instead of lifted. Both look fine at a glance and only show up once the saw is under load.
Chainsaws are powerful tools that require regular maintenance to ensure optimal performance. However, sometimes issues can arise, causing inconvenience and frustration. Here are some common problems you may encounter when changing a chainsaw chain and how to troubleshoot them.
Chain Comes Off
One of the most common issues when changing a chainsaw chain is that it may come off during operation. This can be caused by various factors, such as improper installation or a loose chain tension. To troubleshoot this issue, follow these steps:
- Stop the chainsaw and disconnect the power source.
- Inspect the chain to ensure it is not damaged or worn out. Replace it if necessary.
- Check the chain tension by lifting the chainsaw guide bar by the tip. The chain should sag slightly. If it is too loose, tighten it by turning the adjustment wheel clockwise.
- Make sure the chain is properly installed on the guide bar and the drive sprocket.
- Reconnect the power source and test the chainsaw to ensure the chain stays in place during operation.
Chain Is Too Tight Or Too Loose
Another common issue when changing a chainsaw chain is that it may be too tight or too loose. Both scenarios can negatively impact the chainsaw’s performance and can even cause damage to the chain and guide bar. Here’s how to troubleshoot this problem:
- If the chain is too tight, loosen it by locating the tensioning screw on the inside side of the guide bar and loosening it slightly. This will make installing the new chain easier.
- If the chain is too loose, tighten it by turning the adjustment wheel clockwise. Lift the chainsaw guide bar by the tip so that the chain sags slightly.
- Ensure that the chain is properly tensioned by checking its movement along the guide bar. It should move freely without excessive slack or resistance.
- Test the chainsaw to ensure the chain is properly tensioned and does not come off during operation.
By troubleshooting these common issues, you can ensure a smooth and successful chainsaw chain replacement. Remember to always refer to the manufacturer’s instructions and safety guidelines for your specific chainsaw model. Regular maintenance and proper chain installation will help prolong the lifespan of your chainsaw and keep it operating at its best.
Frequently Asked Questions
What Is The Proper Way To Install A Chainsaw Chain?
To install a chainsaw chain, first, loosen the tensioning screw on the guide bar. Then, place the new chain on the bar, ensuring the cutting edges face forward. Finally, tighten the tensioning screw and check the chain tension. Always refer to the manufacturer’s instructions for specific guidance.
Is There A Wrong Way To Put A Chain On A Chainsaw?
To put a chain on a chainsaw, follow these steps:
1. Locate the tensioning screw on the guide bar and loosen it slightly.
2. Lift the guide bar by the tip to create slight sag in the chain.
3. Install the new chain, ensuring it is properly aligned with the sprocket.
4. Tighten the chain by turning the adjustment wheel clockwise.
5. Make sure the chain is tensioned properly and secure the cover. Remember to consult your owner’s manual for detailed instructions.
How To Remove The Chain From A Chainsaw?
To remove the chain from a chainsaw, follow these steps:
1. Loosen the tensioning screw on the guide bar.
2. Remove the side cover and the old chain.
3. Install the new chain and adjust the tension.
4. Reinstall the side cover and tighten the nuts.
How Do You Get A Loop Out Of A New Chainsaw Chain?
To remove a loop from a new chainsaw chain, locate the tensioning screw on the inside of the guide bar and loosen it slightly. This will make it easier to install the new chain.
Conclusion
Changing a chainsaw chain comes down to the same handful of steps every time — cover off, old chain off, new chain on with the cutters facing forward, tension set with the bar tip lifted. The part that actually trips people up isn’t any single step, it’s skipping the direction check and the re-tension after the first minute of cutting. Get those two right and the rest is just mechanical.
Sponsored / affiliate links. As an Amazon Associate I earn from qualifying purchases. I may earn additional commission from eligible campaigns.