Should You Prime Plywood Before Painting? Yes, and Don’t Skip the Edges
Yes, you need to prime plywood before painting. Plywood’s face veneer absorbs paint unevenly, especially around knots, patches, and any exposed end grain, so skipping primer usually means a blotchy, uneven sheen once the paint dries. But there’s one step almost every “should I prime plywood” article leaves out entirely: the cut edges. A plywood sheet’s edges are far more porous than its smooth faces, and if you prime the face and ignore the edge, that edge will keep absorbing paint and telegraphing through the finish long after the rest of the panel looks done.
Why Plywood Needs Primer Before You Paint
Plywood’s outer face is a thin layer of veneer, and that veneer doesn’t absorb paint the same way all over. Knots, small patches, and areas near the panel’s cut edges pull in far more paint than the smooth, tight-grained sections of the face. Paint straight onto raw plywood and you’ll usually see it: a slightly darker, duller patch around every knot, and a flat, “thirsty” strip along any edge that wasn’t sealed first. Primer stops this by sealing the surface evenly before the color coat goes on, so the paint sits on top of a consistent base instead of soaking into the wood at different rates.
Best Stain-Blocking Primer for Plywood
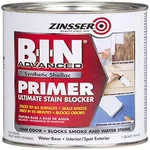 |
Zinsser B-I-N Advanced Shellac-Base Primer – $23.03 A shellac-base primer that seals porous plywood surfaces, including the more absorbent cut edges, and blocks stains, knots, and tannin bleed-through before you paint.
|
A good primer also does two things color paint alone can’t: it blocks the plywood’s natural resins and tannins from bleeding through a light-colored topcoat, and it gives the paint something more consistent to grip, which cuts down on peeling and flaking down the road.
The Step Most Guides Skip: Sealing the Exposed Edges
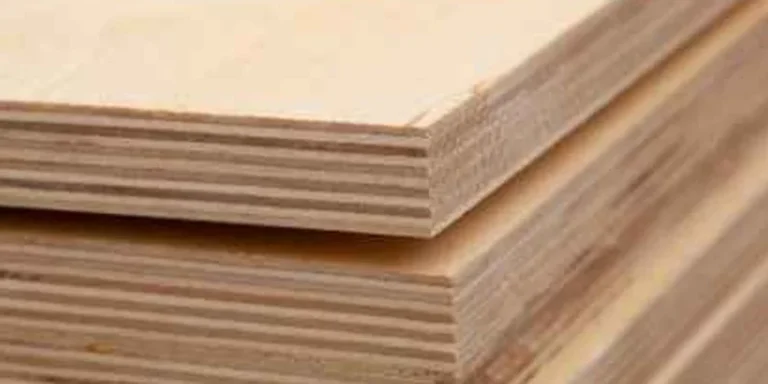
Here’s the part almost every “prime plywood before painting” article glosses over: the edges need more attention than the face, not the same amount. Plywood is built from thin veneer layers glued together with the grain direction alternating in each layer – a structure covered in detail in our breakdown of plywood’s cross-ply grain. Every time you cut a plywood sheet, that cut exposes the end grain of each individual layer along the edge. End grain is essentially a bundle of open wood-fiber tubes pointing straight at the surface, and it soaks up primer and paint far faster than the smooth face grain does.
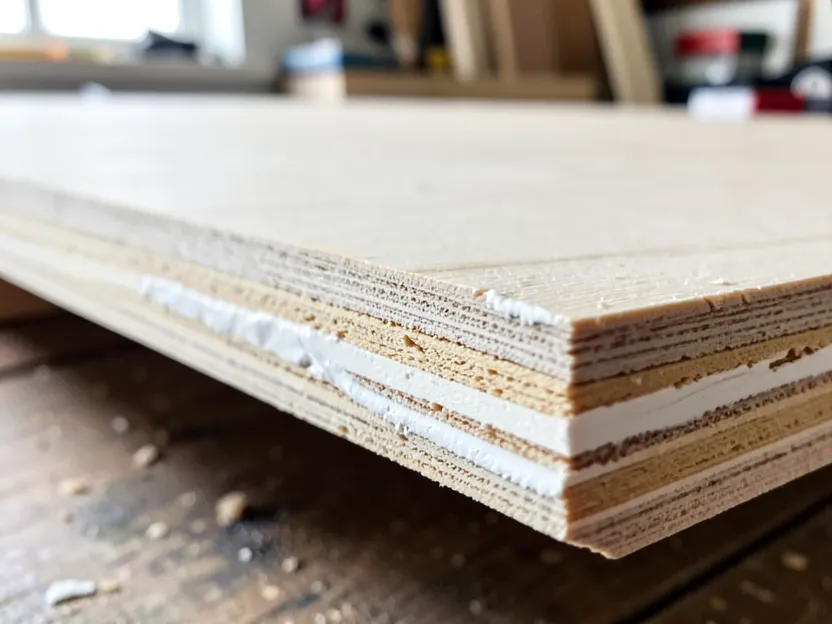
In practice, that means a plywood edge left unsealed will drink in noticeably more primer than the face – and if you don’t compensate, it’ll still show through the topcoat as a flatter, more porous-looking stripe around the whole panel. The fix is simple but easy to skip: brush primer onto every cut edge with the same care you give the face, expect to need a second light coat on the edge specifically if it still looks dull or absorbs the first coat unevenly, and for badly voided or splintery edges, fill and sand before priming rather than trying to prime over gaps.
Types of Primer That Actually Work on Plywood
Not every primer handles plywood’s knots and porous edges equally well. Here’s how the three common types compare for this specific job.
Oil-Based Primers
Oil-based primer penetrates porous plywood surfaces well and does a solid job blocking stains and tannins. It takes longer to dry than water-based options, which actually helps it soak evenly into open grain and edge layers, but cleanup requires mineral spirits and the odor is stronger.
Latex (Water-Based) Primers
Latex primer dries fast, cleans up with water, and has much less odor, making it the easier choice for indoor furniture and cabinet projects. It bonds well to plywood faces but is less effective than oil or shellac at blocking heavy stains, sap, or tannin bleed from knots.
Shellac-Based Primers
Shellac-based primer, like the stain-blocking options in our wood primer comparison, dries in under an hour and seals knots, sap, and porous edges better than either alternative. It’s the standard choice when a plywood panel has visible knots or when you’re specifically trying to seal absorbent cut edges before paint.
How to Prepare Plywood Before Priming
Sanding for a Smooth Finish
Start with 120-grit sandpaper to knock down rough spots and any raised grain, then move to 180- or 220-grit for a smooth surface primer can grip. For more detail on getting the face genuinely smooth first, see our guide to smoothing plywood before painting.
Cleaning the Surface
Wipe down the sanded plywood with a tack cloth or a barely damp rag to pull off sanding dust. Any dust left behind will get trapped under the primer and show up as a rough texture once it dries.
Filling Knots, Voids, and Edge Gaps
Fill knots, gouges, and any open voids along the cut edges with wood filler, then sand flush once it’s cured. This matters even more on the edges than the face: an unfilled void in the edge layers will trap primer unevenly and can telegraph through paint as a small dark or shiny spot.
How to Apply Primer the Right Way
Brush vs. Roller vs. Spray
- Brush: Best for edges, corners, and small or detailed pieces – gives you the most control for working primer into porous end grain.
- Roller: Fastest for large, flat faces, but pair it with a brush for the edges rather than trying to roll them.
- Spray: Gives the smoothest, most even film on both face and edge, but needs good ventilation and masking.
Applying Even Coats
Apply primer in thin, even coats rather than one heavy coat. A heavy coat is more likely to sag on a vertical edge and takes longer to cure fully, which can trap solvent underneath the surface.
Drying Times and Second Coats
Let the first coat dry fully before judging whether you need a second one – most shellac-based primers are dry to the touch in under an hour, while oil-based primers can take several hours. Check the edges specifically: if they still look dull, flat, or slightly darker than the face after the first coat has dried, that’s the primer telling you the edge absorbed it and needs a second pass.
Common Mistakes That Ruin a Painted Plywood Project
Skipping Sanding
Priming over unsanded plywood leaves raised grain and mill marks trapped under the finish, which shows up as texture once the topcoat goes on.
Using the Wrong Primer for the Job
A plain latex primer on a knotty sheet of plywood often lets sap and tannins bleed through months later as yellow-brown spots. If the panel has visible knots, use a stain-blocking oil or shellac primer instead.
Priming the Face and Ignoring the Edges
This is the mistake that causes most of the “why does my paint job look blotchy along the edges” problems. Treat every cut edge as its own surface that needs the same primer attention as the face, not an afterthought you brush over once at the end.
Rushing the Dry Time
Painting over primer that hasn’t fully cured can cause the topcoat to lift, wrinkle, or peel later, which is also a common cause of paint peeling off wood surfaces. Give the primer the full dry time on the can, especially on edges that absorbed more of it.
After Priming: Painting and Maintaining Plywood
Once the primer is fully dry, stir your paint thoroughly and apply it in thin, even coats with a quality brush or roller, working in small sections. Most projects need two coats of paint for full, even coverage – wait until the first coat is completely dry (usually around 24 hours) before checking whether a second is needed. If you’re painting a larger surface like plywood used as a wall panel, the same face-and-edge priming rule applies at every seam and cut edge, not just the visible face.
To keep painted plywood looking good, clean it with a mild detergent and water and avoid abrasive scrubbers. If you notice a chip or scratch, sand the spot lightly, re-prime just that area (edges included, if it’s near one), and touch up the paint before moisture has a chance to get into the exposed wood underneath.
Frequently Asked Questions
Do I need to prime plywood before painting?
Yes. Plywood’s face veneer absorbs paint unevenly, especially around knots, patches, and end grain, so skipping primer usually leaves a blotchy, uneven sheen once the paint dries. A primer seals the surface, blocks stains and tannins, and gives the paint a uniform base to bond to.
What type of primer works best on plywood?
A shellac-base or oil-based primer works best on plywood because it seals knots and porous grain more completely than a latex primer. Latex primer is a fine choice for a quick, low-odor job on plywood that has few knots and no stain-bleed issues.
Do I need to prime the edges of plywood too?
Yes, and this is the step most guides skip. Plywood’s cut edges expose the end grain of every glued layer, making them far more porous and absorbent than the smooth faces. Seal the edges with primer the same as the faces, or they will soak up extra paint and telegraph through the finish.
Conclusion
Priming plywood before painting is not optional if you want an even, long-lasting finish – but priming only the face and skipping the cut edges just moves the blotchy, uneven-absorption problem from the middle of the panel to its border. Sand, clean, fill knots and edge voids, then prime the face and every edge with the same care, giving edges a second coat if they still look thirsty. Do that and the paint job will look uniform and hold up for years, not just months.
Sponsored / affiliate links. As an Amazon Associate I earn from qualifying purchases. I may earn additional commission from eligible campaigns.