Do You Caulk the Bottom of Baseboard? Yes, If the Gap Is 1/8″ or Wider
Yes, caulking the bottom of the baseboard is recommended for a finished and polished look. When installing baseboards, it’s important to consider the overall aesthetics and functionality of the trim.
Caulking the bottom of the baseboard not only creates a seamless and professional appearance but also helps to seal any gaps or cracks that may exist between the baseboard and the floor. This can prevent moisture from seeping in and protect against potential damage.
Additionally, caulk can also help to reduce noise transmission and improve energy efficiency. We will explore the importance of caulking the bottom of the baseboard and provide helpful tips for achieving a neat and tidy finish.
Importance Of Caulking
Caulking is an essential home maintenance task that often goes unnoticed. However, it plays a crucial role in ensuring the structural integrity of your baseboards. By caulking the bottom of the baseboard, you can effectively prevent air leakage and protect against moisture damage. In this section, we will explore the importance of caulking in detail.
Preventing Air Leakage
Air leakage is a common problem that can lead to drafts and increased energy consumption. If there are gaps between your baseboard and the floor, cold or warm air from outside can seep into your home, while conditioned air escapes. This not only compromises your comfort but also puts a strain on your HVAC system, resulting in higher utility bills.
Caulking the bottom of your baseboard creates an airtight seal and prevents air leakage. By closing off these gaps, you can maintain a consistent indoor temperature, reduce energy waste, and save money on heating and cooling costs. Additionally, caulking also helps to minimize the entry of dust, insects, and outdoor pollutants, promoting a healthier living environment.
Protecting Against Moisture
Moisture is another enemy that can wreak havoc on your baseboards and the overall structure of your home. When water seeps into the gaps between the baseboard and the floor, it can lead to moisture buildup, mold growth, and even structural damage over time. This is especially true in areas prone to humidity or where moisture is present, such as kitchens, bathrooms, or basements.
| Benefits of Caulking Against Moisture: |
|---|
|
By caulking the bottom of your baseboard, you create a barrier that prevents moisture from seeping in, minimizing the potential for damage and preserving the longevity of your baseboards. This simple step not only protects your investment but also maintains the aesthetics of your home, ensuring it remains beautiful and well-maintained.
Overall, caulking the bottom of your baseboard is a cost-effective and preventive measure that offers numerous benefits. It prevents air leakage, improves energy efficiency, protects against moisture damage, and enhances the appearance of your baseboards. By taking the time to seal these gaps, you can enjoy a more comfortable and healthy living space while also prolonging the lifespan of your baseboards.
Choosing The Right Caulk
Ensure a seamless baseboard caulk by focusing on the bottom application. Prioritize a durable, flexible seal to prevent moisture and air infiltration. Select a caulk formula suitable for baseboards to maintain a professional and polished finish.
When it comes to caulking the bottom of baseboards, choosing the right type of caulk is crucial. The right caulk not only ensures a tight seal but also enhances the aesthetic appeal of your baseboards. However, with a variety of caulks available on the market, it can be confusing to determine which one is best suited for your specific needs. To help you make an informed decision, let’s dive into understanding different types of caulks and considerations for baseboards.
Understanding Different Types
There are several types of caulks available, but not all are suitable for caulking the bottom of baseboards. The most commonly used types include silicone caulk, acrylic latex caulk, and paintable caulk.
Silicone caulk is well-known for its flexibility and durability. It provides excellent water resistance and is suitable for high-moisture areas such as bathrooms and kitchens.
Acrylic latex caulk is a popular choice for general caulking needs. It is easy to apply, dries quickly, and offers good adhesion to various surfaces. However, it may not be as durable as silicone caulk.
Paintable caulk is essential if you plan to paint your baseboards after caulking. This type of caulk is specially formulated to allow for easy paint adhesion, creating a seamless finish.
Consider the following factors when choosing the right caulk for your baseboards:
Considerations For Baseboards
1. Material: The material your baseboards are made of will impact your caulking decision. If you have wooden baseboards, opt for caulk that adheres well to wood surfaces. On the other hand, for vinyl or PVC baseboards, look for caulk specifically designed for these materials.
2. Location: Consider the location of your baseboards. If they are in a high-moisture area like a bathroom, choose a caulk with excellent water resistance. For baseboards in low-moisture areas, you have more flexibility in selecting a caulk type.
3. Flexibility: Baseboards are subject to slight movements due to temperature changes and settling of the building. Choosing a caulk that is flexible and can accommodate these movements will help prevent cracking or separation.
4. Paintability: If you plan to paint your baseboards, it is crucial to select caulk that is paintable. This will allow you to achieve a seamless look and ensure that the caulk matches the color of your baseboards.
Consider these factors and choose the caulk that best fits your specific requirements. Properly caulking the bottom of your baseboards not only helps improve the overall appearance of your room but also prevents dust, dirt, and moisture from entering gaps and crevices.
With the right caulking product in hand and a little effort, you can achieve a professional-looking finish that will last for years to come.
Preparing The Baseboard
When it comes to caulking the bottom of the baseboard, it’s vital to prepare the baseboard properly to ensure a clean and effective application. This involves cleaning and drying the baseboard thoroughly, as well as removing any old caulk to create a smooth surface for the new application.
Cleaning And Drying
Before adding new caulk, it’s essential to clean the bottom of the baseboard. Use a damp cloth with mild soap to wipe away dirt, dust, and debris. Once cleaned, allow the baseboard to dry completely before proceeding with the next step.
Removing Old Caulk
If there is old caulk present at the bottom of the baseboard, it needs to be thoroughly removed to ensure a proper seal with the new caulk. Use a caulk removal tool or a putty knife to gently scrape away the old caulk. Take care not to damage the baseboard surface during this process.
Applying Caulk
When it comes to applying caulk to the bottom of a baseboard, there are a few techniques you can use to ensure a clean and professional-looking finish. This step is important in sealing gaps and preventing moisture or drafts from seeping through. In this section, we will explore different techniques to apply caulk, including dealing with corners.
Techniques For A Clean Finish
If you want to achieve a clean and seamless caulk finish on the bottom of your baseboard, here are some techniques you can follow:
- Begin by thoroughly cleaning the surface. Remove any dust, dirt, or debris from the baseboard and the floor using a vacuum or a damp cloth. This will ensure better adhesion and a smoother finish.
- Use painter’s tape as a guide. Apply strips of painter’s tape along the edges of the baseboard and the floor, leaving a small gap for the caulk. This will help you achieve straight lines and prevent excess caulk from spreading onto unwanted areas.
- Choose the right caulk for the job. There are different types of caulk available, such as silicone or acrylic-based caulk. Consider the material of your baseboard and the surrounding environment to determine the best option.
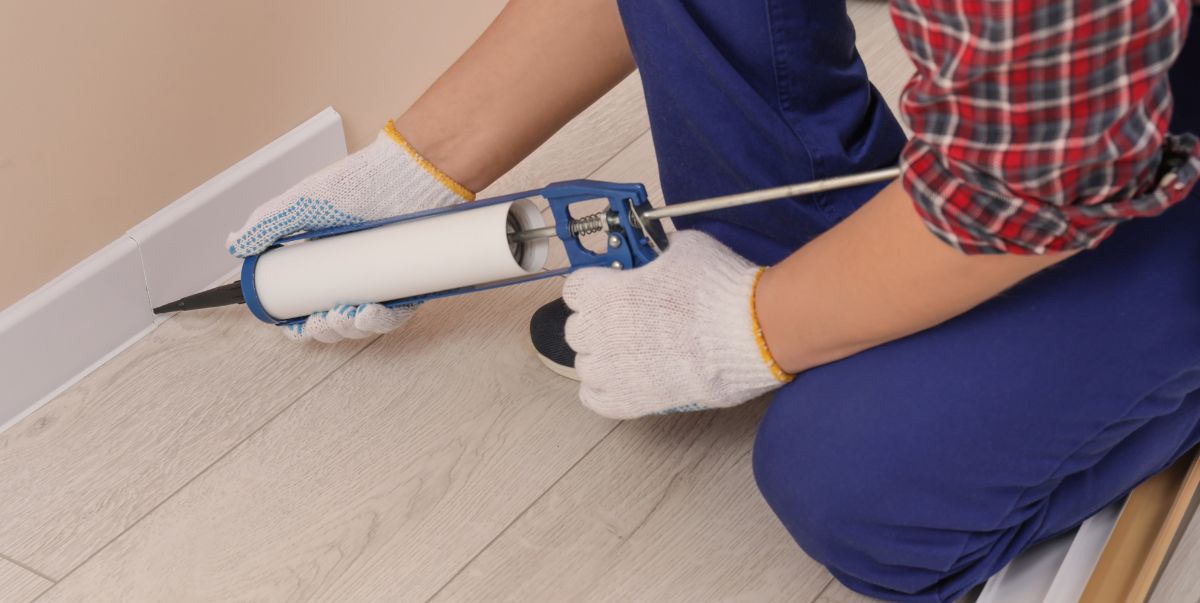
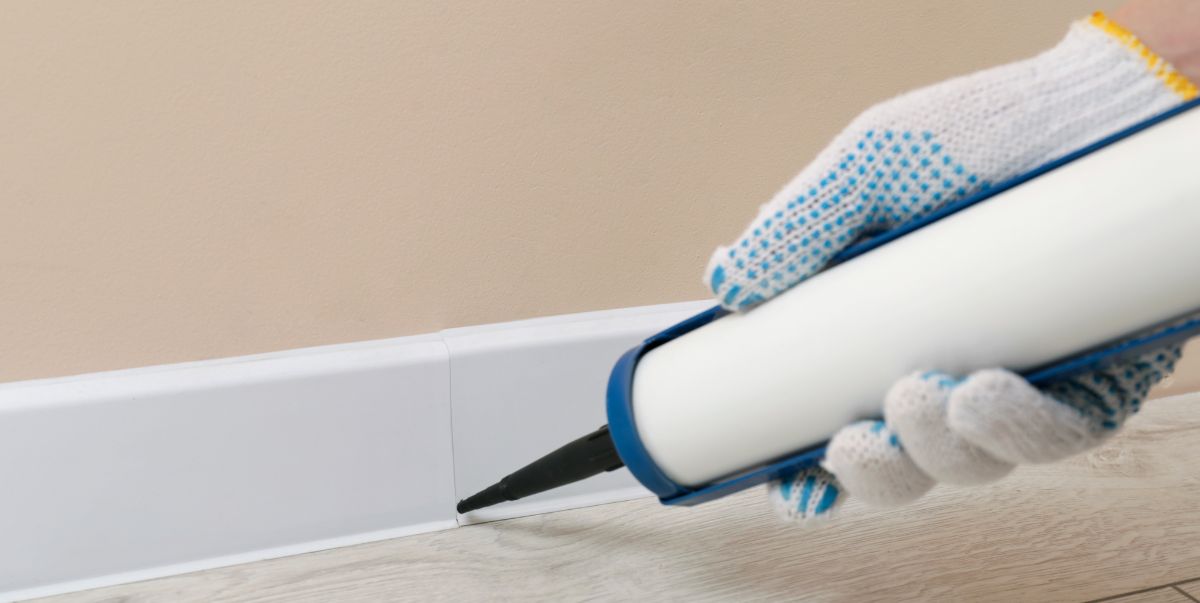
- Load the caulk into a caulking gun. Cut the nozzle at a 45-degree angle for better control and precision when applying the caulk.
- Apply a thin and even bead of caulk along the bottom edge of the baseboard. Be careful not to apply too much pressure on the gun to avoid excess caulk squeezing out.
- Smooth the caulk using a caulk smoothing tool or your finger. Dip your finger in a mixture of water and dish soap to prevent the caulk from sticking to your skin. Gently run your finger along the caulk line to create a smooth and professional finish.
- Remove the painter’s tape immediately after smoothing the caulk. This will prevent the caulk from drying onto the tape and creating messy edges.
Dealing With Corners
Corners can be a bit challenging when applying caulk to the bottom of baseboards. Here are some tips to help you tackle this area:
- Cut the nozzle of the caulk tube at a 90-degree angle. This will allow you to apply caulk in a precise manner at the corners.
- Apply a small amount of caulk to the corner, ensuring that it covers the joint between the baseboard and the adjacent one.
- Use your finger or a caulk smoothing tool to smooth the caulk in the corner, creating a neat and seamless finish.
- Remove any excess caulk using a damp cloth or sponge. Check the corners from different angles to ensure they look clean and well-sealed.
By following these techniques, you can achieve a professional and clean finish when caulking the bottom of baseboards. Taking the time to properly apply caulk will not only improve the appearance of your baseboards but also contribute to better energy efficiency and protection against moisture.
Finishing Touches
Caulking the bottom of baseboards is an essential step in achieving a professional and polished look for your walls. But the process doesn’t stop there! After caulking, there are a few more finishing touches you need to consider to ensure a seamless and flawless appearance. This section will cover two important aspects of completing your baseboard project: smoothing and shaping the caulk and painting over it.
Smoothing And Shaping
Once you have applied caulk along the bottom of your baseboards, it’s crucial to smooth and shape it for a neat finish. To achieve this, follow these simple steps:
- Begin by running a caulking tool or your finger along the caulk line. This will help flatten any bumps and create a consistent texture.
- Next, moisten your finger with a small amount of water or use a damp cloth to gently press and shape the caulk. This will give it a seamless appearance and ensure it blends seamlessly with the baseboard and wall.
- Lastly, use a clean, damp cloth or sponge to wipe away any excess caulk or smudges. This step will help create clean lines and ensure a professional finish.
Remember, taking the time to smooth and shape the caulk will enhance the overall visual appeal of your baseboards and make them look like a seamless part of your walls.
Painting Over Caulk
Now that you have caulked and smoothed your baseboards, it’s time to paint over the caulk to give it a finished appearance. Follow these steps:
-
- Start by selecting a paint color that matches or complements your baseboards and walls.
Dip a small brush into the paint and carefully apply a thin, even coat over the caulk line. Be sure to cover the caulk completely, blending it with the surrounding paint.
Allow the first coat of paint to dry before applying a second coat if necessary. Multiple coats may be needed to achieve the desired coverage and finish.
Painting over the caulk helps to conceal the caulking line and ensures a cohesive look between the baseboards and the walls.
Frequently Asked Questions On Do You Caulk Bottom Of Baseboard
How Do You Fill Gaps Between Baseboard And Floor?
To fill gaps between the baseboard and floor, use caulk or silicone adhesive. Apply a thin bead along the gap, smoothing it with a finger or caulk finishing tool. Allow it to dry before touching or cleaning. This helps to provide a seamless and finished look to the baseboard and floor junction.
Do You Caulk Between Baseboard And Vinyl Floor?
Yes, it is recommended to caulk between baseboard and vinyl floor. This helps to seal the gap, preventing moisture and dirt from getting underneath the baseboard. Caulking also provides a finished and polished look to the flooring installation.
Where Can I Caulk Baseboards?
You can caulk baseboards at the joint where the baseboard meets the wall. This can help with insulation and waterproofing.
Should You Caulk A Floating Floor?
Yes, you should caulk a floating floor. Caulking helps to prevent moisture from seeping between the floorboards, protects against drafts and pests, and enhances the overall stability and durability of the floor. It is an important step to ensure the longevity and appearance of your floating floor.
Conclusion
Caulking the bottom of the baseboard is a simple yet effective way to improve the appearance and functionality of your home. By sealing any gaps, you can prevent air leaks, moisture damage, and pest intrusion. Additionally, it adds a finished look to your baseboards, enhancing the overall aesthetic of your space.