Dungeon Master Screen Wood: Panel Sizes, Hinges & Fold-Flat Plans
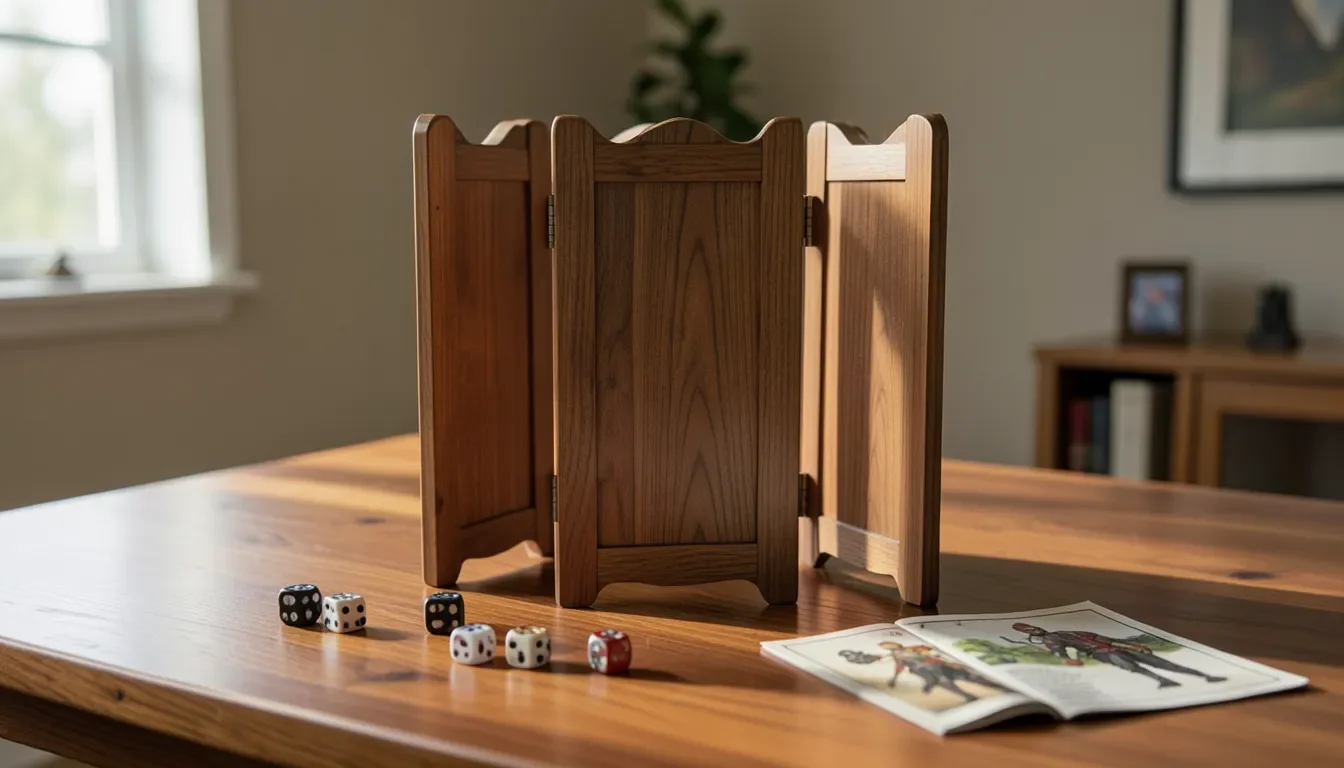
A wood dungeon master screen only earns its place on the table if it does two jobs at once: hide your notes from players during the game, and survive getting thrown in a bag on the way to game night. Most DIY guides only cover the first job – cut three or four panels, hinge them together, done. What they skip is the part that actually determines whether you enjoy owning the thing a year from now: which hinge you use and how thick you cut the panels decide whether the screen folds flat enough to slide into a backpack, or ends up living permanently on a shelf because packing it is a hassle.
What a Wood DM Screen Actually Needs to Do
Before picking wood or hinges, it helps to be honest about what the screen is for. It needs to stand upright on its own without tipping when someone bumps the table, block your notes and monster stats from the players sitting across from you, and give you a surface to prop maps, a rulebook, or a phone. If you run games at a friend’s house or at a local game store, it also needs to fold down small and light enough that carrying it isn’t a chore. That last requirement is the one most tutorials leave out, and it’s the one that decides almost every material choice below.
Best Full-Flat-Fold Hinge Pick
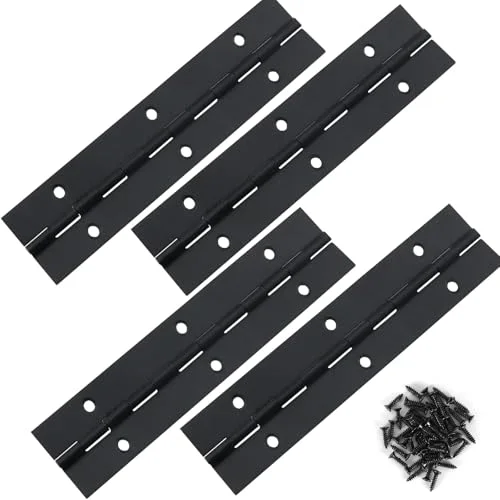 |
4-Pack Heavy Duty Piano Hinges, 6" Black Stainless Steel – $10.99 A continuous piano hinge spreads the load across every knuckle instead of two or three screw points, which is why it folds flatter and stays flatter after repeated packing than small cabinet hinges.
|
Panel Material and Thickness: The Weight Tradeoff
Panel thickness is the first fork in the road, and it’s a straight tradeoff between rigidity and portability. 1/2″ hardwood plywood makes a screen that feels substantial and won’t flex or bow when you lean on it to write, but a 3-panel screen at that thickness can weigh close to 3-4 pounds before hardware, which adds up fast if it’s riding in a bag with dice, books, and minis. 1/4″ plywood cuts that weight roughly in half and is still stiff enough to stand on its own once hinged, which is why it’s the more common choice for a screen meant to travel. Go thinner than that – 1/8″ luan or hobby-grade underlayment – and the panels get light enough to barely notice in a bag, but they’ll need a thin hardwood edge strip or a light frame glued around the perimeter, or they’ll flex and eventually crack along the grain right where the hinge screws bite in.
- 1/2″ hardwood plywood: most rigid, heaviest, best if the screen stays on one table most of the time
- 1/4″ hardwood plywood: the practical middle ground – stiff enough standing, light enough to carry, what most travel screens use
- 1/8″ luan or underlayment: lightest option, needs an edge-banded or framed border to keep the hinge screws from splitting the thin face veneer
Hinge Choice Decides How Flat It Folds
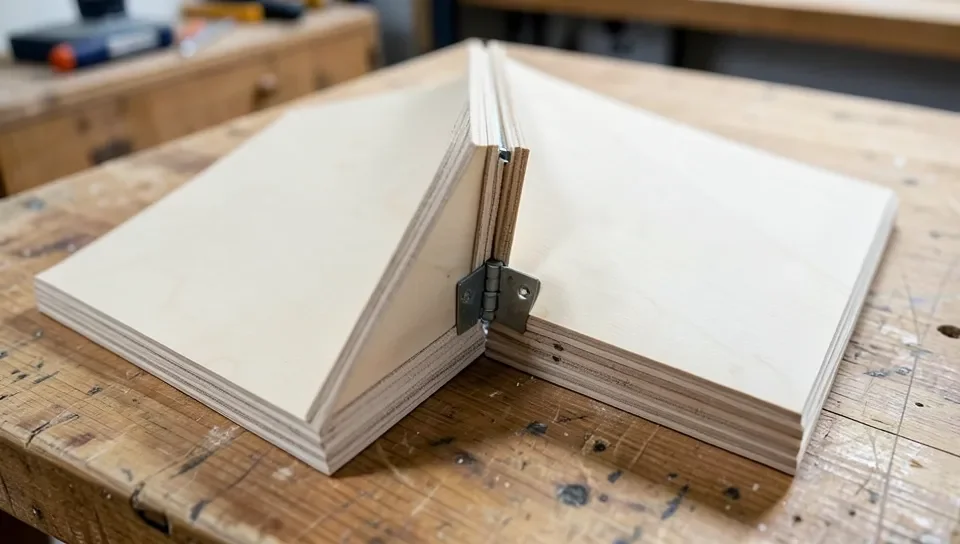
This is the detail that separates a screen you’re happy to pack up from one that ends up half-flattened and awkward in a bag. A continuous piano hinge runs the full height of the panel joint, so the folding pressure is spread evenly across dozens of small knuckles instead of concentrated at two or three screw points. That’s why a piano-hinged screen folds genuinely flat and stays flat – there’s no single weak joint that works loose after a few dozen fold-and-carry cycles. Standard small hinges (the kind sold for cabinet doors, two or three per joint) are cheaper, easier to find in short lengths, and simpler to install without cutting a long, straight mortise – but because each hinge is an independent pivot point, tiny differences in how square each one is mounted mean the panel can end up slightly out of parallel, so the fold isn’t quite flush and the screen can rock a little when closed.
One trick that shows up in several builder logs and is worth copying: on a 3-panel screen, mount the two outer hinges so they fold the same direction, and mount the center hinge on the opposite face. That way the two outer panels fold inward toward each other and the whole thing collapses into a compact, book-sized stack instead of a zigzag that won’t lie flat. It costs nothing extra and works with either piano hinges or standard hinges – it’s purely about which side of the panel each hinge barrel sits on.
Whichever hinge you use, drive the screws by hand for the last few turns and check the panel back for any tip poking through – thin plywood is unforgiving of a screw that’s a hair too long, and it’s an easy fix with a rotary tool before it ever becomes a scratch on your gaming table.
Real Panel Sizes for a Standing Screen
Most commercial and DIY DM screens land in a fairly narrow size range because it’s the range that actually works at a normal gaming table: roughly 11″ tall per panel and about 33-34″ wide when fully unfolded across three or four panels. Go much taller and the screen starts blocking eye contact with your players, which hurts the social side of the game; go much shorter and it stops hiding a laptop or notes propped behind it. A 4-panel screen gives you more surface for reference charts and folds into a narrower stack for storage, while a 3-panel screen is simpler to build and hinge (only two joints instead of three) at the cost of a slightly wider folded footprint.
Building the Screen Step by Step
- Cut three or four panels to matching height (about 11″) from your chosen plywood thickness, with a consistent width per panel (8-11″ each depending on panel count).
- Sand all edges and faces before hinging – it’s much harder to sand cleanly once panels are joined and can only pivot a few degrees.
- Dry-fit the panels edge to edge and mark hinge positions about 1.5″ in from the top and bottom of each joint.
- Mount hinges with the orientation trick above if you want a book-flat fold, then test-fold the whole assembly before adding any finish.
- Apply a wipe-on finish or stain to all panels, including the backs, so the wood seals evenly and doesn’t cup over time.
- Optional: recess a few small magnets on the inside faces to hold reference sheets or player-facing art in place during the session.
Finish, Care, and Storage for Travel
Wipe the screen down with a soft, dry cloth after sessions to keep dust and spilled drink rings off the finish, and avoid setting cold drinks directly on top of it. A light coat of wood polish every few months keeps the finish from drying out, especially on a screen that spends time in a bag rather than sitting in one climate-controlled room. If the screen travels often, a thin felt or fabric sleeve sized to the folded dimensions protects the finish far better than tossing it loose into a backpack next to dice and rulebooks – the hinges are more durable than the finish is, so the finish is what actually needs the protection on the road. For more on getting a hinge to sit flush on thin panels without splitting the veneer, our guide on hinging two pieces of plywood covers the pilot-hole and screw-length details in more depth than fits here.
Frequently Asked Questions
What is on a dungeon master’s screen?
Most DM screens hold quick-reference charts and rules summaries on the DM-facing side – things like condition effects, cover modifiers, or monster stat blocks – so the Dungeon Master isn’t flipping through a rulebook mid-scene. The player-facing side is usually left plain or decorated with campaign art.
What do you put behind a DM screen?
Behind the screen, most Dungeon Masters keep session notes, initiative trackers, maps, and any secrets – like a monster’s actual hit points – that shouldn’t be visible to players. Keeping these out of sight is the whole reason the screen exists.
What size should a wood DM screen panel be?
Around 11 inches tall is the common panel height, with a full 3- or 4-panel screen unfolding to roughly 33-34 inches wide – tall enough to block a laptop or notes but not so tall it blocks eye contact across the table.
Should I use a piano hinge or standard hinges on a folding screen?
Use a piano (continuous) hinge if the screen will be folded and packed regularly – it spreads the load evenly and folds flatter over time. Standard small hinges are fine for a screen that mostly stays set up on one table and only occasionally gets moved, and they’re easier to install without a long mortise.
Conclusion
A wood dungeon master screen is a genuinely simple build – three or four panels and a couple of hinges – but the two decisions that determine whether you actually enjoy owning it are panel thickness and hinge type. Pick 1/4″ plywood and a continuous piano hinge if the screen is coming to game night with you, and it will fold flat, stay flat, and survive years of packing without the finish or the joints giving out first.
Sponsored / affiliate links. As an Amazon Associate I earn from qualifying purchases. I may earn additional commission from eligible campaigns.